This step by step diy woodworking project is about how to build a platform bird feeder. I have designed this plans so you can have the best of both world: cost efficiency and a super design. This is s super simple project but the looks will pay off the time invested. If you like the singing birds, this table will keep them happy and around. You can adjust the size of the table to suit your needs.
Moreover, make sure the lumber hasn’t been treated with toxic substances that might hinder the birds. In order to lock the boards together tightly, we recommend you to add waterproof glue to the joints and to insert finishing nails. Cover the structure with a few coats of light paint, if you want to protect the components from decay and from water damage. See all my Premium Plans HERE.
Made from this plan
Bird Table – Video!
Free Bird Table Plans
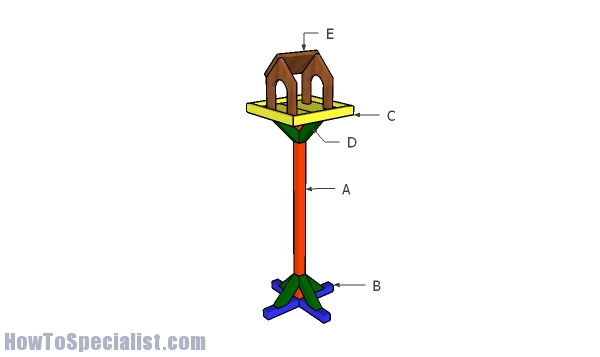
Building a bird table
Materials
- A – 1 piece of 2×2 lumber – 36″ long POST
- B – 2 pieces of 2×2 lumber – 16″ long BASE
- C – 2 pieces of 1×8 lumber – 14 1/2″ long, 4 pieces of 1×2 lumber – 16″ long TRAY
- D – 8 pieces of 2×2 lumber – 7″ long BRACES
- E – 2 pieces of 1×8 lumber – 9″ long, 2 pieces – 8″ long ROOF
- 1 piece of 1×2 lumber – 6′
- 1 piece of 2×2 lumber – 10′
- 1 piece of 1×8 lumber – 6′
- 1 1/2″ nails
- 2 1/2″ screws
Tools
- Safety gloves, glasses
- Miter saw, jigsaw
- Chalk line, tape measure, spirit level, carpentry pencil
- Drill machinery and drill bits
Time
- One Day
Related
How to build a bird table
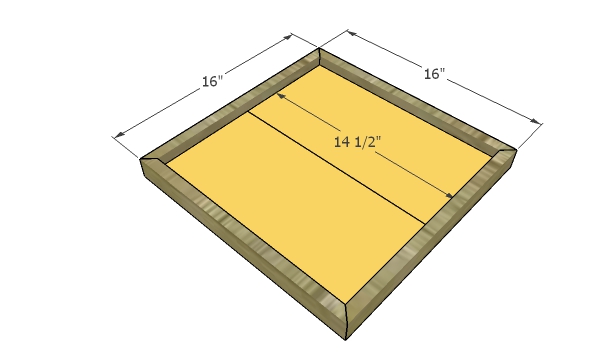
Building the tray
The first step of the project is to build the tray for the bird table. Use 1×8 slats for the base and 1x2s for the trims. Use a miter saw to make 45 degree cuts at both ends of the trims. Use 1 1/2″ nails and glue to assemble everything.

Base
Building the base for the bird table is a straight forward process. Start by building 2 identical pieces, as shown in the diagram. Use a circular saw to make parallel cuts inside the marked area and then remove the excess with a chisel.
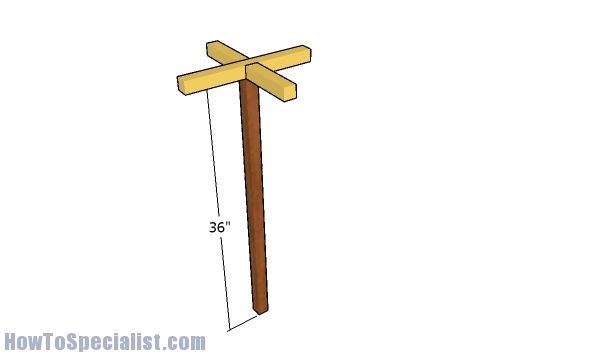
Assembling the base for the bird table
Next, lock the base components together, as shown in the plans. Attach the vertical post and lock it into place with 2 1/2″ screws. Make sure the corners are square.
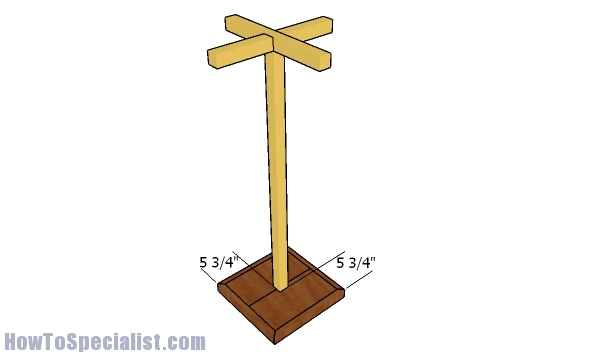
Fitting the bird table to the base
Next, fit the base to the tray. Drill pilot holes through the tray and insert 2 1/2″ screws into the base. Make sure you center the base to the tray.
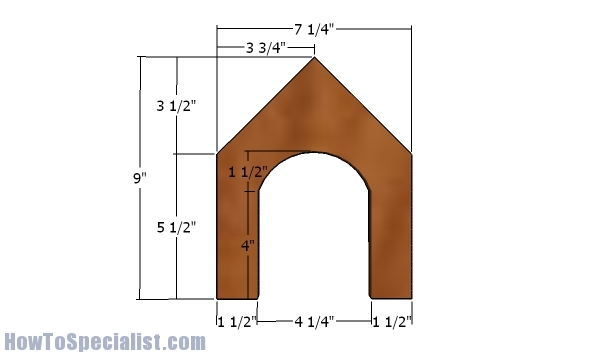
Faces for the bird shelter
Build the faces for the bird table shelter from 1x8s. Use a jigsaw to make the angle cuts. Smooth the edges with sandpaper.
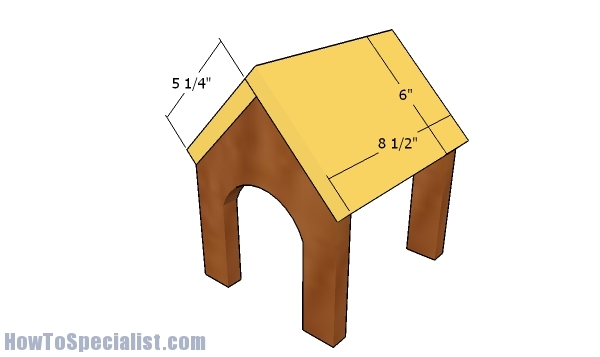
Fitting the roof to the bird shelter
Fit the pieces to the top of the bird shelter walls and lock them into place with 1 1/2″ nails.
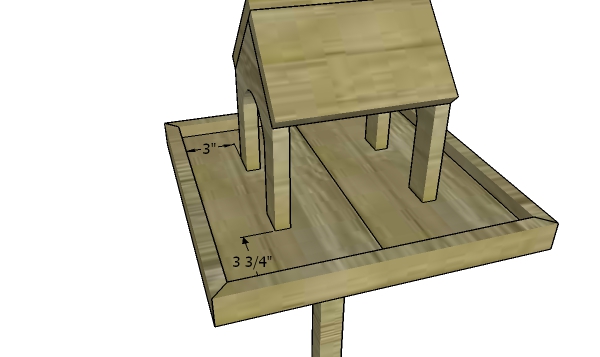
Fitting the shelter to the tray
Fit the roof to the table and lock it into place with a few nails.
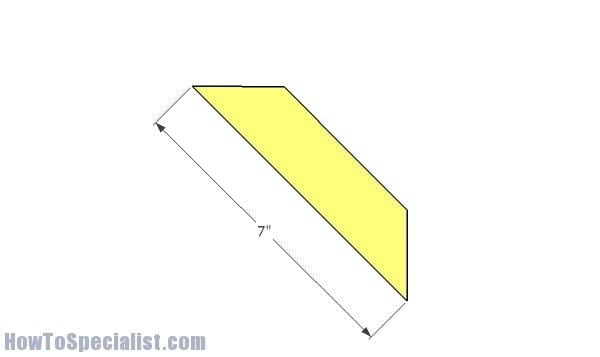
Building the braces
Use 2×2 lumber for the braces. Use a miter saw to make 45 degree cuts at both ends of the braces.
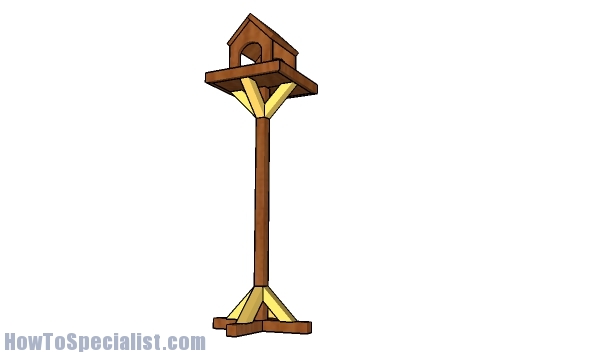
Fitting the braces
Fit the braces to the bird table and secure them into place with screws.
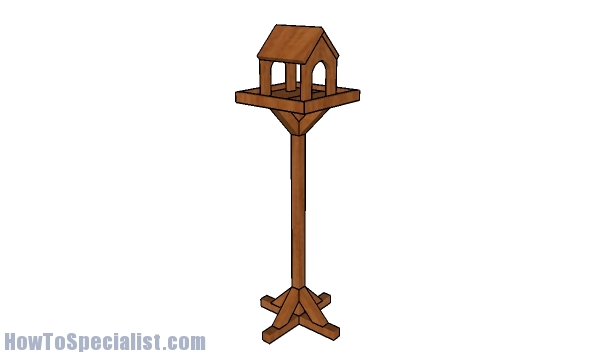
Bird Table Plans
Last but not least, you should take care of the finishing touches. Therefore, check if all the components are locked into place properly and make adjustments if necessary. Smooth the exposed edges and the wooden surfaces with 120-grit sandpaper, along the wood grain.
Thank you for reading our project about how to build a platform bird feeder and we recommend you to check out the rest of the projects. Don’t forget to LIKE and SHARE our projects with your friends, by using the social media widgets. SUBSCRIBE to be the first that gets our latest projects.
