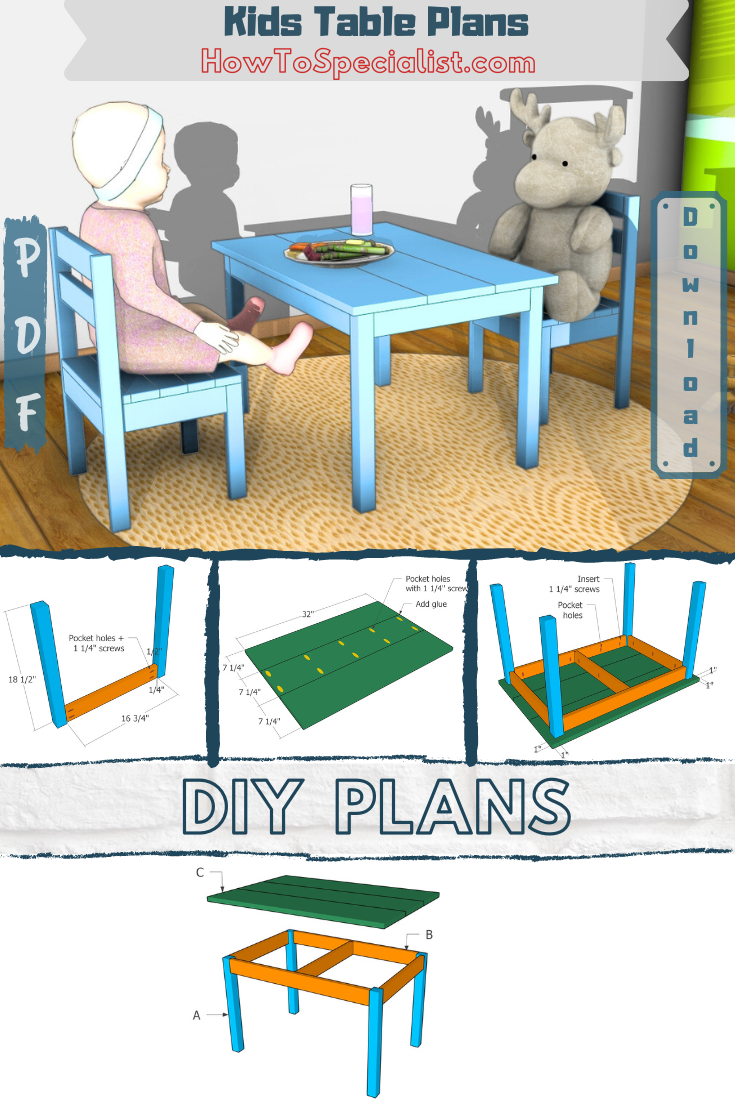
If you’re looking for a fun, practical project with free plans that’s perfect for beginners and seasoned DIYers alike, building a Montessori weaning table is a great way to go. This small, kid-sized table is designed to encourage independence during meal times, and the best part? You can build it yourself with just a few basic tools and materials. In this guide, I’ll walk you through each step, from cutting the wood to adding the finishing touches, so you’ll have a sturdy, functional piece that’s not only useful but something you can be proud of.
The Montessori method is all about fostering a child’s self-reliance, and this table helps do just that, allowing them to sit, eat, and interact comfortably at their own level. Plus, this project gives you a chance to work with simple materials and learn some new woodworking techniques, making it a rewarding experience whether it’s your first build or you’re already a DIY pro. By the time you’re done, you’ll have a sturdy, functional piece of furniture that’s not only useful but something you can feel proud of. Ready to get started? Let’s dive in and create something that’s both beautiful and practical!
We recommend you to invest in the best materials you could afford. Therefore, you should buy weather-resistant lumber, such as pine or cedar. Always take accurate measurements before adjusting the size of the components at the proper size. Drill pilot holes trough the components before inserting the wood screws, to prevent the wood from splitting. My plans come with a full cut / shopping list and they are PDF Download and Print friendly. See all my Premium Plans HERE.
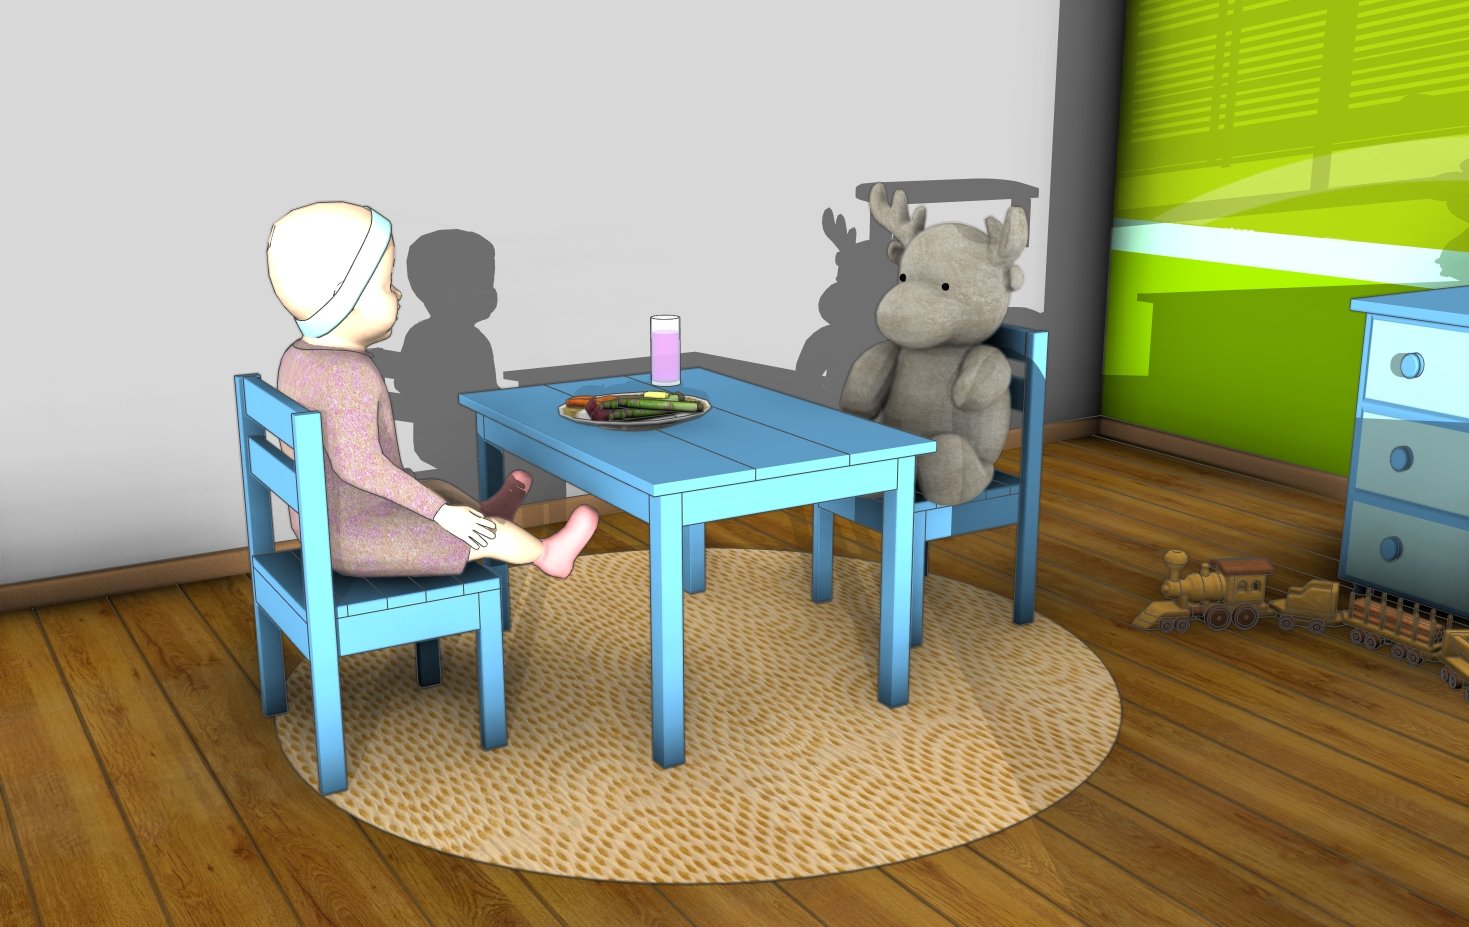
Made from this plan
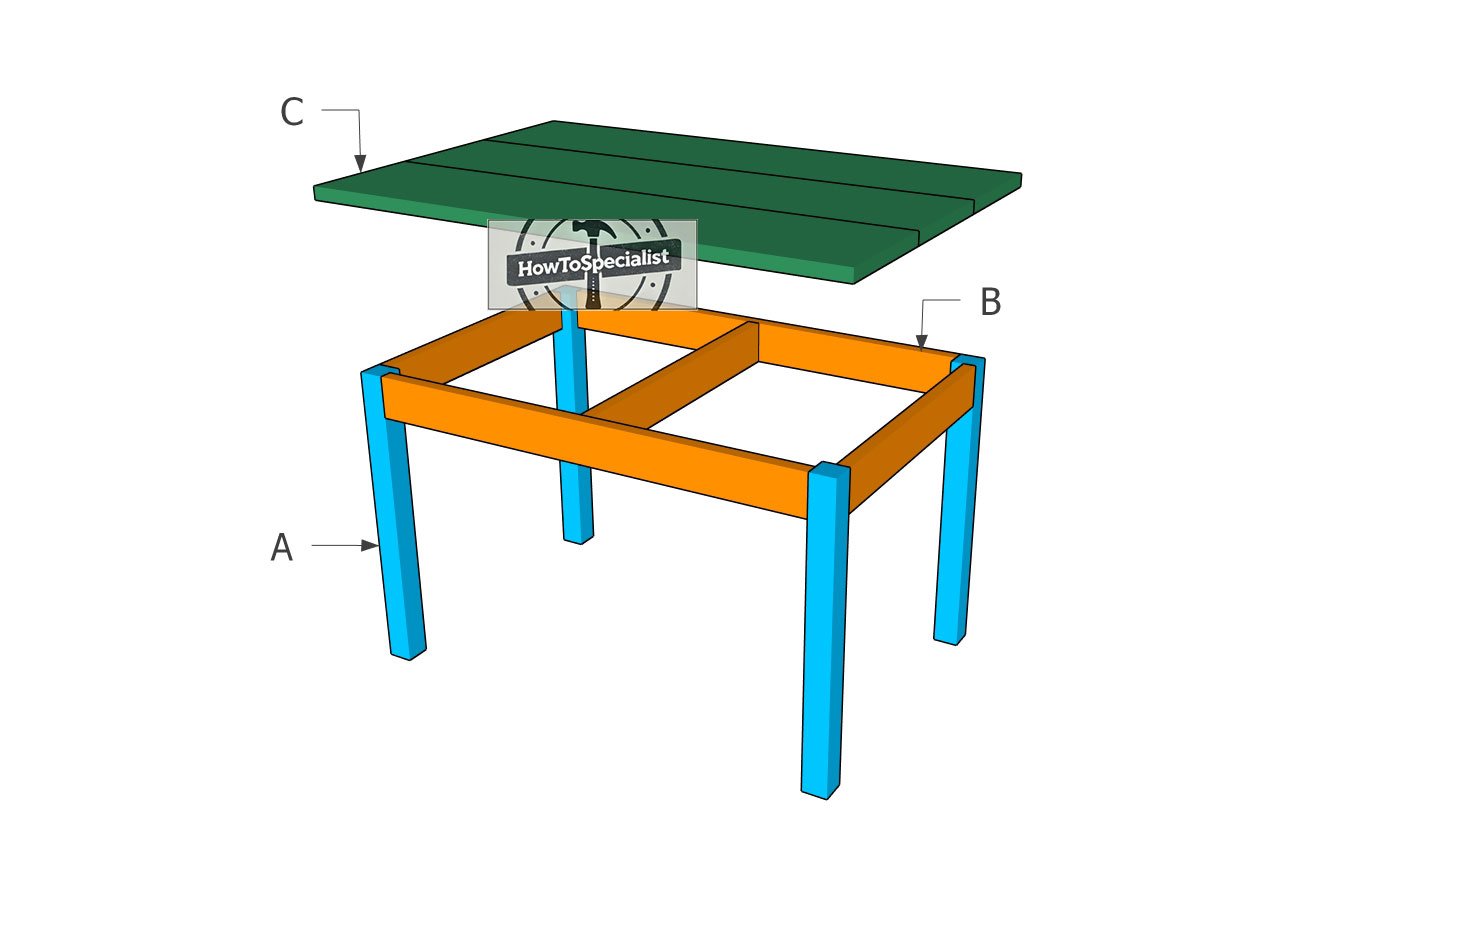
Montessori Weaning Table – Free Plans
Building-a-Montessori-weaning-table
Materials
A – LEGS – 2×2 lumber 18 1/2″ – 4 pieces
B – FRAME – 1×3 lumber 27″ – 2 pieces
B – FRAME – 1×3 lumber 16 3/4″ – 2 pieces
B – FRAME – 1×3 lumber 17 1/4″ – 2 pieces
C – TABLETOP – 1×8 lumber 32″ – 3 pieces
- 1 piece – 1×3 lumber – 10 ft
- 1 piece – 2×2 lumber – 8 ft
- 1 piece – 1×8 lumber – 8 ft
- 1 1/4″ screws – 100 pieces
- glue, stain
Tools
- Circular saw
- Drill machinery, drill bits
- Safety gloves, glasses
- Chalk line, tape measure, spirit level, carpentry pencil
Time
- One weekend
Related
- Kids fort plans
- Kids playhouse plans
- Kids table with sandbox plans
- Montessori Chair Plans
- Mud kitchen plans
Pin for later!
Building the frame
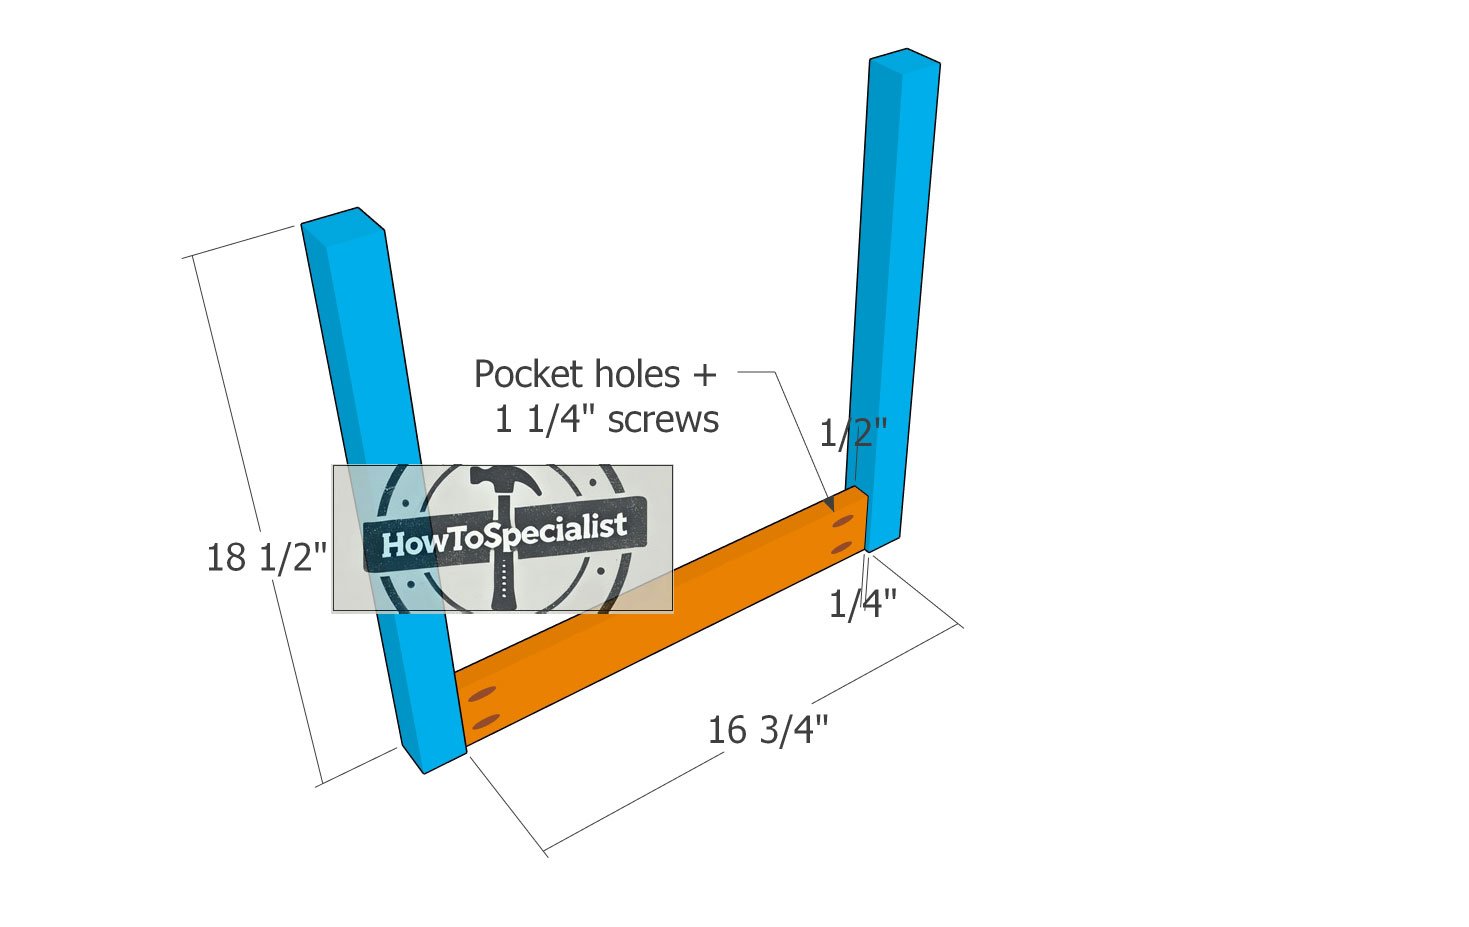
Building-the-sides-of-the-table
First up, we’re going to build the sides for the Montessori weaning table. For this, grab some 2×2 lumber for the legs and a few 1×3 boards to use as the supports. To get started, drill pocket holes at each end of the supports, and then use 1 1/4″ screws to attach them to the legs.
Make sure to line up the supports so they’re slightly offset from the legs – this is important because the pocket holes should be on the inside of the table, which helps keep the screws from splitting the wood when you tighten them down.
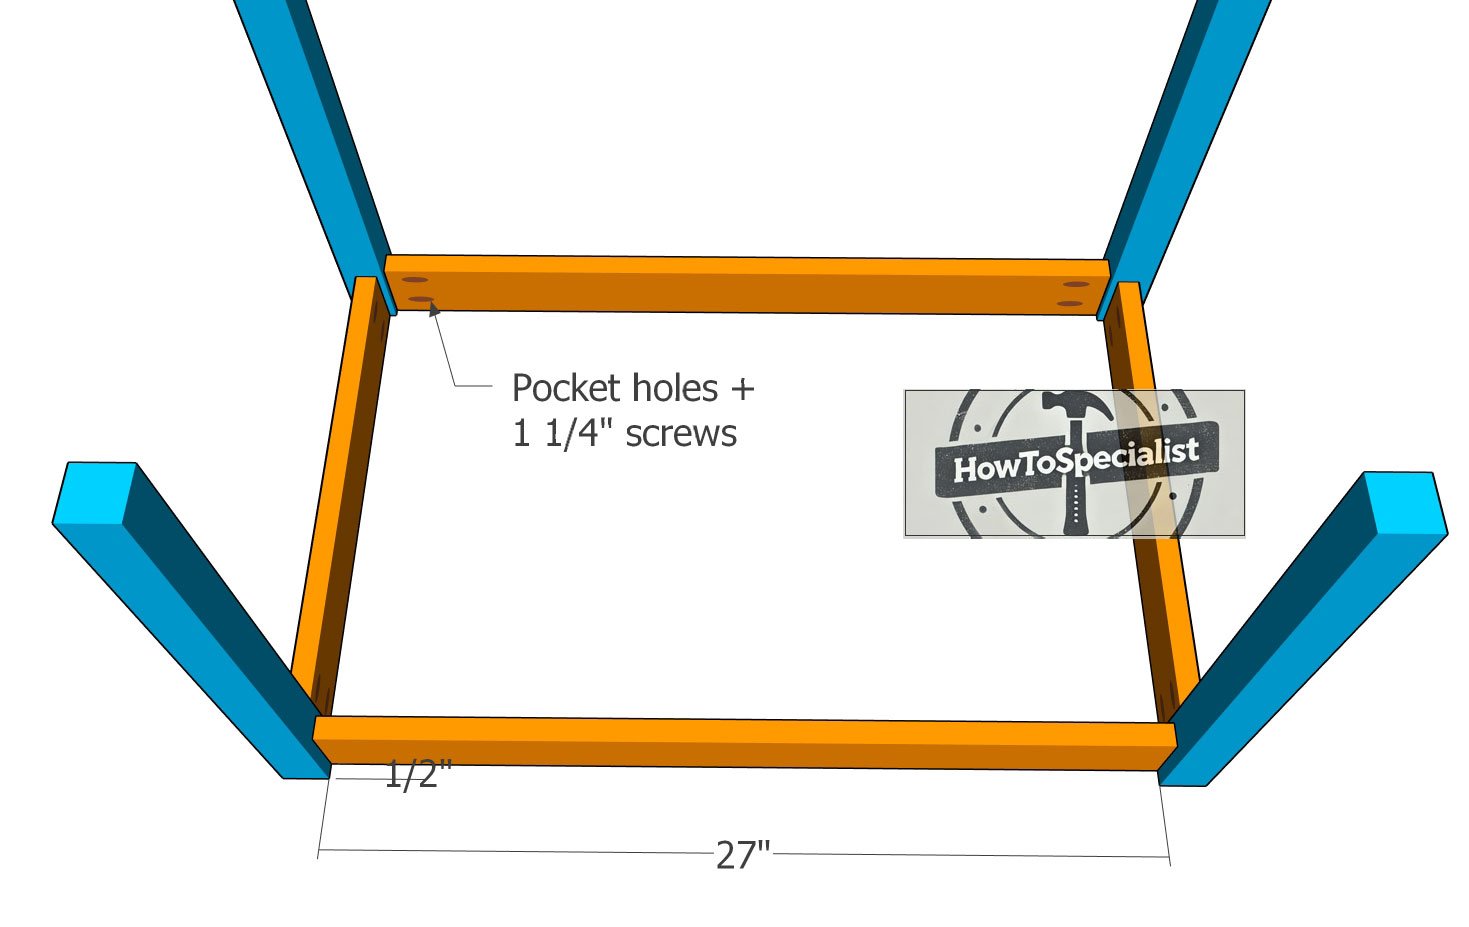
Assembling-the-table-frame
Now it’s time to join the two sides together by attaching the front and back supports. Make sure you’re working on a nice, flat surface so you can get everything lined up perfectly.
You want a snug fit here—no gaps between any of the pieces. Just like before, drill pocket holes at both ends of the supports and fasten them to the legs with 1 1/4″ screws. This will lock the frame in nice and tight, giving you a sturdy base for the table.
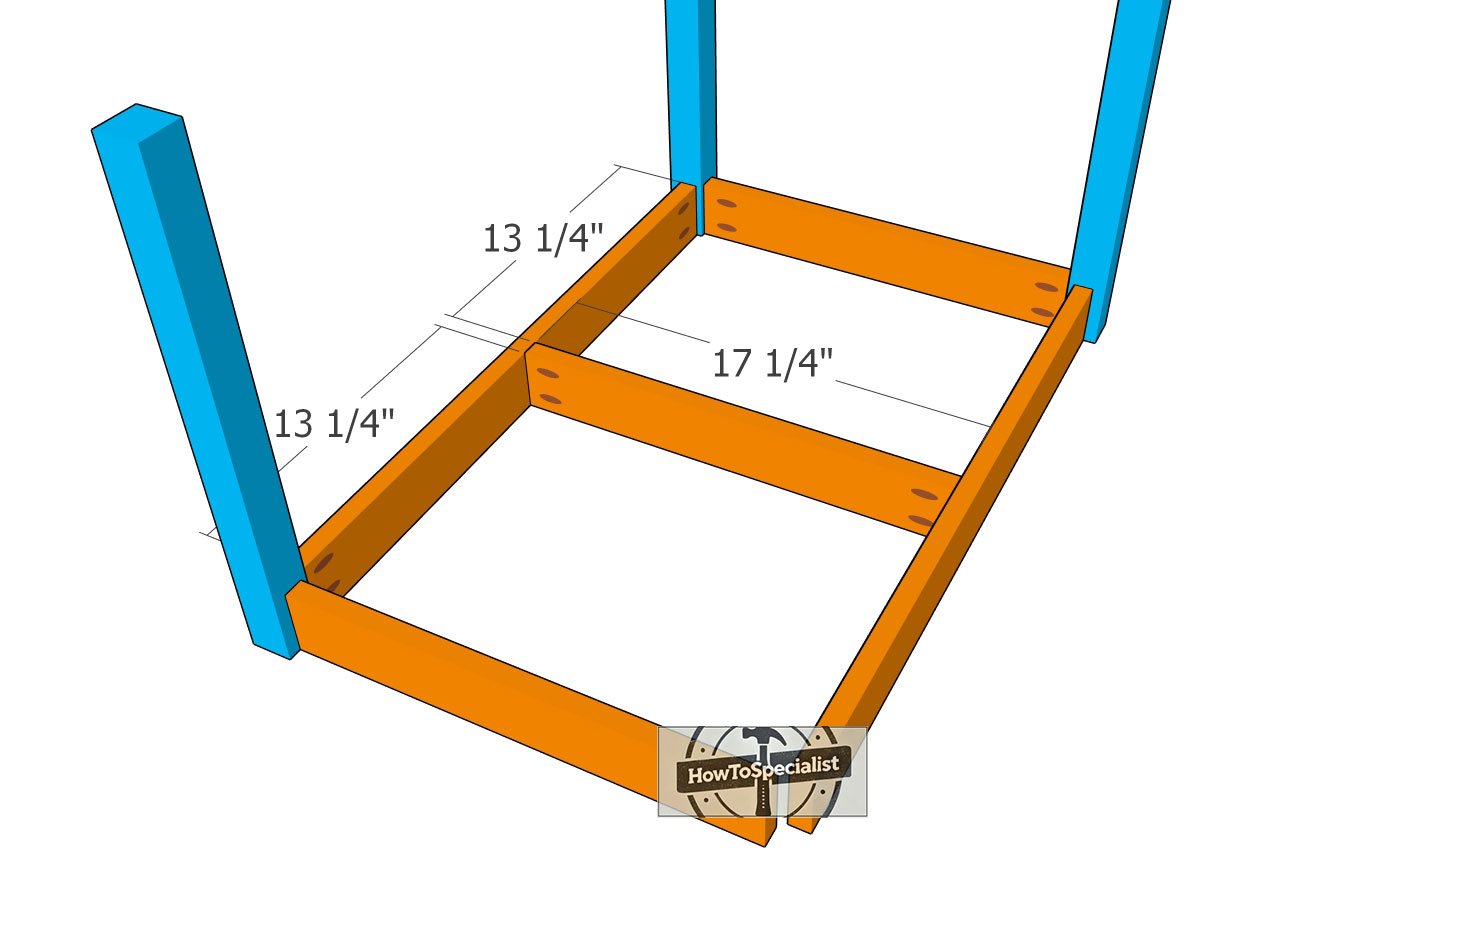
Fitting-the-middle-support
Next, attach the middle support to the tabletop frame. Drill pocket holes into the support, then secure it with 1 1/4″ screws. Be sure to center the support before driving in the screws – this will keep everything aligned properly and give the table added strength.
Assembling the tabletop
Assembling-the-tabletop
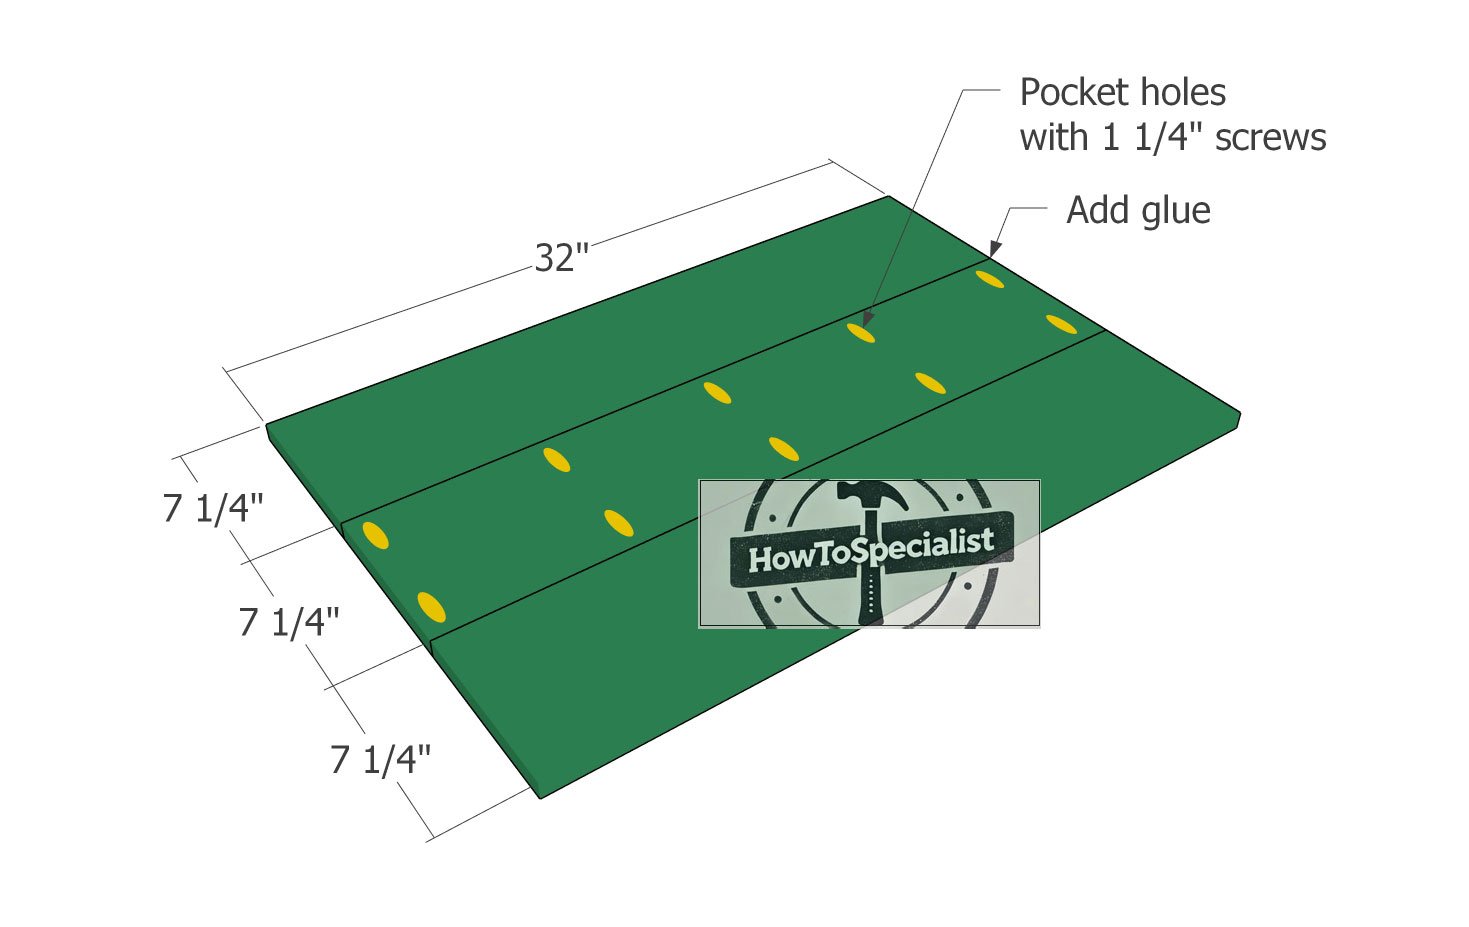
We will use 1×8 lumber for the tabletop. In my design I assume the boards are 7 1/4″ wide. If the boards you find are 7 1/2″ wide you need to adjust the base of the table, so the tabletop overhangs the corner posts 1″ on all sides (as in this design).
Drill pocket holes along the sides of the middle boards and lay everything on a level surface. Align the edges flush to both ends and insert 1 1/4″ screws to assemble the tabletop. Add glue to the joints to reinforce the tabletop.

Attaching-the-tabletop
Now, drill pocket holes through the table frame. Position the frame on the tabletop so you have a 1″ overhang on all sides, just like in the diagram. Once it’s lined up, insert 1 1/4″ screws through the frame into the tabletop. Make sure everything is snug – no gaps between the frame and the tabletop for a nice, clean finish.
Finishing touches
Kids picnic table – free plans
For the finishing touches, start by sanding down the entire table to smooth out any rough edges. You want a nice, even surface, so work your way through finer grits of sandpaper until everything feels smooth to the touch. Once that’s done, wipe away any dust with a damp cloth.
DIY Montessori weaning table – free plans
Next, apply your choice of finish—whether it’s paint, stain, or a clear coat, this will help protect the wood and give the table a polished look. Be sure to apply the finish evenly, following the grain of the wood, and let it fully dry between coats. If needed, lightly sand between coats for an ultra-smooth finish.
How to build Montessori weaning table
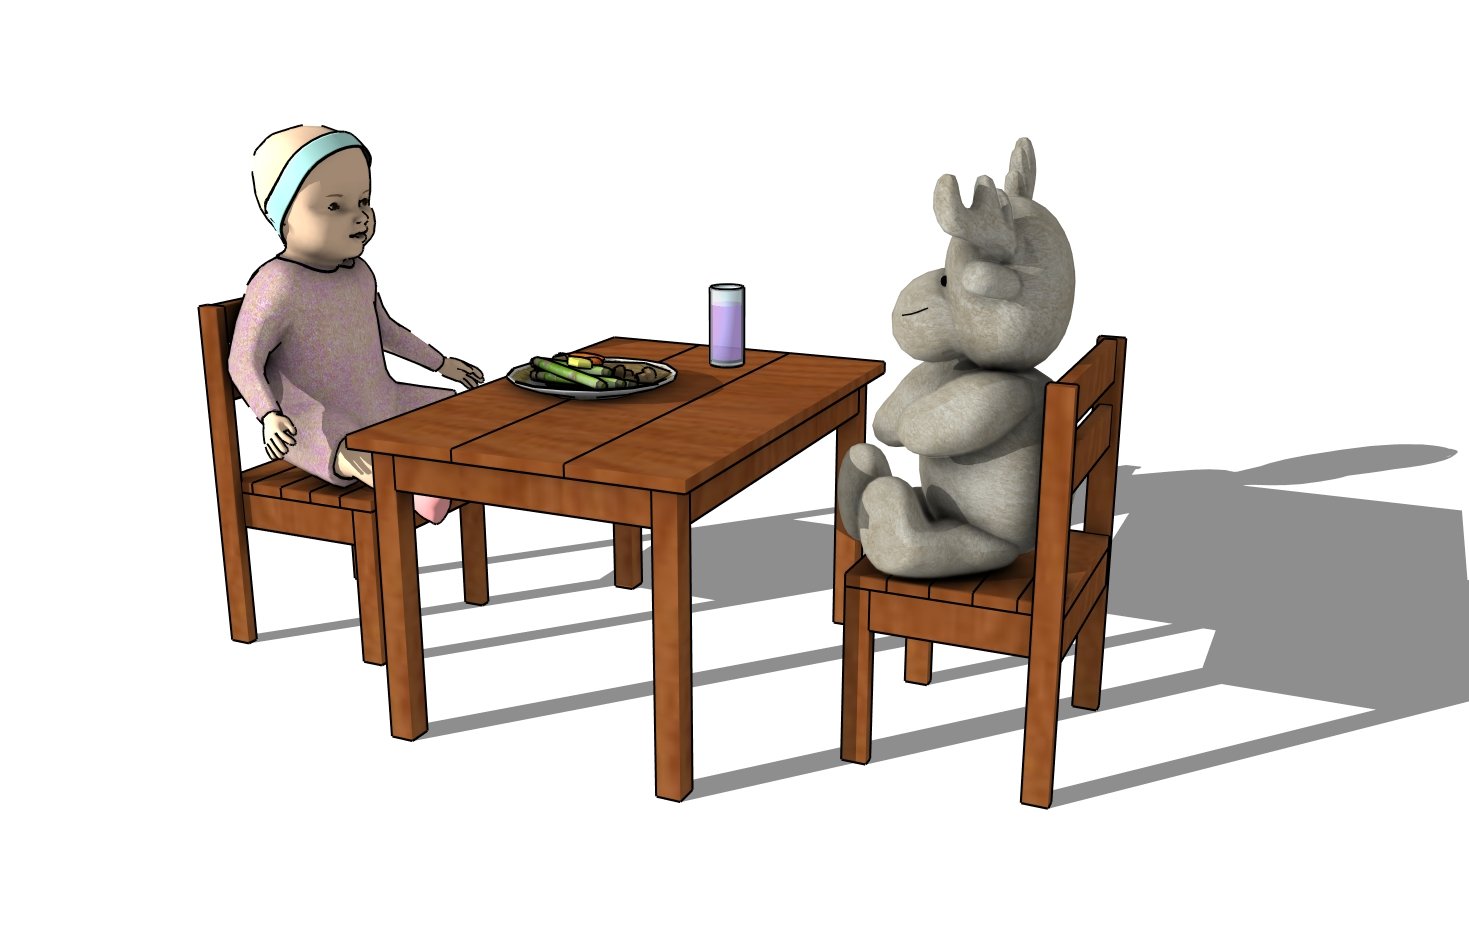
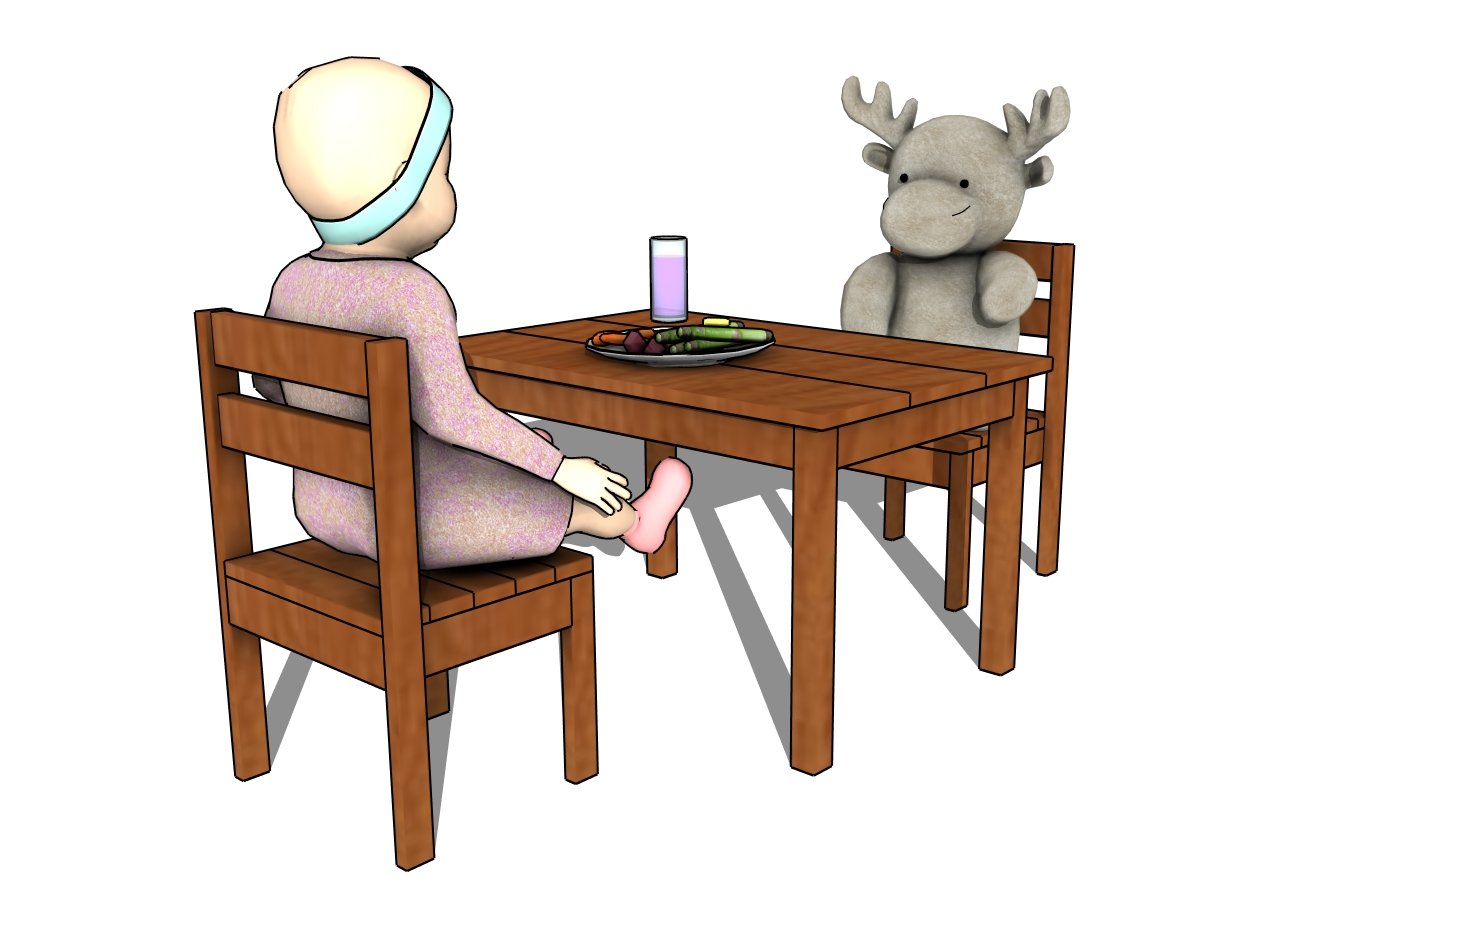
And there you have it! Your Montessori weaning table is complete and ready for use. Not only is it sturdy and functional, but it’s also a piece you can be proud of building yourself. Whether it’s for your own little one or as a thoughtful gift, this table is sure to support a child’s independence and growth.
Plus, with the skills you’ve practiced here, you’re ready to tackle even more woodworking projects. So grab a seat, admire your work, and get ready for your next DIY adventure!
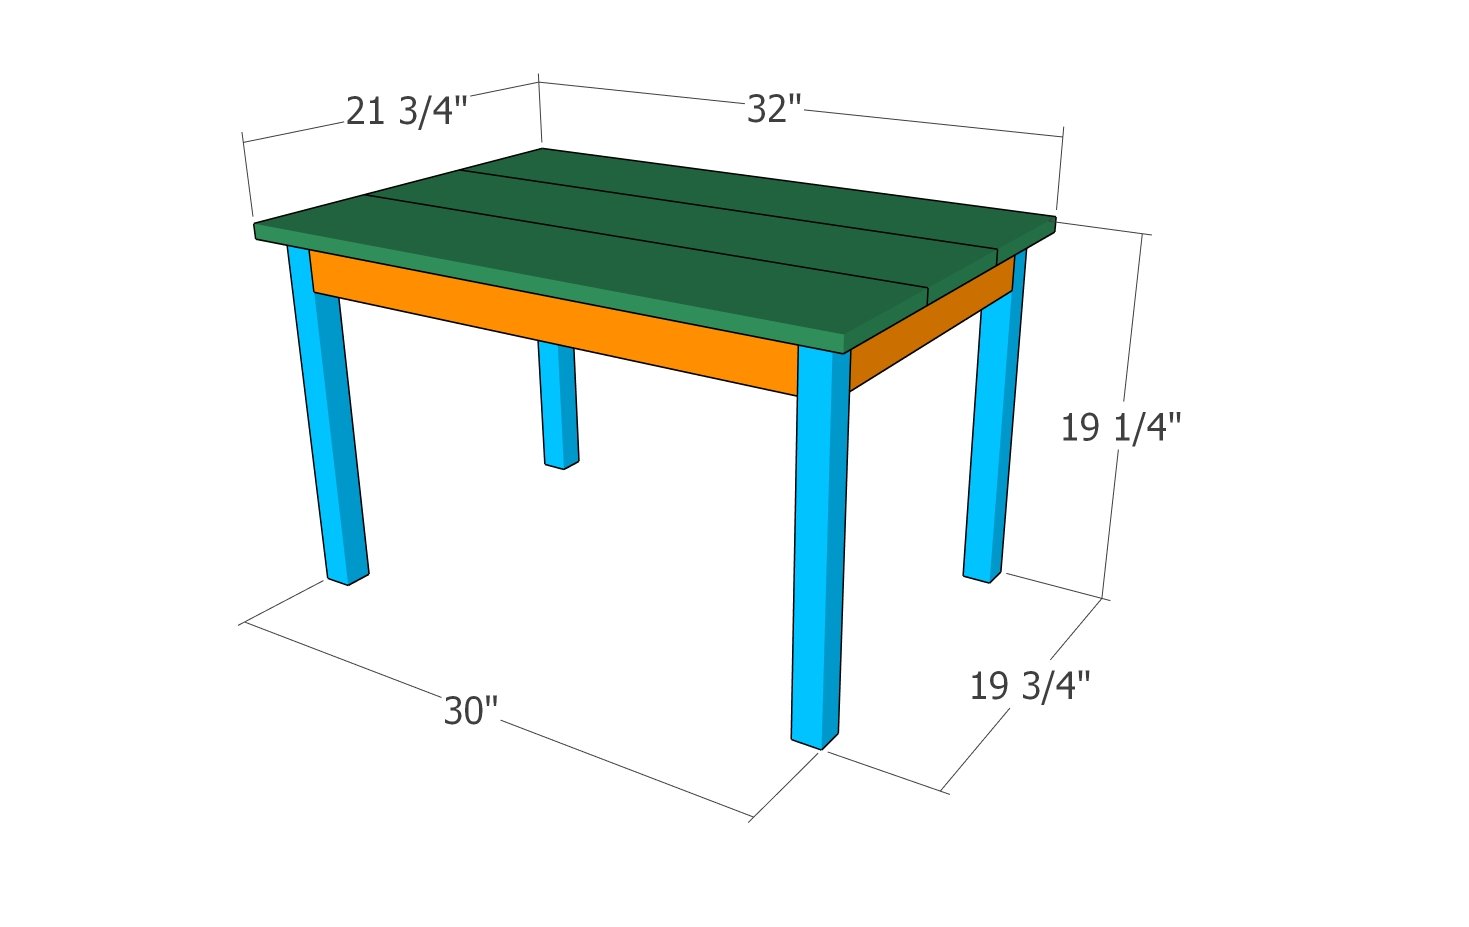
Kids table – dimensions
Smart Tip: I can’t wait to see how you make it your own – don’t forget to share your finished projects with me! In addition, take a look over the rest of my shed plans HERE. Free plans for the corresponding Montessori chair HERE.

Thanks for checking out my Montessori weaning table! Be sure to explore my other projects for more fantastic ideas. Don’t forget to hit the LIKE button and SHARE with your friends using the social media links below.