This step by step woodworking project is about outdoor kids fort plans. If you want to keep your kids entertained for hours and help them grow healthy, an outdoor fort with ladder and slide is what you need. In addition, I have designed the fort in such way that you can use the lower frame as a sandbox. I even added a seating area so they can rest between the playing sessions. The plans come with full Cut and Shopping lists, so all you need is to take the tools and start building.
Taking into account there are so many plans and designs you could choose from, we recommend you to check out the rest of our projects and select the one that fits your needs, tastes and budget. In addition, don’t forget that you could always adjust the size of the playground. Add several swings and a slide to the construction, if you want to keep your kids entertained for many hours.
Invest in quality lumber if you want to build a durable construction. Ask a handy friend to help you during the project, as it requires many measurements, cuts and alignment. While a person holds the components into place, the other one can drill pilot holes and insert the galvanized screws. Add waterproof glue to the joints, if you want to increase the rigidity of the frame. See all my Premium Plans HERE.
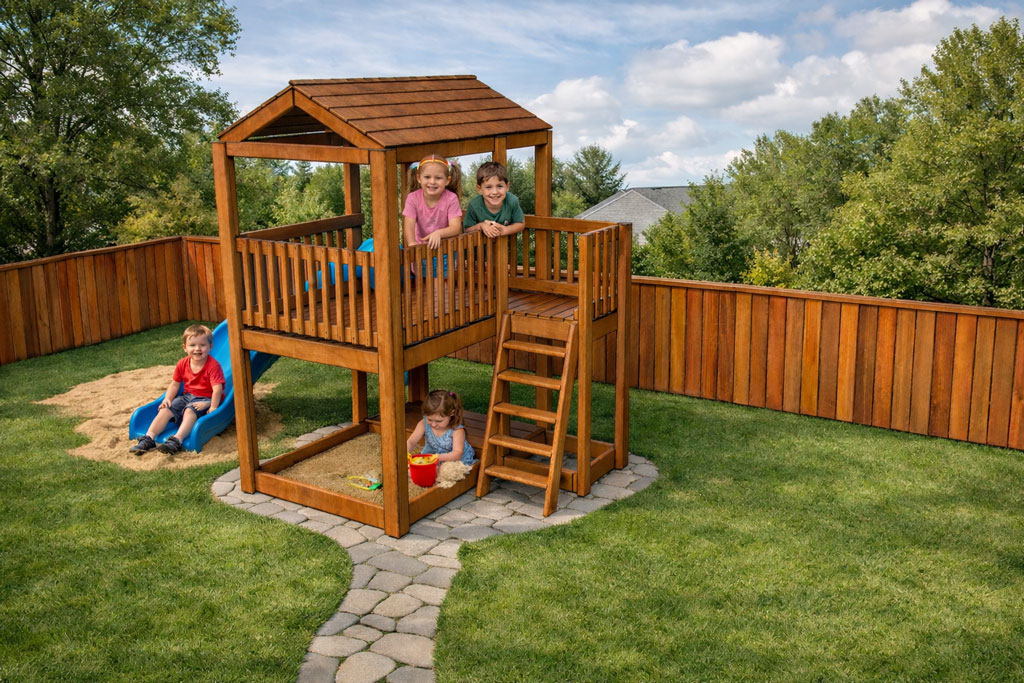
Made from this plan
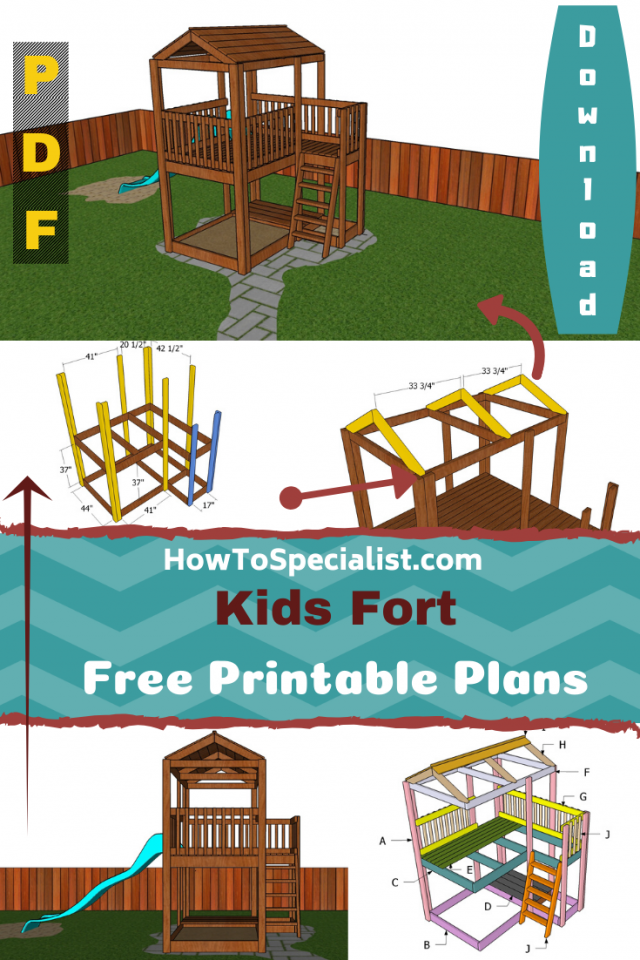
Kids Fort Plans Free – PDF Download
Building an outdoor fort
Materials
Tools
- Safety gloves, glasses, Miter saw, jigsaw, pocket hole jig
- Chalk line, tape measure, spirit level, carpentry pencil
- Drill machinery and drill bits
Time
- One Weekend
Related
- How to build an a-frame swing
- Kids Playhouse Plans
- All outdoor kids plans
- Free Outdoor playset plans
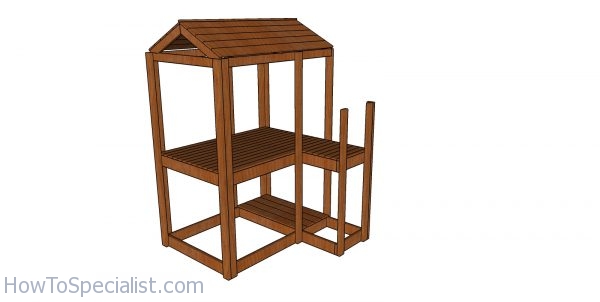
Building an outdoor fort
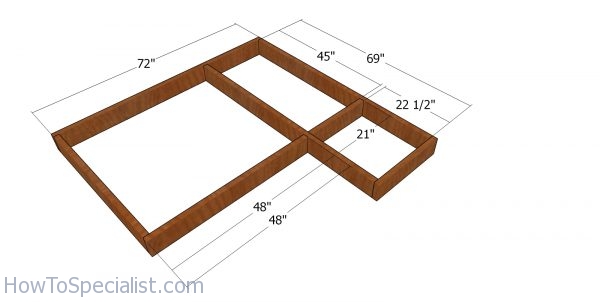
Sandbox frame – fort for kids
The first step of the project is to assemble the frame for the base of the fort. Cut the components from 2×6 lumber, as shown in the diagram. Drill pilot holes through the components and insert 3 1/2″ screws. For the 48″ and 21″ long components, I recommend you to use pocket holes and 2 1/2″ pocket screws. Make sure the corners are square and align the edges flush.
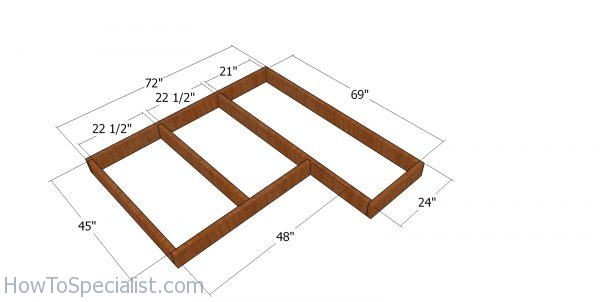
Floor frame – kids fort
The next step is to assemble the frame for the floor of the outdoor kids fort. Assemble the frame using the same techniques described above.
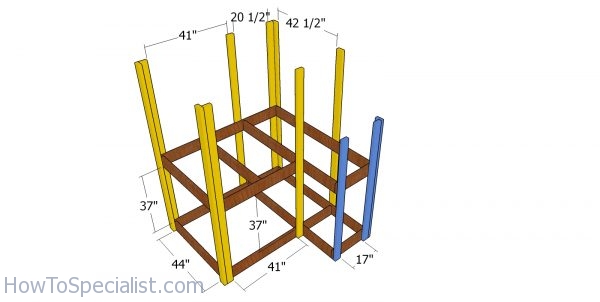
Fitting the posts to the kids fort
Next, we need to attach the vertical posts to the two frames. Cut the posts from 2×4 lumber at the dimensions shown in the diagram. Make sure the frames are horizontal check check the corners for squareness. Clamp the posts to the frames so everything is stable when drilling the pilot holes.
Drill pilot holes through the posts and frames and insert 3 1/2″ carriage bolts. Insert 2 1/2″ screws to lock the corner posts together tightly.
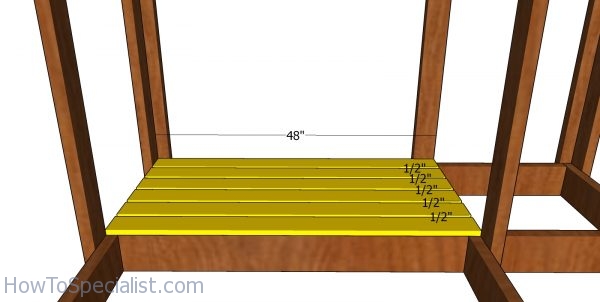
Fitting the slats to the sandbox bench
Use 2×4 lumber for the base floor of the kids fort. The concept is simple, we are going to re-purpose one area of the bottom frame to a sandbox and therefore we need a seating area, as well. We can create that easily by attaching a few 1x6s. Align the slats at both ends, drill pilot holes and insert 1 5/8″ screws to lock them into place tightly.
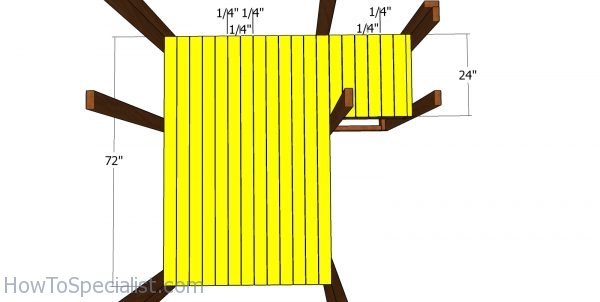
Floor boards
Use 2x4s for the decking boards. Place a piece of 1/4″ plywood between the boards to create even gaps. Align the edges at both ends, drill pilot holes and insert 2 1/2″ screws to lock them into place tightly.
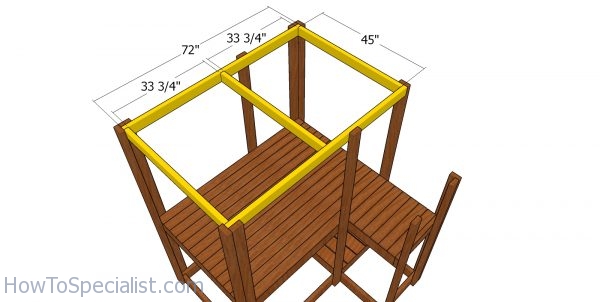
Top frame – wooden fort
Use 2x4s for the top frame. cut the components as shown in the diagram and then lock them together tightly with 3 1/2″ screws. Align the edges flush and make sure the corners are square.
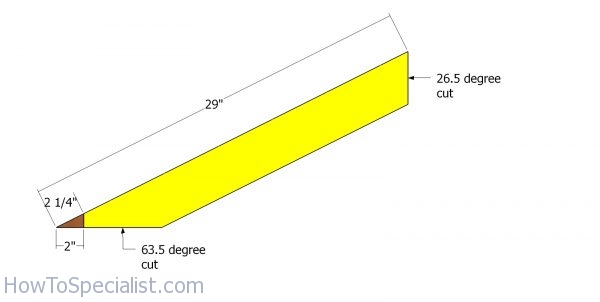
Rafters – kids fort
Use 2×4 lumber for the rafters. Make the angle cuts to the rafters, using a miter saw and following the instructions in the diagram.
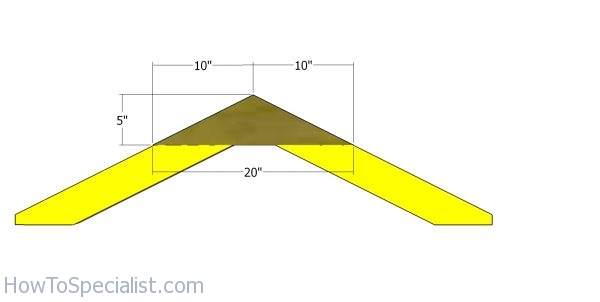
Gussets
Use 1/2″ plywood for the gussets. Cut the gussets as shown in the plans and attach them to the rafters with 1 5/8″ screws. Align the edges flush and leave no gaps between the components.
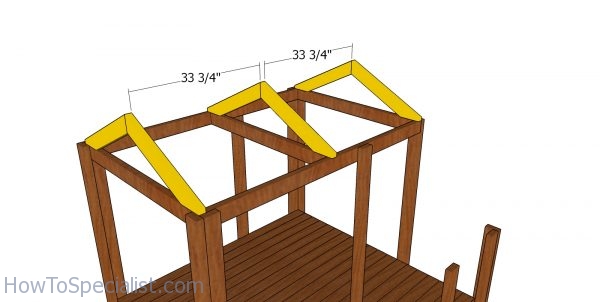
Fitting the trusses
Fit the trusses to the top of the kids fort and lock them into place with rafter ties. Plumb the trusses vertically before inserting the 1 1/2″ structural screws.
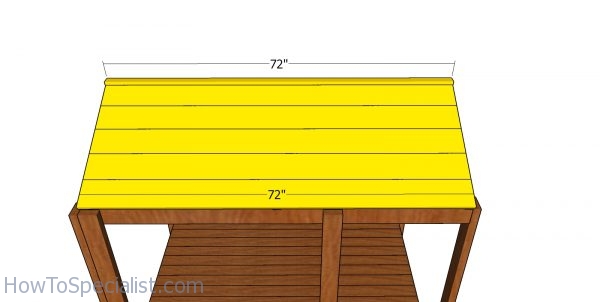
Fitting the roof sheets
Fit the 1×6 boards (cedar ideally) to the top of the outdoor fort. Leave no gaps between the slats and add glue to the joints. Start installing the slats from the top to the bottom of the roof. Drill pilot holes and insert 1 5/8″ screws to lock them into place tightly. Attach a 1×2 board to the top of the gable roof.
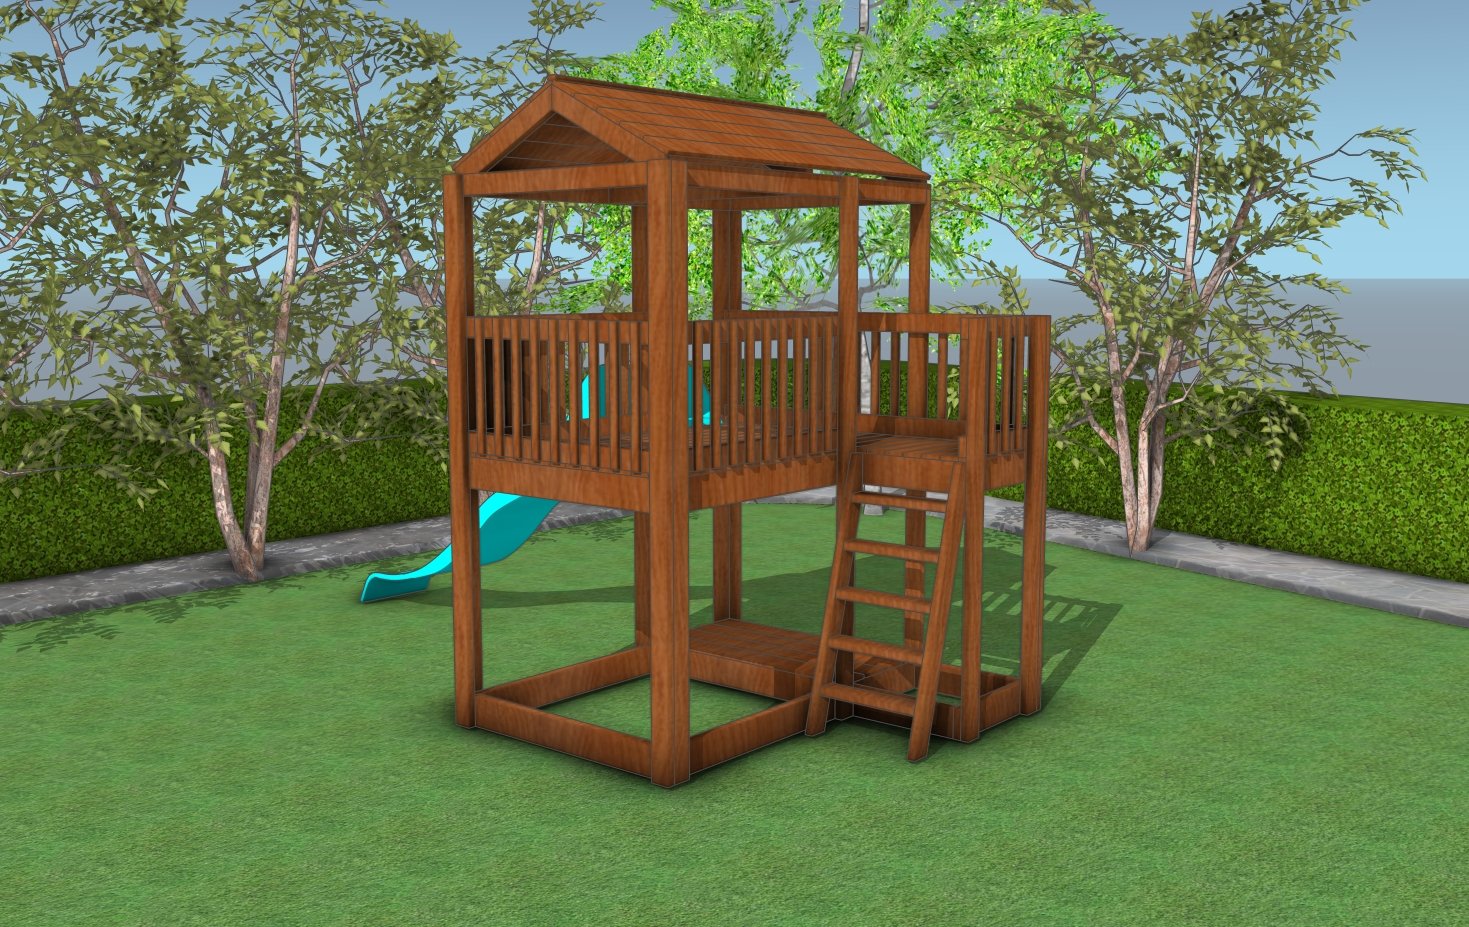
Building a wooden fort
The outdoor fort is starting to take shape.
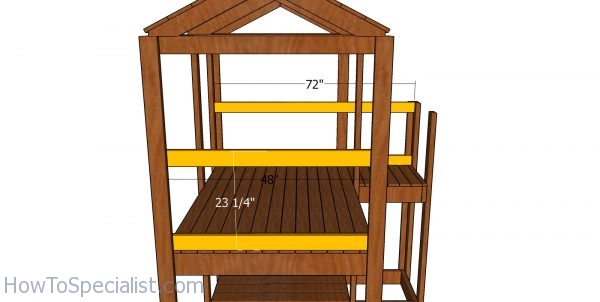
Side rails
Next, we are going to build the railings. Therefore, start by attaching the rails to the sides of the fort. Use 2×4 lumber and 2 1/2″ screws to secure the rails into place tightly. Drill pilot holes before inserting the screws to prevent the wood from splitting. Use a spirit level to make sure the rails are perfectly horizontal.
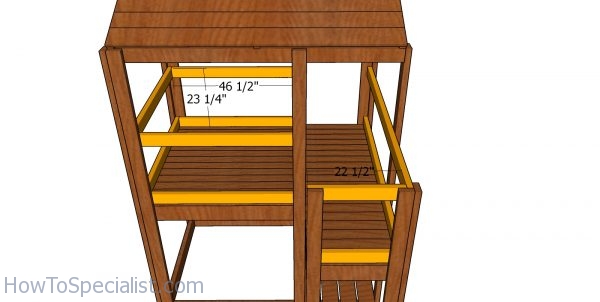
Rails for front and back wall
Fit the rest of the rails to the kids fort.
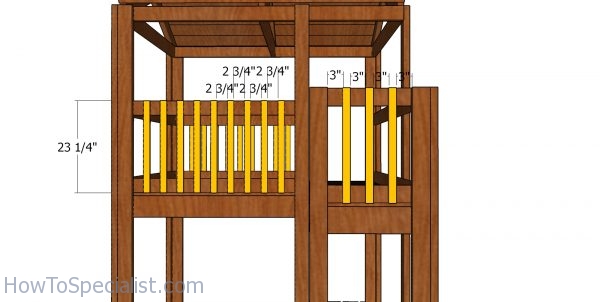
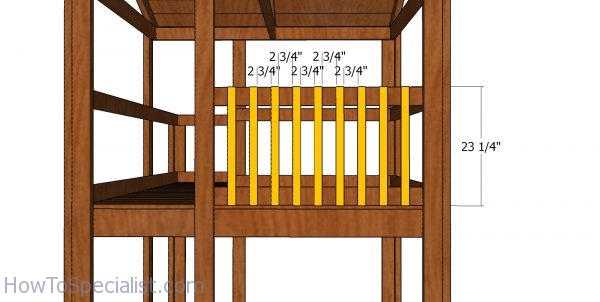
Front balusters
We are going to use 2x2s for the balusters. Cut all the balusters to 23 1/4″ using a saw and then attach the to the rails with 2 1/2″ screws. Make wood spacers to use between the balusters to create even gaps. Drill pilot holes before inserting the screws to prevent the wood from splitting.
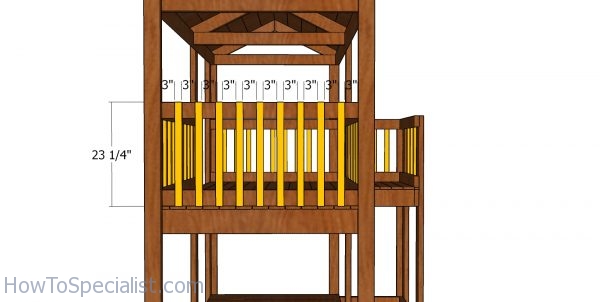
Back balusters – wood fort
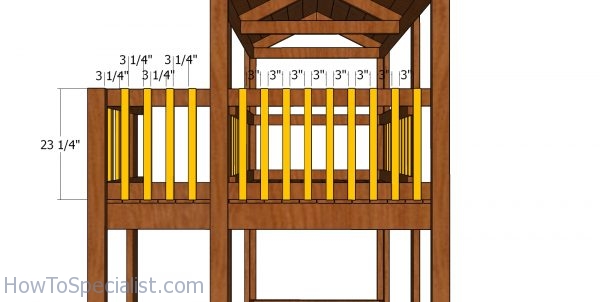
Side balusters – kids fort
Balusters for backyard fort
Fit the balusters to the other sides of the fort, using the same techniques described above.

Ladder stringer

Assembling the ladder
We need a ladder for the outdoor fort. We are going to use 2x4s for all components. Build the stringers for the ladder following the info from the diagram. Next, we need to attach the steps to the stringers. Drill pilot holes through the stringers and insert 3 1/2″ screws into the steps. Make sure you place the steps equally spaced.
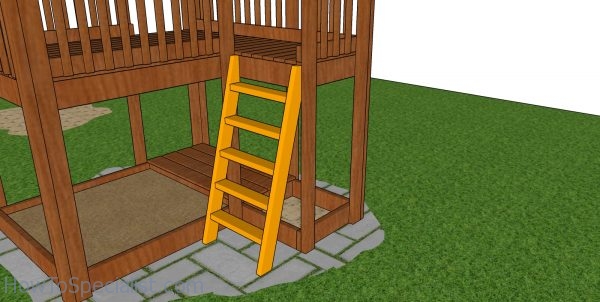
Fitting the ladder – outdoor playhouse
Fit the ladder to the opening and secure the supports to the joists by using 3 1/2″ screws. Make sure there are no gaps between the components and double-check if all the joints are rigid.
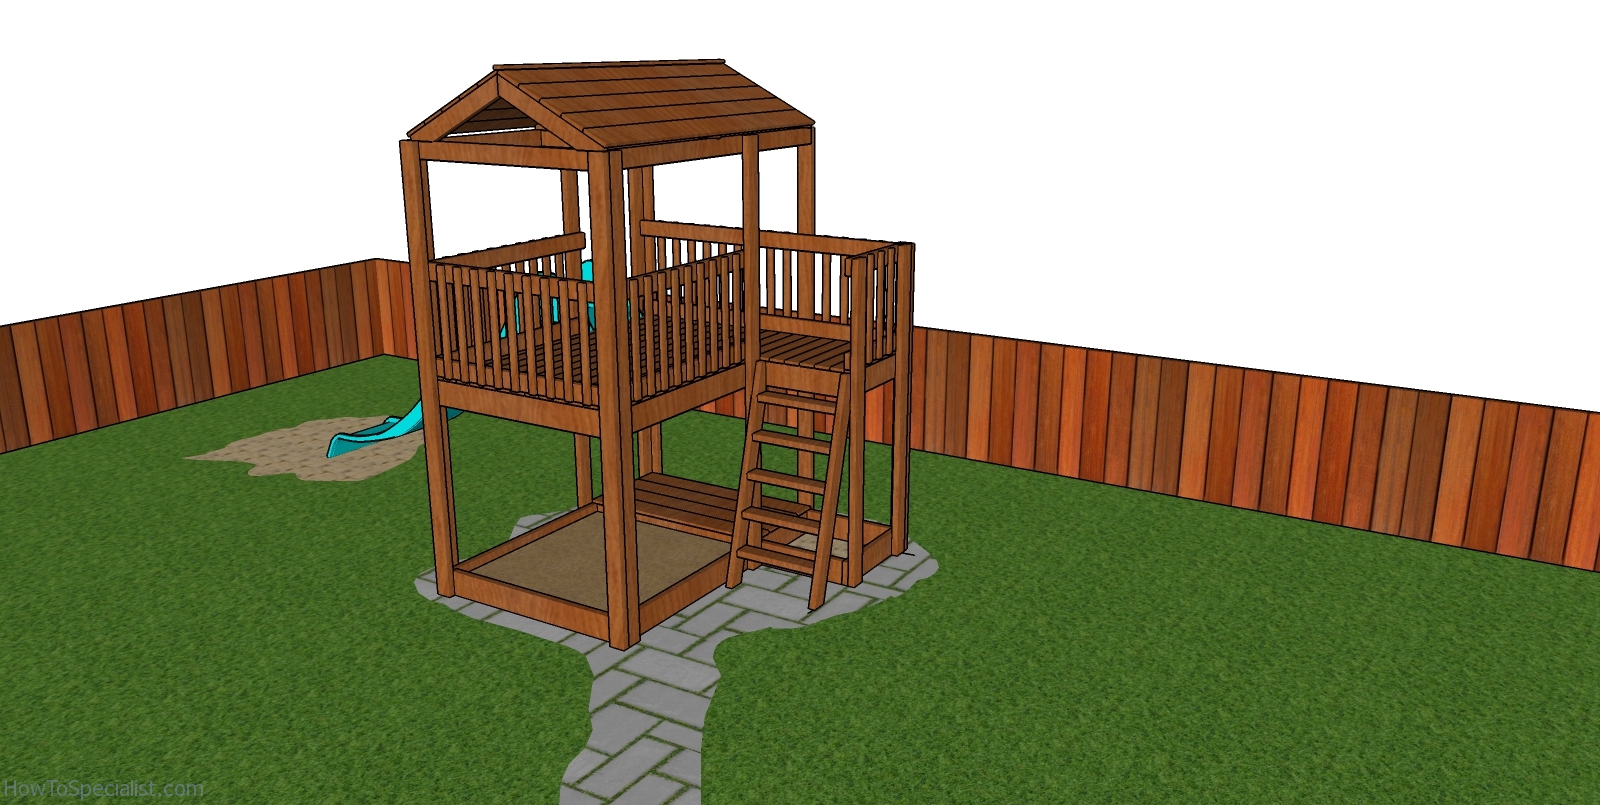
Outdoor Fort Plans
You should consider anchoring the base of the fort to the ground. I suggest pouring 2 ft concrete footings and then using brackets and screws to anchor the frame to the ground.
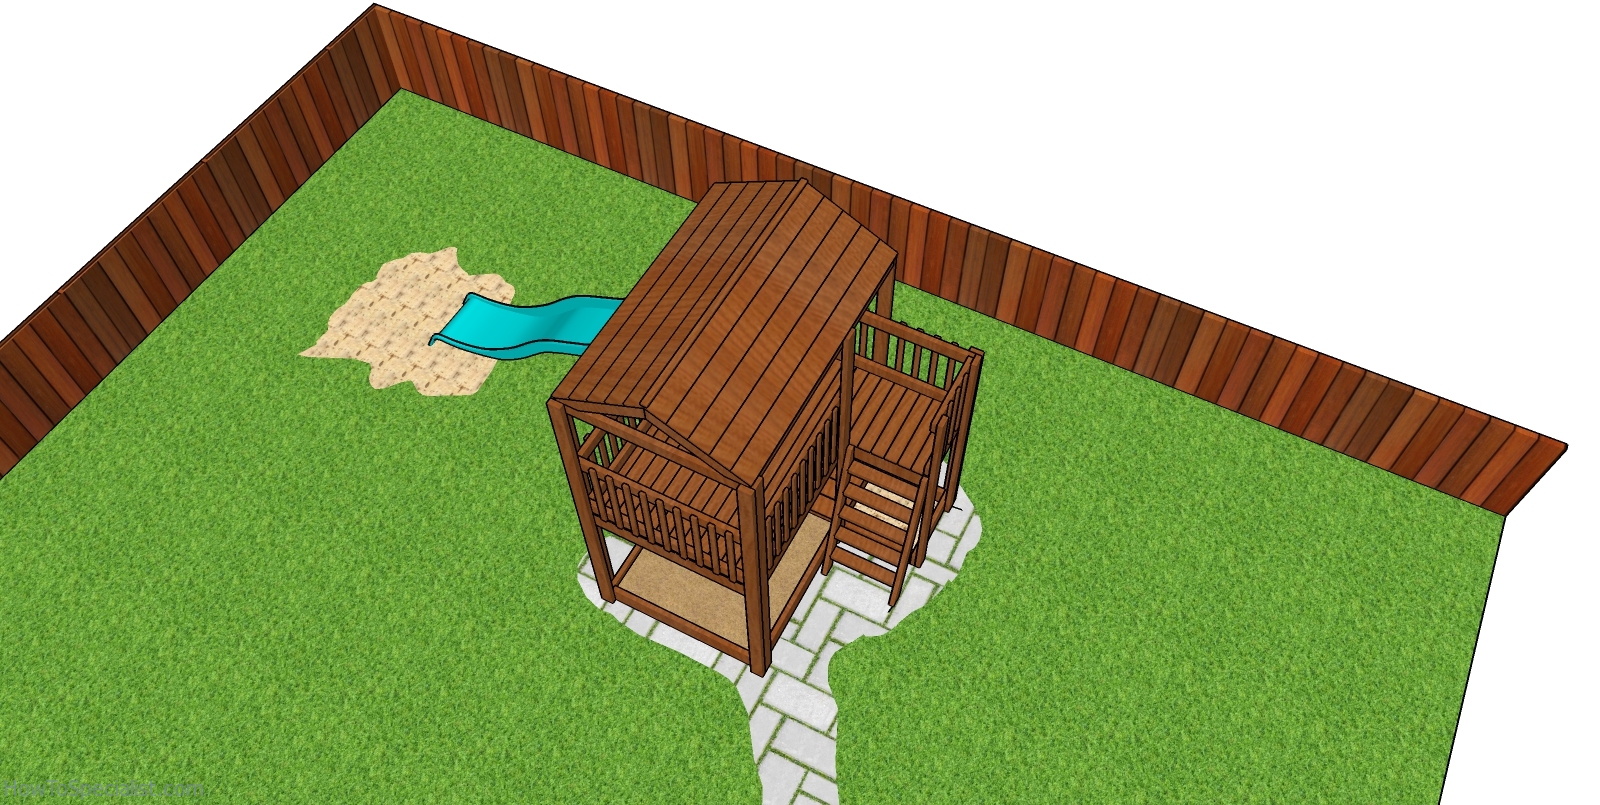
Kids Fort Plans – top view
Staple some landscape fabric inside the sandbox area and then fill it with sand.
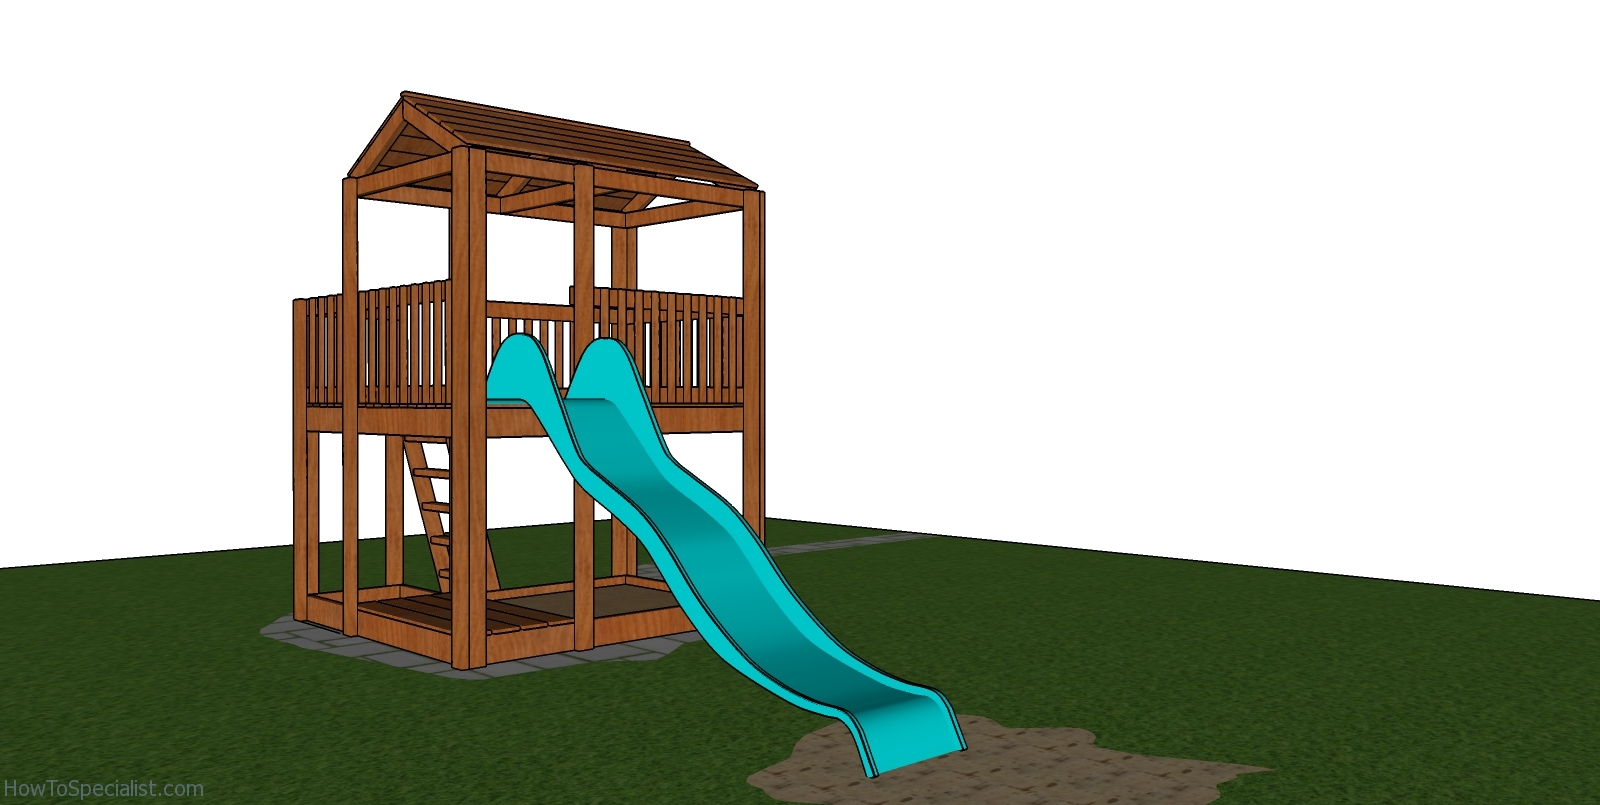
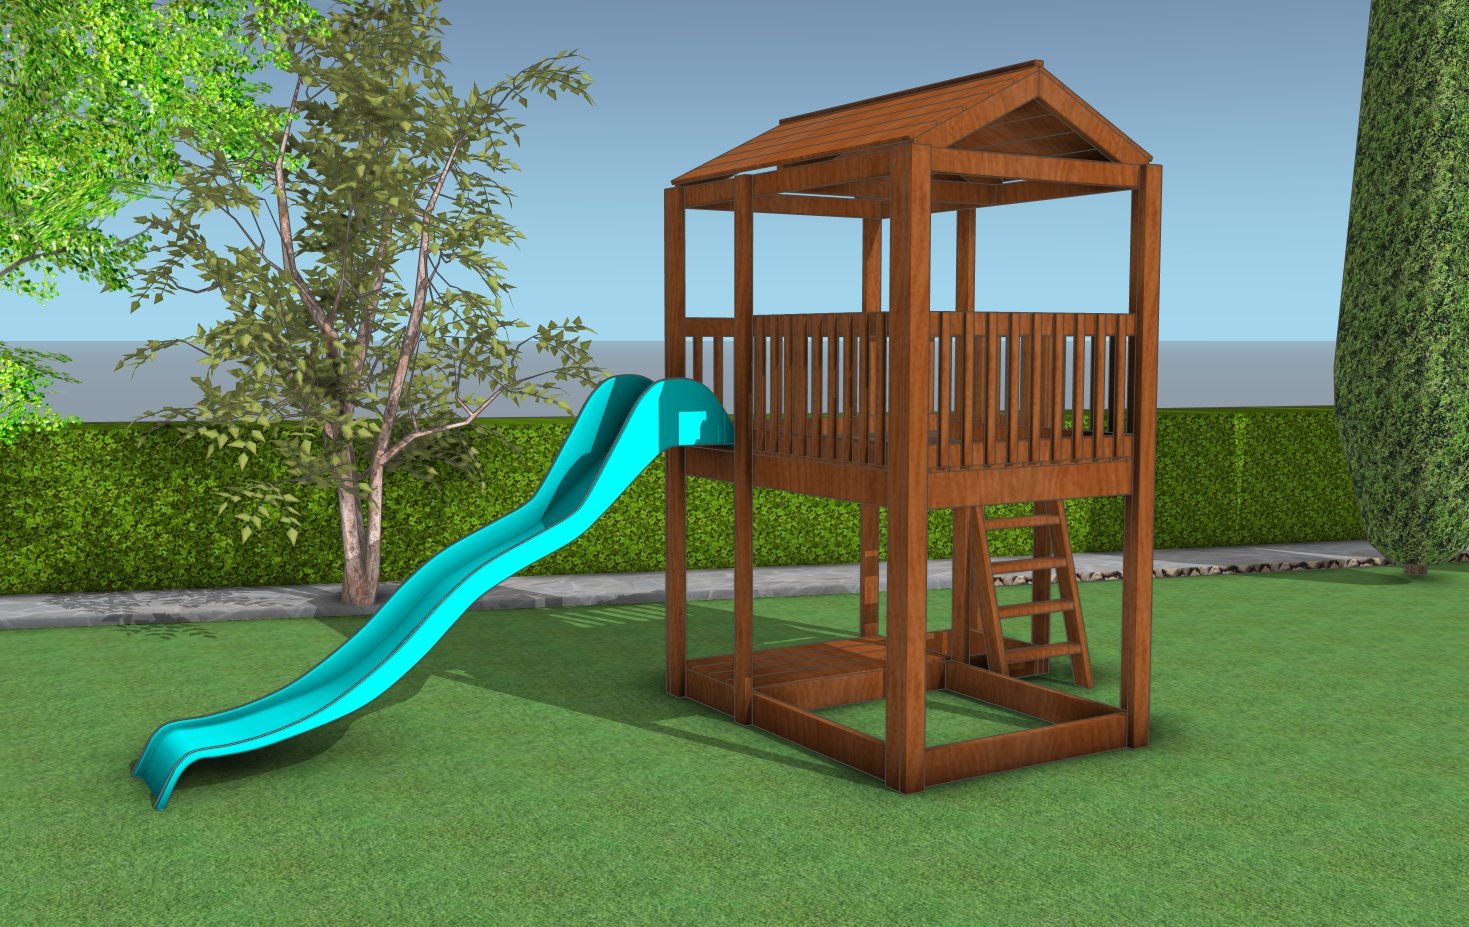
How to build a kids fort with slider
Install the slide to the kids fort. That is the main attraction element of the fort, so make sure you do it right!
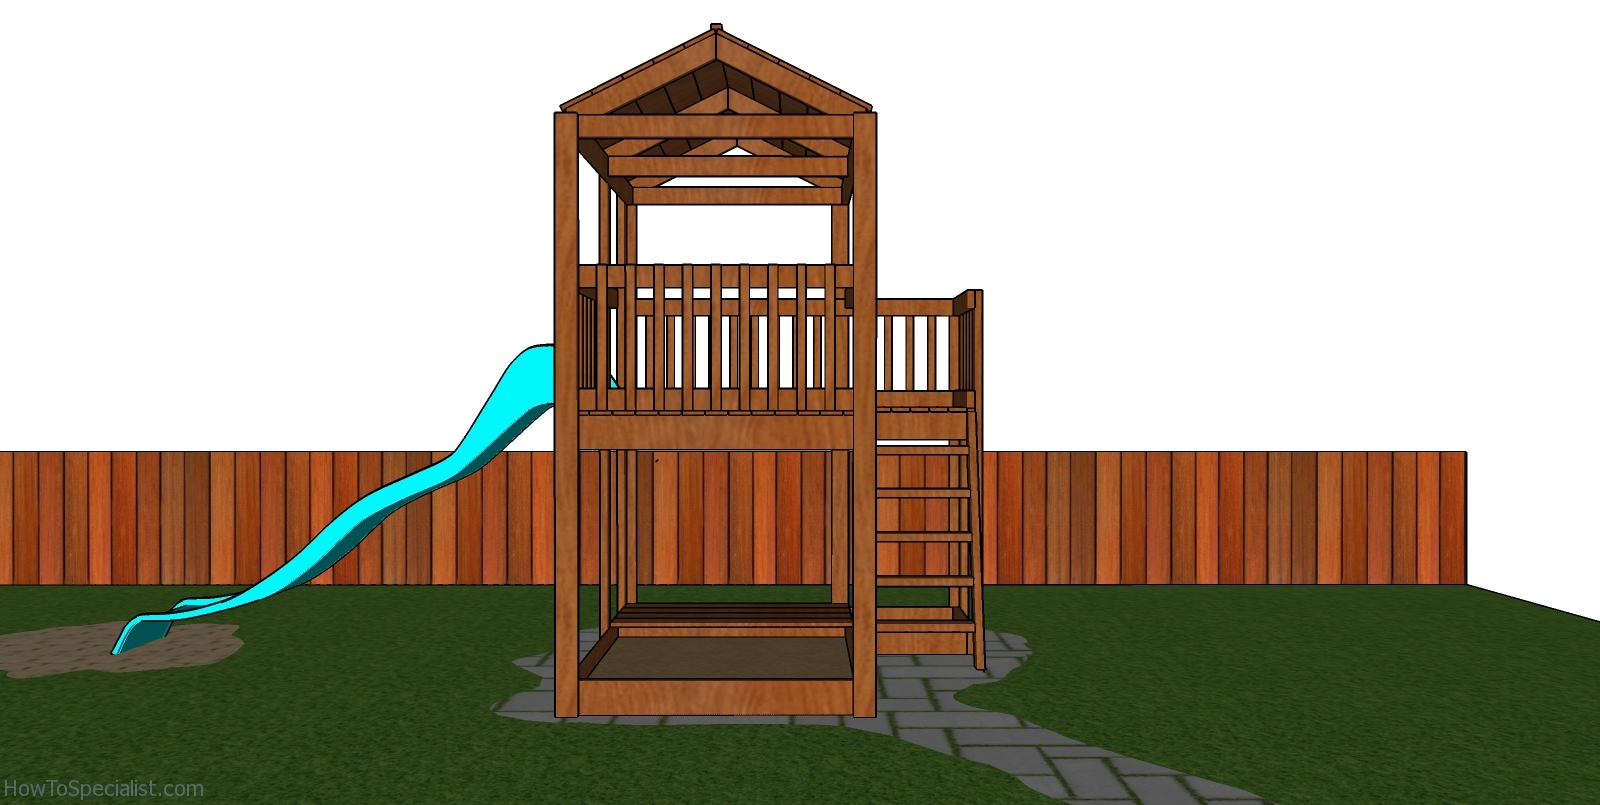
Outdoor Fort Plans – side view
Last but not least, you should take care of the finishing touches. In order to build a playground with a neat appearance, you have to fill the holes with a good wood filler and smooth the surface with 120-grit sandpaper along the wood grain, after the compound has dried out. See all my plans for Kids Projects, for more building inspiration.
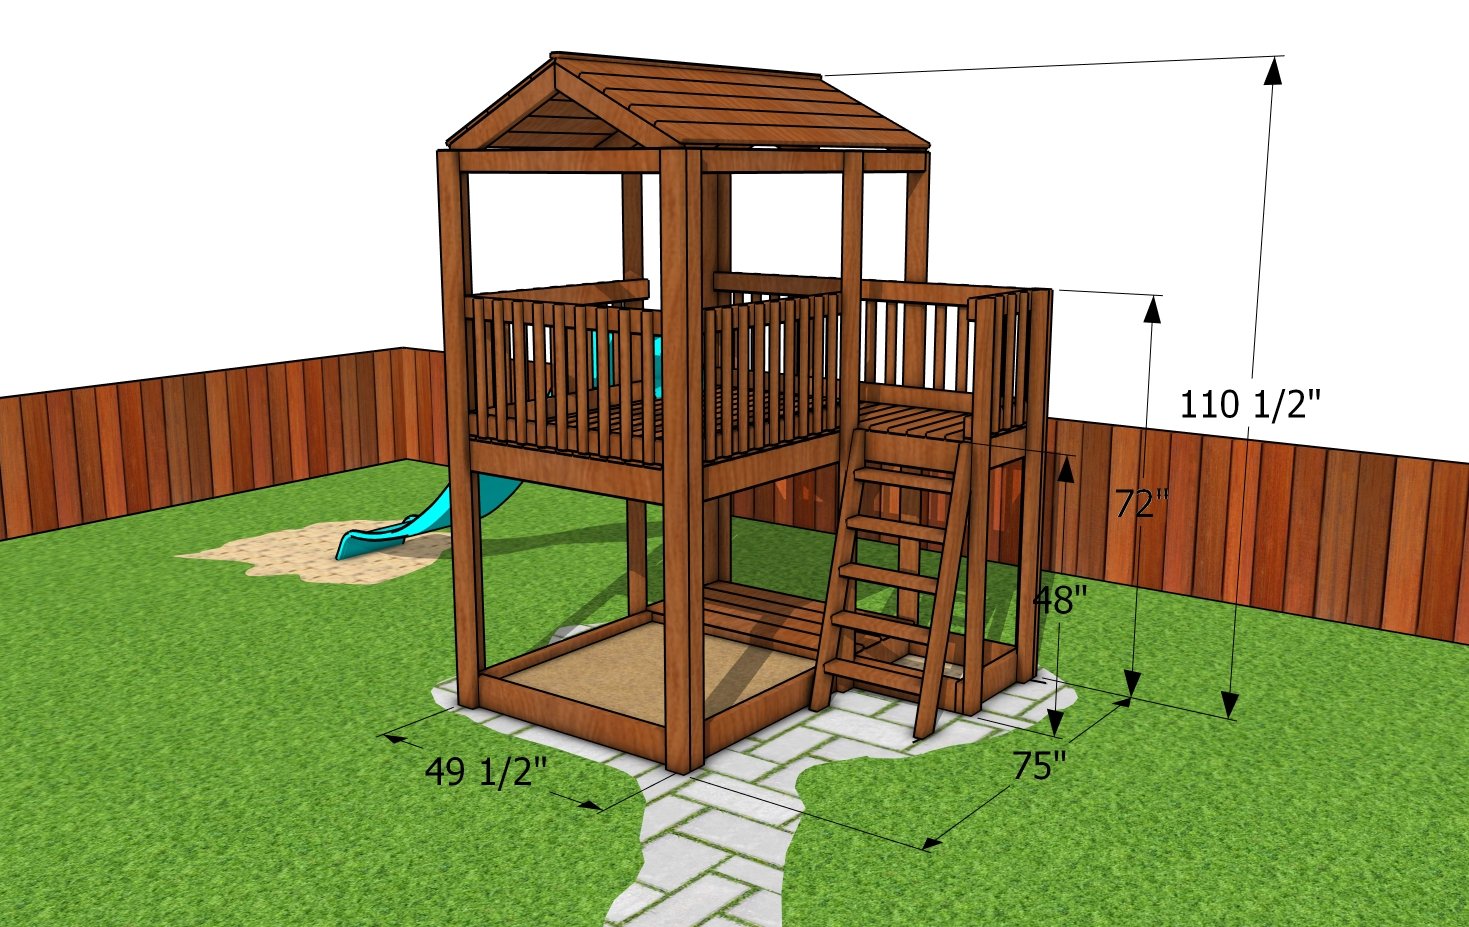
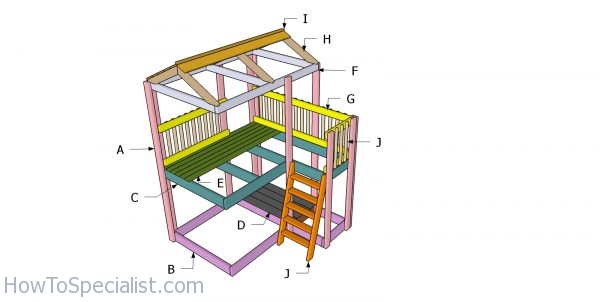
Outdoor Fort Plans – dimensions
Outdoor fort plans
How to build an outdoor fort

Thank you for reading our project about outdoor kids fort plans and we recommend you to check out the rest of the projects. Don’t forget to LIKE and SHARE our projects with your friends, by using the social media widgets.
2 comments
Thank you!!!
I translated all dimensions to mm, scatched it all again – just to ensure all fits, and built one for my grandchild.
It came out GREAT!!!
Now there is an exact copy of your design in the northern part of Israel.
Cheers!
Is this sturdy enough? It does need anything additional support into the ground?