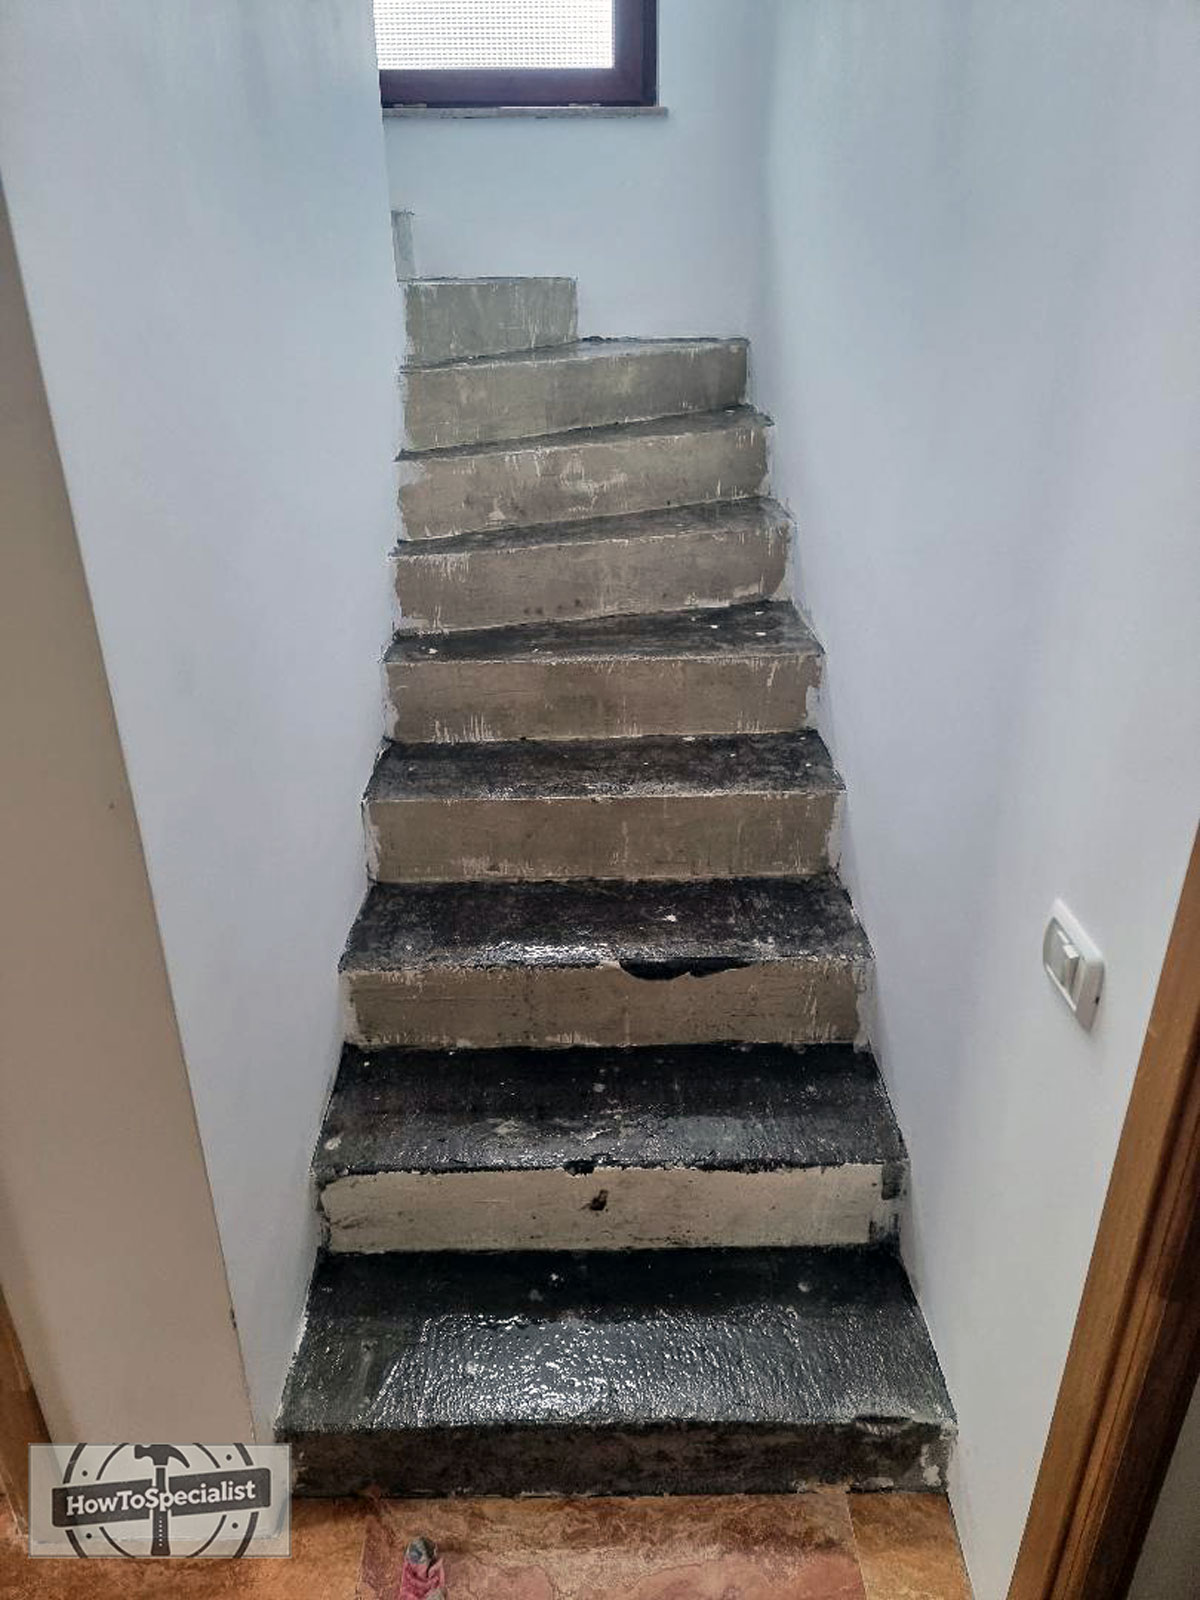
If you’ve got a set of cold, gray concrete stairs in your home—maybe in the basement, a lower-level entry, or even inside an older renovation—you don’t have to live with that unfinished look. Covering concrete stairs with wood is one of the best ways to warm up your space and give it a polished, inviting feel without tearing out the original structure. The beauty of this project is that you’re not starting from scratch. The concrete is solid. It’s strong. It just needs a facelift. With a little prep, some basic tools, and a few pieces of quality lumber, you can transform those stairs into something that looks custom-built—all while staying on budget and doing it yourself. Let’s walk through how to make it happen, step-by-step.
When choosing the right wood for installing over concrete stairs, durability and moisture resistance are top priorities. Pressure-treated lumber is one of the most common choices for this application because it’s chemically treated to resist rot, insects, and moisture damage. It performs well in environments where moisture might be present—like outdoor or basement stairs—and it’s relatively affordable. However, pressure-treated wood can sometimes be prone to surface cracks or slight movement as it dries, so it’s best to let it acclimate before installation.
For a more refined look, hardwoods like oak, maple, or hickory are excellent options for indoor stairs. These species are dense, wear-resistant, and provide a beautiful finish that can be stained or sealed to match the surrounding decor. Oak, in particular, is widely used for stair treads due to its strength and long-lasting appeal. While these hardwoods aren’t as naturally moisture-resistant as pressure-treated lumber, sealing both the top and underside of the boards with a high-quality wood sealer can significantly improve their resistance to moisture intrusion from the concrete below.
If you’re looking for a balance between aesthetics and performance, consider using engineered wood stair treads designed for installation over concrete. These products usually feature a plywood core with a hardwood veneer on top, offering better dimensional stability than solid wood. They’re often prefinished, making installation faster, and some models are specifically manufactured for glue-down applications on sealed concrete. Whatever wood type you choose, make sure it’s rated for the intended use and properly sealed to handle the conditions of the space.

Step 1: Inspect and Clean the Concrete
Before you even touch a piece of wood, take a good look at your concrete stairs. You want to make sure they’re structurally sound—no major cracks, loose edges, or uneven surfaces. A little wear and tear is fine, but if parts of the concrete are crumbling or lifting, you’ll want to patch them first with a concrete repair compound. This ensures your wooden overlay sits flat and secure. Once the surface is solid, give the stairs a thorough cleaning. Sweep off any debris, then scrub the treads and risers with warm water and a degreaser. Let them dry completely. This step is crucial because your adhesive needs a dust-free, dry surface to bond properly.
Applying an epoxy sealer to your concrete stairs is a critical first step before installing any wood over them. Concrete is a porous material, meaning it can absorb and release moisture depending on weather and humidity. Over time, this trapped moisture can migrate into the wooden treads, leading to warping, mold, or rot. By sealing the concrete with a two-part epoxy, you create a non-porous barrier that locks out moisture and protects both the concrete and the wood you’ll be installing on top.
To apply the epoxy, first ensure the concrete is completely dry and free of dust, oil, or loose particles—any contamination can prevent proper adhesion. Mix the two components of the epoxy according to the manufacturer’s instructions and use a roller to spread it evenly across the surface. Pay special attention to corners and edges, and consider applying two coats for added protection. Let the epoxy cure fully—usually between 24 to 48 hours—before moving on to the wood installation. This sealed base gives you a durable, stable surface that will keep your wooden stairs in great shape for years to come.
Step 2: Measure and Cut Your Wood Treads and Risers
Take your time measuring—each step may be slightly different, especially in older homes. Measure the width, depth, and riser height of each stair. You’ll be cutting two pieces per step: one for the tread (the flat part you step on) and one for the riser (the vertical part in front).
For indoor stairs, hardwoods like oak, maple, or birch plywood-faced treads are a great choice. They’re durable, take stain beautifully, and look clean and finished when installed. You can also use engineered wood stair treads or premade tread kits, depending on your budget and style.
Cut each piece to fit snugly. It’s better to take off a little at a time than to cut too short—especially with hardwoods. Dry-fit everything before installing to make sure it all lines up nicely.
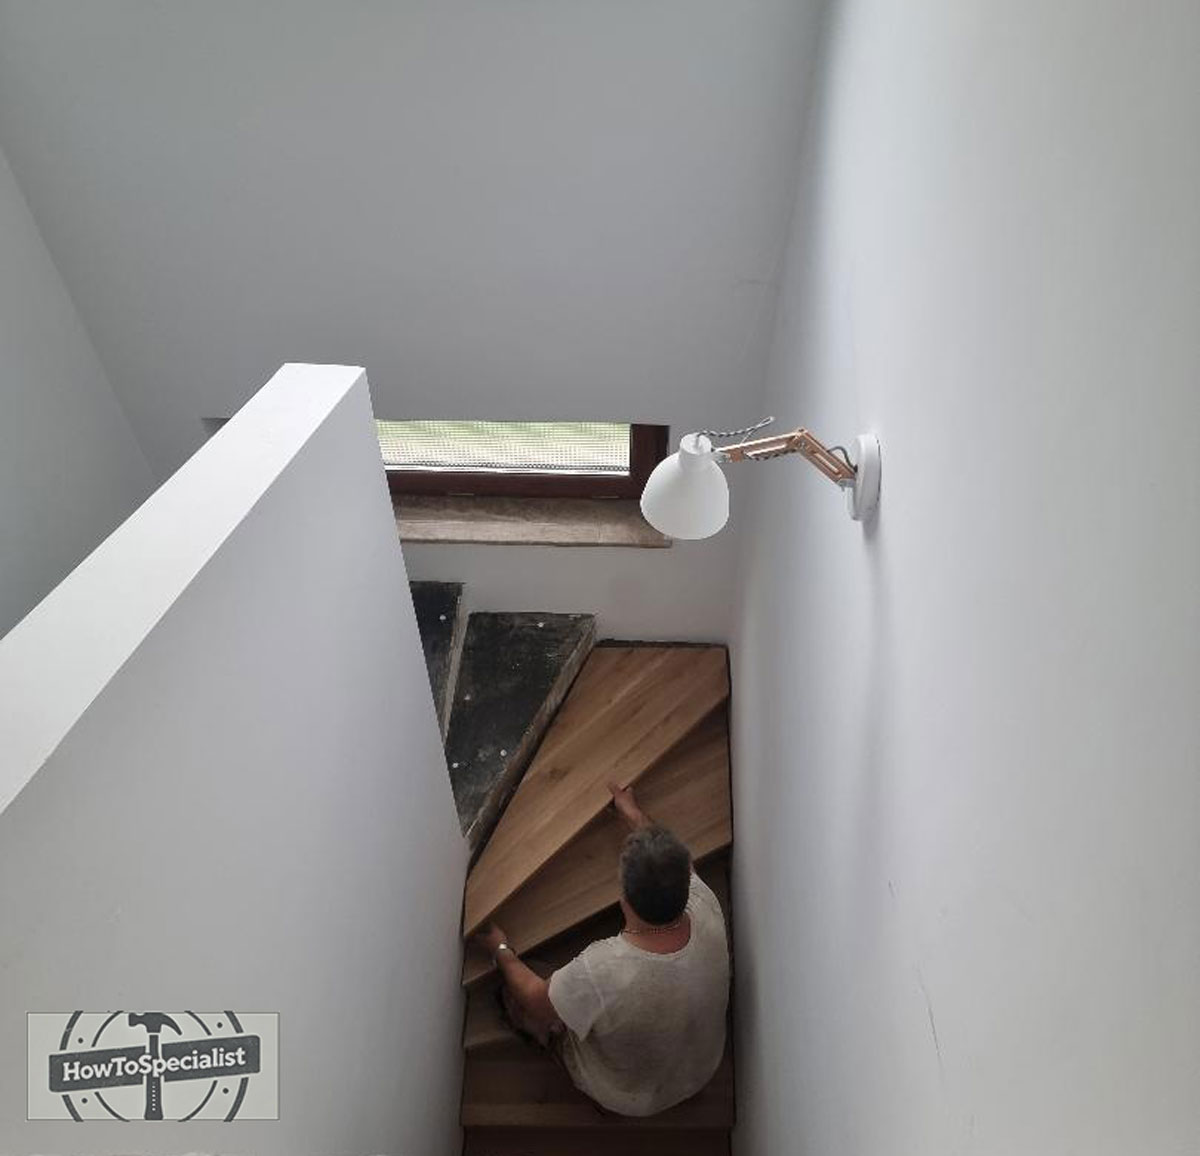
Step 3: Attach the Wood to the Concrete
Now comes the fun part—putting everything together. Use a high-strength construction adhesive rated for concrete and wood, like Liquid Nails Heavy Duty or Loctite PL Premium. Apply the adhesive generously to the back of each wood piece, then press it firmly onto the concrete. A notched trowel helps spread it evenly across the surface for full contact.
For a rock-solid bond, you can also add concrete anchors or masonry screws through pre-drilled holes in the treads and risers. This isn’t always necessary for low-traffic indoor stairs, but it adds extra holding power—especially if you’re working in a humid basement or want that peace of mind. Start with the bottom riser and work your way up, installing the riser first, then the tread on each step. Use shims if needed to level out any imperfections in the concrete. Let the adhesive cure overnight or as directed on the label before walking on the stairs or adding trim.

Step 4: Add Trim and Finish Strong
Once your treads and risers are installed, you can give the whole staircase a polished, professional look with a few finishing touches. Caulk any small gaps between the risers and walls, or use wood filler where the tread meets the riser for a seamless line. If your design calls for it, add stair nosing or bullnose trim to the front edge of the treads for a more traditional look and improved slip resistance. This also helps protect the front edge from wear and tear.
Now’s the time to stain or paint your new wood stairs, if you haven’t already. A good quality stain-and-seal combo works great, or you can go with a clear polyurethane finish for natural wood tones. For high-traffic areas, opt for a durable floor-rated polyurethane in satin or semi-gloss to help it hold up to daily use.

Final Thoughts: A Big Transformation with a DIY Budget
Covering your concrete stairs with wood might sound like a big project, but when you break it down into steps, it’s totally manageable—even for weekend warriors. It’s one of those upgrades that adds instant warmth and value to your home, without requiring demolition or specialty skills.
Whether you’re tackling a basement staircase, upgrading a split-entry landing, or just tired of that cold industrial feel, this project delivers huge results with just a few tools and some quality materials. You’re using what’s already there and making it better—and that’s the heart of smart DIY. So go ahead—measure twice, cut carefully, and transform those concrete steps into something beautiful. You’ve got this.
Maintenance Tips
Maintaining wooden stairs installed over concrete starts with keeping them clean and dry. Dirt, grit, and moisture can slowly wear down the finish and cause the wood to degrade over time, especially in high-traffic areas. Regularly sweep or vacuum the steps to remove debris, and promptly wipe up any spills to prevent water from seeping into seams or cracks. For outdoor stairs or basement areas with higher humidity, it’s a good idea to place mats at entry points to reduce the amount of moisture tracked onto the wood.
Every six months to a year, inspect the stairs for signs of wear, especially around the edges and corners of the treads. If the finish begins to dull, or if you notice any small cracks, it may be time to reapply a protective topcoat. For stairs with a polyurethane or oil-based finish, lightly sanding the surface and applying a fresh coat can restore their look and protection. Be sure to also check that the stairs are still securely fastened to the concrete, as changes in temperature and humidity can sometimes cause minor shifting or loosening over time.
Long-term care may include refinishing the wood every few years, depending on the amount of foot traffic and exposure to elements. If the wood has been sealed properly from the start and maintained with regular cleaning and touch-ups, it can last for decades. In outdoor settings, you may also want to apply a UV-resistant stain or sealant once a year to protect the wood from sun damage and fading. By keeping an eye on small issues and addressing them early, you’ll ensure your wooden stairs stay safe, solid, and attractive for the long haul.
1 comment
Hello Jack, I have a similar set of concrete basement steps. I would love to replace them. The problem: the treads have been worn for many years, so they’re not flat any more. The tread is also not wide enough for an adult foot. Plus, the rise for the steps is a bit short. Do you have suggestions for me? I’m stumped!