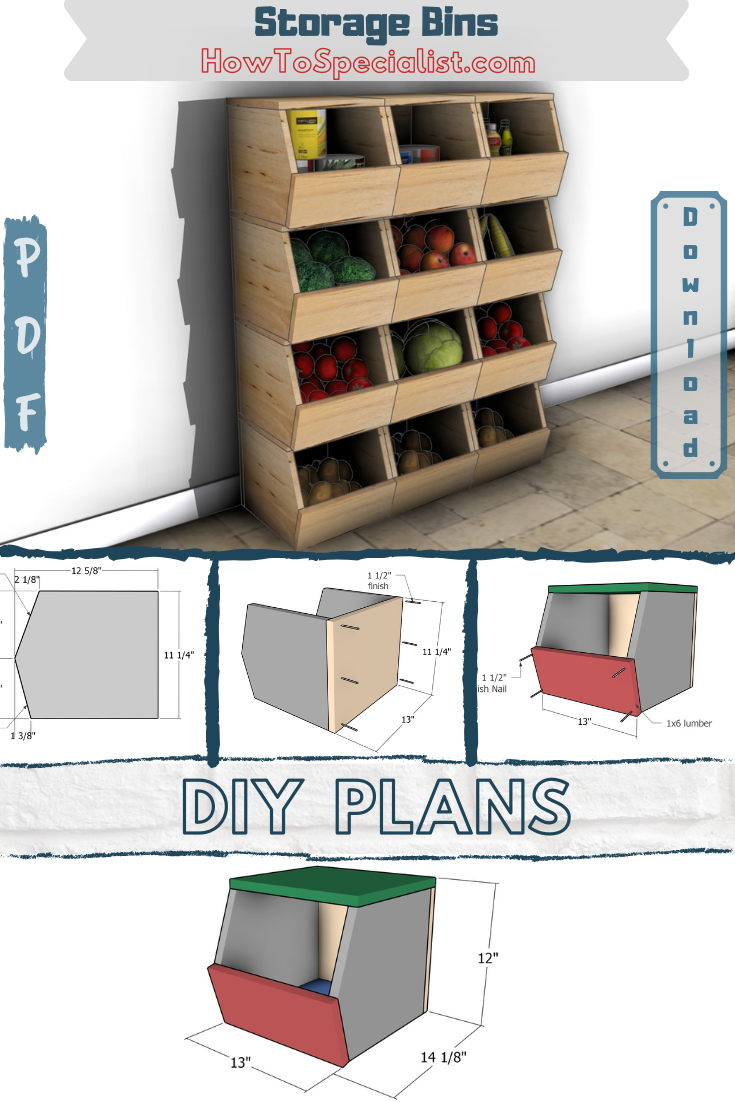
Organizing your kitchen or pantry doesn’t have to be boring—why not make it functional and stylish? This DIY wooden storage bin plan is the perfect solution for keeping your root vegetables, canned goods, and bottles neatly stored and easy to access. With a versatile, stackable design, these bins can be arranged to fit your space, whether horizontally or vertically. Plus, they’re easy to assemble, disassemble, and customize, making them a great addition to any home.
These wooden storage bins are as versatile as they are practical. You can use them to neatly organize root vegetables like potatoes and onions, store canned goods, or even stack bottles securely. Their stackable design allows you to arrange them vertically to save floor space or horizontally for easy access. Whether in your kitchen, pantry, or even your garage, these bins add both functionality and a touch of rustic charm to your space. Plus, they’re lightweight and easy to move, making them perfect for reconfiguring as your storage needs change.
For the perfect project, focus on precision when cutting and assembling the pieces to ensure the bins stack neatly and securely. Sand all the surfaces thoroughly for a smooth finish, and if you’re using the bins for food storage, choose a food-safe finish to protect your produce. I also recommend attaching the bins with screws rather than nails if you want the flexibility to disassemble them later. These small details will elevate the project and make it truly practical for daily use.
We recommend you to invest in the best materials you could afford. Therefore, you should buy weather-resistant lumber, such as pine or cedar. Always take accurate measurements before adjusting the size of the components at the proper size. Drill pilot holes trough the components before inserting the wood screws, to prevent the wood from splitting. My plans come with a full cut / shopping list and they are PDF Download and Print friendly. See all my Premium Plans HERE.
Made from this plan
Pin it for Later!
DIY Stackable bin crate plans
Wooden Storage Bins – Free DIY Plans
Building-food-bins
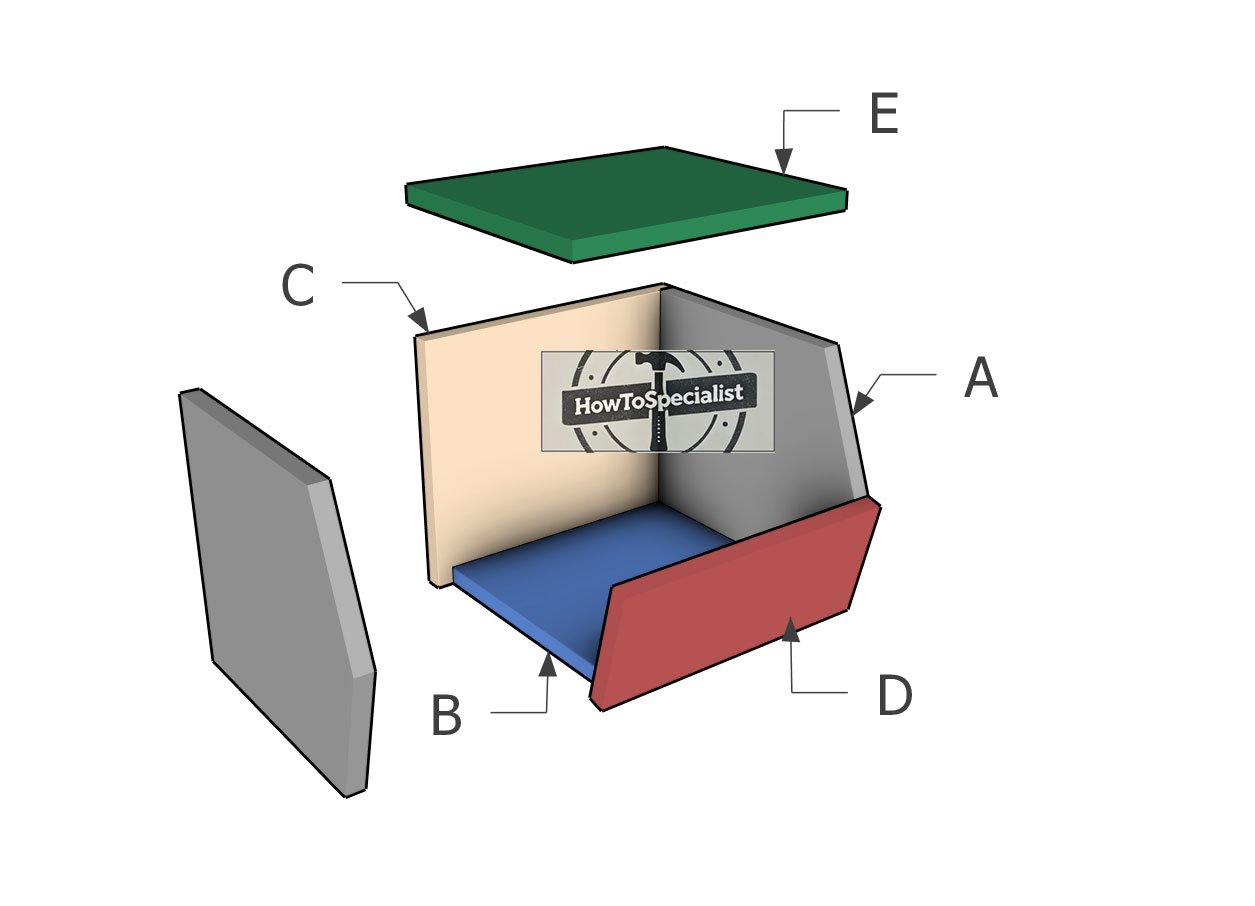
Materials (for 6 bins)
A – SIDES – 1×12 lumber 12 5/8″ – 12 pieces
B – BOTTOM – 3/4″ lumber 11 1/2″ – 6 pieces
C – BACK – 1×12 lumber 13″ – 6 pieces
D – FRONT – 1×6 lumber 13″ – 6 pieces
E – TOP– 1×12 lumber 13″ – 6 pieces
- 1×6 lumber 8 ft – 1 piece
- 1×12 lumber 8 ft – 2 pieces
- 1×12 lumber 10 ft – 2 pieces
- 1 1/2″ finish nails – 150 pieces
- 1 1/4″ screws – 20 pieces
- Mineral oil – 1 can
- Glue – 1 piece
Tools
- Miter saw, Pocket hole jig
- Drill machinery, Drill bits, Jigsaw
- Safety gloves, Glasses
- Chalk line, tape measure, spirit level, carpentry pencil
Time
- One week
Related
Cut layout diagram

Step 1: Building the main frame
Cutting-the-side-boards
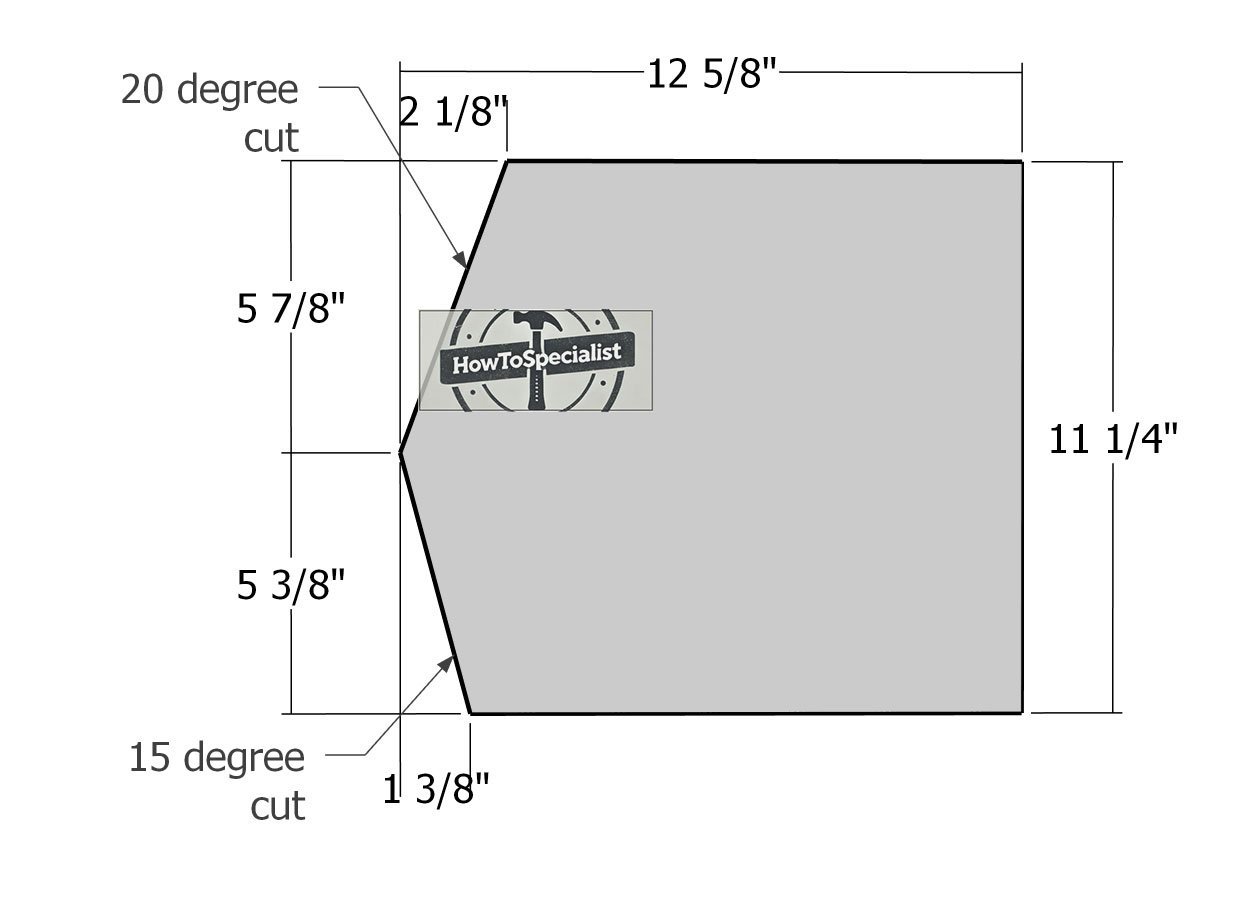
The first step in building the onion and potato bins is to create the side boards. Start by cutting the 1×12 boards to 12 5/8″ in length. Next, mark the angle cut lines on the front edge according to the plans.
Use a circular saw or miter saw to make these precise cuts, and then smooth out the edges with sandpaper for a clean, polished finish. Let’s get those sides ready to go!
Attaching-the-bottom-board
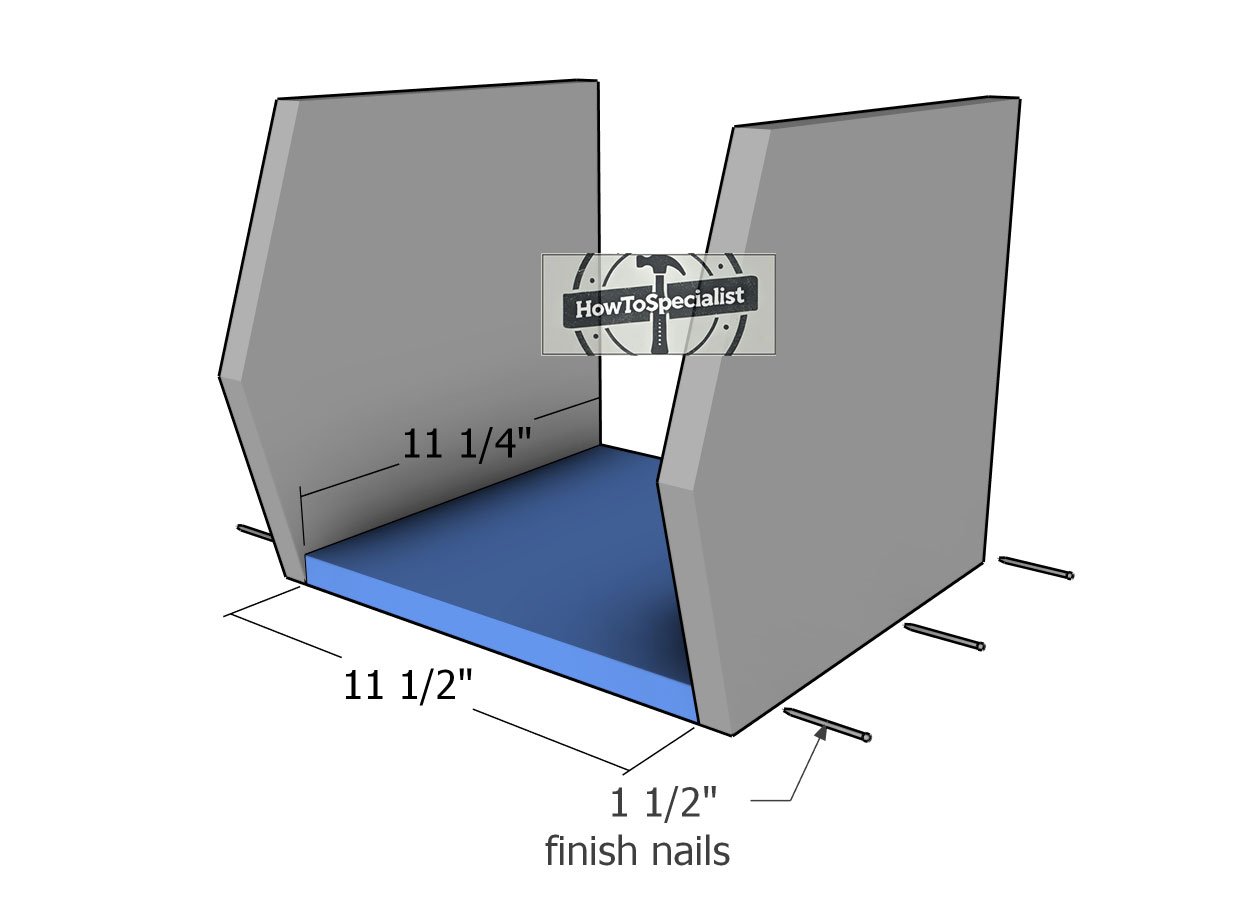
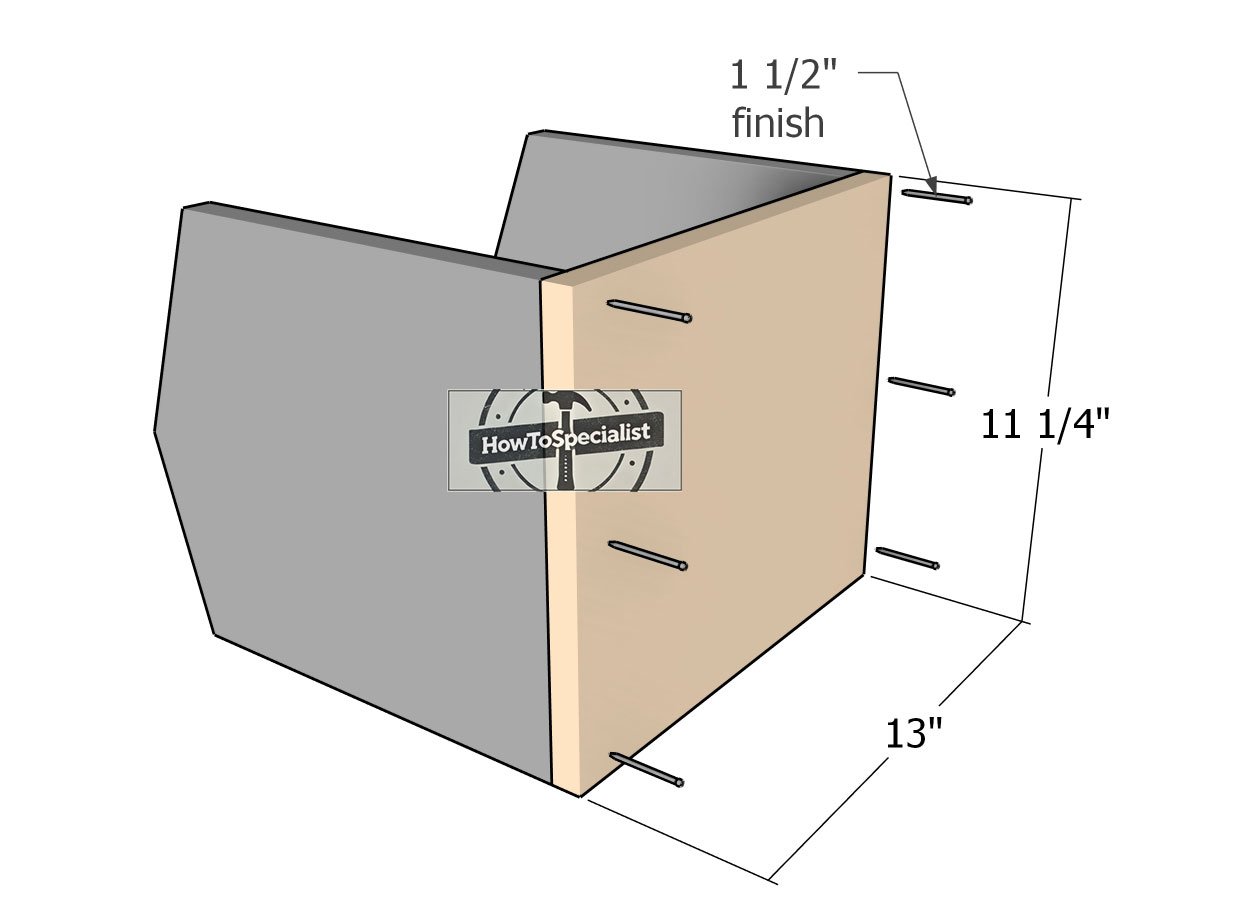
Cut the bottom piece from 1×12 lumber to a length of 11 1/2″ and place it on a level surface. Position the side boards upright, ensuring the edges are perfectly flush with the front and back of the bin.
Apply wood glue to the joints for extra strength, then secure the frame by inserting 1 1/2″ finish nails. Take your time here to keep everything aligned and sturdy—this is the foundation of your bin!
Fitting-the-back-panels
Next, let’s attach the back panel to the bins. Cut the panel from 1×12 lumber to match the size of the bin. Apply wood glue along the edges, then position the back panel in place, ensuring there are no gaps between the components.
Use quick clamps to hold everything tightly together, making sure it’s nice and secure, then drive in 1 1/2″ finish nails to lock it all down. This step will give the bin its sturdy structure, so take your time to get it just right!
Fitting-the-top-board
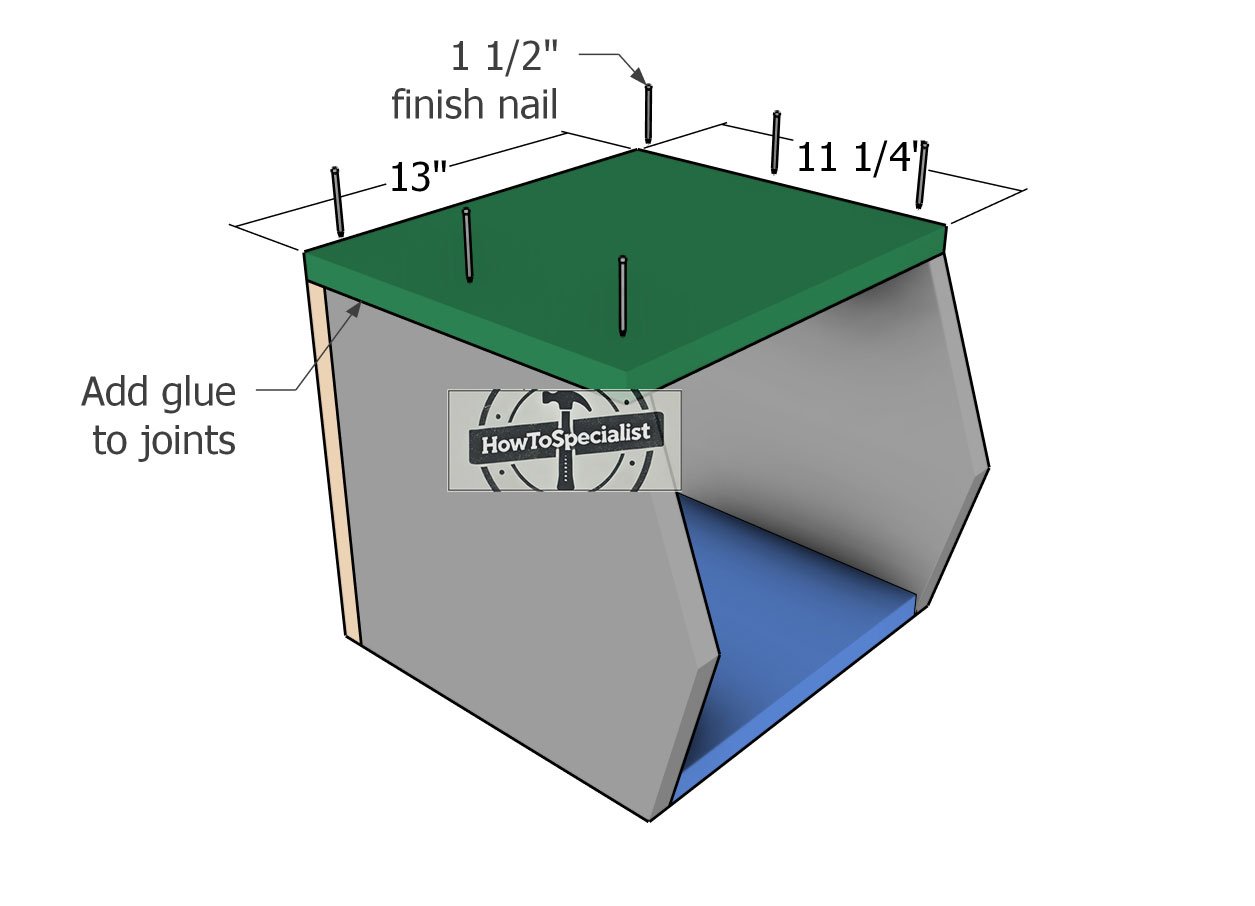
Now it’s time to attach the top board to the wood storage bins. Cut the top piece from 1×12 lumber, ensuring it matches the dimensions of the bin. Align the edges flush for a clean, polished look, then add wood glue to the joints for extra strength.
Secure the top board in place by inserting 1 1/2″ finish nails. This step ties everything together and gives the bins a finished, professional appearance!
Fitting-the-front-board
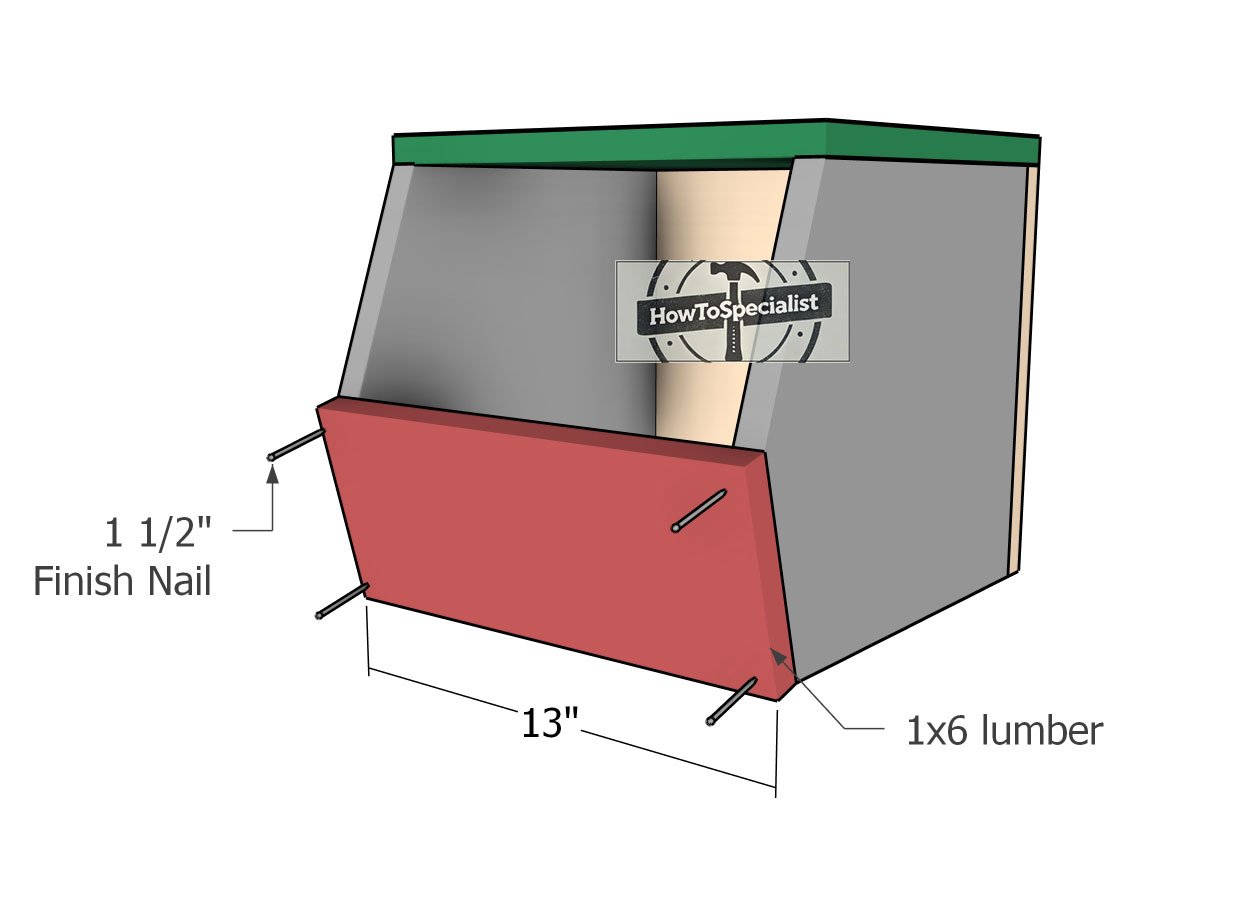
The final step of the assembly is to attach the 1×6 board to the front of the wooden bin crate. Align the edges carefully for a seamless look, and secure it in place with 1 1/2″ finish nails. This front board adds structure and helps keep everything tidy.
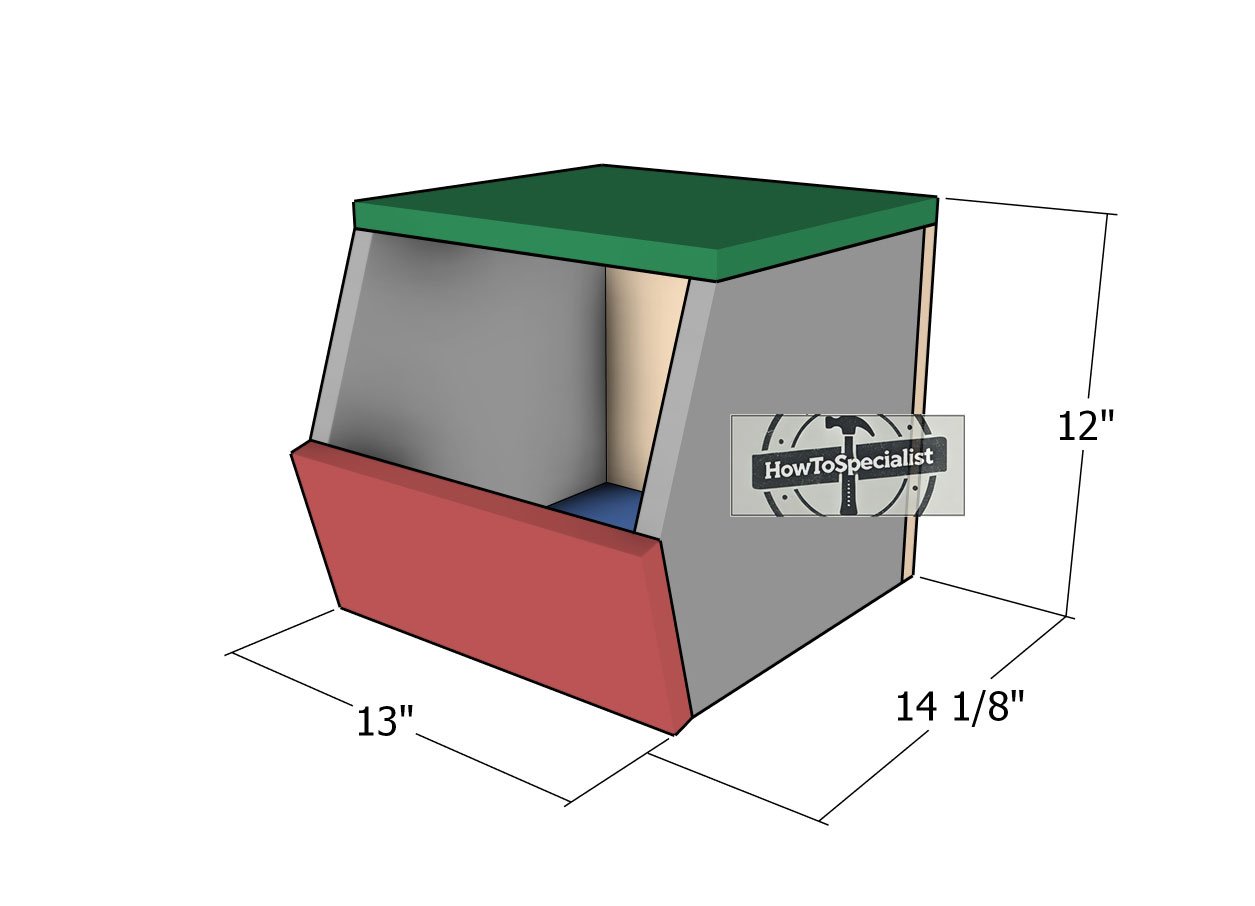
One of the best features of these bins is their stackable design! You can build multiple bins and stack them vertically or horizontally to create the perfect storage solution for your root vegetables, canned goods, or bottles. It’s a versatile project that adds functionality and charm to your storage space. Let’s put these bins to good use!
Step 2: Finishing touches
Storage-bins—dimensions
For the finishing touches, it’s important to make the bins food-safe, especially if you’re storing root vegetables. Start by sanding all the surfaces thoroughly to remove splinters and rough spots. Then, apply a food-safe finish such as mineral oil, beeswax, or a water-based polyurethane designed for food contact.
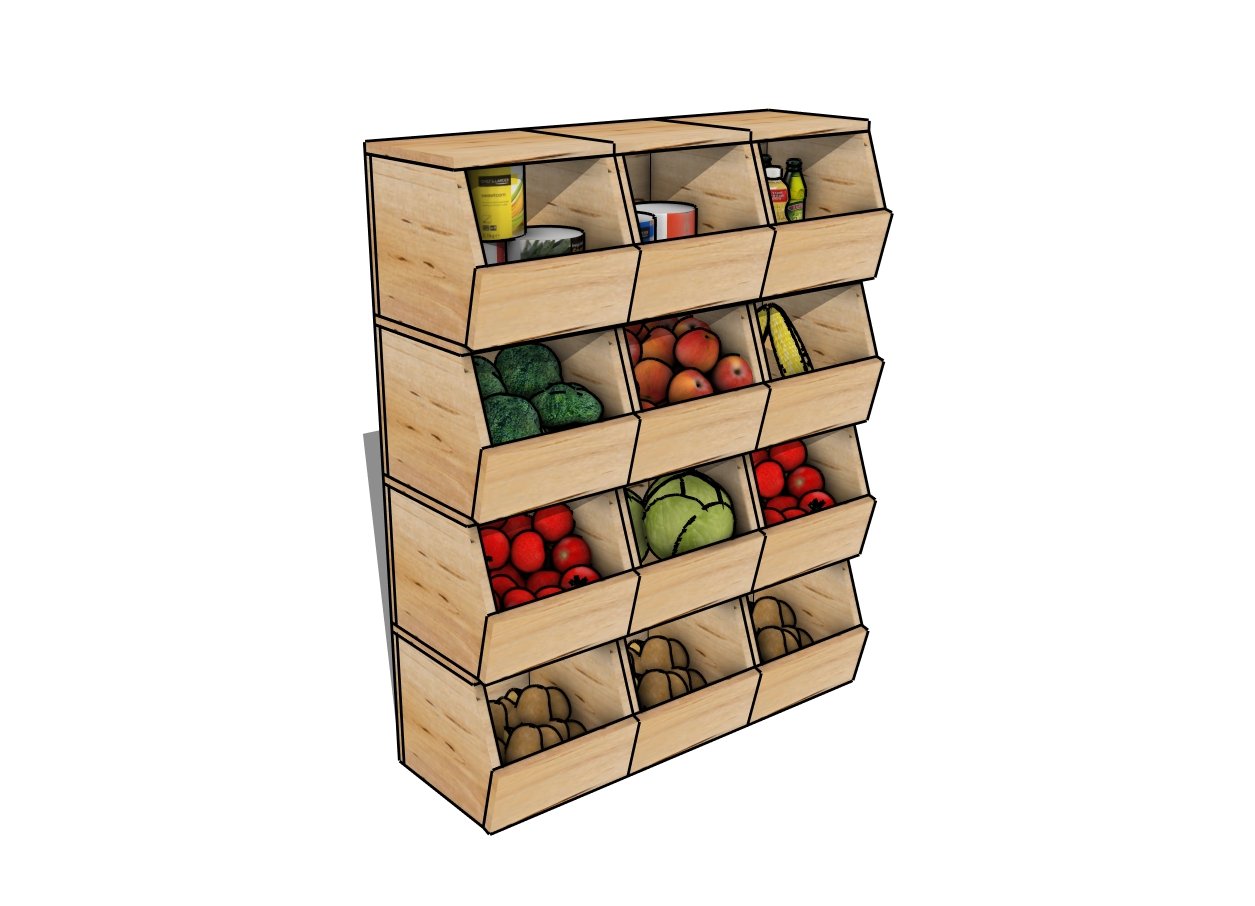
Storage bins plans
These finishes not only protect the wood but also ensure it’s safe for storing produce. Avoid using harsh chemicals or finishes that could contaminate your food. With these final steps, your bins will be both functional and safe for your kitchen or pantry!
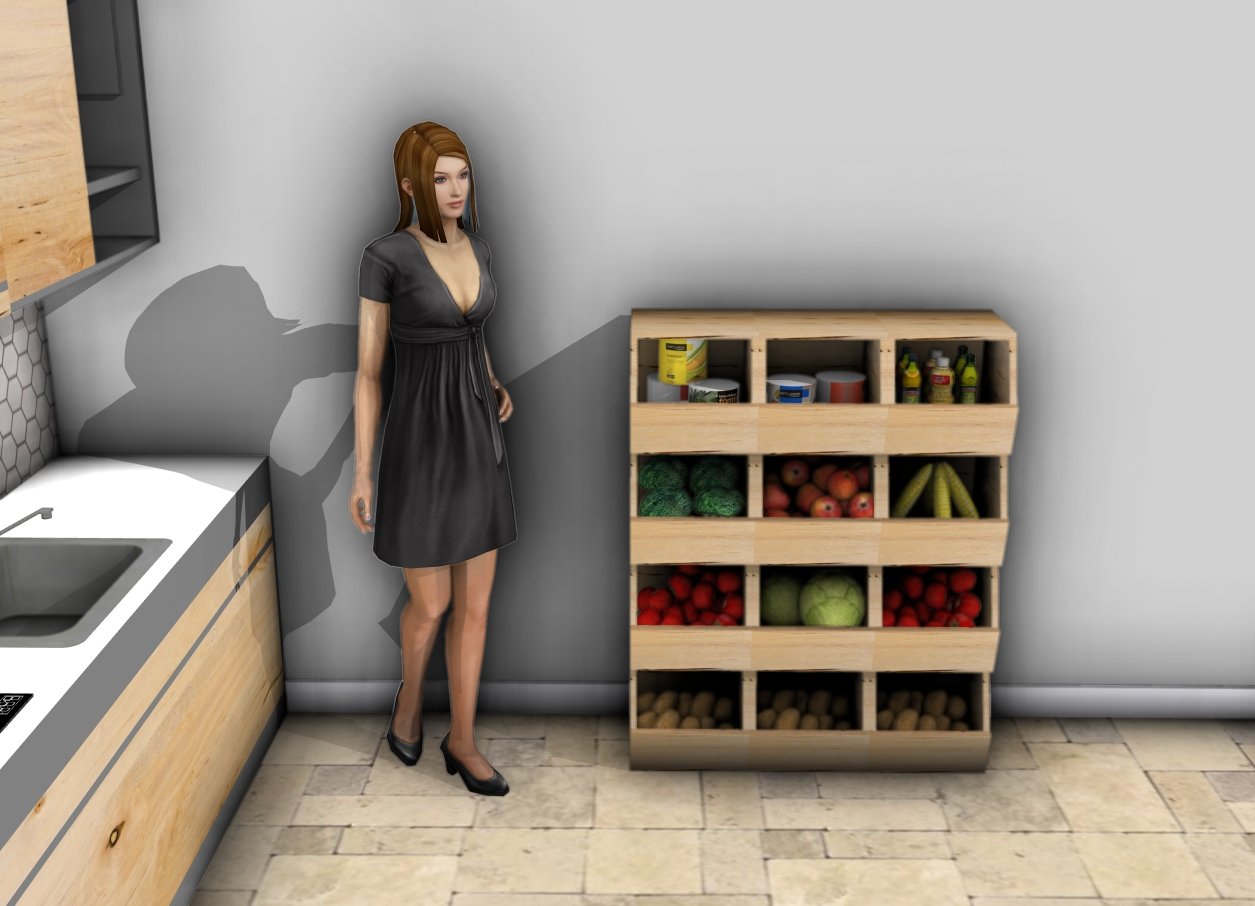
Root vegetable storage bins
To make the bins versatile and easy to manage, you can join them together using 1 1/4″ screws. This allows you to stack and secure the bins for a stable storage solution while also making it simple to disassemble them whenever needed. Whether you’re rearranging your space or giving the bins a deep clean, this assembly method ensures convenience without compromising functionality. It’s a smart way to keep your storage both flexible and efficient!
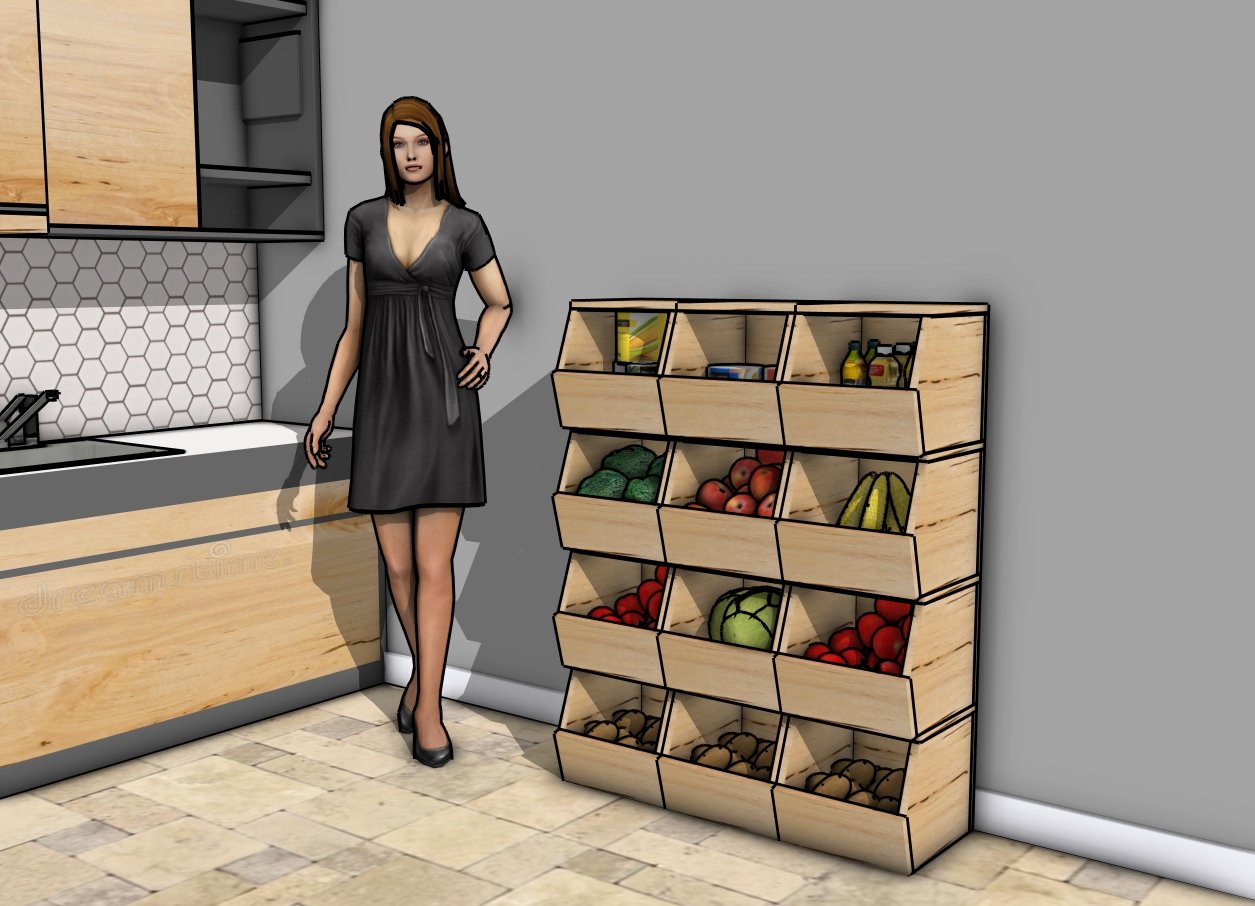
DIY Stackable storage bins
And there you have it, a versatile, stackable set of wooden storage bins perfect for organizing your root vegetables, canned goods, or bottles. This project not only provides a functional storage solution but also adds a rustic, handmade touch to your home. By taking the time to customize the design and finish, you’ve created a unique piece that suits your needs and style.
Whether you’re expanding your kitchen storage or adding organization to your pantry, these bins are a game-changer. Plus, with their stackable and easy-to-assemble design, they’ll adapt as your needs grow.
Thanks for checking out my DIY wooden storage bin plans! Be sure to explore my other projects for more fantastic ideas. Don’t forget to hit the LIKE button and SHARE with your friends using the social media links below.

