This step by step woodworking project is about free outhouse plans. I have designed this wood outhouse so you can build one without much effort and with a minimum investment. This outhouse has a lean to roof and a large front door, so you can seal it and to have an easy access to the interior of the shelter. See my other DIY projects HERE.
These detailed designs make it easy to build a practical addition that can serve as a garden bathroom or cozy retreat. Customize your outhouse with unique features like a reclaimed wood door, a charming window, and a cute, shingled roof. With step-by-step guides, even a DIY novice can create a standout structure that adds character and convenience to any outdoor space.
We recommend you to invest in the best materials you could afford. Therefore, you should buy weather-resistant lumber, such as pine or cedar. Always take accurate measurements before adjusting the size of the components at the proper size. Drill pilot holes trough the components before inserting the wood screws, to prevent the wood from splitting. See all my Premium Plans in the Shop.
Made from this plan
Free Outhouse Plans
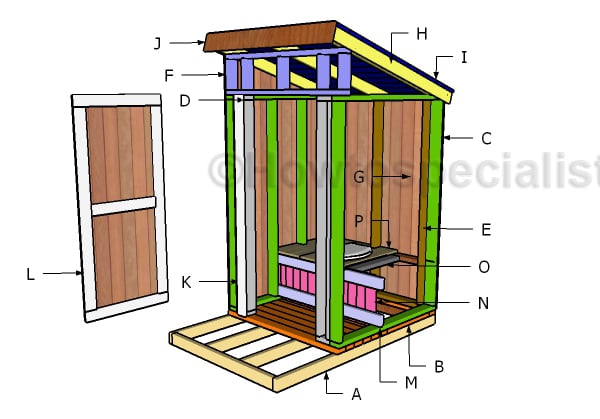
Building an outhouse
Materials
- A – 2 pieces of 2×4 lumber – 72″ long, 4 pieces – 45″ long, 2 pieces – 43″ long FLOOR FRAME
- B – 13 pieces – 48″ long, 2 pieces – 22 1/2″ long FLOOR
- C – 2 pieces of 2×4 lumber – 48″ long, 4 pieces – 67 1/8″ long 2xSIDE WALL
- D – 4 pieces of 2×4 lumber – 5 1/2″ long, 4 pieces – 67 1/4″ long FRONT WALL
- E – 2 pieces of 2×4 lumber – 41″ long, 3 pieces – 67 1/8″ long BACK WALL
- F – 2 pieces of 2×4 lumber – 48″ long, 5 pieces – 9 1/4″ long TOP FRAME
- G – 1 piece of T1-11 siding – 48″x82 1/2 long, 1 piece – 48″x70 1/4″ long SIDING
- 31 pieces of 2×4 lumber – 10′
- 2 pieces of T1-11 siding – 4’x8′
- 3 1/2″ screws, 1 1/4″ screws
- 6d nails
- wood glue, stain/paint, wood filler
Tools
- Safety gloves, glasses
- Miter saw, jigsaw
- Chalk line, tape measure, spirit level, carpentry pencil
- Drill machinery and drill bits
Time
- One week
Related
Building a wood outhouse plans
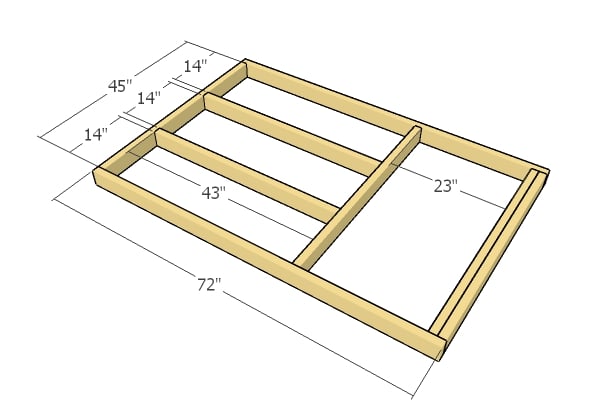
Building the frame
The first step of the project is to build the frame for the outhouse. Cut the components at the right dimensions from 2×4 lumber. Drill pilot holes through the rim joists and insert 2 1/2″ screws into the perpendicular components. This outhouse has this awesome platform in the front, which makes access to the interior very easy.
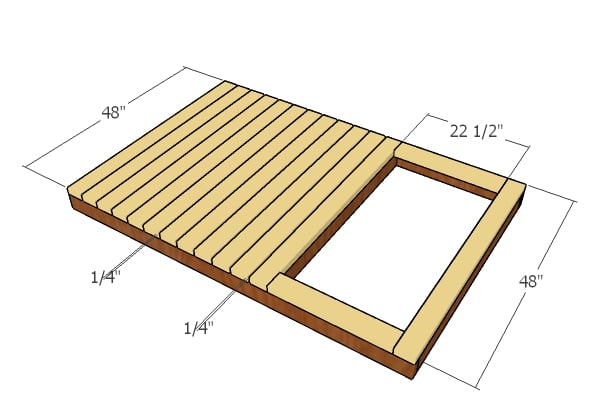
Fitting the decking
Continue the project by fitting the 2×4 decking to the floor frame. Place a nail between the slats so you create some drainage gaps between the decking slats. Drill pilot holes and insert 2 1/2″ screws to lock them into place tightly.
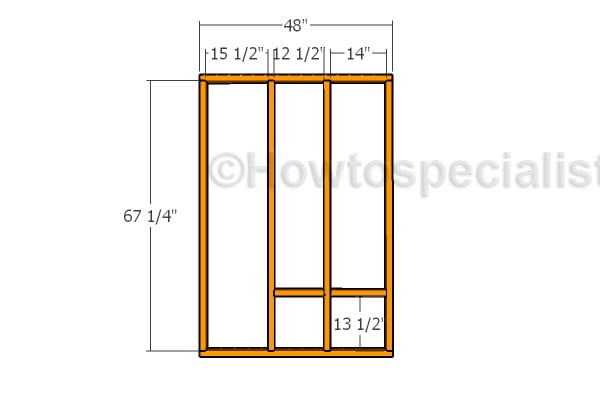
Building the side walls
Build the side walls for the outhouse from 2×4 lumber. Cut all the components at the proper dimensions described in the diagram and then lock them with 3 1/2″ screws. Drill pilot holes through the plates and insert 3 1/2″ screws into the studs. Make sure the corners are aligned and check of the edges are flush.

Back wall frame
Build the back wall for the outhouse in the same manner described above. Drill pilot holes through the plates and insert 3 1/2″ screws into the studs.
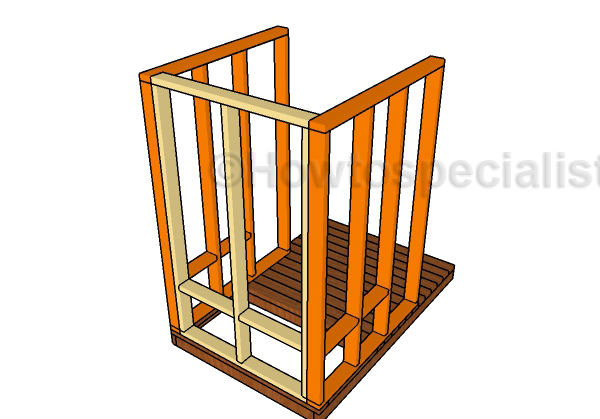
Assembling the frame of the outhouse
Fit the wall frames to the floor of the outhouse. Drill pilot holes through the bottom plates and insert 2 1/2″ screws onto the floor. In addition, align the edges flush and make sure the corners are square. Drill pilot holes and insert 2 1/2″ screws to lock the adjacent walls together tightly.

Fitting the front walls
Last but not least, build the small front walls using the techniques described above. Fit the walls to the front of the outhouse. Drill pilot holes and insert 2 1/2″ screws into the side walls and into the floor.
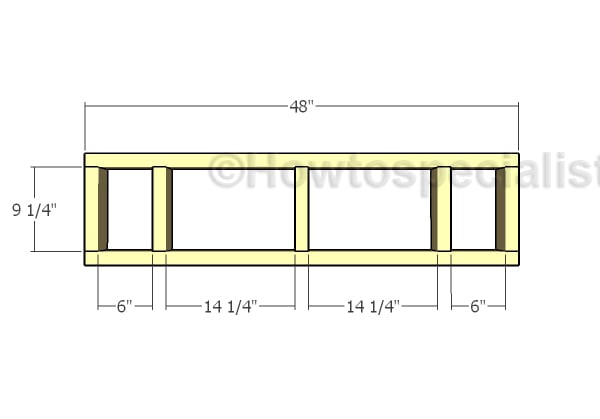
Building the top frame
Build the top frame for the front wall from 2×4 lumber. Cut the components from 2×4 lumber.

Fitting the top frame
Fit the small frame into place and align the edges flush. Drill pilot holes through the bottom plate and insert 2 1/2″ screws into the front wall.
Fitting the siding sheets
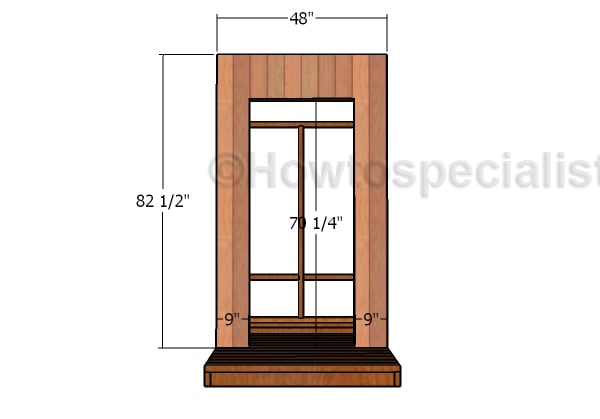
Front wall siding
Use T1-11 siding for the front of the outhouse. Make cuts to the panel so you can fit the panel around the door opening. Align the edges flush and use 6-8d nails to lock them into place tightly.
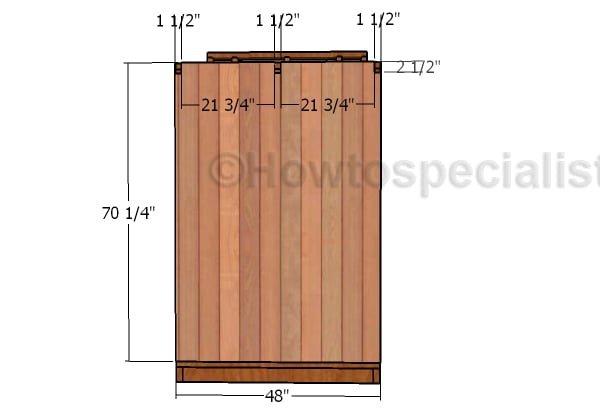
Fitting the back wall siding
Attach T1-11 siding to the back of the outhouse, as well. Use 6-8d nails to secure the sheets into place, every 8″ along the studs.

Wood Outhouse Plans
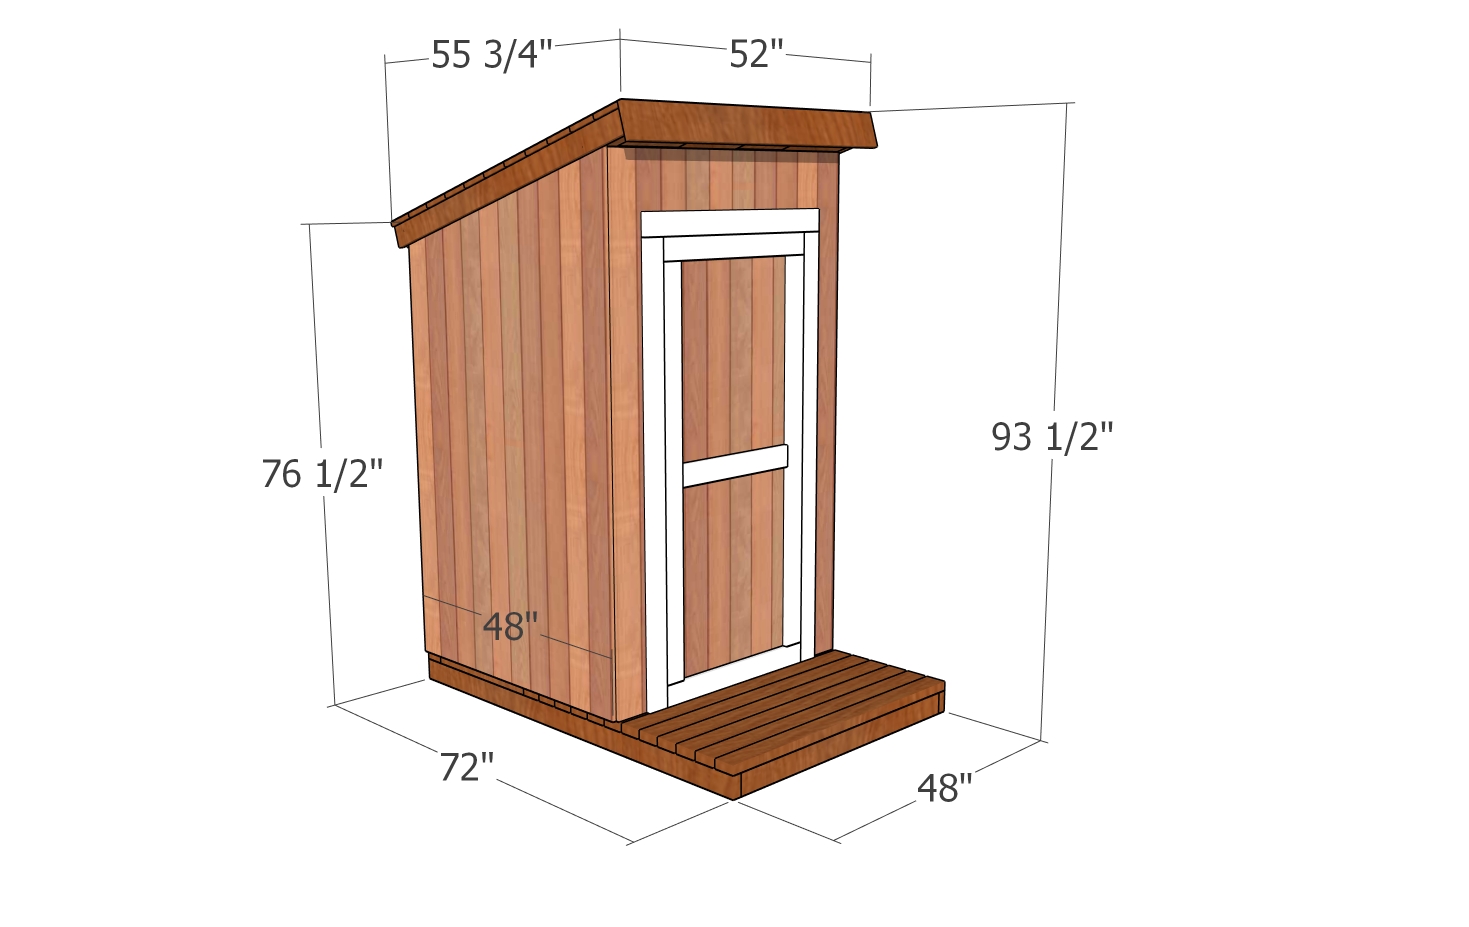
Free Outhouse Plans dimensions
Make sure you check out PART 2 of the project, so you learn how to build the roof, the door and the seat for the outhouse. If you like my project, don’t forget to SHARE it on Facebook and Pinterest.
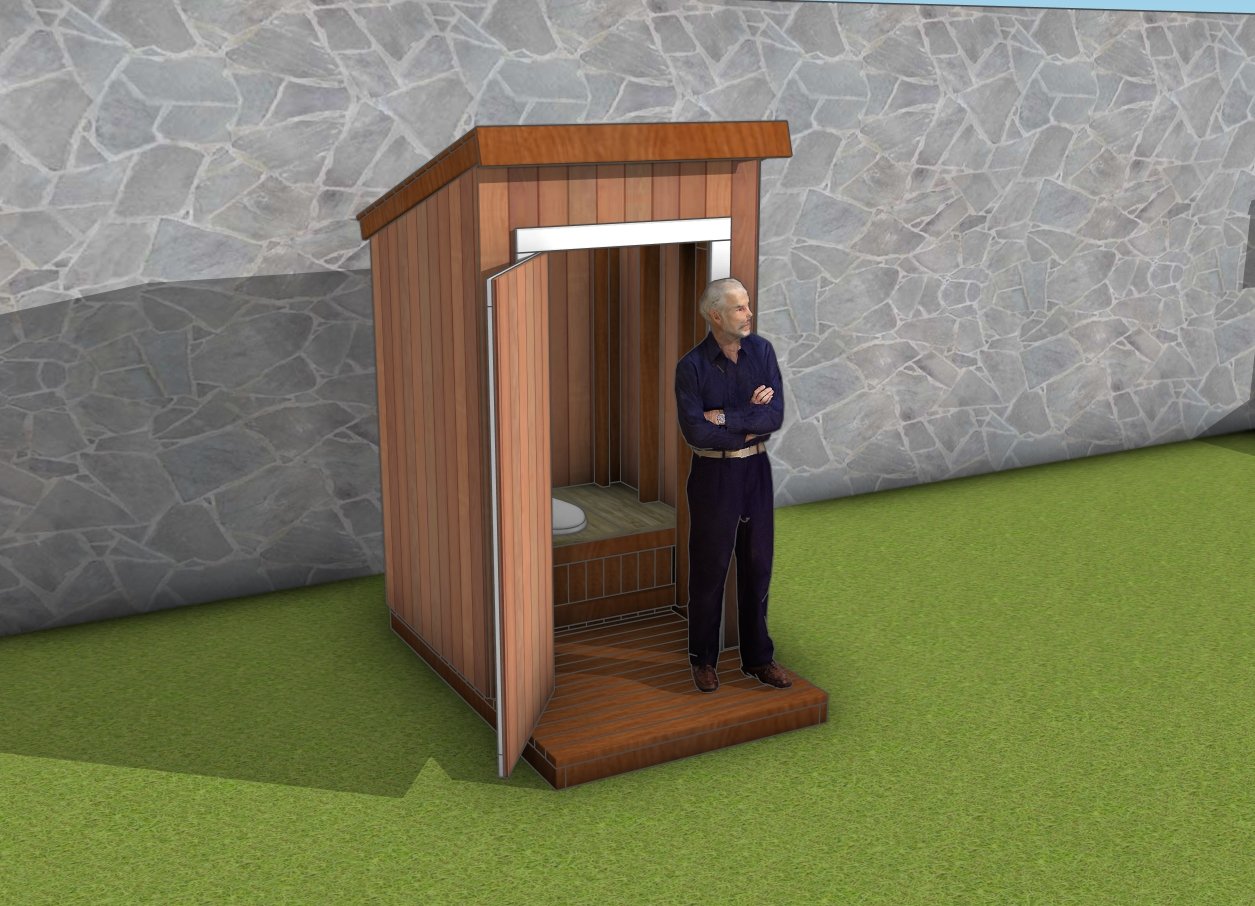
DIY Outhouse Plans
Building an outhouse can be a fun and rewarding project that doesn’t break the bank. Expect to spend between $300 and $1,000, depending on the materials and finishes you choose.
With a clear plan and some basic tools, you can complete this project over a weekend or two. Adding personal touches like a decorative door or a small window can enhance both the aesthetic and functionality of your new outdoor structure.
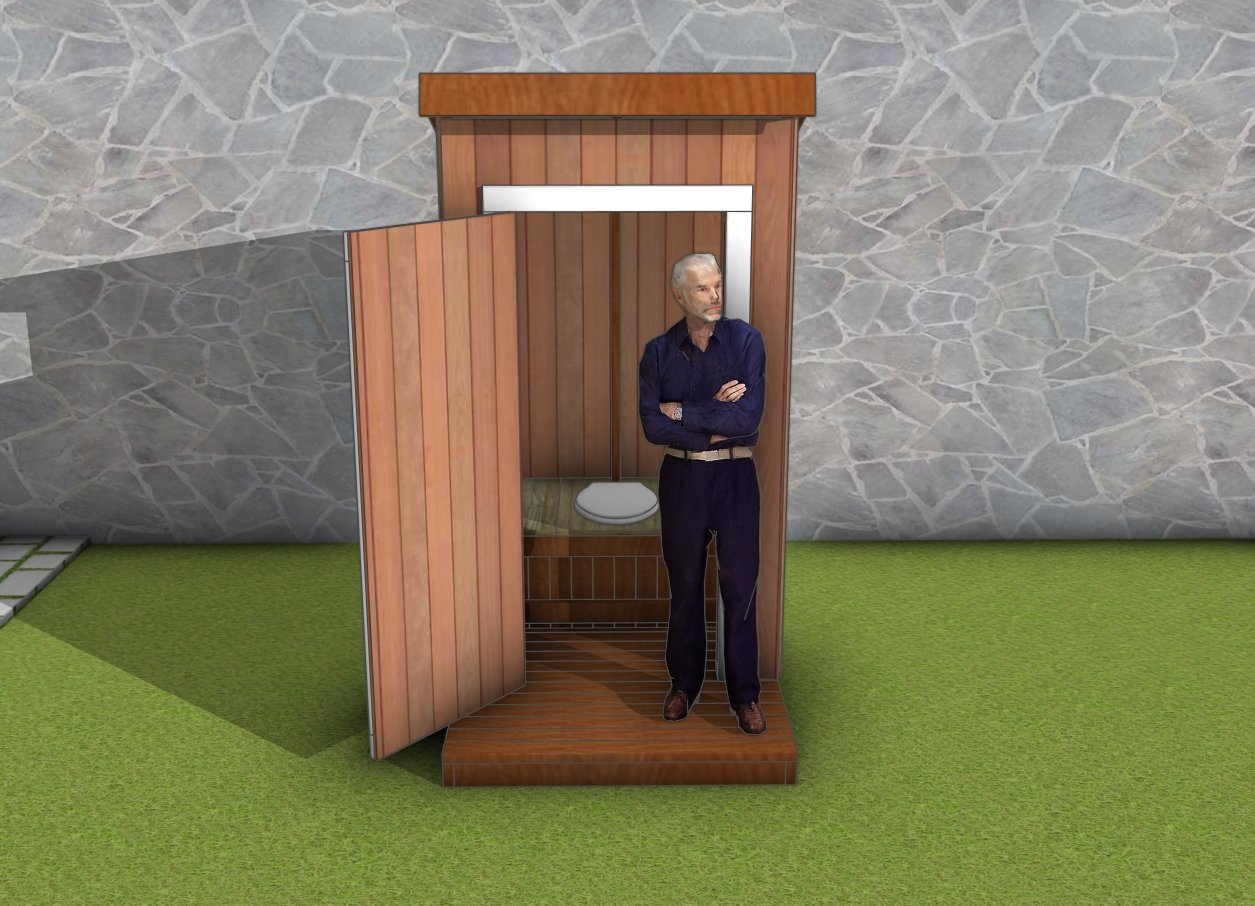
How to make an outhouse
Ready to tackle a fun and functional project? Building an outhouse is a fantastic way to hone your DIY skills while adding a unique feature to your outdoor space. You’ll find that this project is perfect for both beginners and seasoned builders. Plus, the satisfaction of creating a custom, rustic outhouse from scratch is unbeatable.
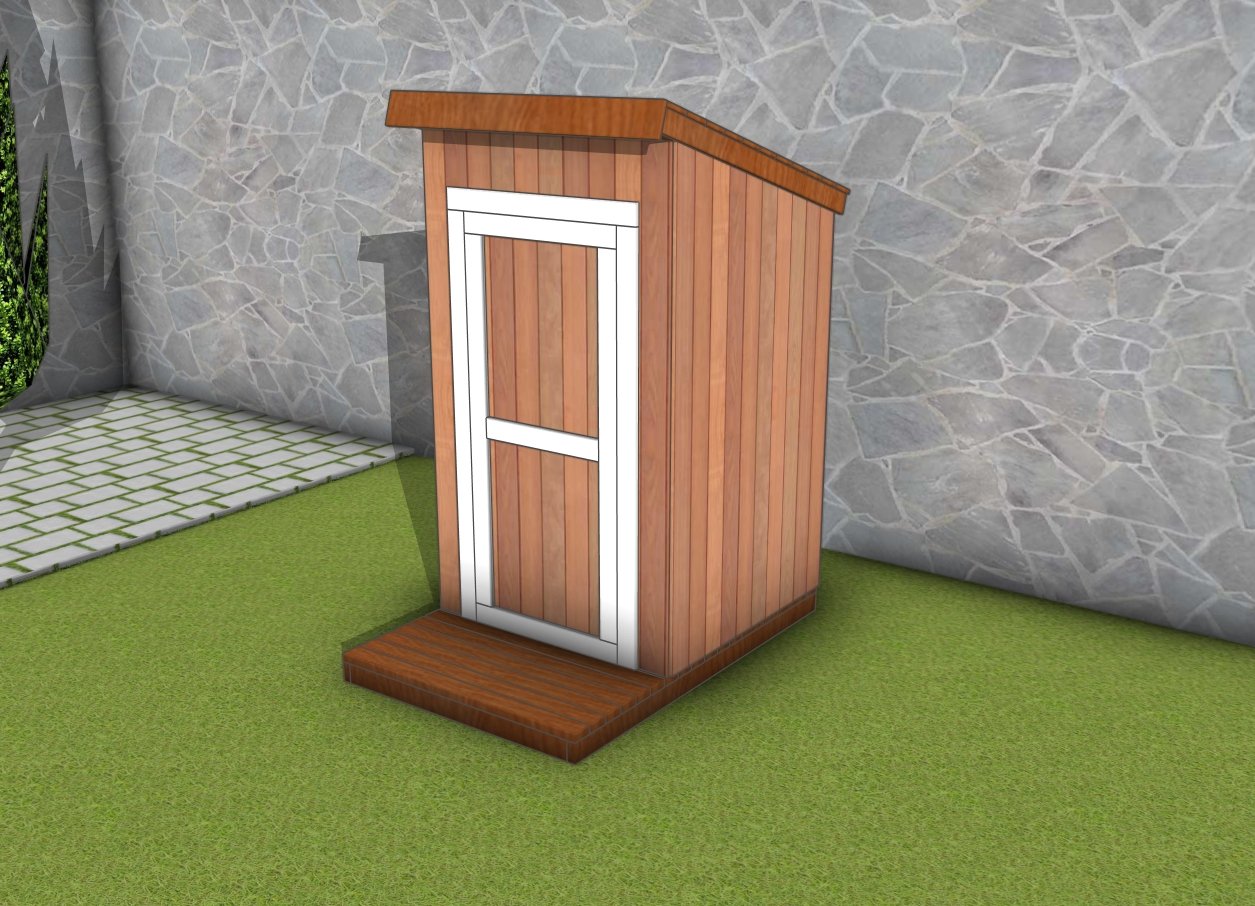
Free Outhouse Plans
If you want to download the plans. just click on the GET PDF PLANS button bellow.
Thank you for reading our project about free outhouse plans and I recommend you to check out the rest of the projects. Don’t forget to LIKE and SHARE our projects with your friends, by using the social media widgets. SUBSCRIBE to be the first that gets our latest projects.
<< Previous | Next >>


10 comments
Does anyone made this using cm?
You suggest 67 1/4″ for the door opening. That’s 5′ 8″ high. Many people I know, me included, would have a sore forehead from going in to this outhouse.
The door is 70 1/4″ high, look again.
In this plan, where are you putting the waste? Pit toilet? Buried barrel? Would love to know more about that part of plan. Would you consider making a plan for a wheelie bin composting toilet?
How do you install the toilet seat platform?
How can I print these outhouse plans, for my husband to use?
See the blog FAQs
Thank you for the detailed plans. Been searching for sometime now and these plans look exactly what I had in mind. I will be using pressure treated wood for the floor base and flooring
Says free several times but click on the free pdf link and it asks you for $6.99
Read the FAQs to see how to download the free version. The $6 is for the Premium Version.