This step by step woodworking project is about free gazebo screens plans. This is PART 3 of the project where I show you how to build the screens for the exterior of the gazebo. These screens will not only protect the gazebo from flies and other mosquito, but they will also enhance its look. Make sure you check out the rest of the project for complete instructions.
There are many designs and plans you could choose from, so you should take a look on more projects before starting the actual project. Nevertheless, if you are looking for a simple but sturdy design, this project might be the solution to your needs. Moreover, you could build all the components from 2×4 lumber, as to save both time and money. Make sure you check all the dimensions before making the cuts, otherwise the components might not fit together easily. See all my Premium Plans in the Shop.
Made from this plan
Gazebo Screens Plans
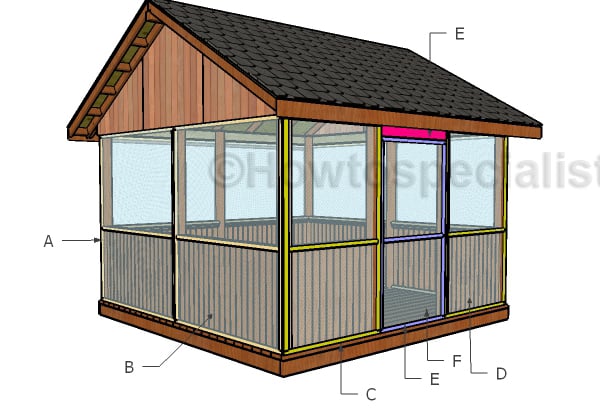
Building the screens
Materials
- A – 2 pieces of 1×2 lumber – 80 1/2″ long, 2 pieces – 70 1/2″ long, 1 piece – 67 1/2″ long 6xFRAME
- B – 1 piece of fiberglass mesh – 70 1/2″x83 1/2″ long 6xSCREEN
- C – 2 pieces of 1×2 lumber – 49 1/4″ long, 2 pieces – 80 1/2″ long, 1 piece – 46 1/4″ long 2xFRAME
- D – 1 piece of fiberglass mesh – 49 1/3″x83 1/2″ long 2xSCREEN
- E – 2 pieces of 1×6 lumber – 42 1/4″ long HEADER
- E – 2 pieces of 1×2 lumber – 42 1/4″ long, 2 pieces – 75″ long, 1 piece – 39 1/4″ long DOOR FRAME
- F – 1 piece of fiberglass mesh – 42 1/4″x78″ long DOOR SCREEN
- 16 pieces of 1×2 lumber – 8′
- 40 pieces of 1×6 lumber – 8′
- fiberglass mesh
- hinges
- 1 1/4″ screws, staples
- wood glue, stain/paint, wood filler
Tools
- Safety gloves, glasses
- Miter saw, jigsaw
- Chalk line, tape measure, spirit level, carpentry pencil
- Drill machinery and drill bits
Time
- One Week
Building gazebo screens
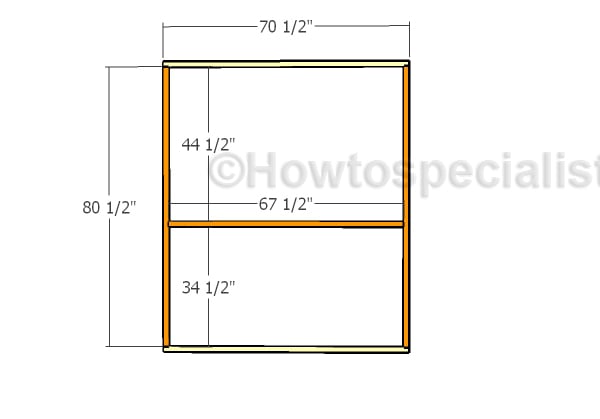
Side and back screens frame
Build the frame for the back and side screens. Cut the components from 1×2 lumber. Drill pocket holes at both ends of the orange components and insert 1 1/4″ screws into the perpendicular components. Align the edges flush and add glue to the joints.
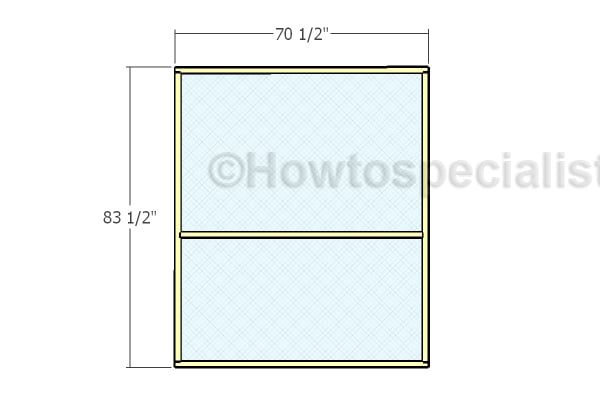
Fitting the fiberglass mesh
Staple the fiberglass mesh to the frames. Make sure you attach the mesh properly to the frame.
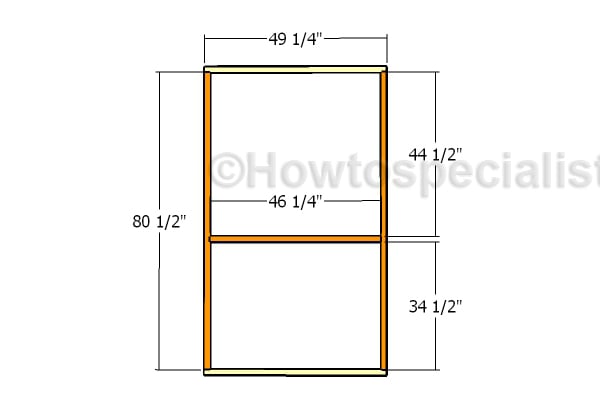
Front screens frame
Build the frames for the front of the gazebo. Cut the components from 1×2 lumber and drill pocket holes at both ends of the orange components. Align the edges flush and insert 1 1/4″ screws to lock them together tightly.
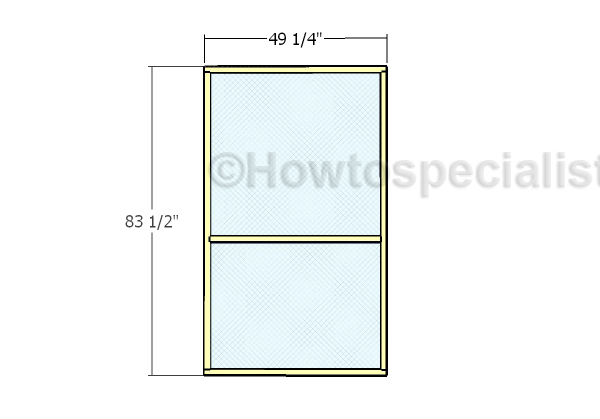
Front frames mash
Staple the fiberglass mesh to the front screens.
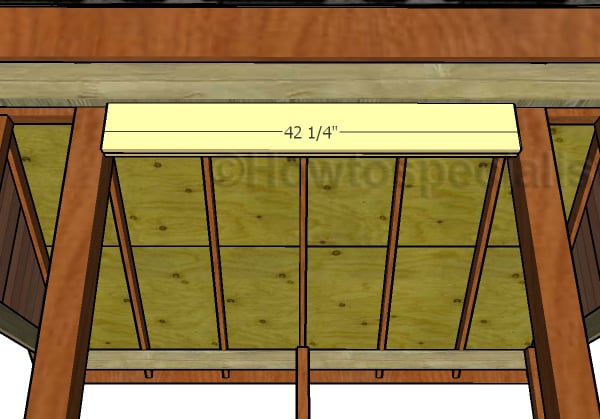
Door header
Fit 1×6 headers to the door opening. Fit the headers into place with 1 1/4″ pocket screws.
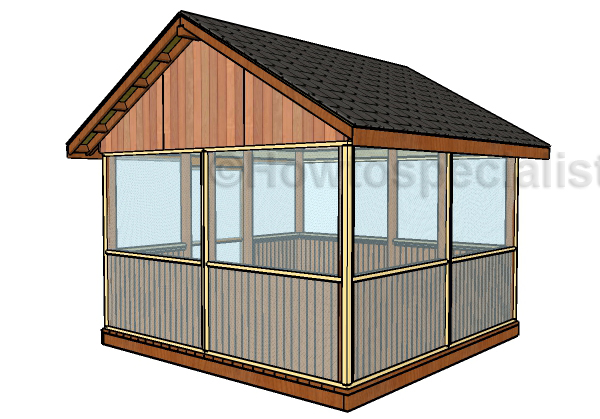
Fitting the screens to the sides and back
Fit the screens to the sides and to the back of the gazebo. Align the screens with attention and lock them into place tightly with 1 1/4″ screws. Lave no gaps between the panels and secure them lightly, so you can remove them easily.
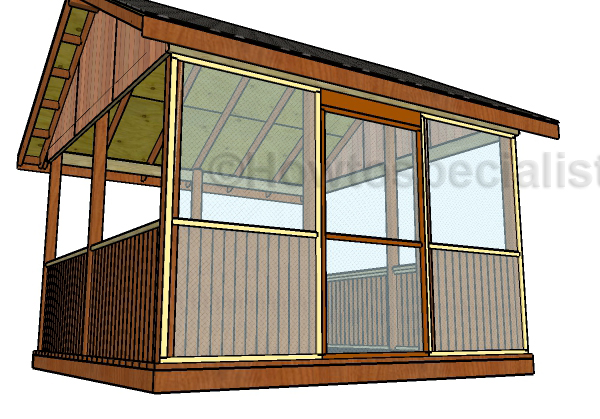
Attaching the screens to the front
Fit the panels to the front of the gazebo, as well. Align the screens with attention and lock them into place with 1 1/4″ screws.
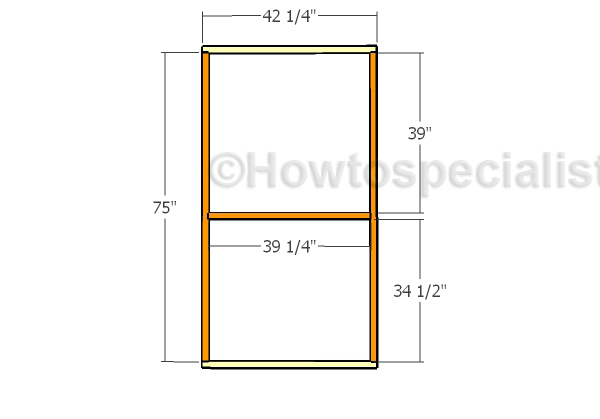
Building the door frame
Assemble the door for the gazebo from 1×2 lumber. Drill pocket holes at both ends of the orange components and insert 1 1/4″ screws to lock everything tightly. Make sure the corners are square and align the edges flush.
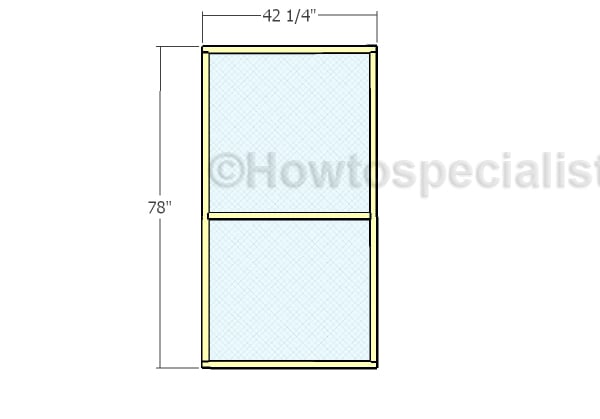
Door fiberglass mesh
Staple fiberglass mesh to the frames.
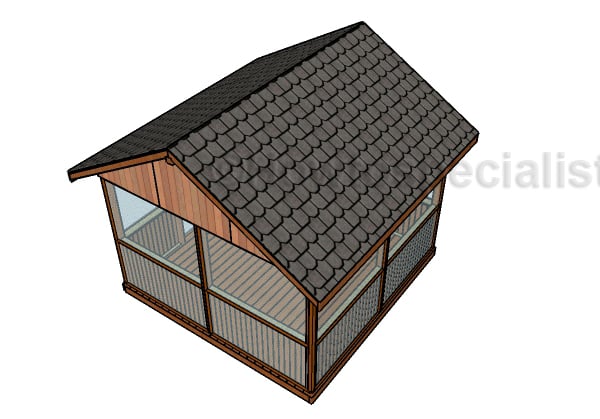
Screened gazebo plans – Roof
Once you have attached the screens, I recommend you to take care of the finishing touches. Therefore, fill the holes with wood putty and smooth the surface with 120-220 grit sandpaper. Apply a few coats of paint or stain over the components, so you protect them from decay.
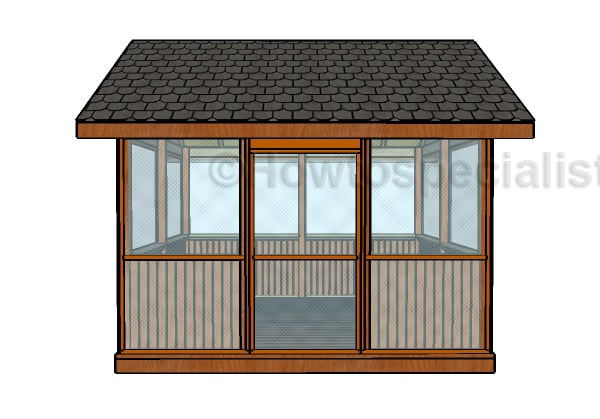
How to build a screened gazebo
Check out PART 1 and PART 2 of the project, where I show you how to build the frame and the roof for the gazebo.
Thank you for reading our project about free gazebo screens plans and we recommend you to check out the rest of the projects. Don’t forget to LIKE and SHARE our projects with your friends, by using the social media widgets.
<< Previous | Next >>
