This step by step woodworking project is about free gazebo railings plans. This is PART 2 of the gazebo project, where I show you how to build the railings for the structure. If you take accurate measurements and if you work with attention, building the railings for the square gazebo should not be difficult, at all. Pay attention to PART 1 and PART 3 of the gazebo project.
There are many designs and plans you could choose from, so you should take a look on more projects before starting the actual project. Nevertheless, if you are looking for a simple but sturdy design, this project might be the solution to your needs. Moreover, you could build all the components from 2×4 lumber, as to save both time and money. Make sure you check all the dimensions before making the cuts, otherwise the components might not fit together easily. See all my Premium Plans in the Shop.
Made from this plan
Gazebo Railings Plans
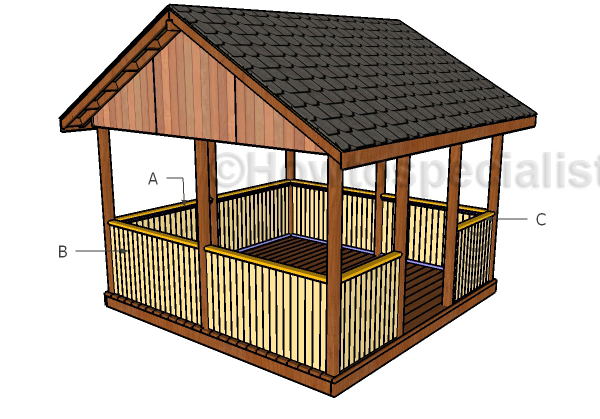
Building the railings
Materials
- A – 12 pieces of 2×2 lumber – 65 1/4″ long, 4 pieces – 42 1/4″ long CLEATS
- B – 108 pieces of 1×4 lumber – 36″ long, 24 pieces – 36″ long FLOOR FRAME
- C – 6 pieces of 2×4 lumber – 65 1/4″ long. 2 pieces -42 1/4 ” long TOP RAILS
- 16 pieces of 2×2 lumber – 6′
- 66 pieces of 1×4 lumber – 6′
- 8 pieces of 2×4 lumber – 6′
- 1 5/8″ screws, 2 1/2″ screws
- 2″ brad nails
- wood glue, stain/paint, wood filler
Tools
- Safety gloves, glasses
- Miter saw, jigsaw
- Chalk line, tape measure, spirit level, carpentry pencil
- Drill machinery and drill bits
Time
- One Week
How to build gazebo railings
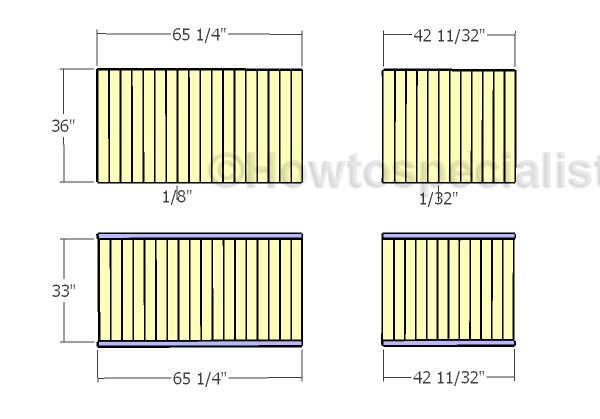
Building the rail panels
First of all you need to build the railings pans for the gazebo. As you can easily notice in the diagram, you have to use 2×2 lumber for the cleats and 1×4 slats for the rails.
Take accurate measurements before assembling the panels, because they distance between the posts will vary. Drill pilot holes through the slats and insert 1 5/8″ screws into the cleats.
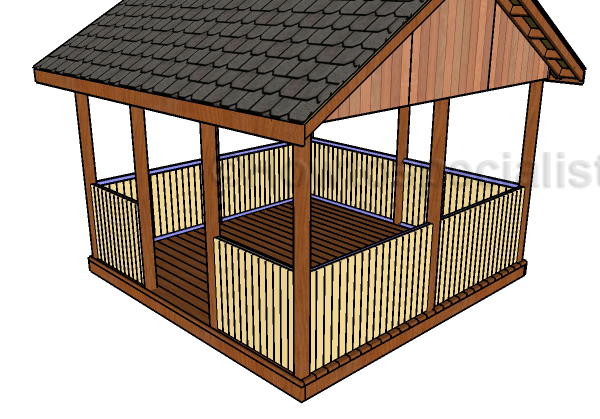
Fitting the rails
Drill pocket holes at both ends of the cleats and insert 2 1/2″ screws into the posts, after aligning the edges flush. As you can see in the plans, you should not fit any panel to the door opening.
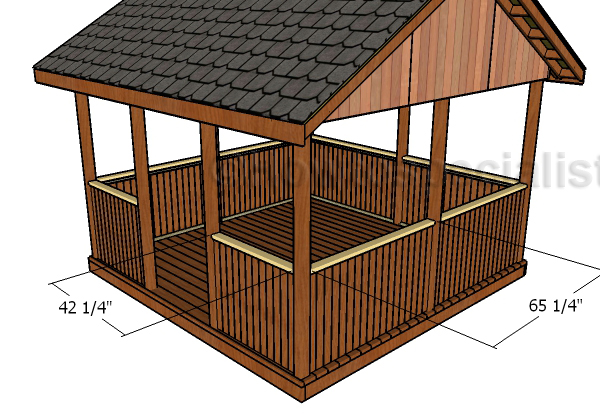
Fit the handrails
Last but not least, you need to attach the top rails to the railings. Cut the rails at the right dimensions from 2×4 lumber and fit them into place with 2 1/2″ screws. Drill pilot holes before inserting the screws, to prevent the wood from splitting.
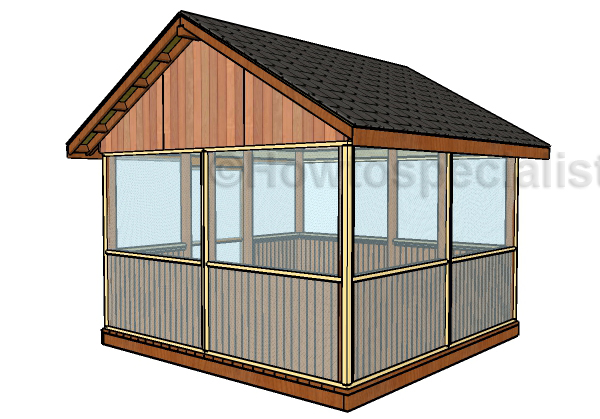
Fitting the screens to the sides and back
Don’t miss PART 3 of the project, where I show you how to build the screens for the four sides of the gazebo. In addition, check PART 1 of the project, where I show you how to build the frame for the square gazebo.
Thank you for reading our project about free gazebo railings plans and we recommend you to check out the rest of the projects. Don’t forget to LIKE and SHARE our projects with your friends, by using the social media widgets.
