This step by step diy article is about how to build a drywall arch, on a metal or wooden frame. Building a metal stud frame arch is not as difficult as it might look at first glance and we show it in this article. You can build your archway in any room: in your kitchen, living room or in the hallway, as to add style and personality to your home. This project can take up to a couple of days, if you aren’t experienced, but we can assure you the hard work it will pay off eventually.
Building an archway in a door opening is usually a weekend project, provided you use the right materials, tools and techniques. The most important step is to draw the ellipse in a proper manner, otherwise the hard work will be in vain. Place screws at both ends of the drywall sheet and use a piece of string to guide you when drawing the mark line. Using a longer piece of string will increase the radius of the curve and make it steeper. See all my Premium Plans in the Shop.
Made from this plan
Materials
- Drywall boards
- Drywall screws
- Spakling
- Corner tape
- Metal track and studs / wooden studs and plywood
Tools
- Safety gloves, glasses and respiratory mask
- Measuring tape, framing square, pencil
- Electric screwdriver
- Utility knife
- Metal snips / circular saw
Tips
- When drawing the arch ellipse, use a smart setup, for a professional look
- Build a metal or wood stud frame, according to your needs
Building a metal stud frame for the drywall arch
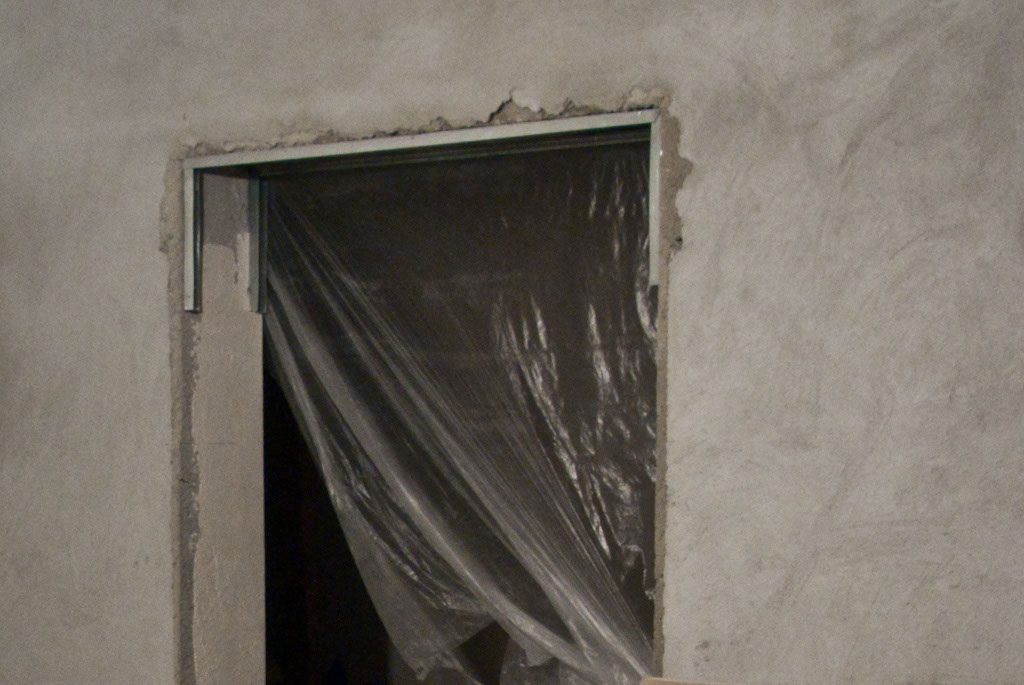
Before building the drywall arch
First, decide the place where to build it. In our case, we will build the drywall arch inside of a door opening. Nevertheless, you can virtually build a drywall archway in any place inside your house.
Next, measure the dimensions of that specific area. Afterward, you should begin building the arch frame, using either metal or wood studs. Each approach has its own advantages: the metal is perfectly straight and very light, as the wood studs are very resistant. Use metals studs for brick walls and wood for timber walls.
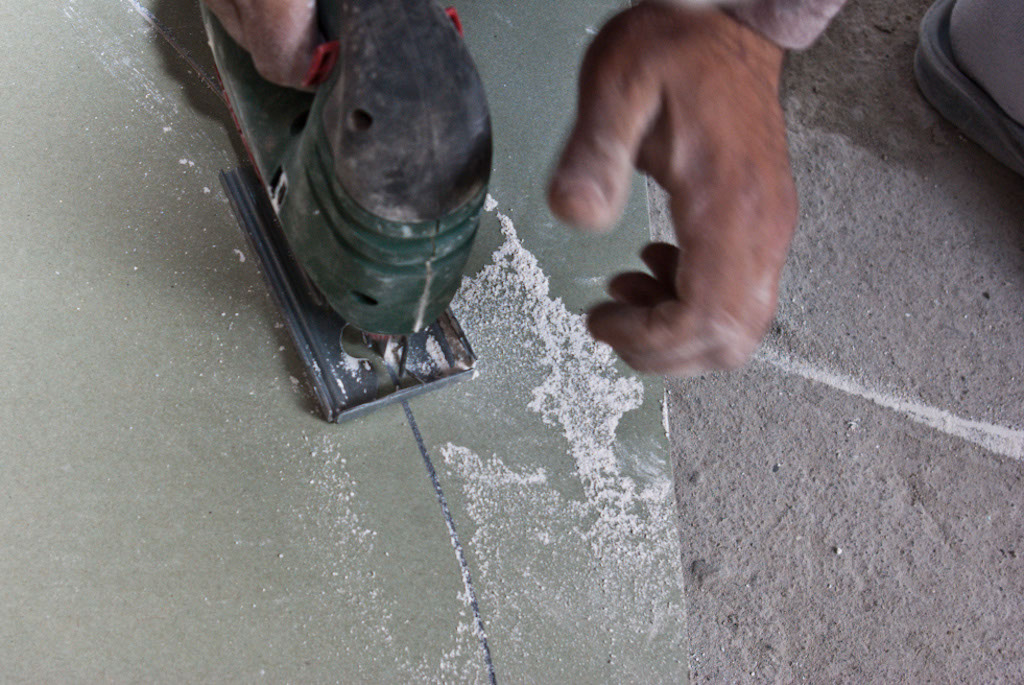
Cutting drywall arch
After you have drawn the arch on the drywall board, you should cut it, using a jigsaw or a drywall saw. During the operation, make sure you locked firmly the drywall board, otherwise you can injure yourself, or damage the material. The jigsaw’s blade should cut the drywall exactly over the drawn line, so work carefully to make a good job.
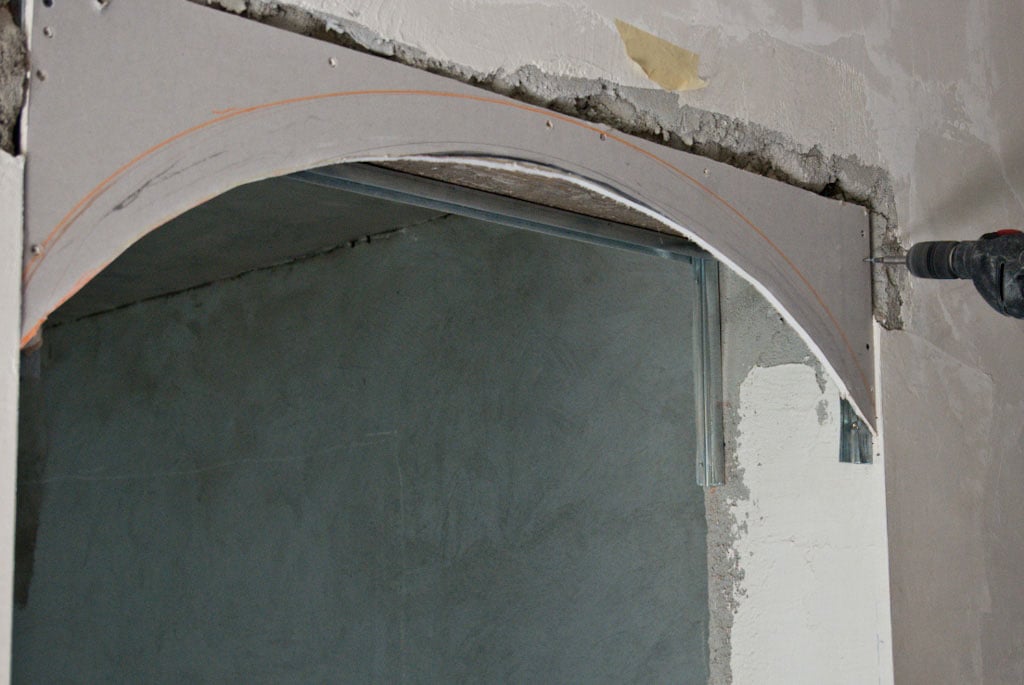
Installing the drywall arch on metal studs
In order to get the desired drywall arch, you could make several attempts till you obtain a form to fit your tastes and needs.
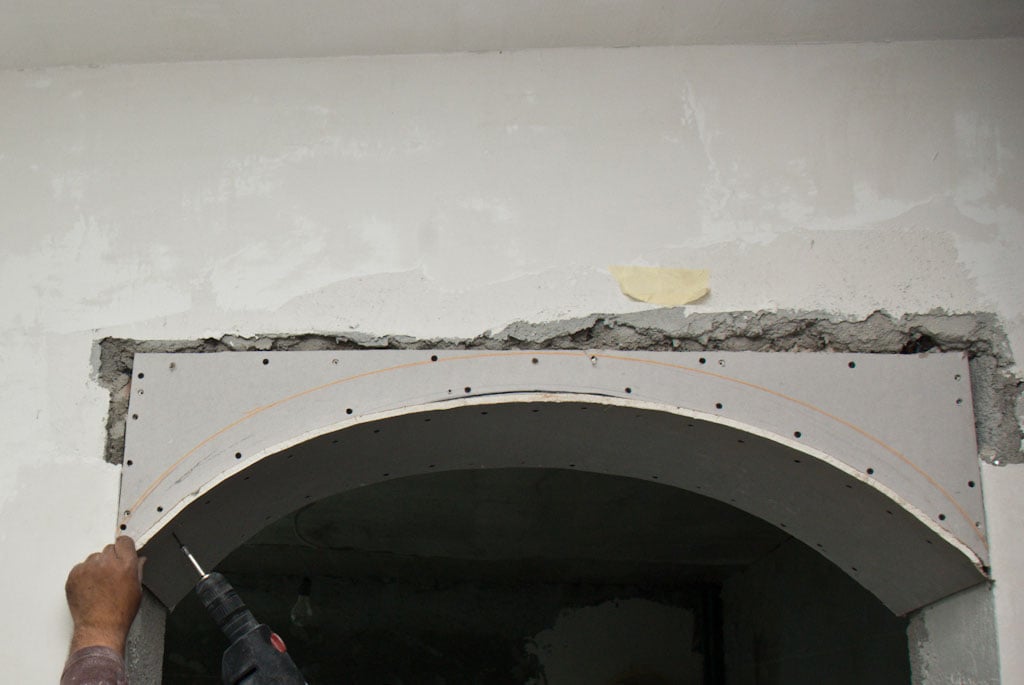
After you have fixed the metal studs in screws, you can continue the process by installing the first sheet of drywall. In order to make a professional operation, we recommend you to use an electrical screwdriver with torque control. If you install 1/2” drywall, then you should use 1-1/4″ drywall screws, as if you are installing 5/8” drywall, then a better option would be 6 x 1-5/8″ screws.
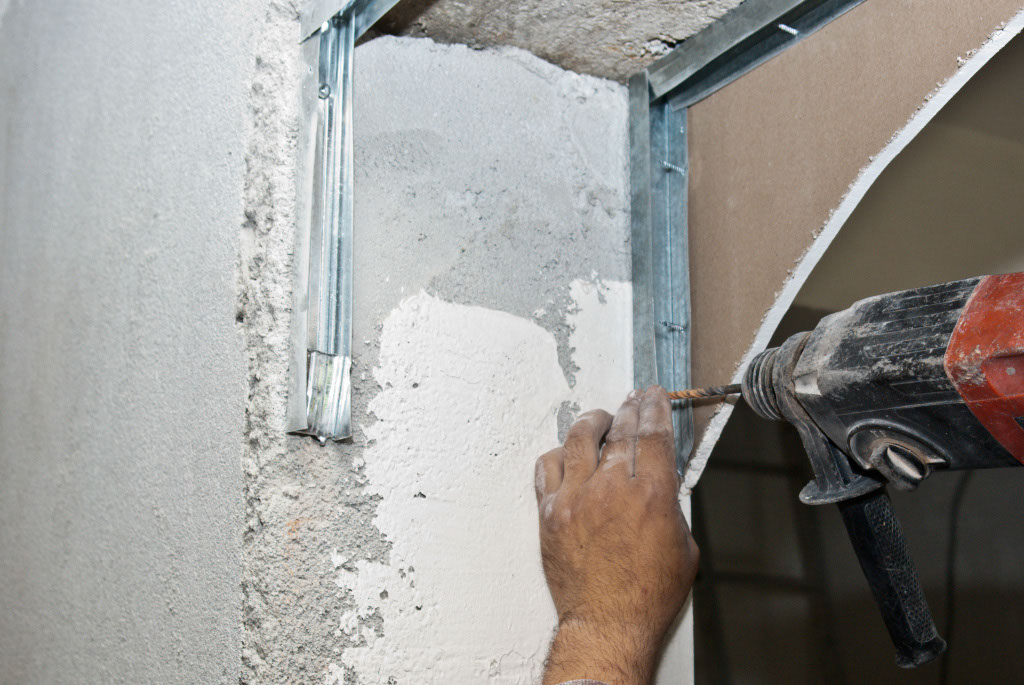
Fastening the metal stud frame to the wall
In this image you can see how you should fasten the metal studs on a concrete wall. Consequently, you should use a drill machine to drill holes, install dowels and then drive the screws to fix the metal stud frame.
However, if you install the metal studs on wooden walls, you show use only 2” wood screws. The distance between screws should be around 5”/ 12 cm.
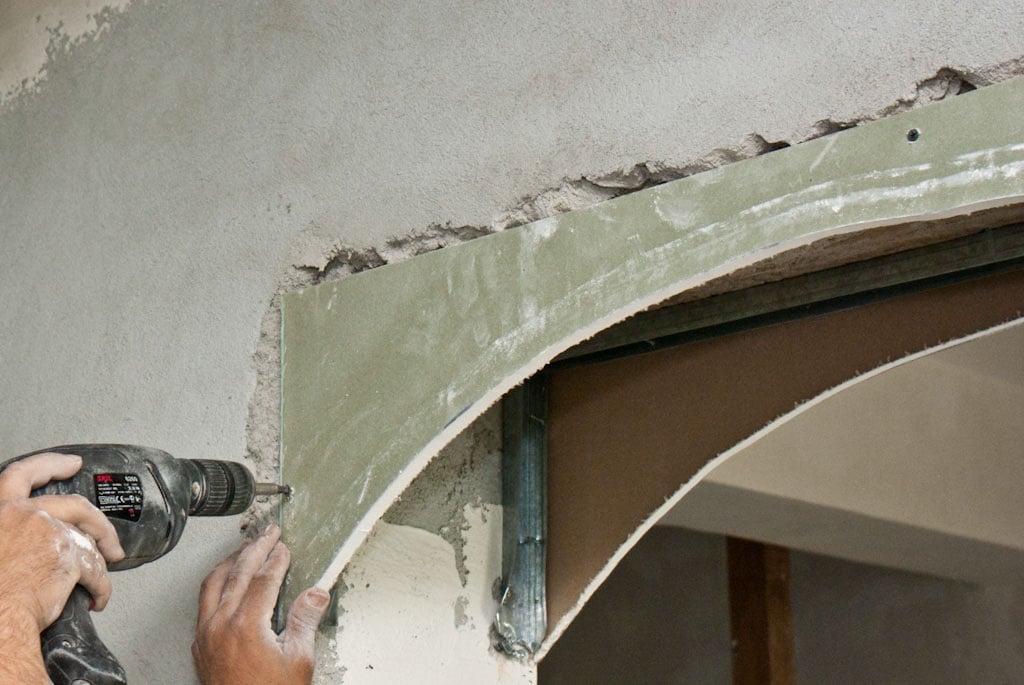
Fastening the drywall arch with screws
Continue the process by installing the other side of the drywall arch in the same manner as in the previous steps. Use an electrical screwdriver and install the screws as their heads to be level with the drywall surface, otherwise you will have to repair the surface with drywall mud.
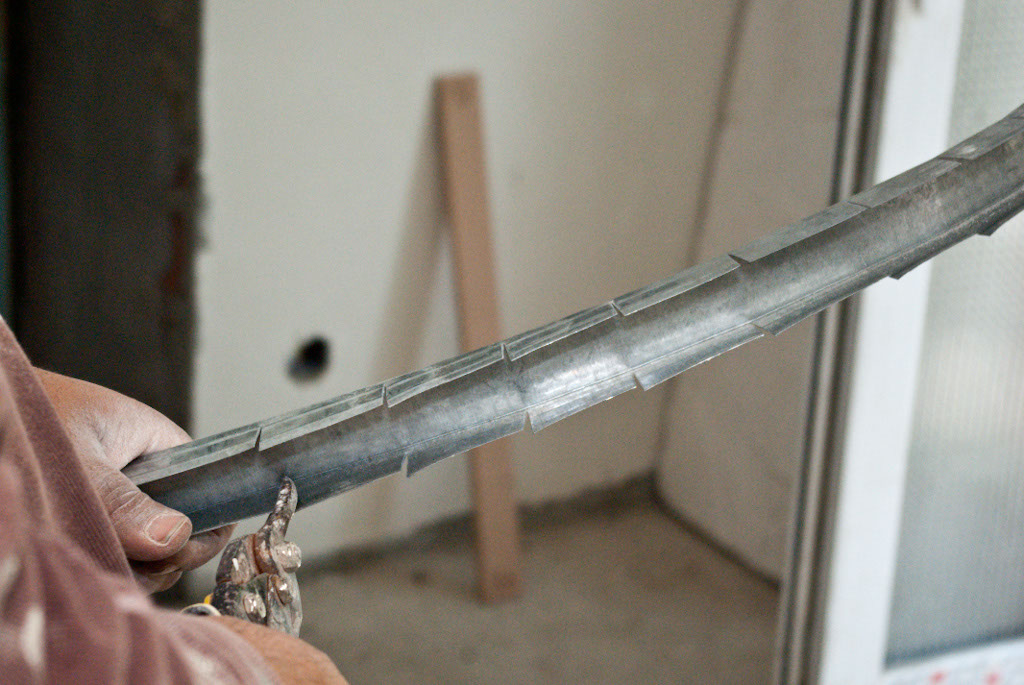
Cutting the metal studs to build the arch
Next, you have to install a curved metal stud on the edge of the drywall arch, for a better rigidity of the frame. Consequently, measure the archway and cut with metal snips a metal stud with at that exactly dimension. Don’t forget to use safety gloves, as to avoid cutting yourself in the sharp edges.
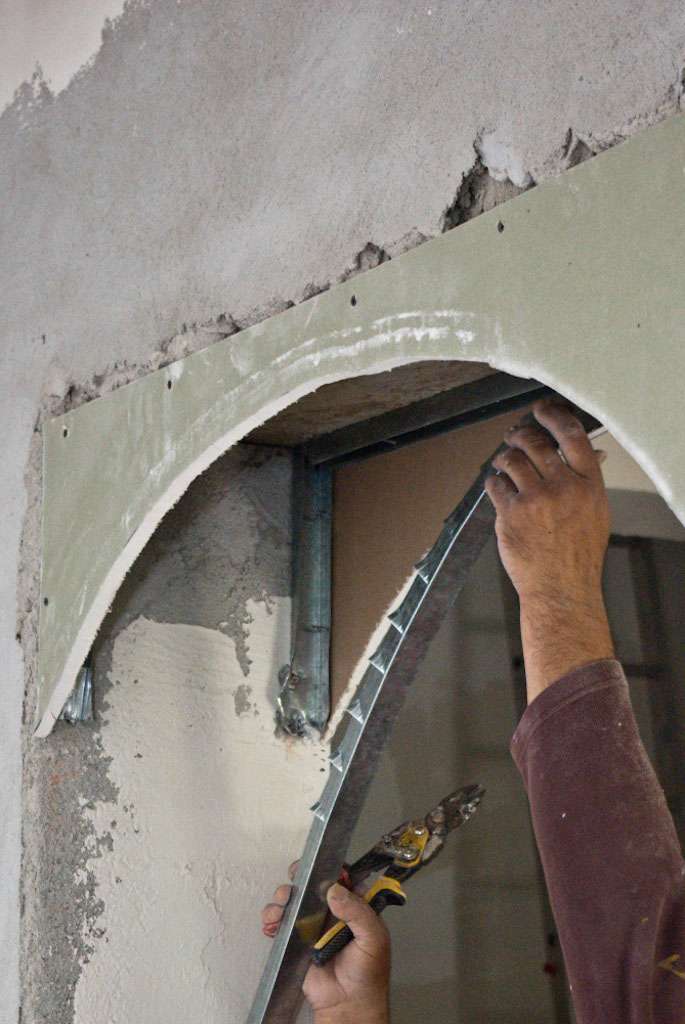
Installing the metal stud arch
If you have cut the metal stud according to our recommendation, you can proceed to the next stage. Remember to use safety gloves, as you could easily cut yourself in the edges of the metal stud.
The curved metal stud should be fixed in the following manner: start with one end and bend the metal stud as to fit the archway. Next, fix the curved stud to the metal frame with screws, as to lock it into position.
After you make sure the both ends of the curved metal stud are connected to the metal frame, you can continue the process by fastening the drywall arch to the metal track with screws, by using an electric screwdriver. If you have to bend more the metal stud, just make more cuts along its side skirts and it will fit properly into position.
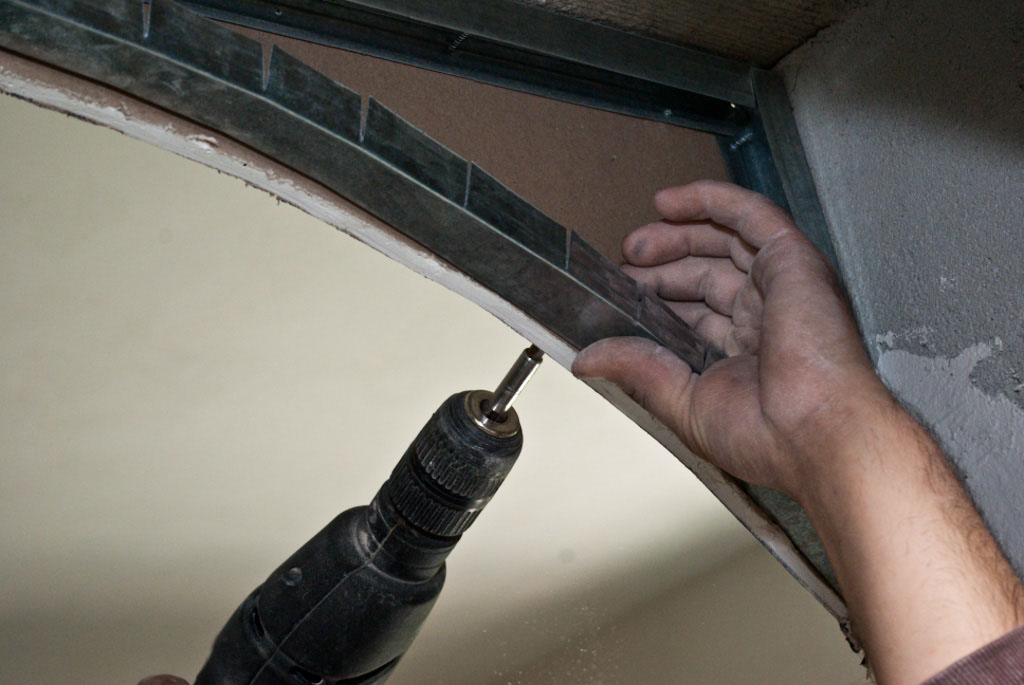
Fastening the drywall arch to the metal frame
This step is very important for the construction of your archway, so pay attention and make sure the drywall board is well locked to the metal frame. The screws must be inserted every 7”/15 cm, as to get a straight surface.
Remember that the frame is not completed until you fix a perpendicular metal stud, which has to link both curved arches. This perpendicular metal stud must be placed at the maximum point of both arches.
Building a wooden frame for a drywall archway
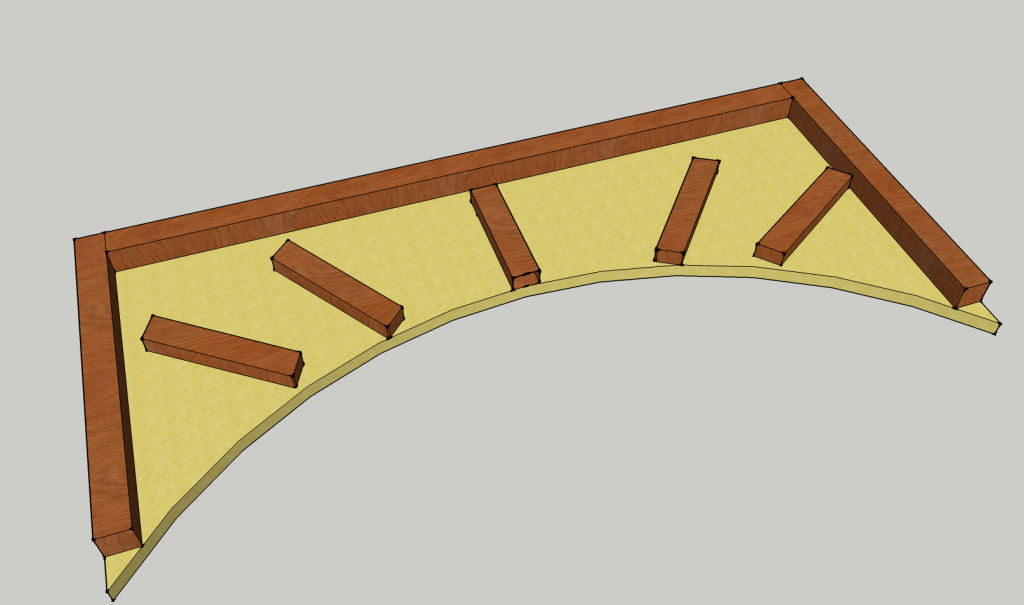
Wood frame for drywall arch
Building a wooden frame for your drywall arch is easy. You should first measure the door opening. Then subtract the drywall plus plywood thickness (1”/2 cm) and you will get the thickness of your wood studs. Consequently, use 1” plywood, draw the ellipse and cut it using a jig saw.
Afterwards, fasten with 2” screws the wood studs to build the basic frame of the arch. Then attach the arch to the opening door with long wood screws every 7 inch/15 cm.
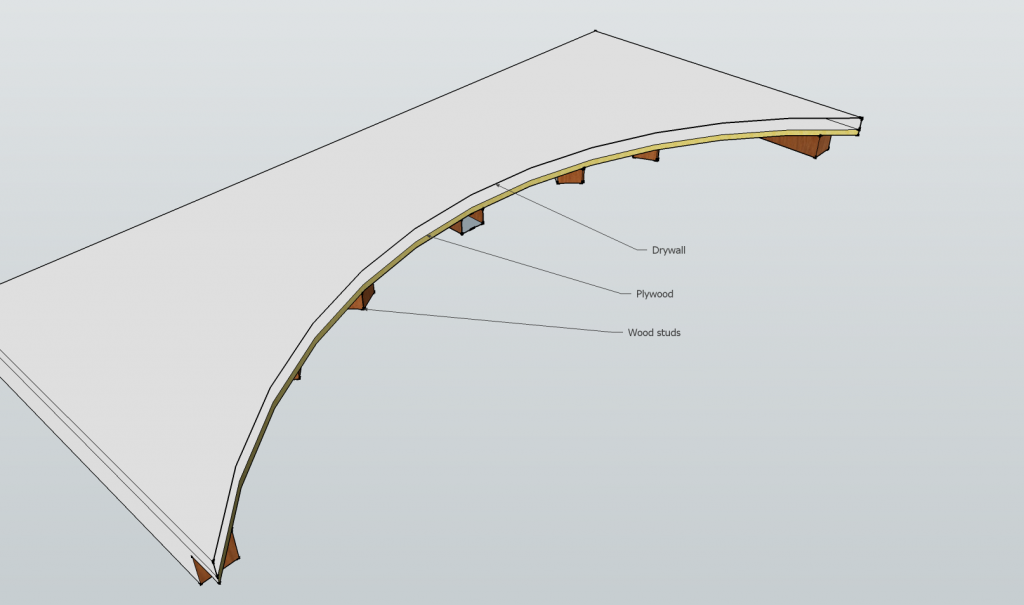
Wood frame drywall arch
The final step is to fasten the other plywood boards, and then the drywall boards. The drywall should be fastened with drywall screws, as to make sure it is locked into position.
Before starting the project, make a detailed plan to calculate the right dimensions of the drywall arch, as to fit perfectly in the door opening.
Installing the drywall arch
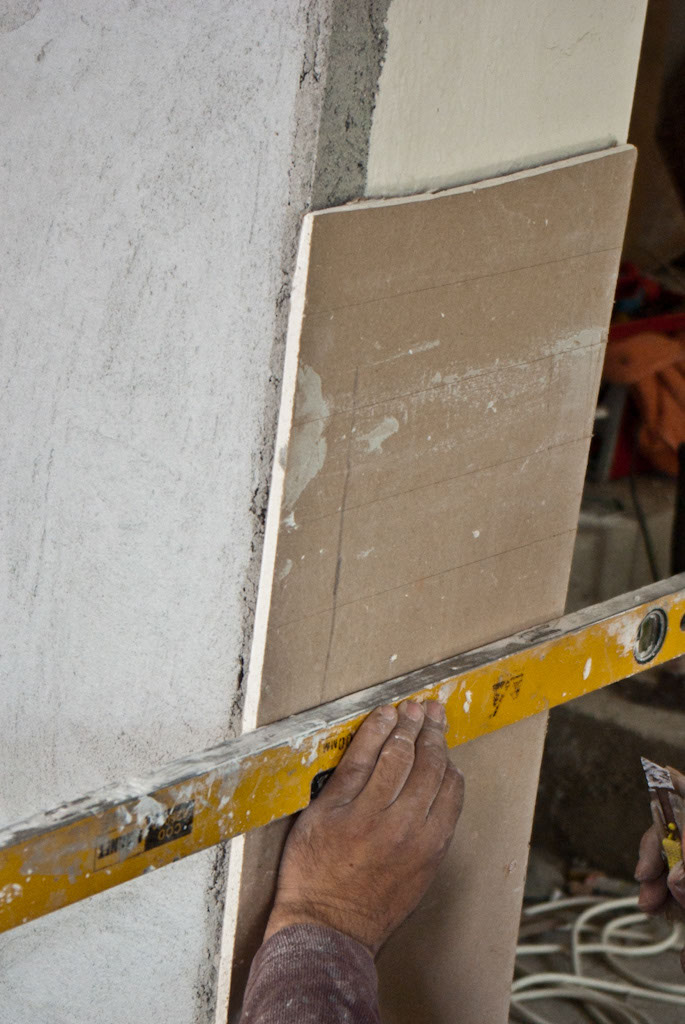
Cutting the drywall to make it bend
After we have built the frame and we have installed the sides of the drywall arch, we have to complete the project by fixing the bottom section. Consequently, measure the distance with a measuring tape (the width and the length of the curved arch). Next cut a piece of drywall exactly to that specific dimensions, using an utility knife and a t-square.
After we have obtained the rectangle, we used one of our little tricks to make the drywall bend. We used a spirit level and cut straight lines every 4”/10 cm with an utility knife, just to go over the paper layer. After we have applied the technique to the whole surface of the drywall rectangle, we turn it with the cuts upward. It is essential to use the spirit level, or a T-square as to make sure the cuts are perpendicular on the side edges and parallel between them.
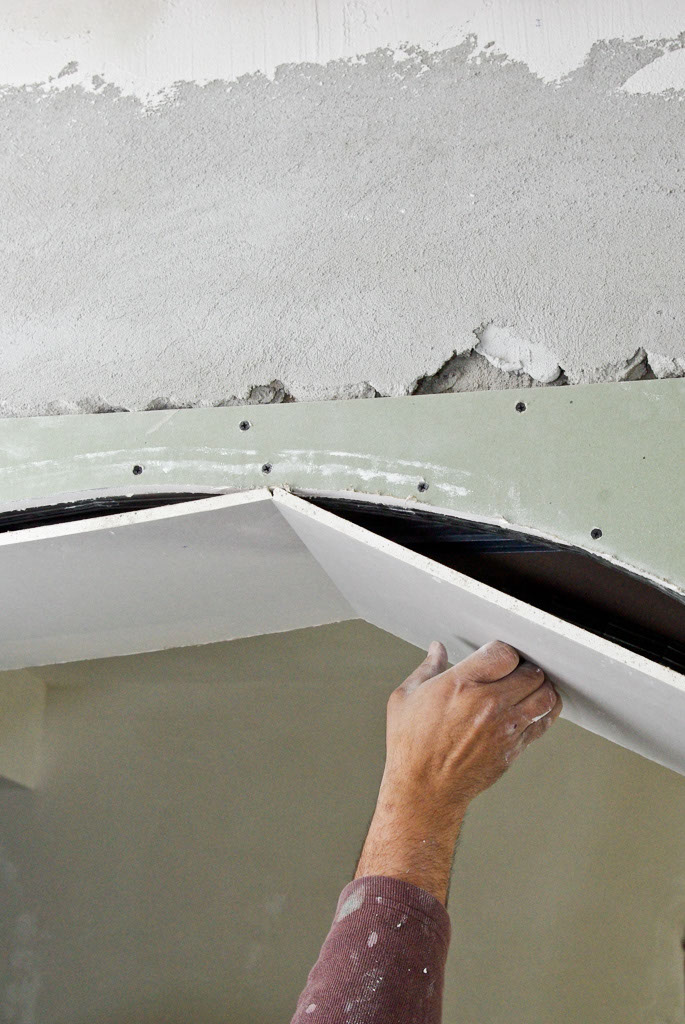
Installing the bent drywall arch
After you have turned the drywall with the cuts oriented upward, you can continue the project by fixing it to the bottom of the arch. Make sure you don’t apply too much force when you bend the drywall, as you risk damaging the board. Just use the small-steps technique, and the drywall will get the form of the arch in a matter of seconds.
Next, we have fixed the drywall with several screws starting with the top of the arch. Afterwards, we fasten the drywall board with screws on each side, every 7”/15 cm, using an electrical screwdriver with torque control. Work with good judgment, as you have almost finished building your dream drywall arch.
When installing the drywall rectangle, align perfectly its edges with the arch walls, on both sides. Also check if the ends of the rectangle fit the archway, otherwise adjust its dimension.
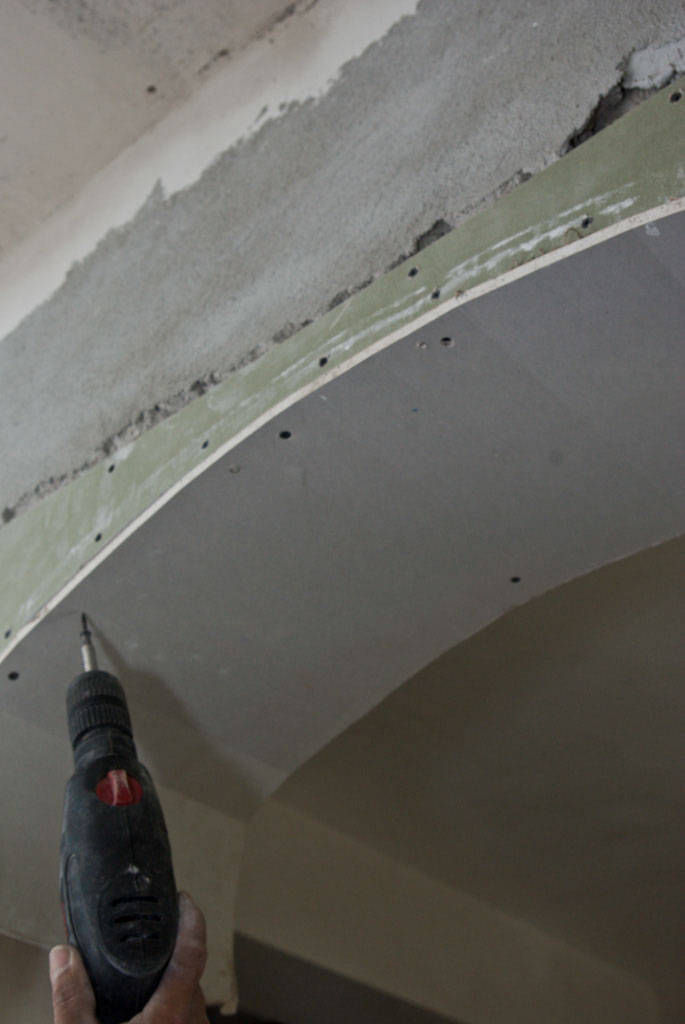
Fastening the drywall in screws
In this image you can see the whole fastening process illustrated. You can also notice that the drywall board gets the curved shaped, step by step, as we install more screws and go along the arch, towards its both ends.
The most important aspect, is to make the cuts on the drywall board every 5-7”/10-15 cm or even closer, otherwise you won’t be able to obtain a professional look to your drywall arch. Be patient and do not hurry the process, as to avoid mistakes. In addition, we reiterate to take all necessary measures to work in safe conditions, as diy projects have their risks.
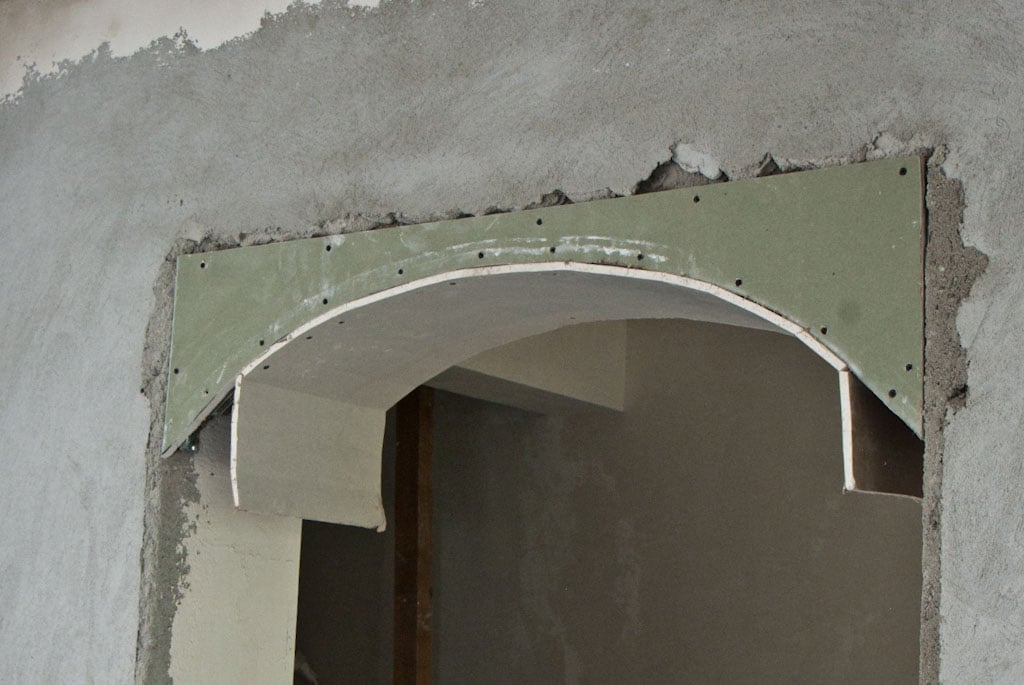
Finishing the installation of the drywall arch
Our arch is on the verge of being completed, as only a small area has to be fastened with screws. You can notice that the right technique is to work in mirror, to fix the bottom drywall starting from center in both directions.
Make sure you work in proper conditions: the area should be well lighted, ventilated and you should use safety gloves and glasses, whenever the situation requires it.

Drywall arch fixed in screws
You can notice the pattern of the drywall screws in the imagine, and how you should use the electric screwdriver to insert the screws.
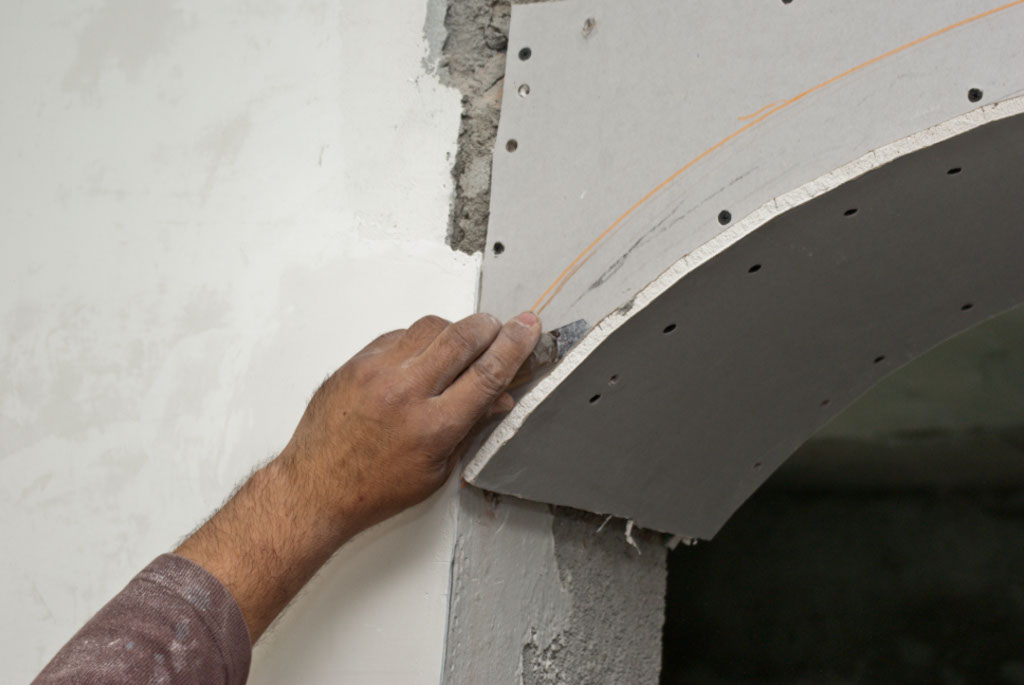
Cutting the excess drywall arch with a razor knife
After you have finished installing the drywall arch, you should focus on details. Consequently, it is possible that in several areas the drywall boards not to be perfectly aligned.
Thank you for reading our article on how to build a drywall arch and we recommend you to check out the rest of the projects related to drywall arch. Don’t forget to LIKE and SHARE our articles with your friends, by using the social media widgets. SUBSCRIBE to be the first that gets our latest projects.
<< Previous | Next >>

