This article is about How I Removed a Stone Wall and Transformed It into a Smooth, Fresh Finish. Removing a stone wall inside a room isn’t something you plan to do every day, but sometimes it’s the only way to fix a problem that just won’t go away. In my case, the wall had a constant dusty smell that made the whole space feel off, no matter how much I cleaned. That’s when I decided to remove the stone wall completely and start fresh.
At first, the idea of tearing it all down felt like a big job, but once I got started, it turned into a straightforward, step-by-step process. If you approach it with patience and the right mindset, removing a stone wall and refinishing the surface underneath is absolutely doable—even for a DIYer without years of experience.
What I like most about this kind of project is the transformation. You go from a heavy, outdated surface to a clean, smooth wall that completely changes the feel of the room. I’ll walk you through exactly how I removed the stone wall, prepped the surface, and finished it with a fresh coat of paint so you can get the same result.
Removing the stone wall


I grabbed a hammer and a chisel and got to work. Removing the stone wasn’t complicated, but it did take patience and a bit of rhythm. I tapped the chisel behind each piece until it loosens. Don’t rush it—controlled, steady taps are much better than swinging hard and risking damage to the wall underneath. Some sections will pop off clean, while others will fight back a bit, especially where the adhesive is thicker. That’s completely normal, just adjust your angle and keep working it loose.
As the pieces started coming off, I made sure to set aside the ones that were still in good shape. You can easily recover a good portion of the stone if you’re careful, and it’s worth it. Clean pieces can be reused for another project, an accent wall, or even outdoor landscaping. Just stack them neatly and avoid tossing them into a pile, since they can chip or break on impact.
This part of the job gets messy fast, so it’s important to stay ahead of the dust. Wear a proper dust mask from the start—it makes a huge difference, especially in a closed room. I also stopped every so often to sweep and vacuum the floor, which kept the workspace safer and easier to move around in. Dust and small debris can build up quickly, and stepping on loose pieces while working with tools is not something you want. Before long, the entire wall was stripped down to the base layer, and I could already feel the room breathing again.
Removing the tile adhesive
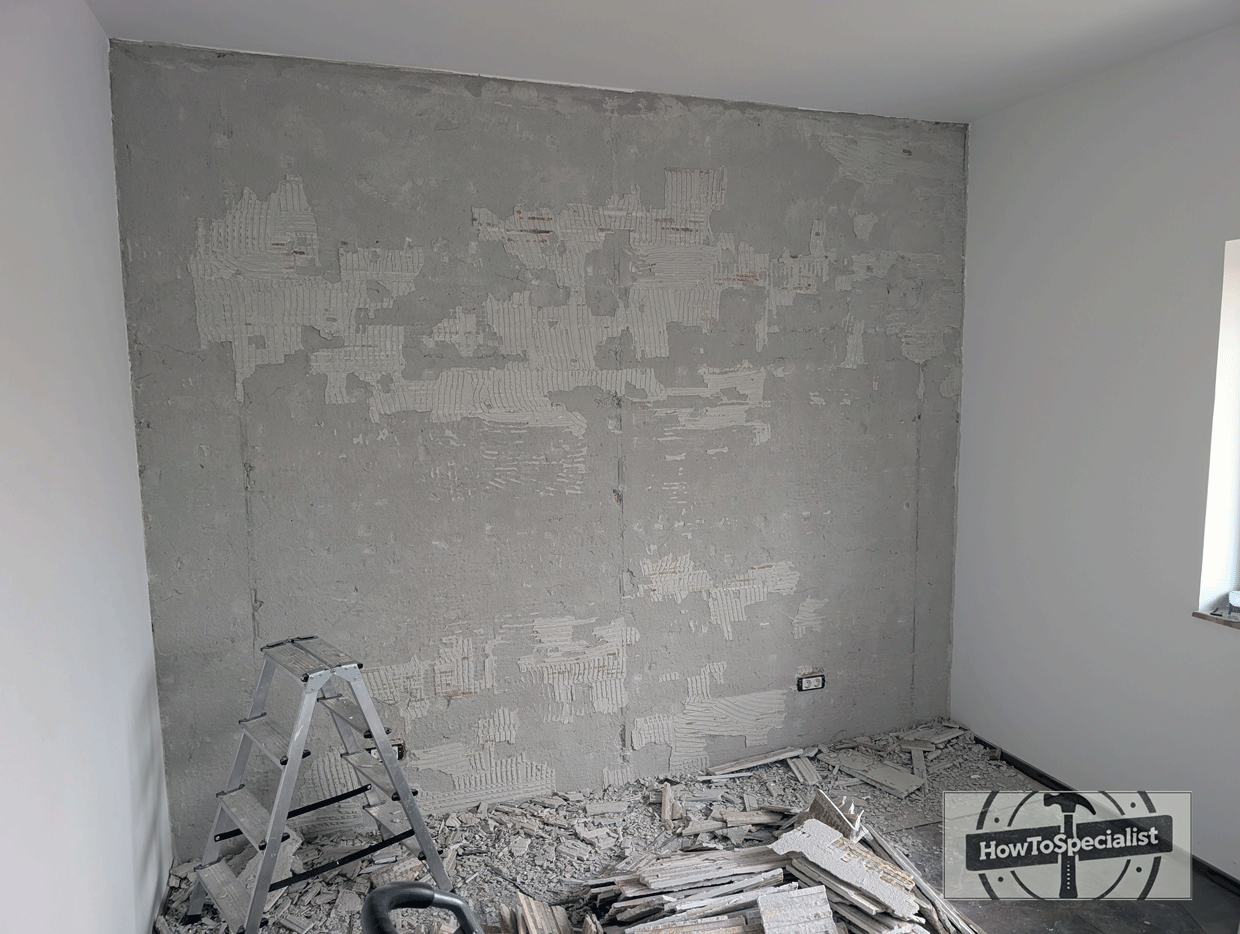
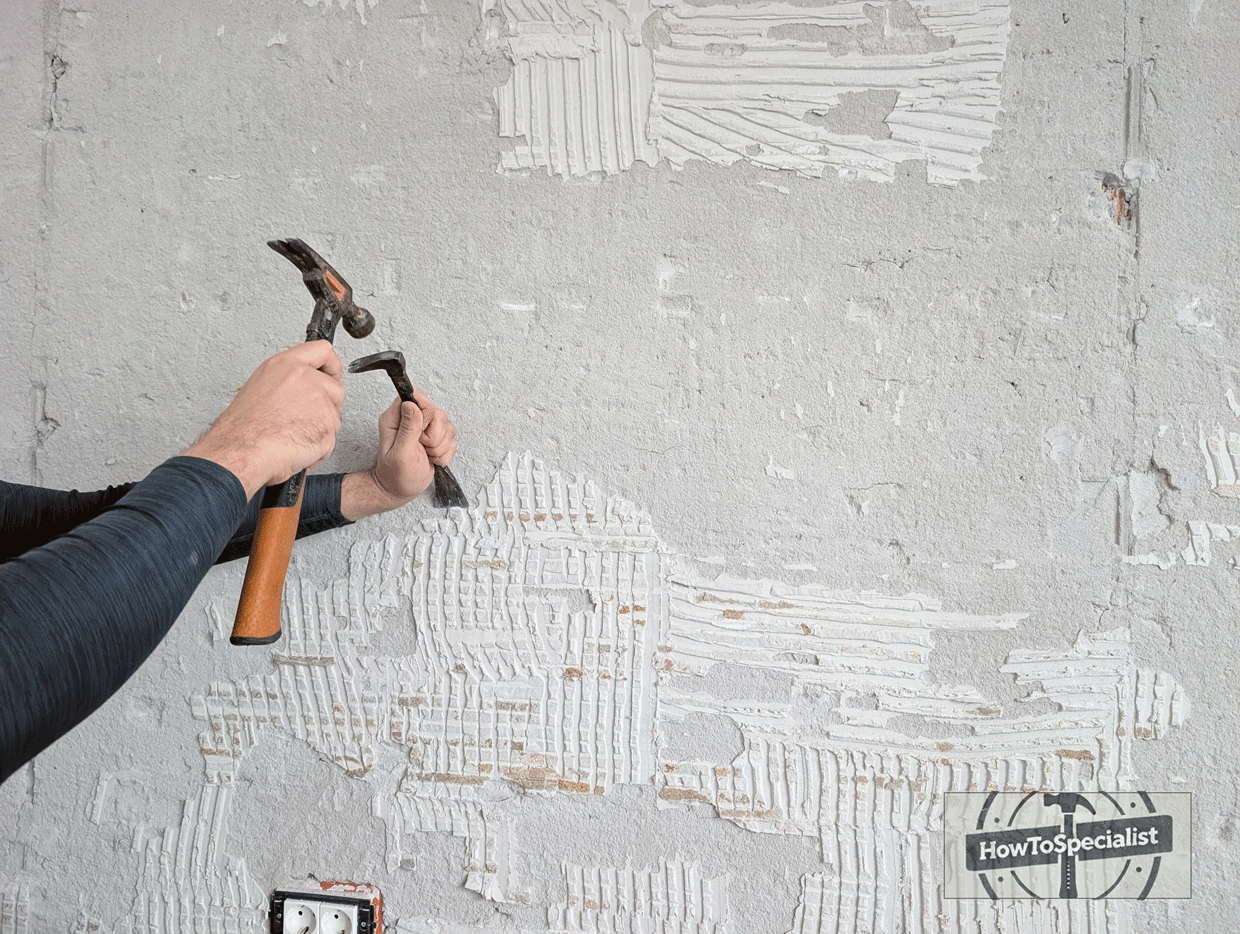
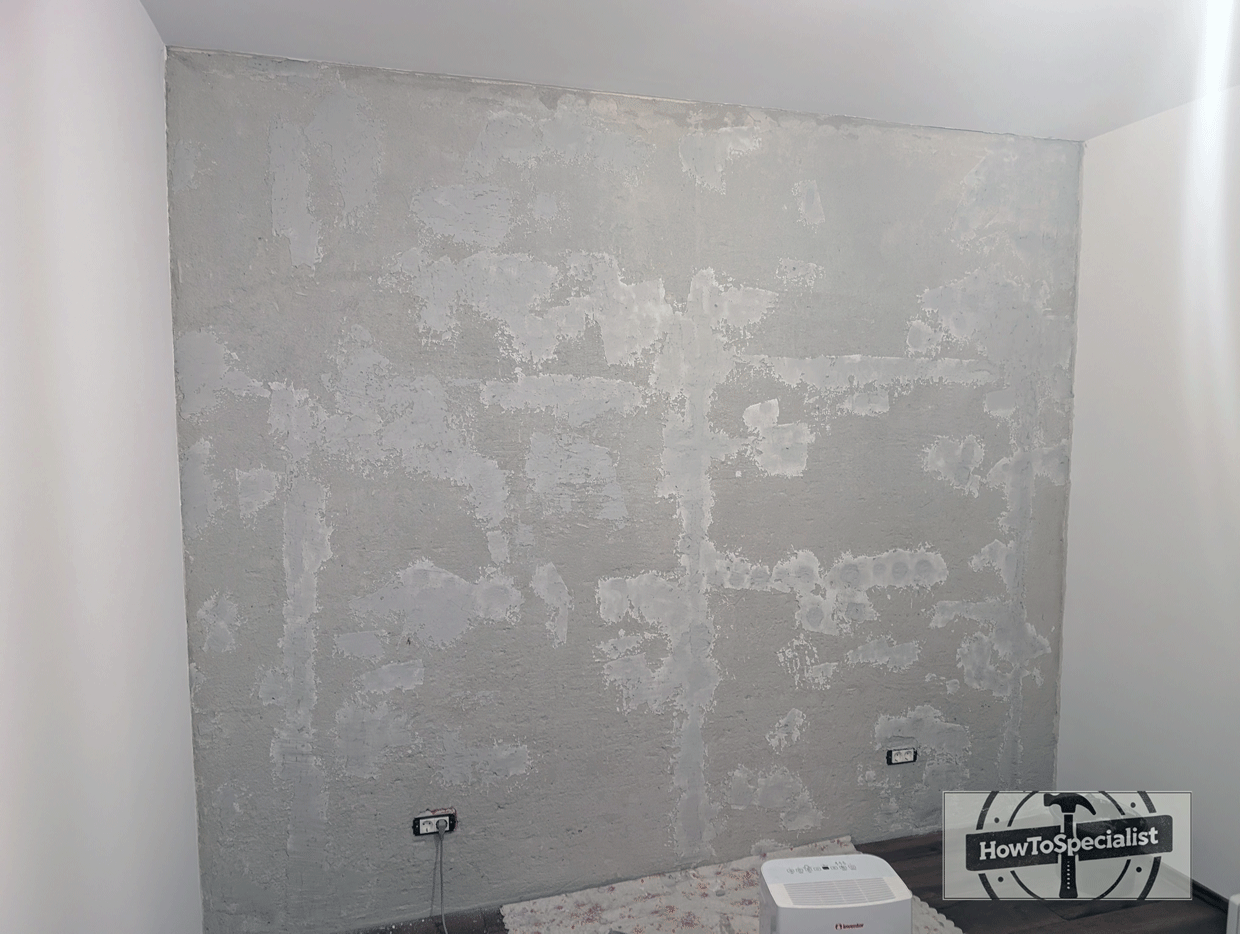
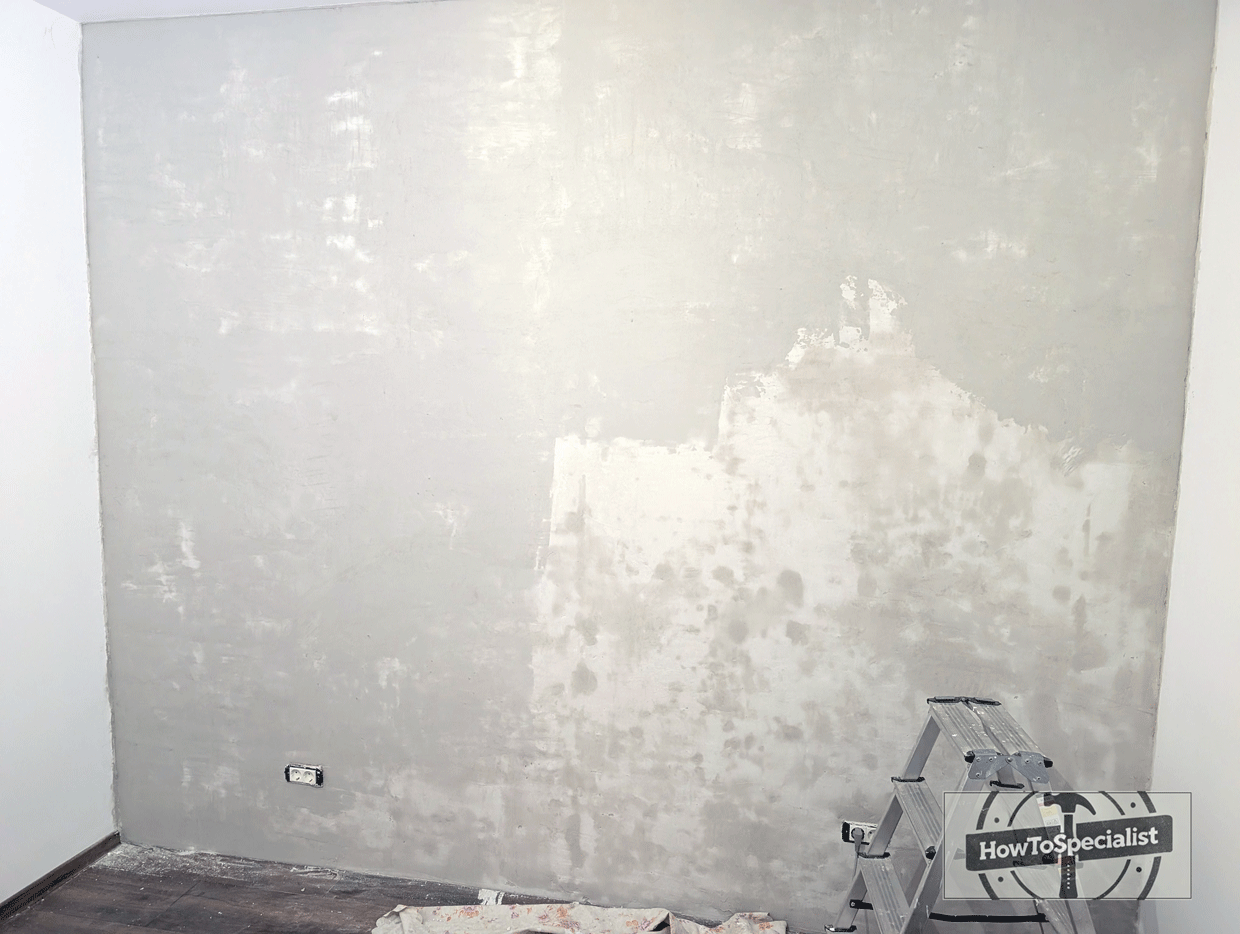
Once the stone was off, the wall was far from ready. Adhesive residue was left behind in patches, creating an uneven surface that would show through anything applied over it. Before jumping straight to plaster, I went back in with the hammer and chisel and removed as much of the old adhesive as possible. It’s a time-consuming process, no question about it, but it makes a huge difference later when you start leveling the wall.
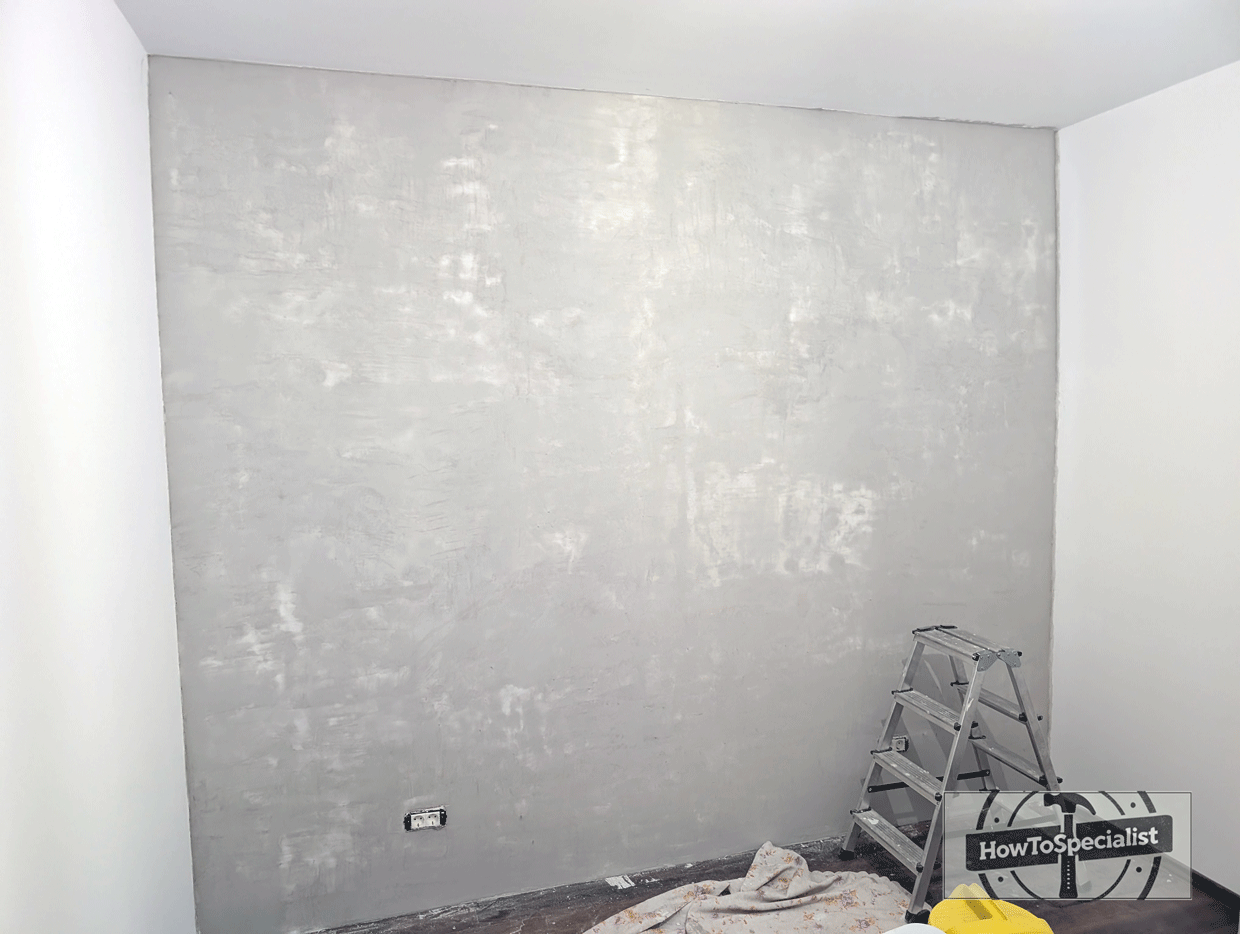
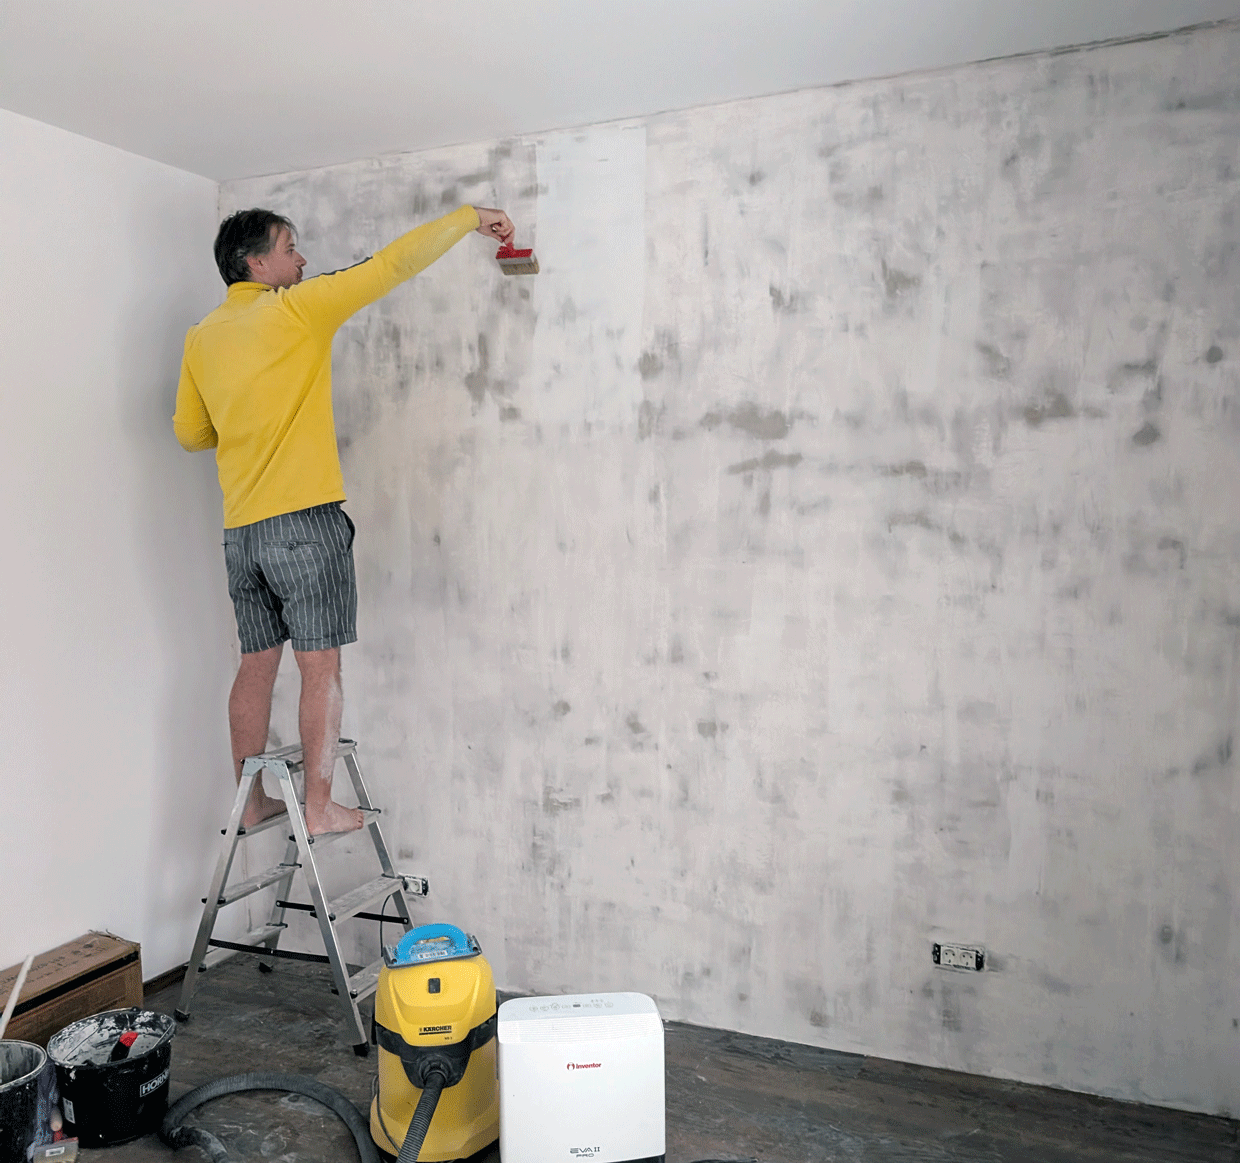
Focus especially on the areas where the adhesive protrudes the most. You don’t need to get everything perfectly clean, but knocking down those high spots is essential. If you skip this step, you’ll end up using a lot more plaster and fighting to get a flat surface. By taking the time now, you make the next steps smoother, faster, and more precise. Before plastering, I applied a coat of primer over the cement render to close the pores, reduce absorption, and help the next layers bond properly.
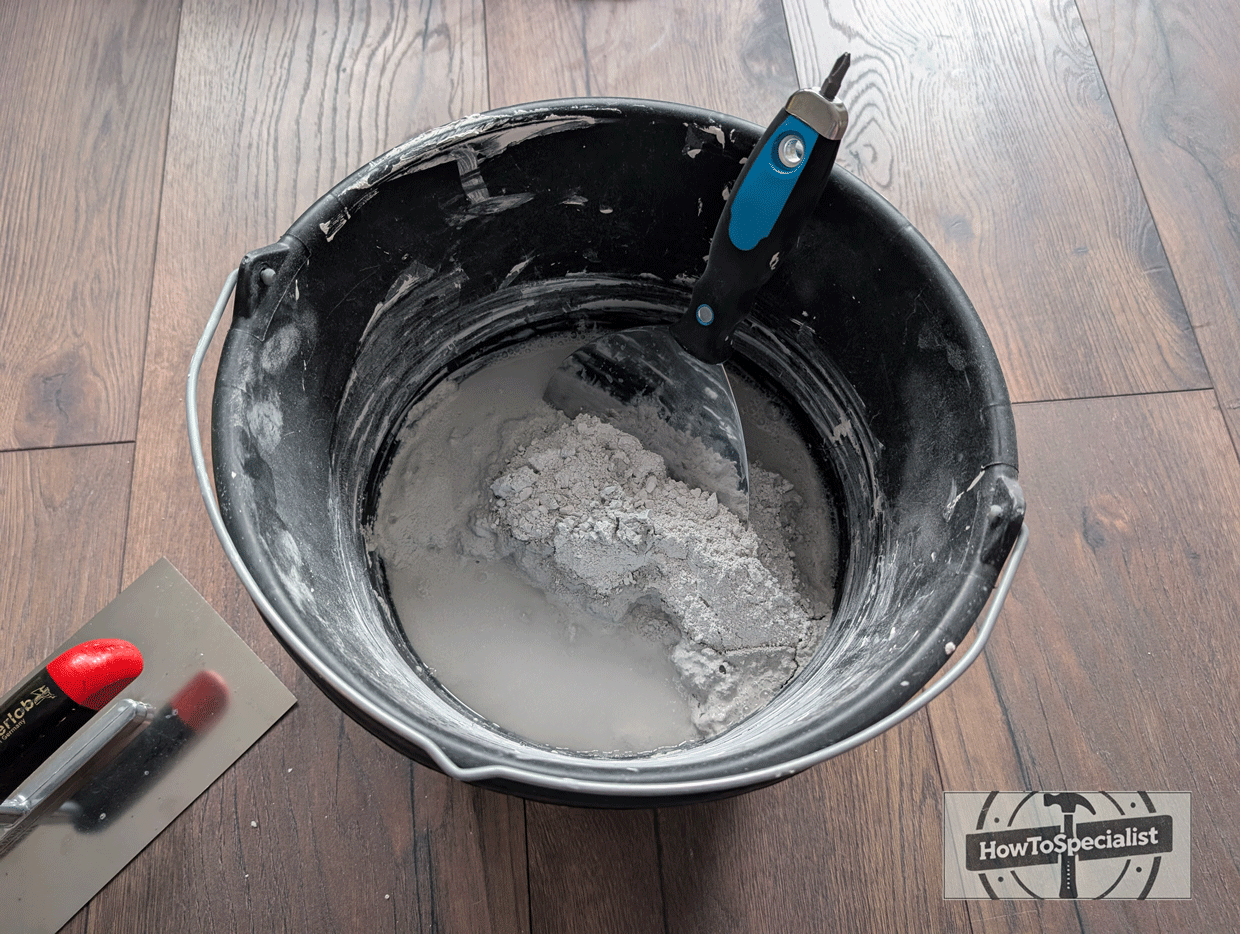
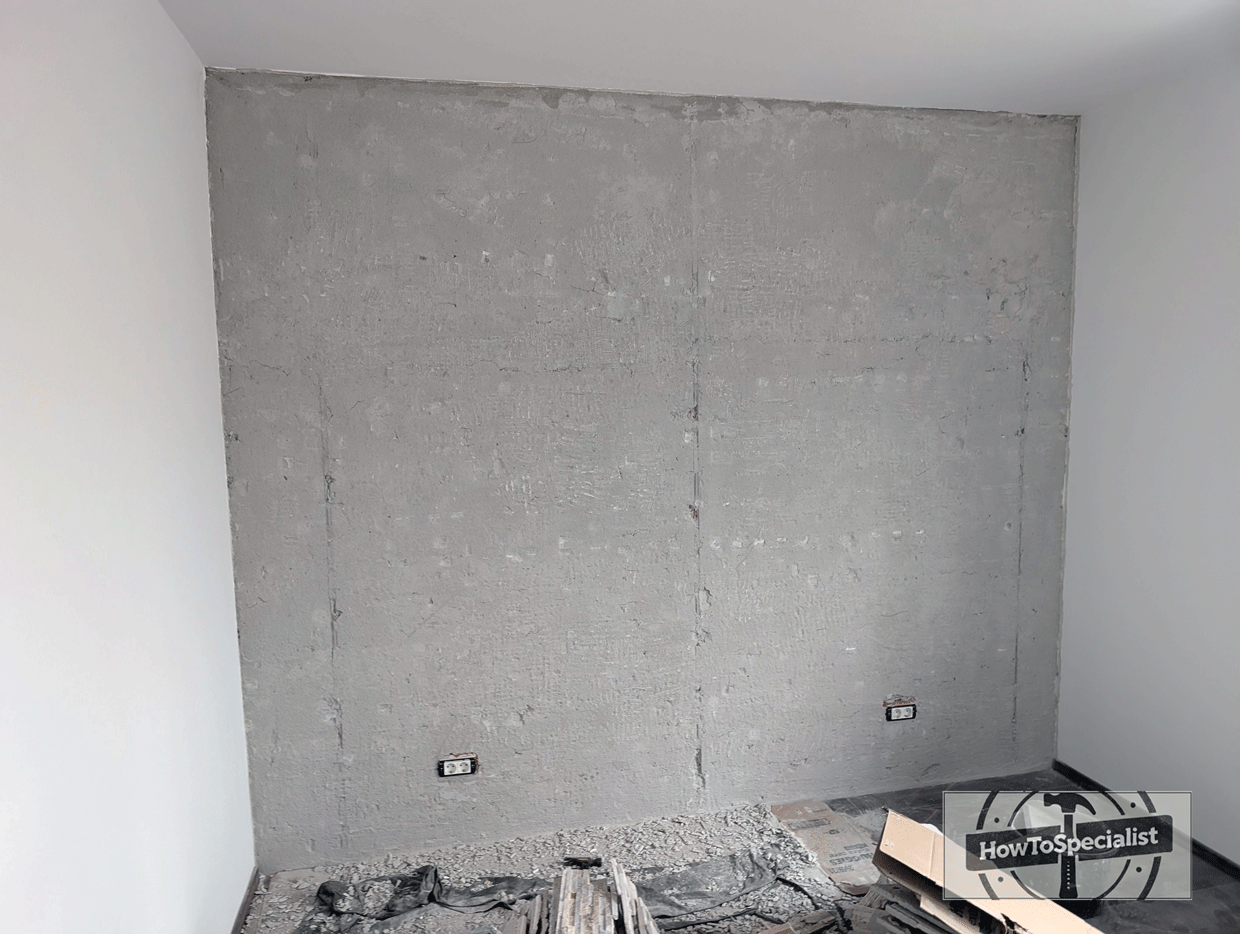
After that, I used a cement-based plaster to level everything out and bring the wall back to a uniform plane. When mixing the plaster, I worked with a cement-based compound, so I paid attention to getting the consistency just right. I aimed for a smooth, creamy mix that would stay on the trowel without dripping. I always added the powder into clean water, not the other way around, and mixed it gradually to avoid lumps.
The secret I learned is to let the plaster soak in the water for about 5 minutes before mixing it. After I added the powder into the bucket, I didn’t rush to mix it right away—I let it sit so the material could fully absorb the water. This made a big difference, because when I started mixing, the plaster blended much smoother, with fewer lumps, and it was much easier to work with on the wall. I mixed it by hand, since I had a small surface to finish. After the first mix, I let it sit for a couple of minutes, then mixed it again briefly—this helped activate the material and made it easier to work with. I also made sure not to mix too much at once, because cement-based plaster starts to set fairly quickly and I wanted enough time to apply it without rushing.
Apply it in controlled, even layers and work across the wall methodically. Don’t aim for perfection at this stage—this isn’t even your first finish coat, you’re just filling the holes and bringing the surface closer to flat. Focus on knocking down the big imperfections and building a solid base rather than chasing a perfectly smooth finish. Take your time here—this step sets the foundation for everything that follows. Let it cure properly before moving on, because a solid base is what makes the final finish look clean and professional.
Applying the Base coats of plaster
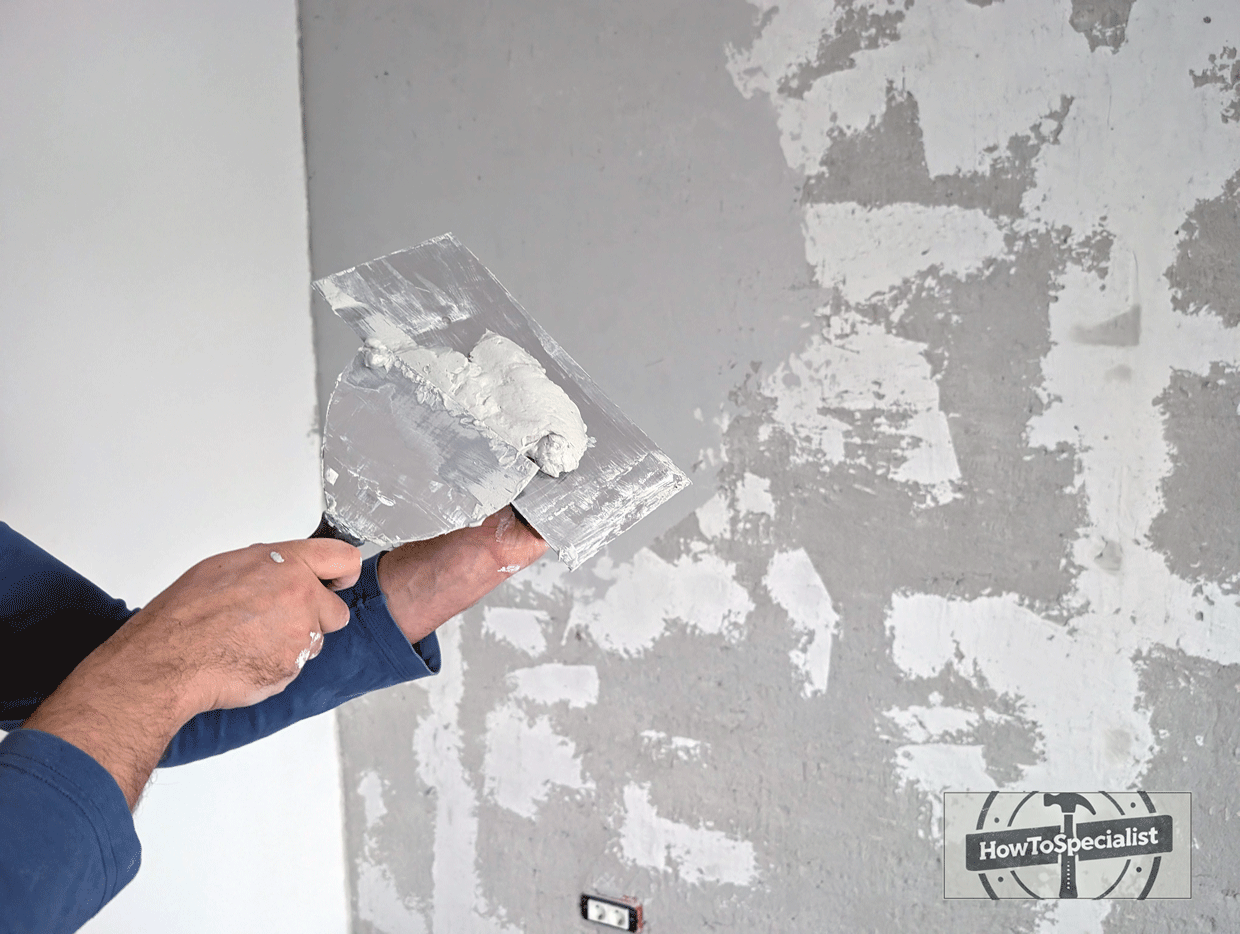
Once that set, I applied two coats of base plaster using a trowel. The creamy consistency of the mix made it surprisingly easy to work with, even though I had never done this before. It almost felt like a natural motion—holding the trowel at a slight angle and spreading the material across the wall in smooth passes, building up layers just a few millimeters thick. Spread it evenly, keep your angles tight, and aim for consistency rather than perfection at this stage.
One thing I learned quickly is that you need to clean the trowel from time to time. It makes a big difference, because dried bits of plaster on the blade can drag across the wall and leave marks. Keeping it clean helps you get smoother, more consistent layers and makes the whole process much easier.
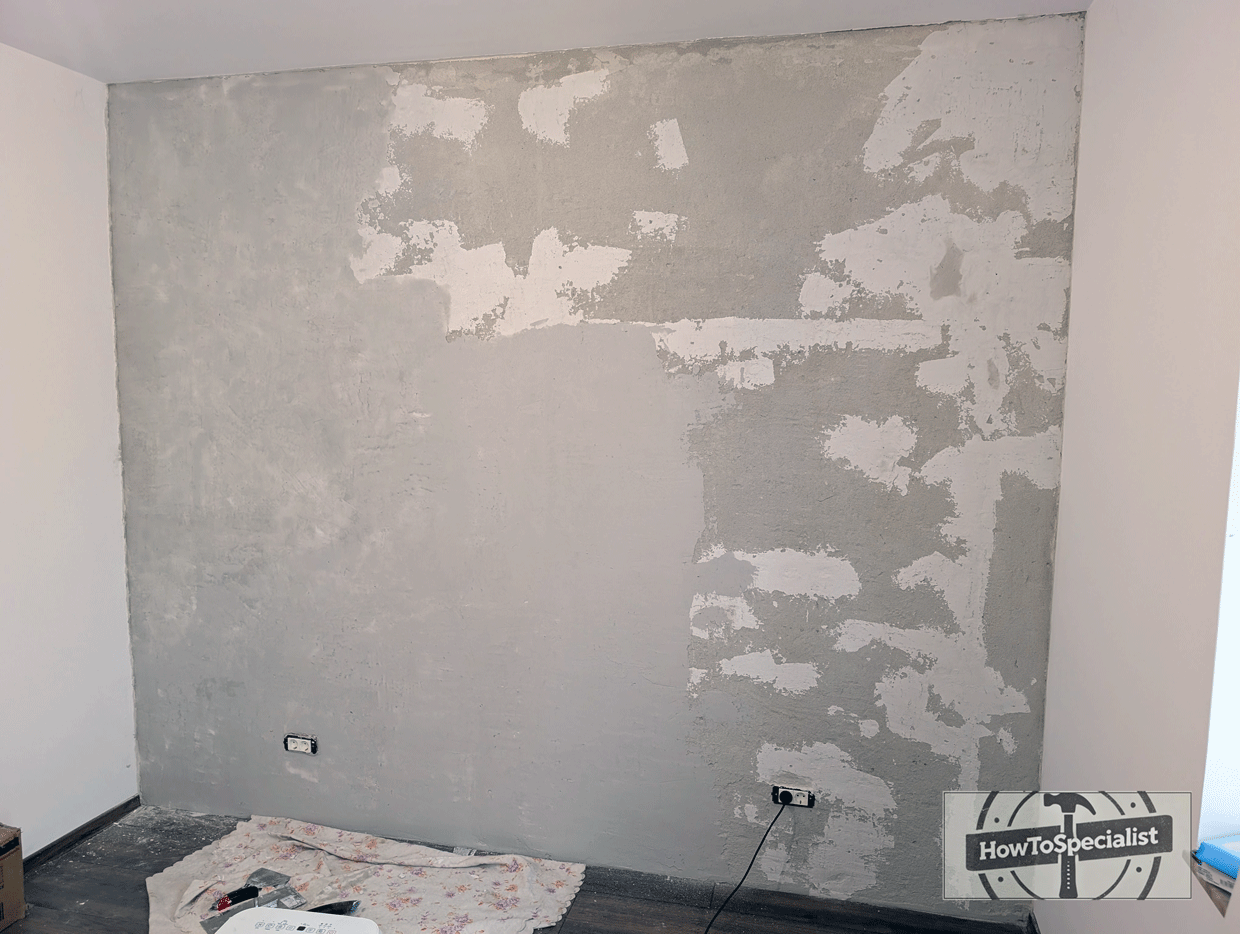
I left the wall to dry for a full day before coming back with the second coat. This gives the first layer enough time to firm up and prevents dragging or pulling the material when you go over it again. The second coat goes on much smoother because the surface is already more uniform, and you can start refining the wall even further.
After the second coat, I let the wall rest for two full days so everything could dry and harden properly. This step is important—rushing it can lead to cracks or weak spots. Giving it time to cure properly sets you up for a much cleaner and easier finish in the next stages.
Using a dehumidifier can really help speed up the drying process, especially in rooms with poor ventilation. It pulls moisture out of the air, allowing the plaster to cure more evenly and reducing waiting time between coats. I had one, so I used it to make sure there’s no excess moisture in the room.
Applying the Finish
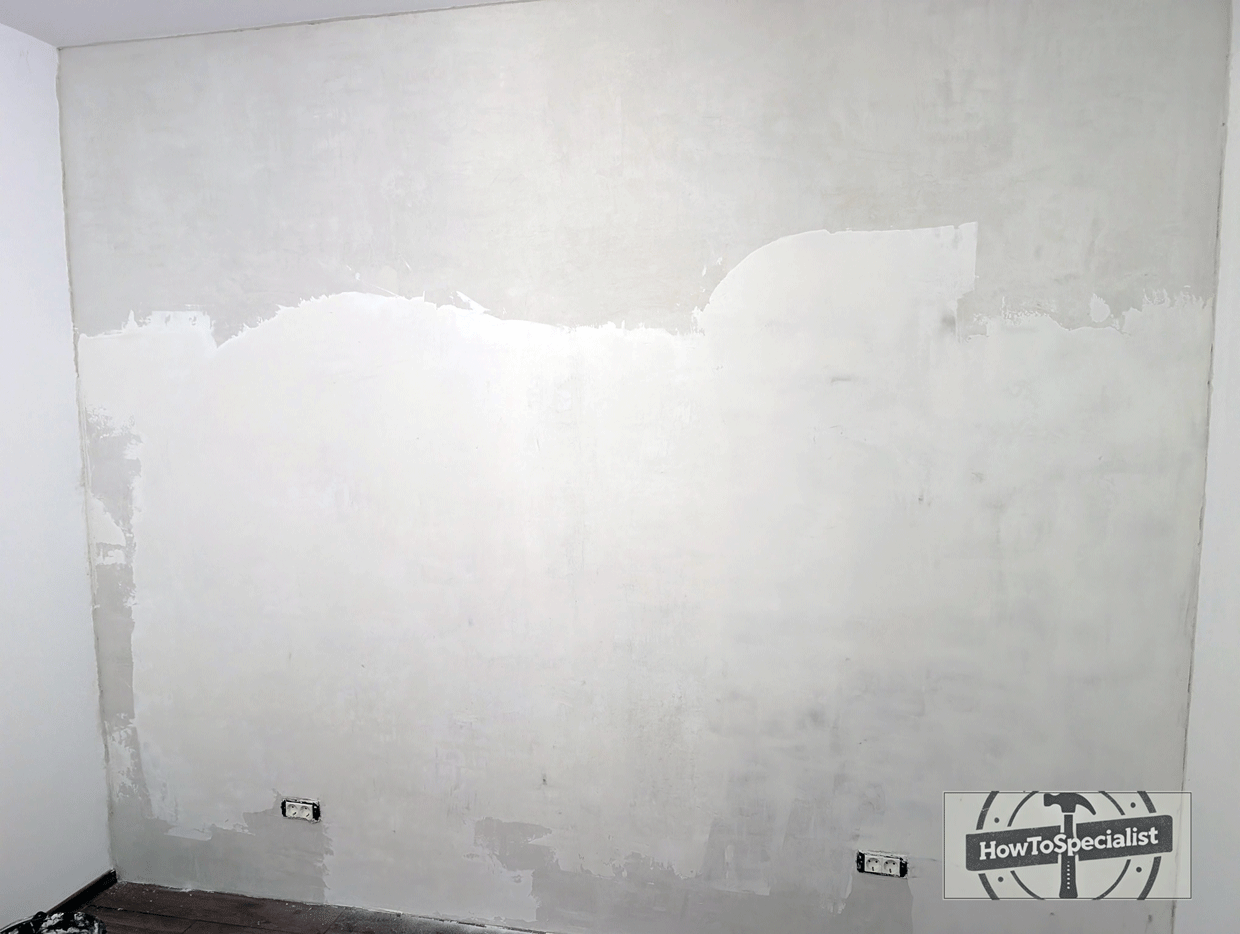
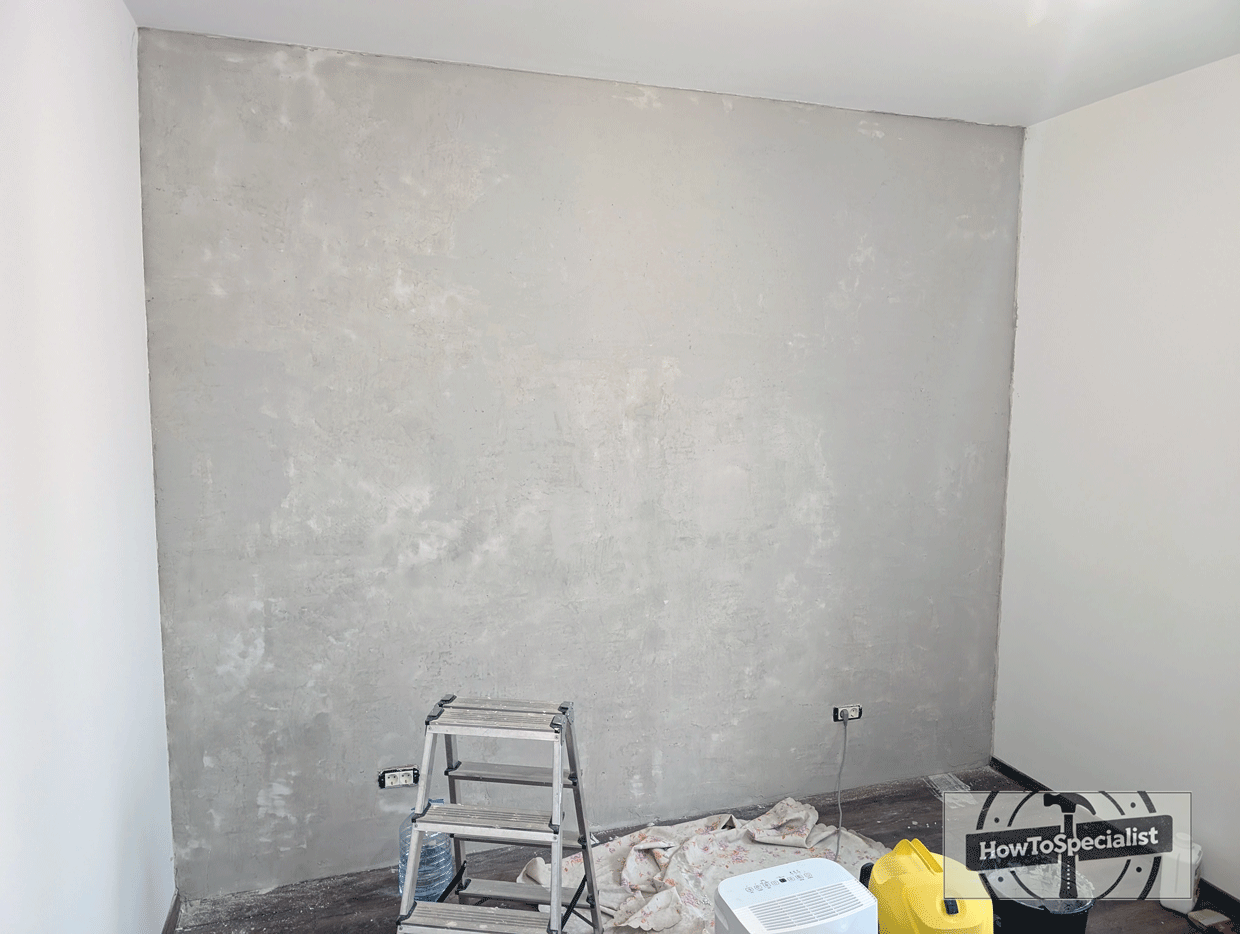
Next came the finishing skim coat. This is where the wall really starts to come together. This layer is much smoother and closer to white, so you can instantly see the difference compared to the base coats. It’s also easier to apply and requires less material, since the two plaster coats underneath have already leveled the surface. I applied a thin, smooth layer to refine everything and eliminate any remaining texture, using light pressure and clean passes with the trowel.
Because the surface was already well prepared, the skim coat went on quickly and evenly. At this stage, you’re not building thickness anymore—you’re just perfecting the surface. Keep your strokes long and consistent, and clean the trowel often to avoid dragging dried bits across the wall.
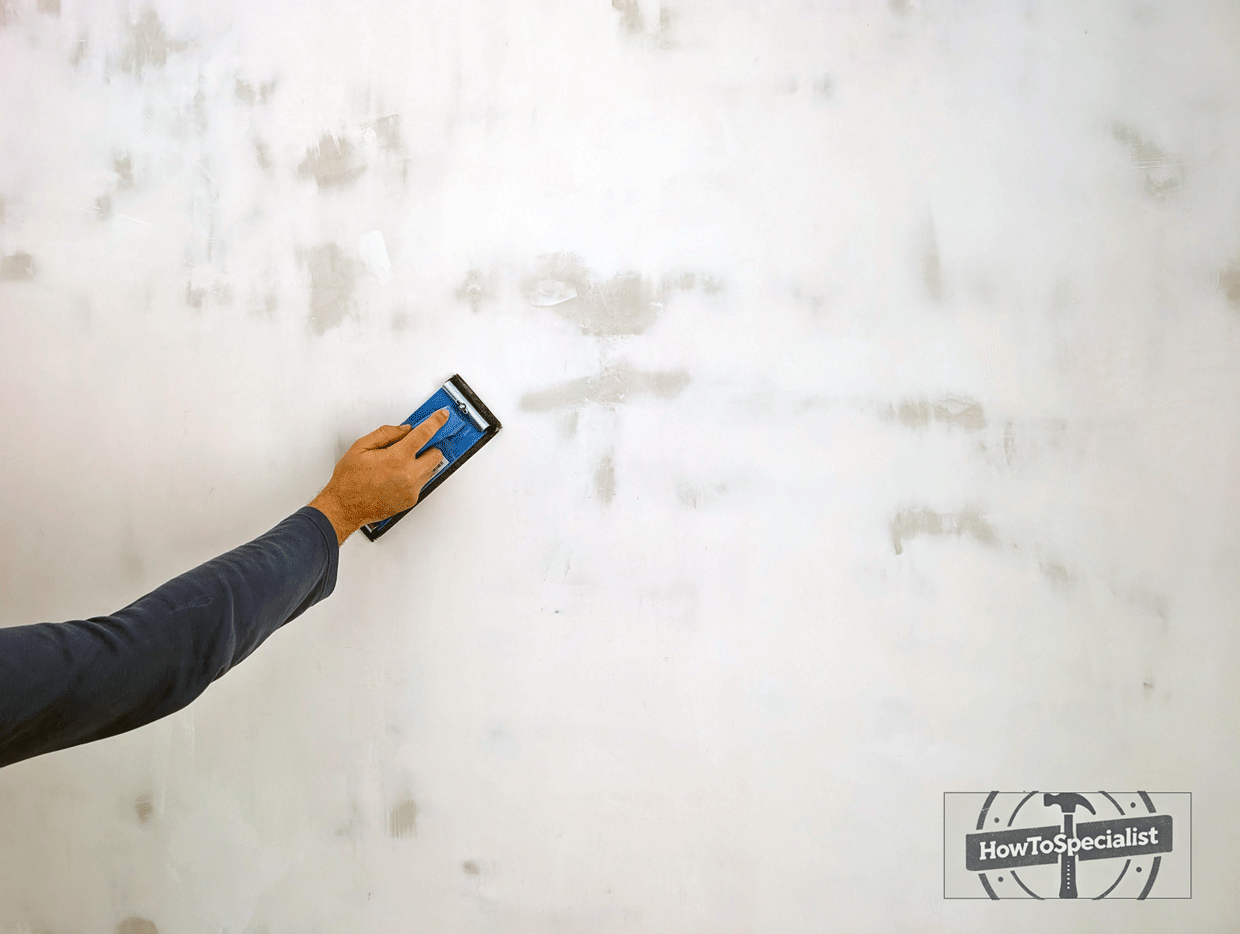
After letting it dry overnight, I sanded the entire wall carefully using fine-grit sandpaper to get that smooth, even finish. This step creates a lot of fine dust, so I made sure to wear a dust mask the whole time—it’s absolutely worth it. A strong light is your best friend here—shine it across the surface and it will reveal every little imperfection, from small ridges to tiny holes you might miss otherwise.
As I worked, I tried to keep the sanding even and not press too hard in one spot, so I wouldn’t create dips in the surface. Once I was done, I vacuumed the entire wall and floor thoroughly to remove all the dust. This is an important step, because any leftover dust will affect how well the primer and paint stick to the wall.
After cleaning, I went back and touched up the problem areas with finishing compound, then lightly sanded again where needed. Taking the time to fix those small imperfections is what makes the final result look clean and uniform, ready for primer and paint.
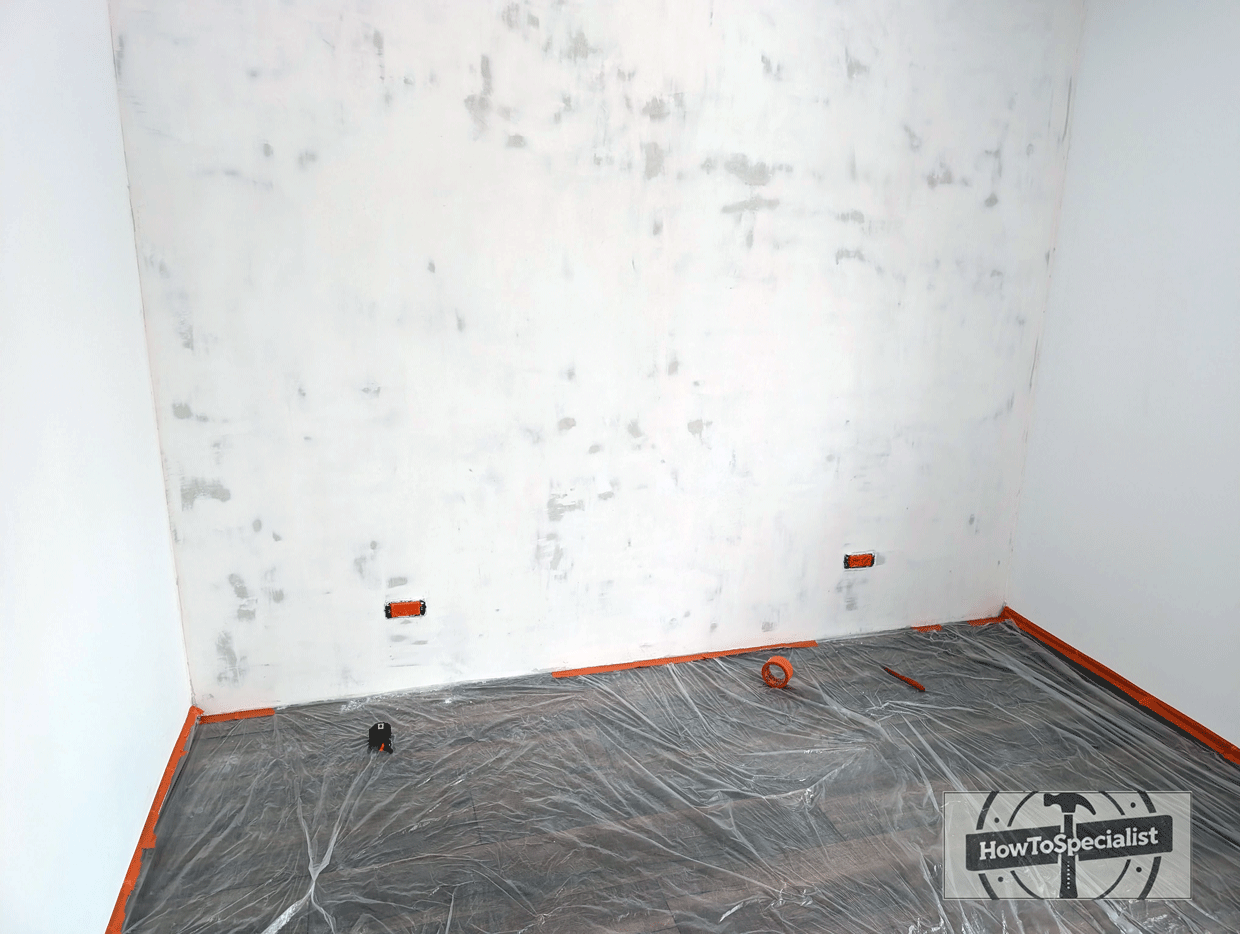

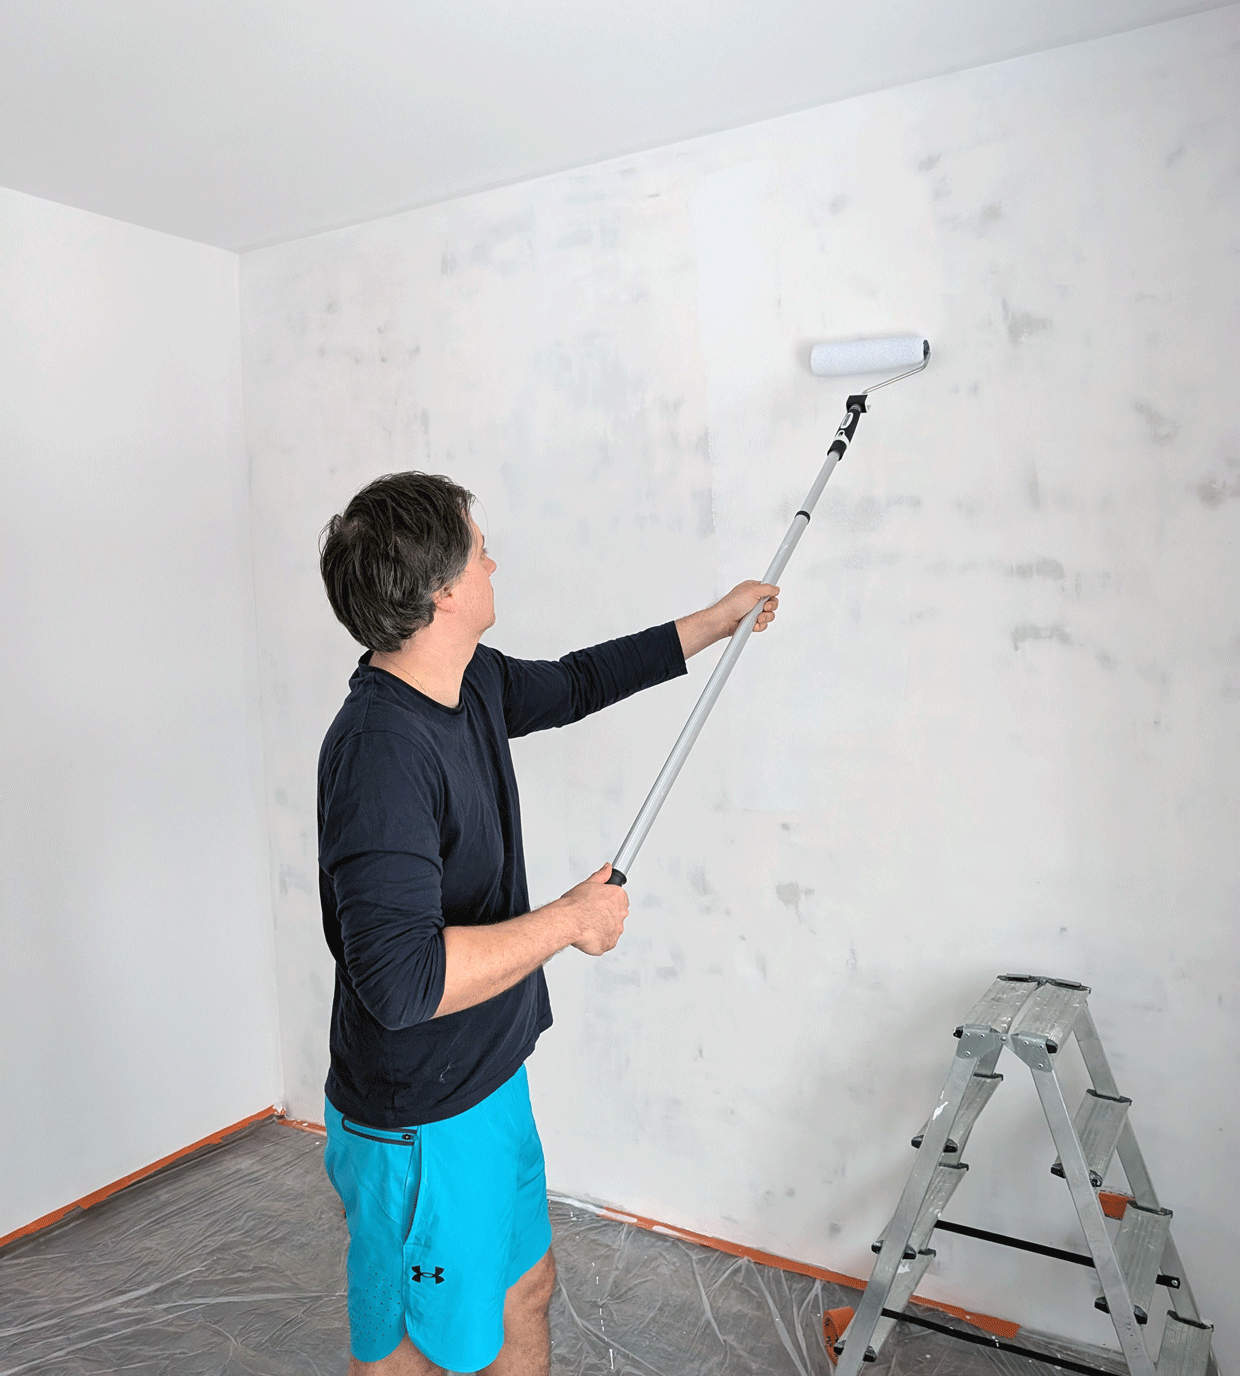
With the wall finally smooth, I applied a paint primer to prepare for the final finish. This helps the paint adhere better and gives you a more even color in the end. After that, I masked off the edges using plastic sheeting and painter’s tape to protect the ceiling, adjacent walls, and trim. It might seem like a small step, but it makes a huge difference when you want sharp, clean lines without extra touch-ups later.
For the paint, I started by cutting in the edges and corners using a brush. This lets you get into tight areas where the roller can’t reach and keeps everything neat along the edges. Once that was done, I came in with the roller and covered the larger surfaces, working in even passes and keeping a wet edge to avoid marks. The key is not to overload the roller—light, consistent coats always give a better finish.
I applied three coats of white paint, with about four hours between each coat. The first coat builds the base, the second evens everything out, and the third brings everything together with a clean, solid finish. As you go from one coat to the next, you’ll really see the wall transform into a smooth, bright surface that looks fresh and professionally done.
Conclusion
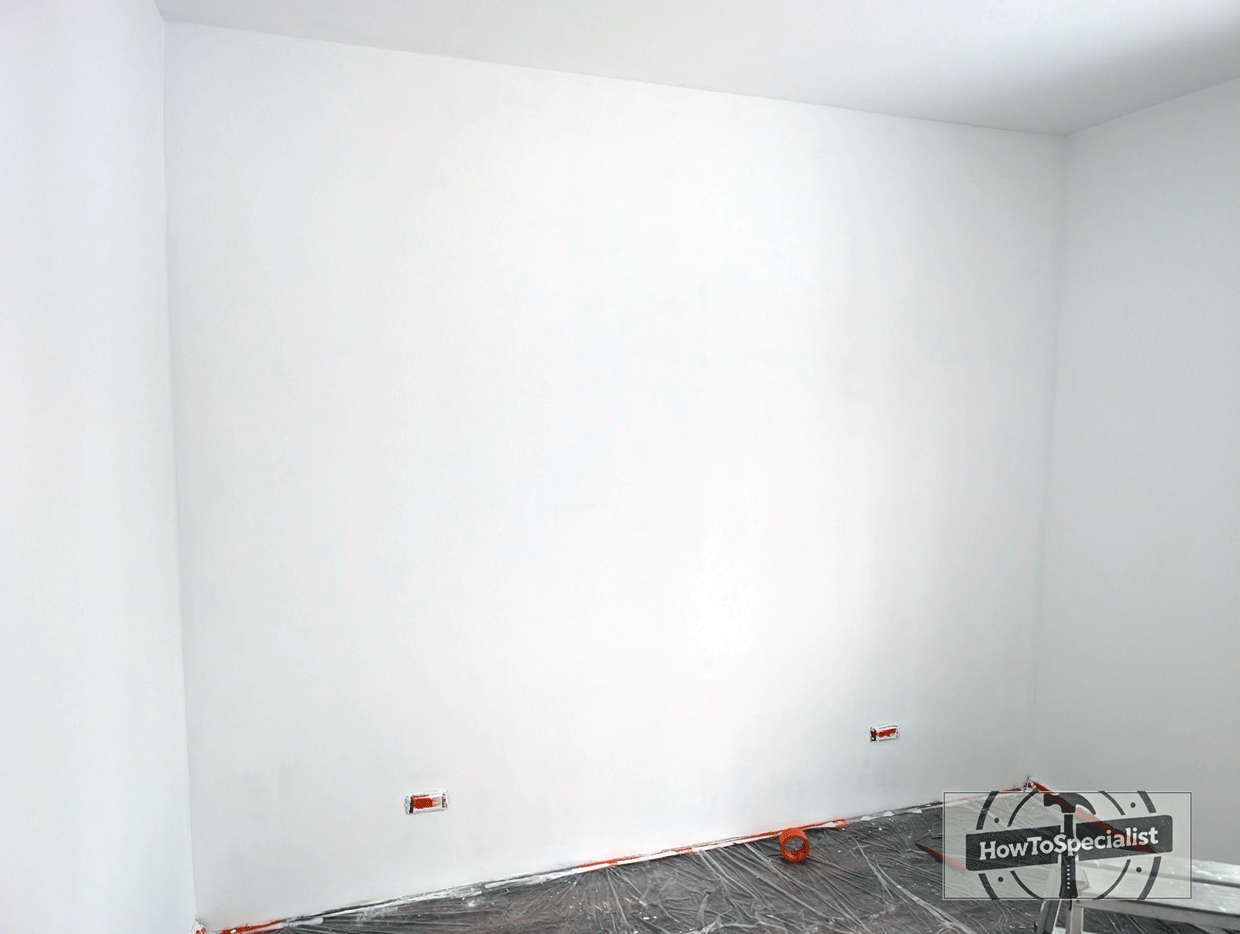
What started as a dusty, outdated stone wall turned into a fresh, bright surface that completely changed the feel of the room. More importantly, it completely solved the issue I had with that constant dust smell—the air feels cleaner and the space is much more comfortable now. It’s one of those projects that looks like a lot of work—and it is—but when you break it down step by step, it’s absolutely doable.
Overall, it took me about one week, working just a few hours each day. Along the way, I learned a lot of new things, especially about working with plaster and getting a wall perfectly smooth. It also gave me a big boost in DIY confidence. Once you go through a full process like this, you start to realize that a lot of these “complicated” jobs are just a series of simple steps done right.
At the end, I gave everything a good clean—vacuumed, then mopped the floor to get rid of the last bit of dust. I installed the baseboards back in place, stepped back, and that was it. A completely transformed wall, a fresh room, and a project that was absolutely worth every minute.
Best tips for a beginner
If you’re just starting out, focus on control rather than speed. When removing the stone, work methodically and let the hammer and chisel do the work instead of forcing it. Keep your angle consistent and avoid hitting too hard—you want to remove the stone, not damage the wall behind it. Also, expect dust. Seal off the room with plastic if you can, open a window, and wear a mask. A clean workspace will keep you focused and make the whole job feel a lot less overwhelming.
Surface prep is where most beginners either win or lose the project. Take your time with the plaster and skim coat—don’t try to fix everything in one thick layer. Thin, even applications are much easier to control and give better results. Let each layer dry properly before moving on, even if it looks ready on the surface. When sanding, use a strong light held at an angle to the wall. It will reveal imperfections instantly, and fixing them now is ten times easier than after paint.
When it comes to painting, slow and steady always looks better. Don’t overload the roller—apply light, even coats and build up the finish gradually. Keep a wet edge as you move across the wall to avoid streaks and lap marks. Masking is also worth the extra few minutes, especially around edges and ceilings, because it gives you that clean, professional look. Stick to the drying times between coats, and by the third layer, you’ll see the wall come together in a way that makes all the prep work worth it.