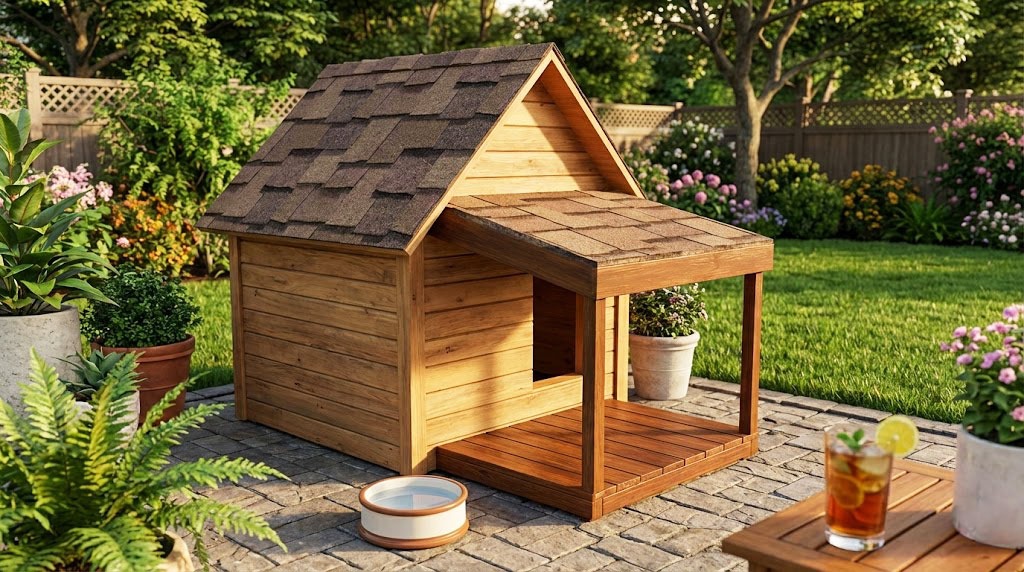
This step by step diy article is about how to build an insulated dog house. In order to help keep your dog warm in the winter and cool in the summer, you should install insulation sheets between the wall studs. Use either 3” thick polystyrene sheets or rigid foam insulation. If you want to reduce the costs, you could also install 1 1/2” studs and fit 1 1/2” thick insulation. After you fit the sheets into place, you have to cover them with 1/4” or 3/4” plywood sheets.
Make sure you dog can easily turn around inside the dog house, before beginning the actual construction. Therefore, you should adjust the size of the dog house as to fit the needs of your dog. There are many design you could choose from, therefore make sure you study several alternatives, before taking the final decision. Buy quality materials, if you want to get the job done as a professional.
Align the components at both ends before securing them with wood screws. Pre-drill holes in the lumber, to prevent the wood from splitting. Work with great care and attention, making sure sure the walls are plumb and the top plates are perfectly level. Cut the insulation sheets to the right size with a saw, before fitting them between the wall studs. If you live in a cold are, build the studs from 2×4 lumber and fit 3 – 3 1/2” thick insulation, otherwise you could get the job done with 2×2 lumber and 1 1/2” insulation. See all my Premium Plans in the Shop.
Made from this plan
In order to build a dog house, you need the following:
Materials
- 3 pieces of 2×4 lumber – 33″, 2 pieces – 36″ long JOISTS
- 1 piece of 3/4” plywood – 36″x36″ FLOORING
- 4 pieces of 2×4 lumber – 36″ long, 4 pieces – 29″ long, 12 pieces – 22 1/2″ long WALLS
- 2 pieces of 5/8″ plywood – 28 1/4″x36″ long, 2 pieces – 37 1/4″x47″ long WALLS
- 6 pieces of 2×4 lumber – 26 1/4″ long RAFTERS
- 2 pieces of 3/4” plywood – 21″x45 1/4″ long ROOFING
- 2 pieces of 2×2 lumber – 24″ long, 3 pieces – 27″ long, 8 pieces of 1×4 lumber – 24″ long DECK FRAME
- 2 pieces of 2×2 lumber – 20″, 2 pieces – 30″ long, 3 pieces – 24 1/2″ long, 1 piece of 3/4″ plywood – 24 1/2″x30″ DECK ROOF
- 1 piece of 2×4 lumber – 10 ft
- 6 pieces of 2×4 lumber – 12 ft
- 1 piece of 3/4″ plywood – 4’x8′
- 1 piece of 3/4″ plywood – 2’x3′
- 2 pieces of 5/8″ plywood – 4’x8′
- 4 pieces of 2×2 lumber – 8 ft
- 2 pieces of 1×4 lumber – 8 ft
- 2 1/2″ screws
- stain, putty
- Asphalt shingles
Tools
- Safety gloves, glasses
- Circular saw, Miter saw
- Hammer, Spirit level, Carpentry pencil, Tape measure
Tips
- Measure attentively the lumber, before making the cuts
- Install polystyrene sheets rather than mineral wool battens
Time
- One weekend
Related
How to build an insulated dog house

Building the base of the dog house
The first step of the project is to build the floor of the dog house. Therefore, build the frame from 2×4 joists and assemble them together, as in the image. Drill pilot holes trough the rim joists and drive in the 3” wood screws. Use a carpentry square to make sure the corners are right-angled.
Attach the 3/4” plywood flooring and secure it with 2” nails / screws, every 6” along the joists. The edges have to be flush with the joists.

Installing the walls
Afterwards, you should build the walls and secure them to the floor. In order to get the job done as a professional, we recommend you to build the frames from 2×4 lumber. Work on a level surface, as to obtain consistent results.
Place the walls, plumb them with a spirit level and drive in the 3” screws in the flooring. Secure the adjacent walls together, using screws. Pre-drill the components to prevent the wood from splitting.

Attaching the exterior siding
Continue the woodworking project by installing the exterior siding. As you should easily notice in the image, you have to use 5/8” plywood. Cut the 4×8′ sheets to the right size using a circular saw with a fine blade. Mark the cut lines and build the components to the right size.
Don’t forget to cut out the door opening, using a jigsaw. Secure the sheets to the frame with 1 1/4” nails, every 8”, along the studs.

Fitting the insulation
The next step of the project is to install the insulation sheets or bats. From our experience, we recommend you to fit 3” thick polystyrene sheets between the studs, instead of mineral wool batts. Irrespective of your choice make sure there are no gaps between the wall studs and the insulation sheets, otherwise the layer won’t be as effective.
Use a handsaw to adjust the size of the polystyrene sheets. Work with attention and with great care, if you want to obtain a professional result.

Installing the interior walls
In order to get the job done, you have to install the interior walls, made out of 3/4” plywood. Cut the sheets to the right size, using a circular saw or a table saw, making sure you don’t damage the edges.
Fit the sheets into place and secure them to the wall studs with 2 1/2” screws (decking screws). It is essential to fit the interior siding at this stage, as later on you won’t have a good access.

Building the rafters
Building the rafters of the dog house is a straight forward step, if you use the right techniques and plans. Therefore, build the rafters from 2×4 lumber, making sure you cut their ends at 45º, using a miter saw. Make sure all the rafters are perfectly equal.
Align the rafters at both ends and secure them to the top plates with 3” nails. Drill pilot holes to prevent the wood from splitting. Place the rafters equally spaced, as in the image.

Attaching the roofing sheets
After building the roof structure you should cut the roofing sheets and install them into place. As you should notice in the plans, you have to build the roofing sheets from 3/4” plywood. Center the sheets on the roof structure and secure them to the rafter, every 6”, using 2” nails.

Installing the front deck
If you really want to enhance the look of the insulated dog house, you should consider adding a front deck with a simple pergola. Therefore, start building the frame of the deck, from 2×2 lumber. Assemble the components together, making sure the corners are square and the diagonals equal.
Attach the 1×4 slats to the deck frame and secure them into place with wood screws. Countersink the head of the screws, in order to obtain a neat appearance.

Building the front deck
The next step of the project is to build the covered pergola of the dog house. Build the posts from 2×2 lumber and secure them into place with screws. Alternatively, you could also lock them to the joists, before attaching the slats. Make sure all the components are aligned and tightly secured.
Afterwards, build a small frame, as in the plans. Cut the ends of the crossbeams as to fit along the dog house.

Installing the asphalt shingles
Cover the roof with tar paper and secure it into place with staples, before installing the asphalt shingles. In order to get the job done as a professional, you should install asphalt shingles starting with the bottom left part of the roof. If you want to add decorative trims, you should fit them before fitting the shingles.

How to build an insulated dog house
Afterwards, you should take care of the finishing touches. Therefore, fill the holes with wood filler and seal the gaps with a silicone. Let the compound dry out properly, before sanding the surface with 120 sandpaper.
Thank you for reading our step by step article about how to build an insulated dog house and we recommend you to check out the rest of our step by step projects. Don’t forget to share our projects with your friends, by using the social media widgets.
12 comments
It looks like you completed the floor without insulation on several insulated dog house plans. And the dog will be laying on the coldest part of the dog house-the floor!
Your observation is correct. One can fit insulation to the floor frame to and seal it with a plywood panel.
What about insulating the roof? Not needed?
You could add floor and roof insulation if you want.
You don’t give the amount for each of the materials needed, how many 2x4s, # of sheets of plywood, etc… I’m new at this so I don’t know how to guess at the amount of materials needed. How many screws, shingles, sheets of insulation ( as I’d like to insulate the floor and roof as well) it can get to -50F here in the northeast. Also I have a 180lb Labrador, will this be big enough? If not, how do I adjust for that?
Thanks
Suzette
Unfortunately, I haven’t made a materials list for this project, but it shouldn’t be that hard to add the components up with the cut list in front of view. This is a 3’x3′ dog house so if your dog can turn around freely and stand up inside, then it is the right size for him.
Thanks Jack, I’ll be using the 2×4’s and the thicker insulation. Can you add a porch like structure to this plan? To keep his food and water safe from the elements.
Scratch that last question, lol, I see the porch on the pictures.
You should also check out these plans: http://myoutdoorplans.com/animals/dog-house-plans-for-large-dog/ You would have to add insulation to the walls and the interior panels.
You have very good plans, it was very hard for me to build it because we have metric system (hard time with the numbers) I would like to know what program you are using 4 the planning if you may.
Thank you for your help and support keep up the great work
It’s called SketchUp.
You have very good plans, it was very hard for me to build it because we have metric system (hard time with the numbers) I would like to know what program you are using 4 the planning if you may.
Thank you for your help and support keep up the great work