This step by step woodworking project is about free chicken pen plans. I have designed this 8×10 wood pen so you can keep the chickens outside while being predator free. The structure is made entirely from 2x4s except for the base which should be built using 4×4 pressure treated lumber. This pen is a great match for the large chicken coop plans. See my other DIY projects HERE.
We recommend you to invest in the best materials you could afford. Therefore, you should buy weather-resistant lumber, such as pine or cedar. Always take accurate measurements before adjusting the size of the components at the proper size. Drill pilot holes trough the components before inserting the wood screws, to prevent the wood from splitting. See all my Premium Plans HERE.
Made from this plan
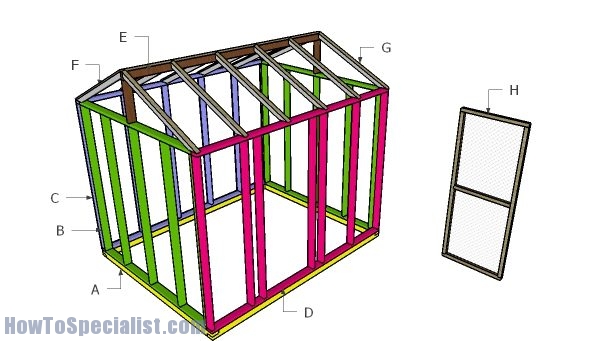
Building a chicken pen
Materials
- A – 2 pieces of 4×4 lumber – 120″ long, 2 pieces – 96″ long SKIDS
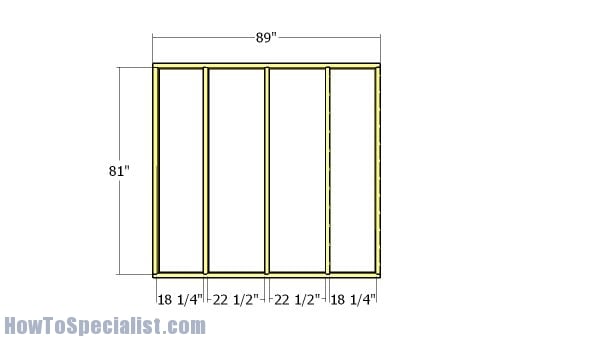
- B – 2 pieces of 2×4 lumber – 89″ long, 5 pieces – 81″ long 2xSIDE WALL
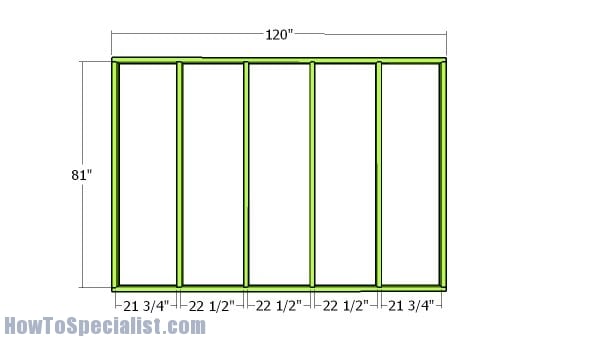
- C – 2 pieces of 2×4 lumber – 120″ long, 6 pieces – 81″ long BACK WALL
- D – 2 pieces of 2×4 lumber – 120″ long, 7 pieces – 81″ long FRONT WALL
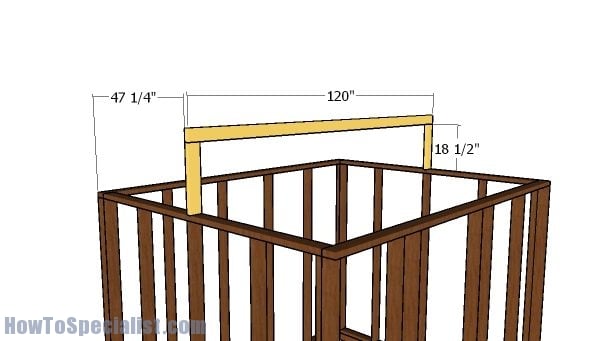
- E – 2 pieces of 2×4 lumber – 18 1/2″ long, 1 piece – 120″ long TOP RIDGE
- F – 12 pieces of 2×2 lumber – 52 1/4″ long RAFTERS
- 2 pieces of 4×4 lumber – 10′
- 2 pieces of 4×4 lumber – 8′
- 5 pieces of 2×4 lumber – 10′
- 28 pieces of 2×4 lumber – 8′
- hinges, latch
- 2 1/2″ screws, 3 1/2″ screws
- wood filler , wood glue, stain/paint
Tools
- Safety gloves, glasses
- Miter saw, jigsaw
- Chalk line, tape measure, spirit level, carpentry pencil
- Drill machinery and drill bits
Time
- 1 week
How to build a chicken pen
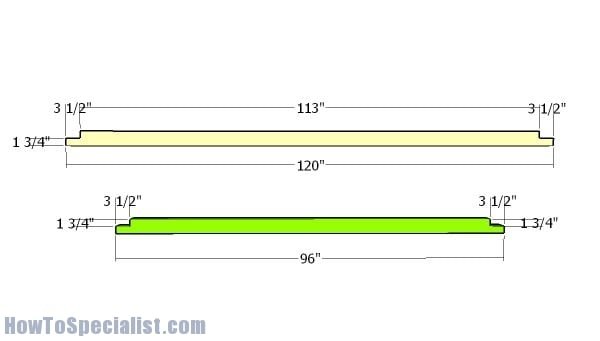
Base beams
The first step of the project is to build the beams for the base of the greenhouse. Use 4×4 lumber for the beams and then make notches to both ends, as shown in the diagram. Use a circular saw to make parallel cuts and then remove the excess with a chisel. Smooth the surface with sandpaper.
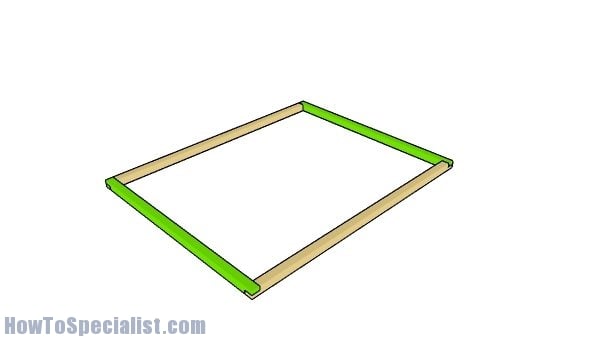
Assembling the base
Select the location for the chicken pen and then lock the beams together tightly with 3 1/2″ screws. Level the surface with attention. Make sure the corners are square and align the edges flush.
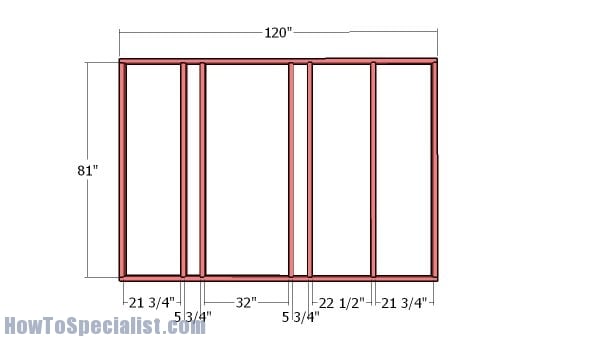
Front wall – frame
Build the front wall for the pen from 2×4 lumber. Cut the components at the right dimensions, as shown in the diagram. Drill pilot holes through the plates and insert 3 1/2″ screws into the studs. Place the studs as shown in the diagram and make sure the corners are square.
Back wall – frame
Build the back wall for the pen from 2×4 lumber. Cut the components at the right dimensions, as shown in the diagram. Drill pilot holes through the plates and insert 3 1/2″ screws into the studs. Place the studs every 24″ on center.
Side walls – frame
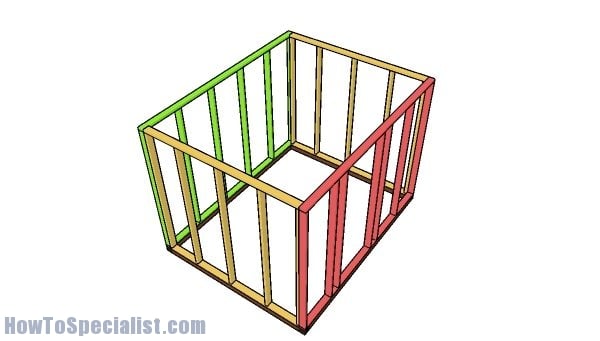
Build the side walls from 2×4 lumber, as well. Use the same techniques described above for a professional result.
Assembling the shed frame
Fit the wall frames to the base beams, as shown in the diagram. Align the edges flush and plumb the walls vertically with a spirit level. Drill pilot holes through the base plates and insert 3 1/2″ screws into the skids. In addition, you need to lock the adjacent walls together tightly with 3 1/2″ screws, after drilling pilot holes.
Fitting the ridge beam
Use 2×4 lumber for the ridge beam and for the supports. Drill pocket holes at both ends of the supports and then lock them into place with 2 1/2″ screws. Fit the ridge beam and then insert 2 1/2″ screws to lock it into place tightly.
Building the rafters
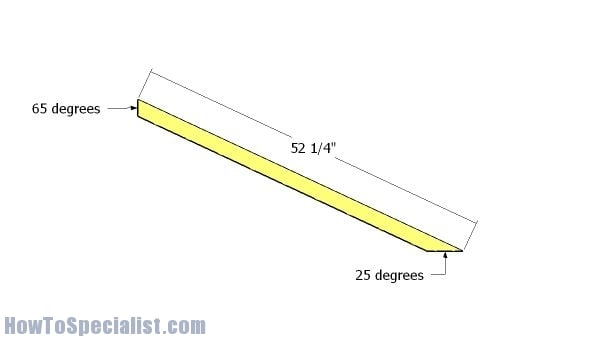
Build the rafters for the chicken pen from 2×4 lumber. Make angle cuts to both ends of the beams, as shown in the diagram.
Fitting the rafters
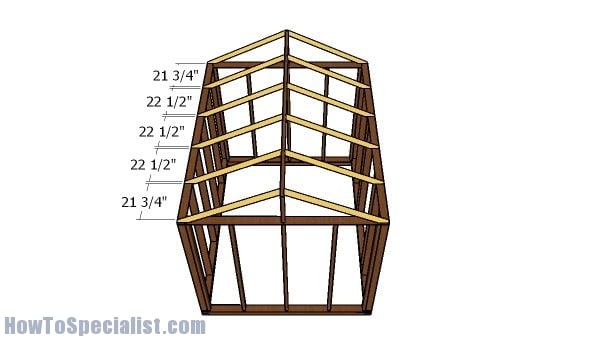
Fit the rafters to the top of the chicken pen every 24″ on center. Drill pilot holes and insert 3 1/2″ screws to lock them to the top ridge and to the side wall frames.
Chicken pen plans
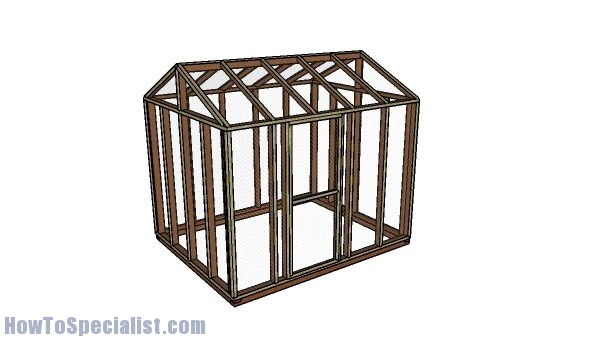
You really need to fit the chicken wire and then lock it into place with 1×2 trims. Read PART 2 of the project to see how to do that.
Chicken pen plans – Back view
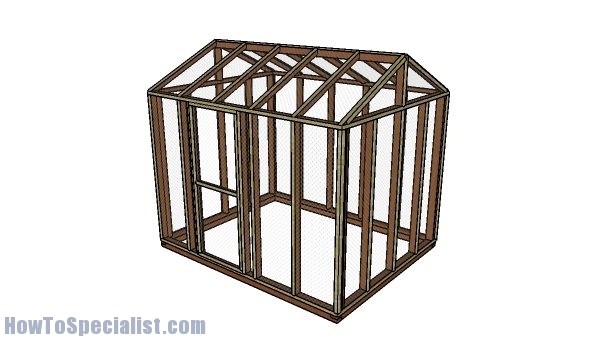
You can adjust the size of the chicken pen really easy. This chicken pen is predatory safe, cheap to build and it looks great. If you like my project, don’t forget to SHARE it on Facebook and Pinterest.
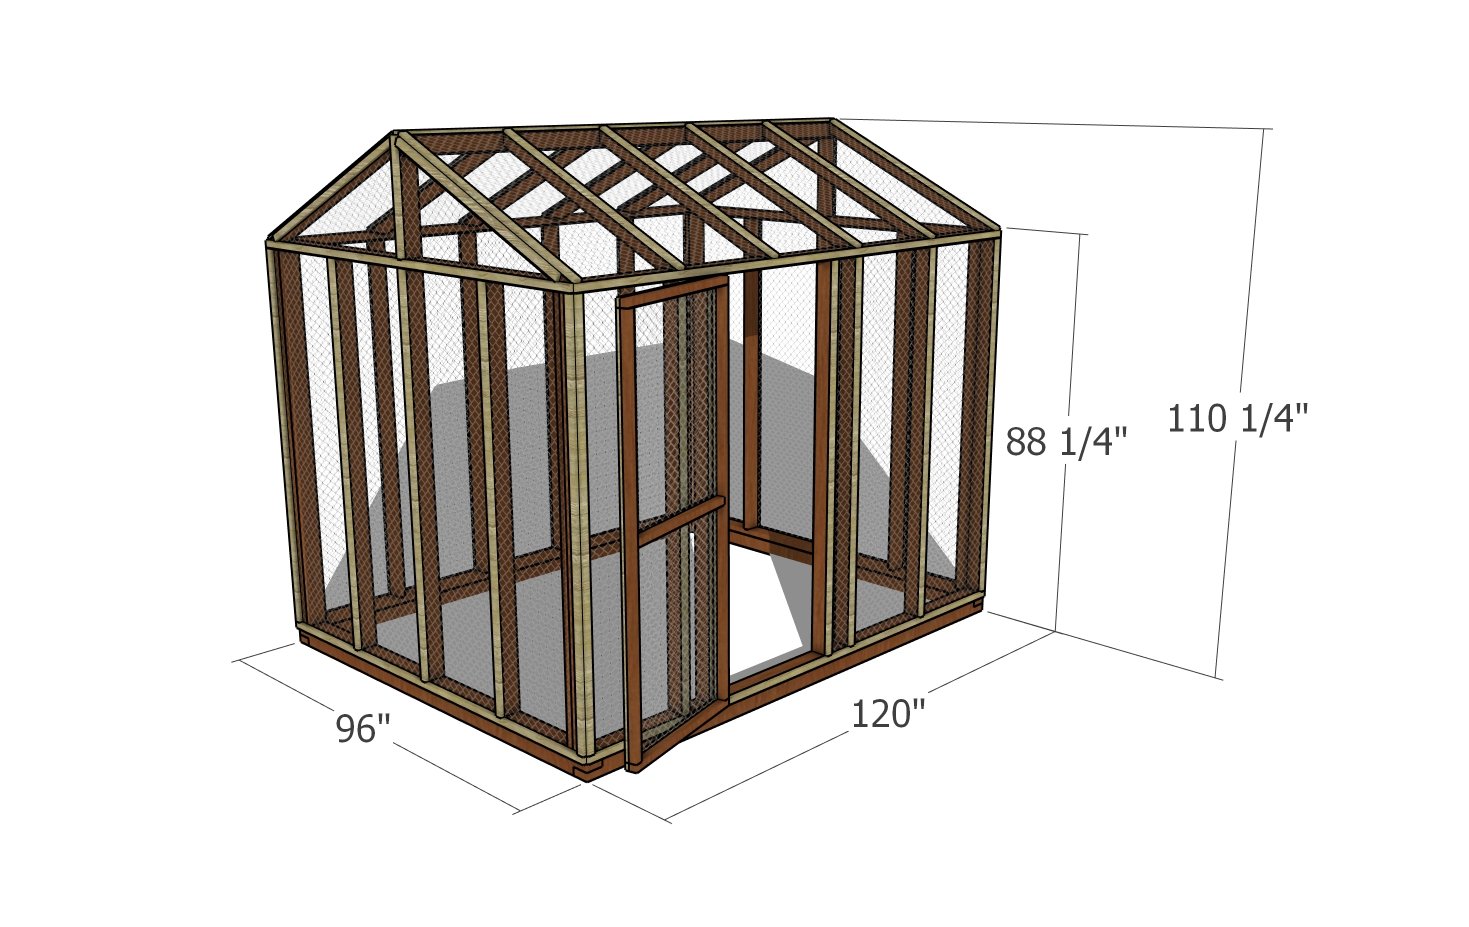
Chicken pen plans – dimensions
Your 10×12 chicken pen is officially ready to welcome its new feathery tenants! Not only have you built a cozy, secure spot for your chickens to strut their stuff, but you’ve also given them the ultimate backyard VIP lounge. Eggs on demand? Yes, please!
Now it’s time to sit back, grab a lemonade (or your favorite beverage), and watch your chickens live their best lives—scratching, pecking, and occasionally plotting their next great escape (just kidding…we think).
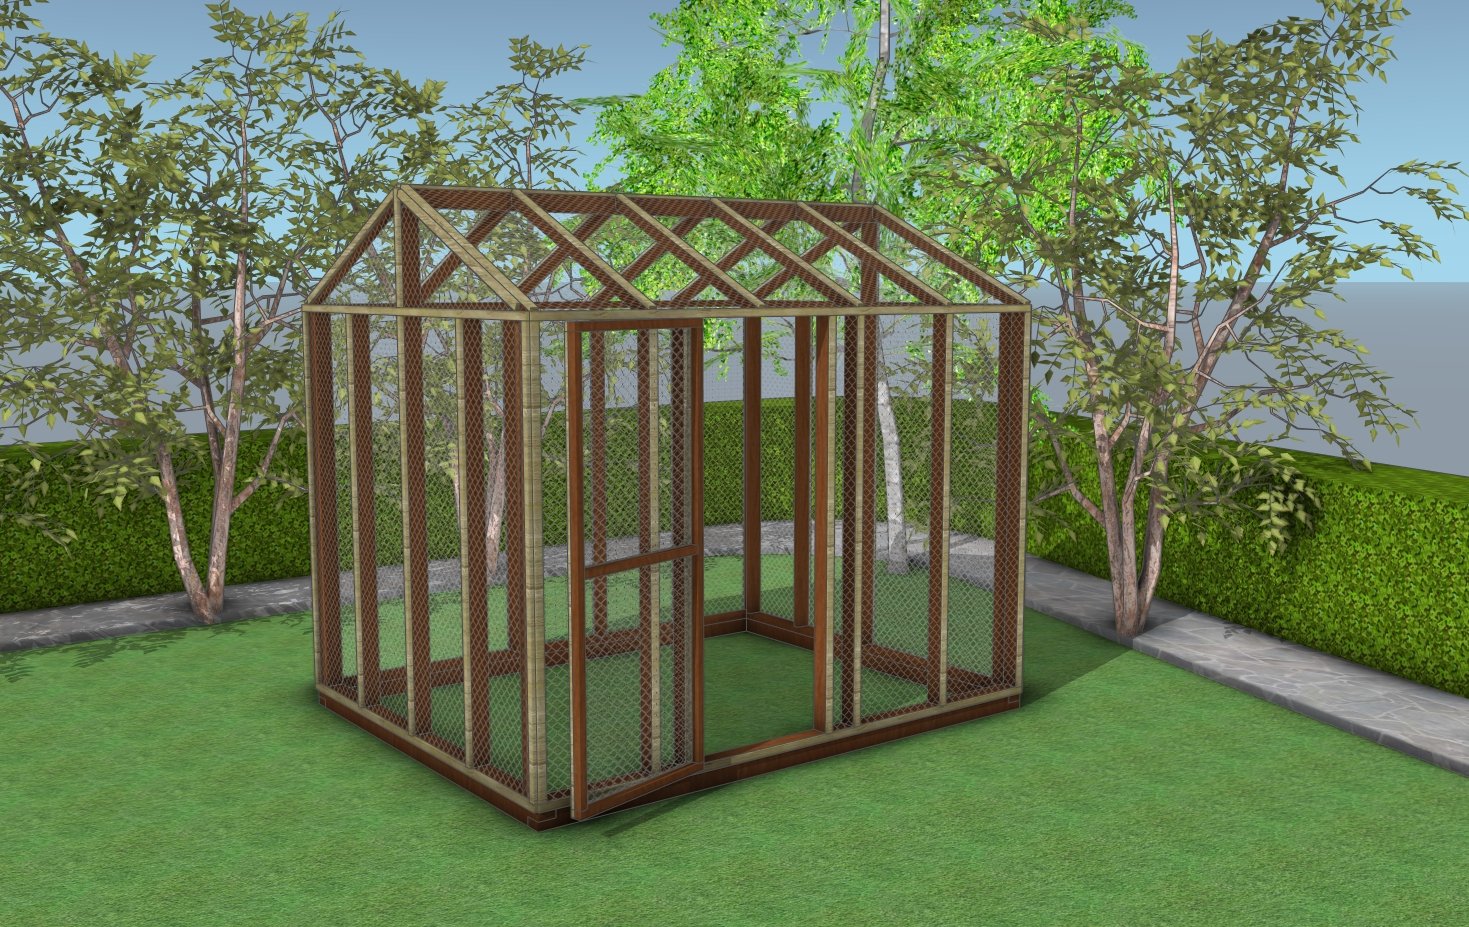
Chicken pen plans
Thank you for reading our project about free chicken pen plans and I recommend you to check out the rest of the projects. Don’t forget to LIKE and SHARE our projects with your friends, by using the social media widgets. SUBSCRIBE to be the first that gets our latest projects.
<< Previous | Next >>

