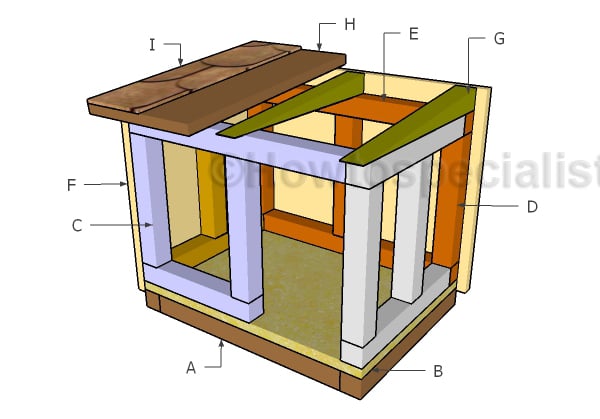
This step by step woodworking project is about how to build a cat house roof. After building the frame of the cat house, you should build the roof so you can seal it from bad weather. The large entrance will allow your favorite fur pets to have an easy access to the shelter. Add a few coats of paint or stain to the components, to protect them from decay.
This cat house can be easily converted to an insulated shelter, if you add insulation sheets to the walls. In this manner, your favorite pets can use the shelter even during the cold winter days. From our experience, we recommend you to invest in quality materials, otherwise the cat house won’t be durable and won’t have a beautiful appearance. Always align the components at both ends and drill pilot holes, to prevent the wood from splitting. See all my Premium Plans in the Shop.
Made from this plan
Building a Cat House Roof
Building-a-cat-house
Materials
- F – 2 pieces of 1/2″ plywood – 14″x15 1/2″ long, 2 pieces – 14″x20 1/2″ long SIDING
- G – 3 pieces of 2×2 lumber – 14 3/4″ long RAFTERS
- H – 1 piece of 1/2″ plywood – 17 1/2″x22 1/2″ ROOF
- I – 5 pieces of tar paper, 5 sq ft of asphalt shingles ROOFING
- 2 1/2″ screws
- 1 1/4″ brad nails
- 1 piece of 2×2 lumber – 8′
- 1/2″ plywood – 48″x96″
Tools
- Safety gloves, glasses
- Miter saw, jigsaw
- Chalk line, tape measure, spirit level, carpentry pencil
- Drill machinery and drill bits
Tips
- Add trims to the cat house
- Secure the walls to the floor frame with galvanized screws
Time
- One Week
Related
Lean to cat house plans
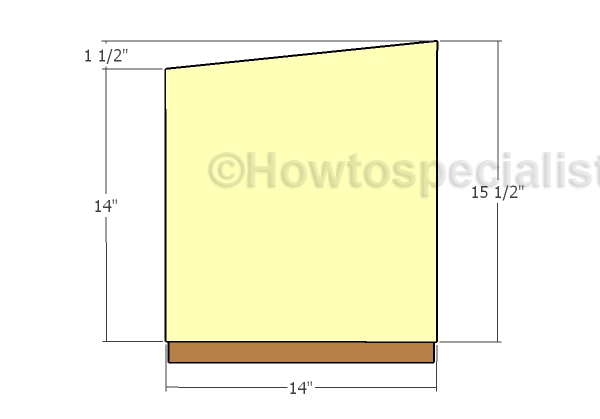
Side-walls
Build the exterior walls for the cat house from 1/2″ plywood. Cut the panels to shape and then secure them into place with 1 1/4″ brad nails.
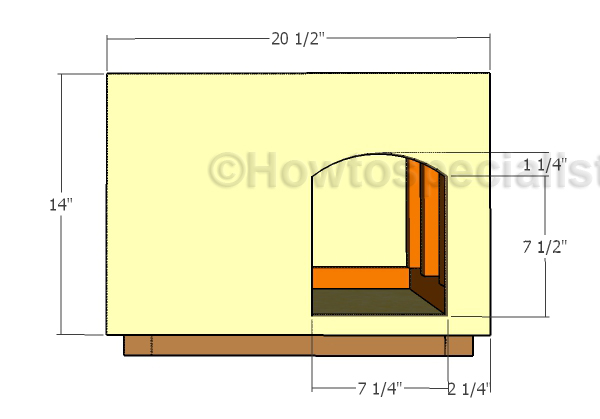
Front-wall
Build the front exterior wall from 1/2″ plywood, as well. As you can easily notice in the diagram, you need to cut out the door opening. Drill a starting hole and then get the job done with a jigsaw. Smooth the edges with sandpaper for a neat result.
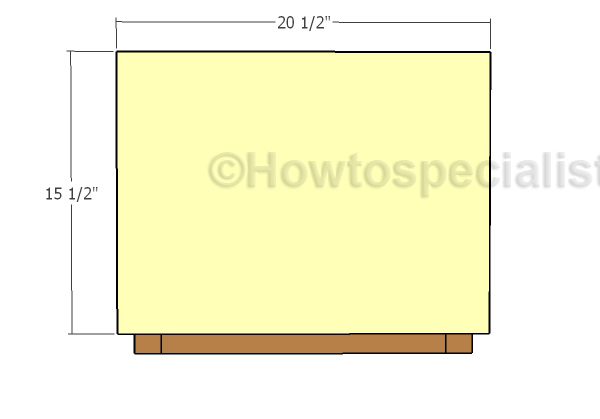
Back-wall
Attach the exterior walls to the back wall, in the same manner described above.
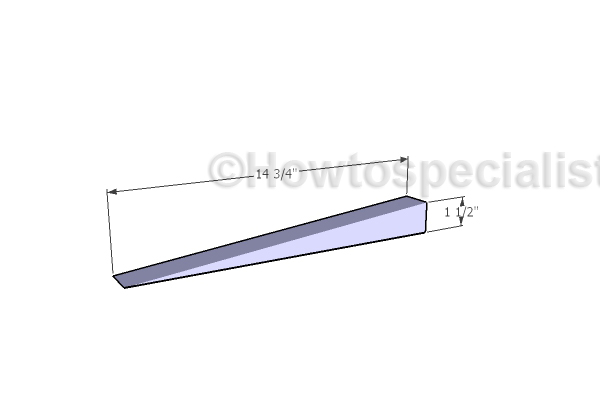
Building-the-rafters
Build the rafters from 2×2 lumber. Make a cut to the beams using the information from the plans.
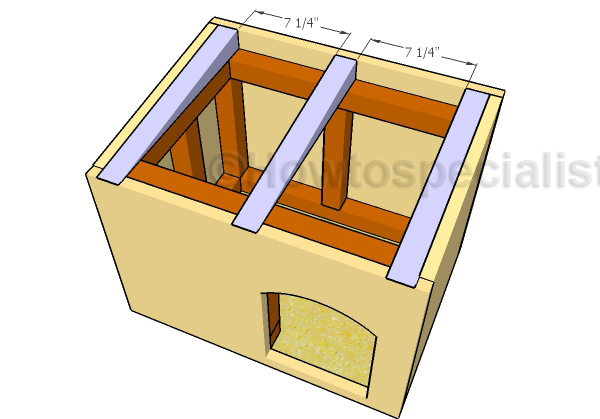
Attaching-the-rafters
Attach the rafters to the top of the cat house. Drill pilot holes and insert 2 1/2″ screws, so you secure them into place tightly.
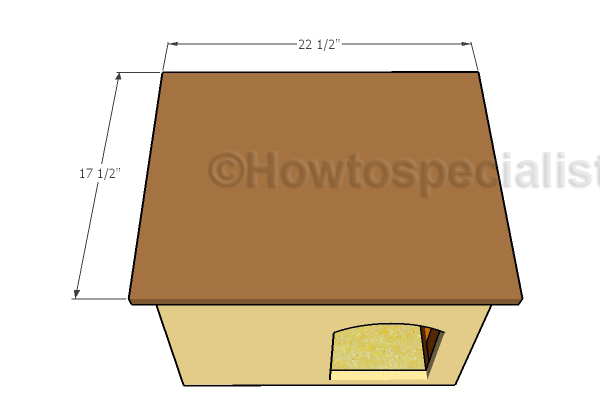
Fitting-the-roof
Use 1/2″ plywood for the roof of the cat house. Center the panel to the roof of the cat house and then secure it to the framing with 1 5/8″ screws.
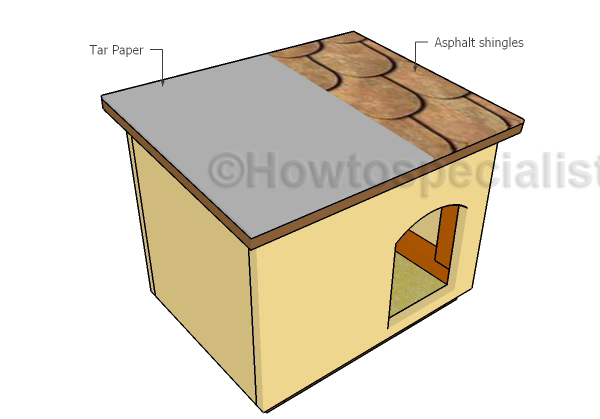
Fitting-the-roofing
Attach tar paper and asphalt shingles to the roof of the cat house. In addition, you need to attach the drip edges to the roof of the cat house, so you drain the water in a professional manner.
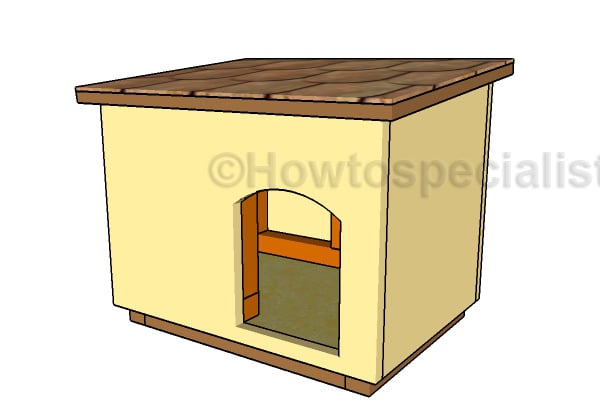
Outdoor-cat-house-plans
Last but not least, we recommend you to take care of the finishing touches. In order to get a professional result, fill the holes and the gaps with wood filler and let it dry out for a few hours. Check if there are protruding screws and fix the issue if necessary. Check out PART 1 of the project, so you learn how to build the frame of the cat house.
Thank you for reading our project about how to build an outdoor cat house roof and we recommend you to check out the rest of the projects. Don’t forget to LIKE and SHARE our projects with your friends, by using the social media widgets.
<< Previous | Next >>