This step by step project is about how to build a small shed. Building a small shed is a basic woodworking project but it will create a significant storage space. Nevertheless, there are a few things that you should take into account before starting the actual construction, such as its size, design or the materials you are going to use. Due to the large amount of information, we have split the project in several parts, so make sure you take a look over all of them.
This article is the second part of the project regarding the construction of a small storage shed. Therefore, we recommend you to check out the first part of the project, as to get accustomed with the techniques required to build the floor of the shed, as well as the rest of the project. Make sure you comply with the local building codes, as there are several requirements you need to comply with.
From our experience, we recommend you to invest in quality lumber, as the components need to be resistant to bad weather. Therefore, buy 2×4 pressure-treated lumber when building the wall frames, as they are highly durable. Always align the components and drill pilot holes, before inserting the galvanized screws into place. Plumb the walls with a level, before locking them to the floor with screws. See all my Premium Plans in the Shop.
Made from this plan
Building a small shed
Materials
- A – 2 pieces of 2×4 lumber – 89″ long, 1 piece – 96″, 2 pieces – 80 1/2″, 4 pieces – 84″, 2 pieces – 42 1/4″ FRONT WALL
- B – 4 pieces of 2×4 – 120″ long, 2 pieces – 113″, 16 pieces – 84″ SIDE WALLS
- C – 2 pieces of 2×4 lumber – 88″ long, 1 piece – 96″, 5 pieces – 84″ BACK WALL
- D – 8 pieces of 5/8” grooved plywood SIDING
- 34 pieces of 2×4 lumber – 8 ft
- 6 pieces of 2×10 lumber – 10 ft
- 8 pieces of 5/8” grooved plywood – 4’x8′
- 2 1/2″ screws
- 1 1/4″ screws
- glue, stain
- wood filler
Tools
- Safety gloves, glasses
- Miter saw, jigsaw
- Chalk line, tape measure, spirit level, carpentry pencil
- Drill machinery and drill bits
Tips
- Use a good miter saw to make the angle cuts
- Drill pilot holes before inserting the screws
Time
- One Week
Related
- Part 1: How to build a shed floor
- Part 2: How to build a small shed
- Part 3: How to build a roof for a shed
- Part 4: How to build a door for a shed
How to build a small shed
The first step of the project is to build the wall frames. As you can see in the image, when building the front wall, you need to leave enough space for the door opening. Frame the door in a professional manner, otherwise you won’t get a professional result.
Afterwards, you should continue the outdoor project with building the back wall. As you can notice in the image, you need to place the studs equally spaced, leaving about 24″ on center. Make sure you assemble the wall frames on a level surface, in order to get a professional result.
Similarly, the side walls should be assembled tightly, after adjusting the size of the components according to the above plans. You should notice the space of the double top plates, as they are designed to create a strong bond with the adjacent walls.
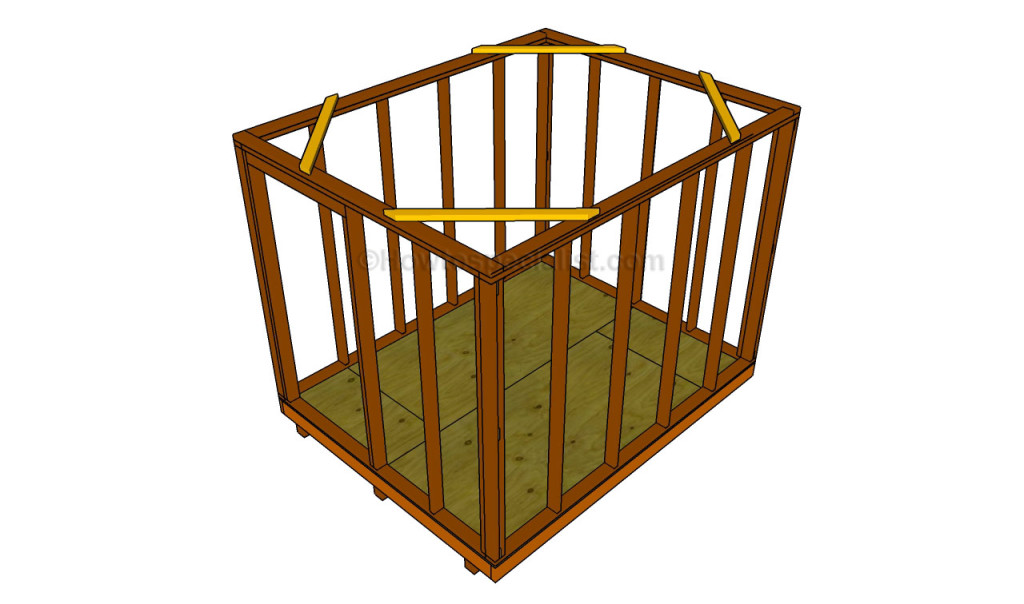
After building the four walls of the storage shed, we recommend you to place them on the floor, as in the image. Lock the side walls with temporary braces, after plumbing them with a good spirit level. Place the front and the back walls into place and lock them to the side walls with 3 1/2″ galvanized screws.
It is essential to drill pilot holes trough the bottom plates and to insert screws into the flooring, to lock the walls tightly and to add rigidity to the structure. Use a spirit level to check if the top plates are perfectly horizontal.
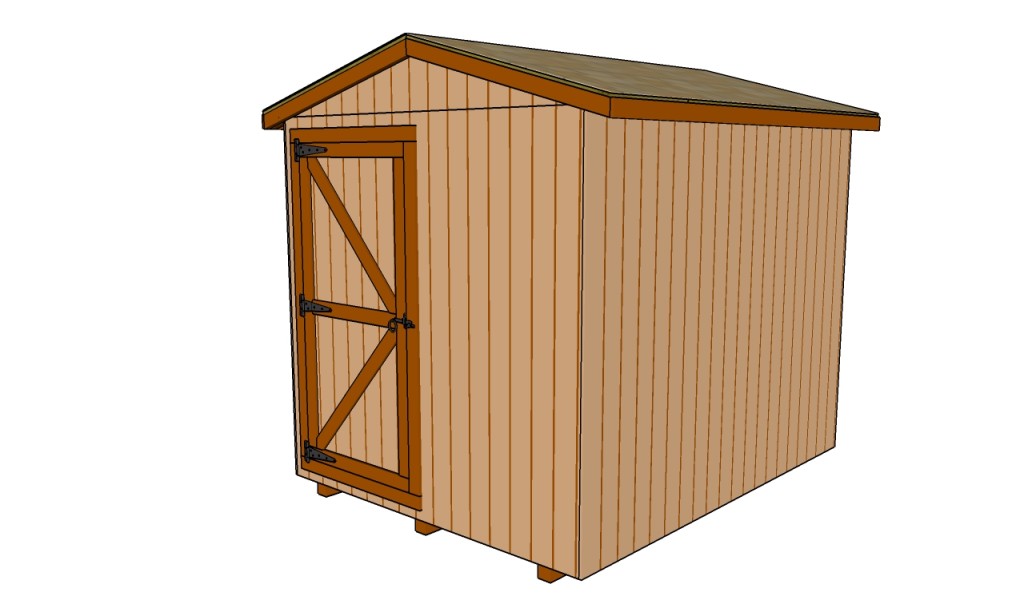
The next step of the woodworking project is to attach the 5/8″ grooved siding to the exterior of the structure. Mark the cut lines on the 4×8′ sheets and adjust their size with a good circular saw. Align the sheets at both ends and lock them to the studs with 1 1/4″ finishing nails, every 6″. Cut out the door opening with great attention, as we will need the piece of siding later on, when making the door for the shed.
Continue attaching the siding sheets to the back of the shed, as in the image. Align the sheets at both ends and insert 1 1/4″ finishing nails into the studs. Using tongue and groove sheets will create proper joints between the sheets.
Attach the siding to both sides of the shed in the same manner described above. It is essential to align the top of the sheets with the bottom plates, otherwise you won’t get a neat appearance.
Last but not least, we recommend you to take care of the finishing touches. In order to get a professional result, fill the holes and the gaps with wood filler and let it dry out for a few hours. Check if there are protruding screws and fix this issue, if necessary.
Thank you for reading our project about how to build a small shed and we recommend you to check out the rest of the projects. Don’t forget to LIKE and SHARE our projects with your friends, by using the social media widgets. SUBSCRIBE to be the first that gets our latest projects.


