This diy step by step article is about wooden playhouse plans free. We show you how to build a wooden playhouse, as to obtain add a dramatic effect to your garden and to create a beautiful place where your kids can play and develop their creativity. In addition, the best part of our free plans is that anyone can get the job done in a professional manner, even though we speak of an inexperienced handyman. Beside several basic woodworking techniques, you need to select the material with great care, take accurate measurements and cut the components properly.
There many plans and designs you can choose from, but you should select the playhouse plans that fit your needs, tastes and budget. Therefore, you should decide from the very beginning if you need a large or a small playhouse, or if you need to build footings or a concrete slab. If the soil structure is weak and if you live in an area with strong winds, you should build a concrete slab. Otherwise, it is enough to pour several footings, every 3-4′, as the provide enough support.
In most of the cases, you don’t need a building permit, but we recommend you to visit the local building department, in order to obtain all the needed information. By consulting the legislation, you will find the space you have to leave from the fence, or the ideal depth of the footings. All these aspects are important when building any structure in your backyard, therefore make sure you comply with the local regulations,
Made from this plan
In order to build a wooden playhouse, you need the following:
Materials
- 2×6 joists
- 2×4 studs
- 4”, 6” long nails / screws
- Tube forms, joist hangers / corner brackets
- Cement, sand, gravel
- 3/4” and 1/2” plywood
- Asphalt shingles
Tools
- Hammer, spirit level, carpentry pencil
- Safety gloves, glasses
- Circular saw, jigsaw
- Posthole digger, Ladder
Tips
- Lay out the playhouse like a pro, using batter boards and string
- Plumb the walls using a spirit level and braces
- Predrill holes with a drill machinery, before inserting the screws
Time
- Two weekends
Free wooden playhouse plans
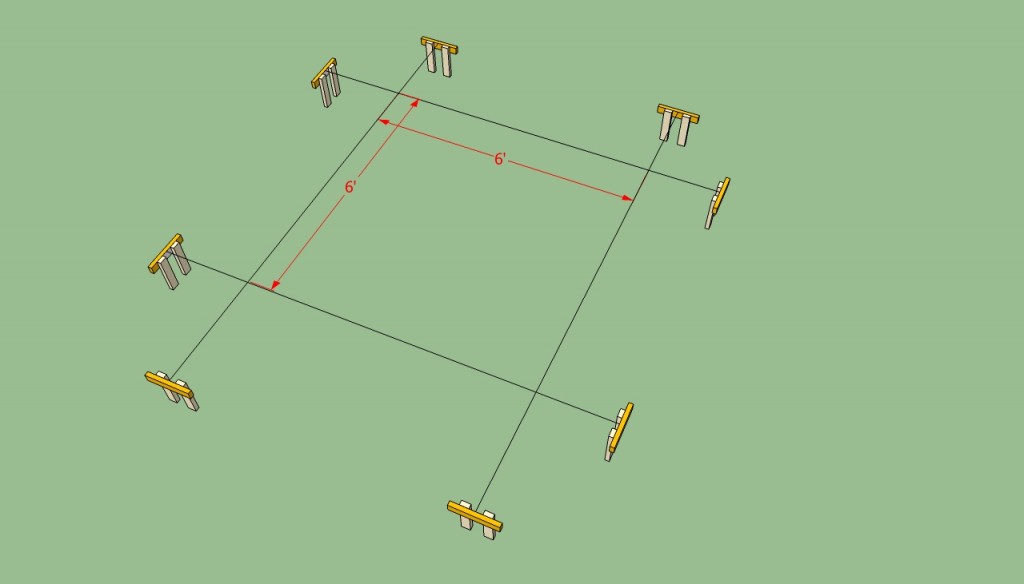
Wooden playhouse layout
The first step of the project is to lay out the wooden playhouse plans properly, in order to obtain a professional result. Therefore, you have to build four batter boards from 2×4 wooden boards and to place them as in the image. Measure the diagonals of the contour, to check if they are equal.
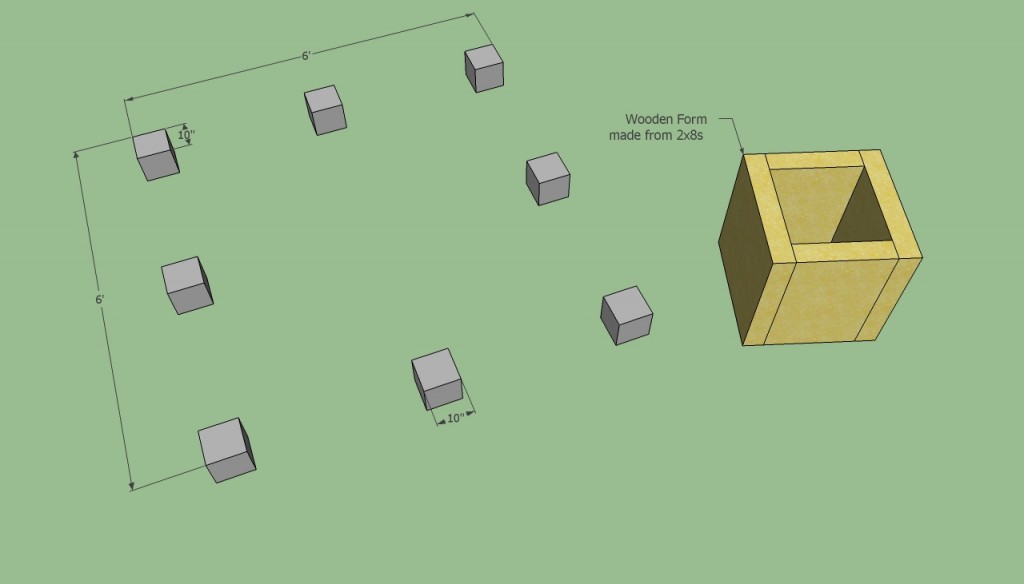
Playhouse footings
Next, build the footings or the foundation of the playhouse, to support the frame of the playhouse’s floor. The first option is to build several concrete footings, as you can see in the image, ideal for light constructions placed in areas protected from strong winds.
Dig 1-2′ holes and place tube forms or build wooden form. Afterwards, pour a 4” layer of gravel and fill them with concrete.
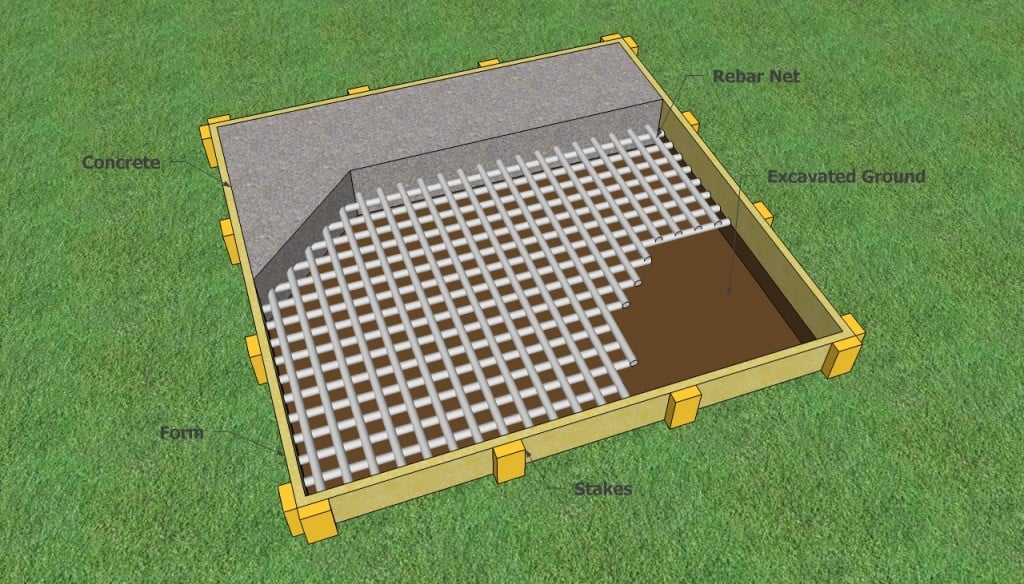
Concrete foundation
On the other hand, if you want to build a sturdy surface to support the wood playhouse, you should take into account pouring a concrete slab. According to to the soil structure, you have to dig about 10” in the ground (at corners you might have to build pillars).
Build a basic formwork and place inside it a rigid structure of rebars. Pour concrete and level it with a straight edge, along the sides of the form.

Playhouse floor joists
You can build the floor of the construction in several ways, but we recommend you to follow our free plans. As you can see in the image, you have to lay the 2×6 sill into place, making sure they are perfectly level and aligned properly.
Next, install the rim beams and the floor joists. Insert galvanized screws through the perimeter beams in the joists and in the bottom plates, to build a rigid frame.
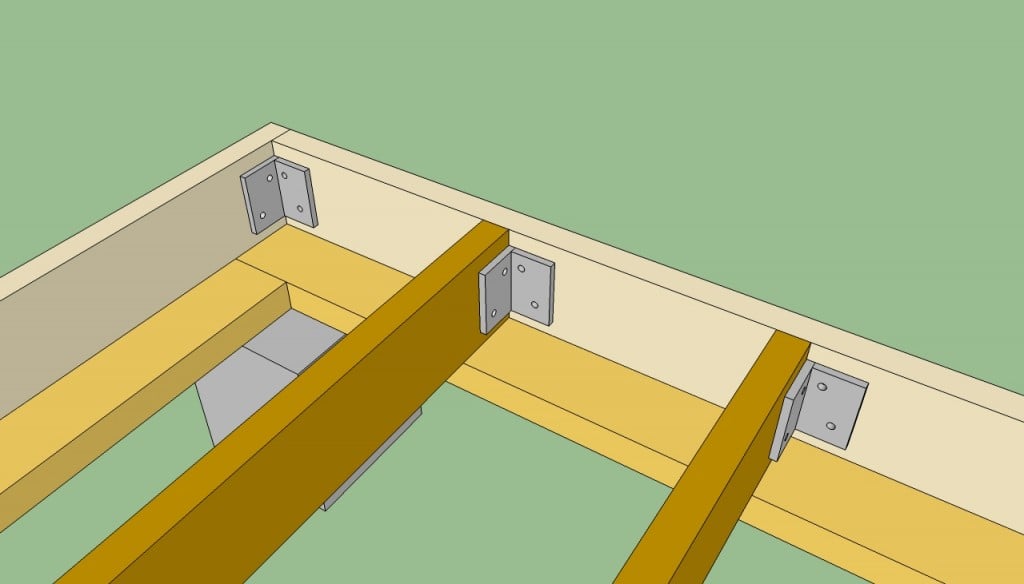
Securing the floor joists
In addition, if you want to do a professional job, we recommend you to use metal hardware, such as corner brackets or joist hangers. Irrespective of your choice, align the joists at both ends before securing them into place, making sure they are equally spaced (16” OC).
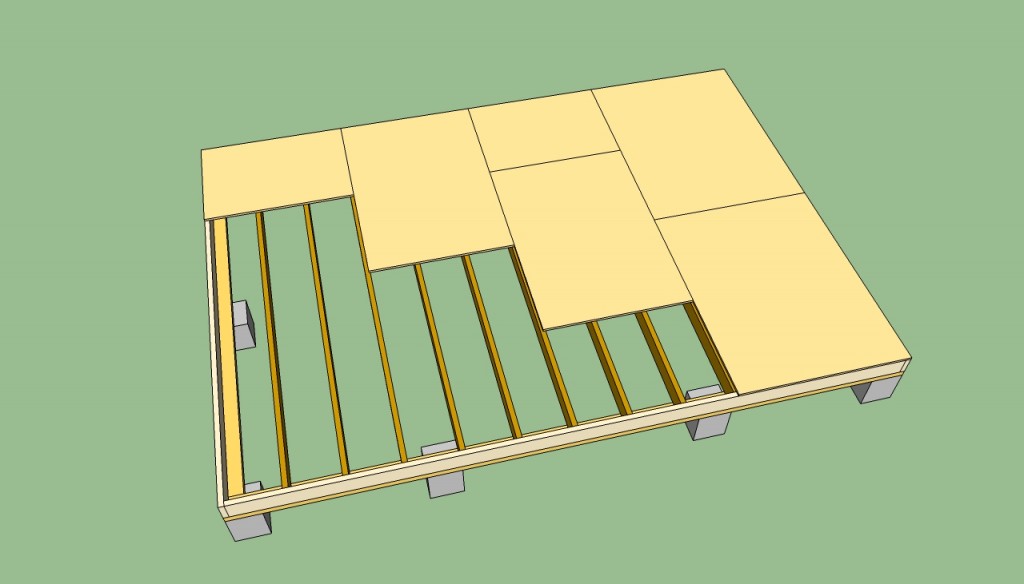
Installing shed’s flooring
Afterwards, you have to fit 3/4” plywood sheets over the beam and lock them into place with decking screws. Work with great care and attention, making sure the sheets are installed properly and aligned on all edges.
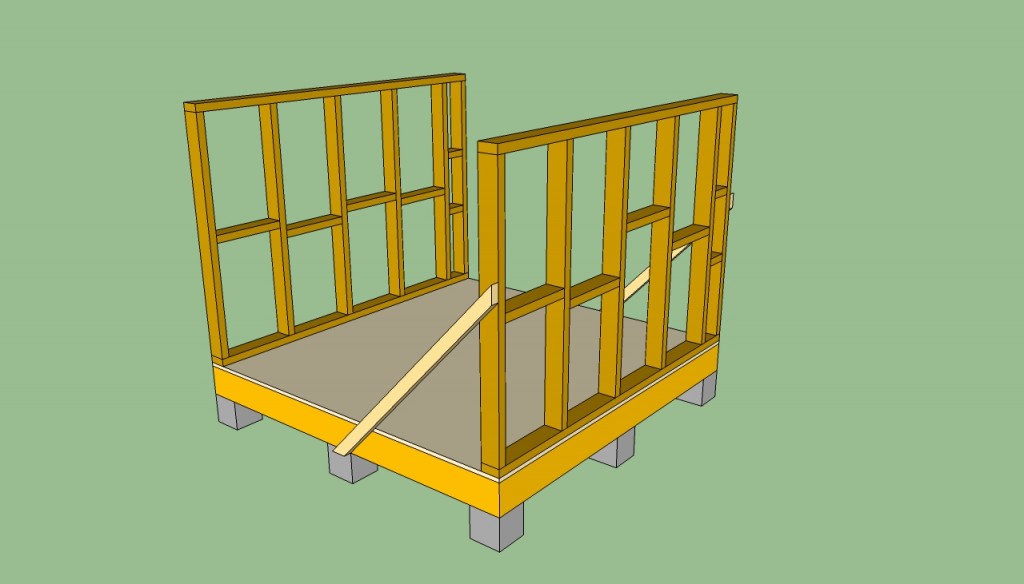
Installing the playhouse walls
Next, you have to build the walls on the ground, and set them into place by inserting 6” screws. In order to get the job done, you have to use 2×4 lumber and a nail gun. In addition, we recommend you to cut the lumber to the right dimension, using a circular saw.
As you can see in the image, you have to place the wall frames into place, plumb them with a spirit level and lock them with several 2×4 braces.
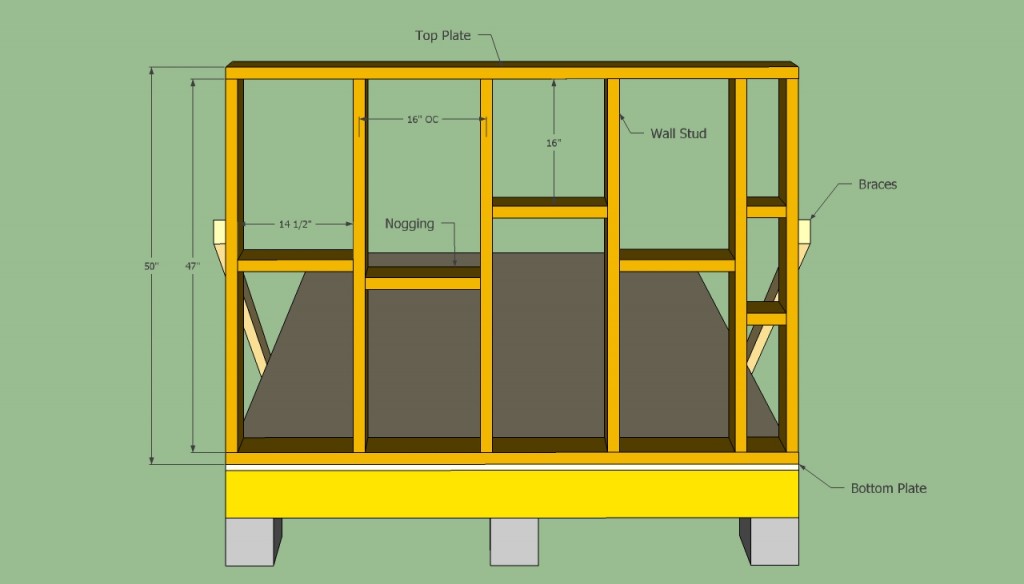
Playhouse wall frame
Use our wooden playhouse plans free to build the walls, but you should know that you could adjust these dimensions to fit your needs and tastes. Nevertheless, we recommend you to place the studs every 16” OC, as to obtain a rigid structure.
Don’t forget to fit 2×4 nogging and to leave enough space to install the windows. When installing the wall frame into position, drive 6” screws trough the bottom plate directly in the rim joists.

Playhouse front wall plans
As you can see in the image, you also have to leave enough space to fit a door and possibly another window, if you want to let more light in the playhouse.

Installing siding boards
The next step of the project is to install the exterior siding boards. The procedure is straight forward, but you also have to read carefully the manufacturer’s instructions, in order to install the boards accurately.
Before installing the boards, you have to fit tar paper, as to keep the moisture away. Use appropriate nails/screws to secure the siding boards into place.
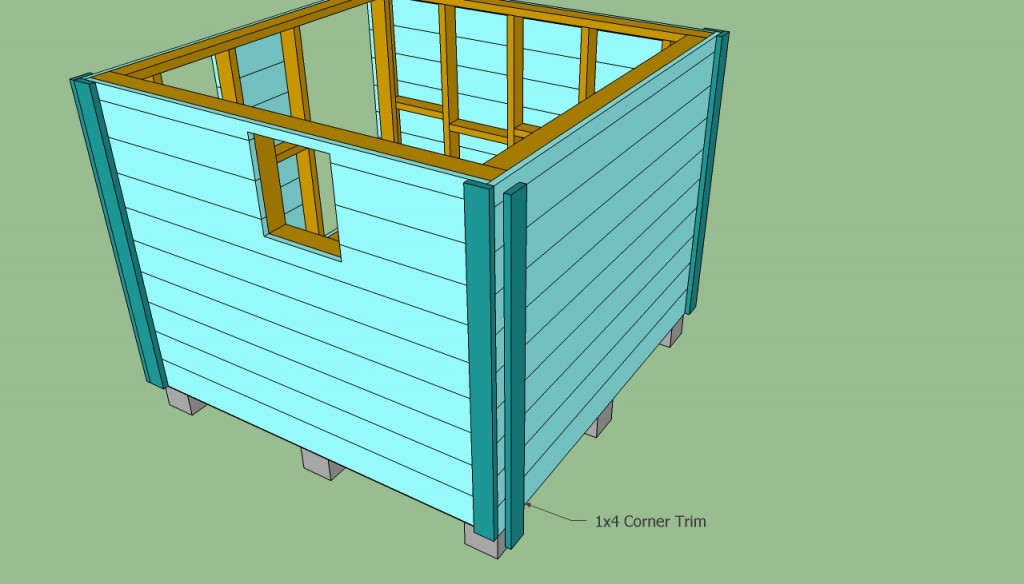
Installing Corner Trim
If you want to obtain a neat look, we recommend you to cover the corners of the wooden playhouse plans with 1×4 trim. Attach the trims to the walls, by using finishing nails.
How to playhouse plans
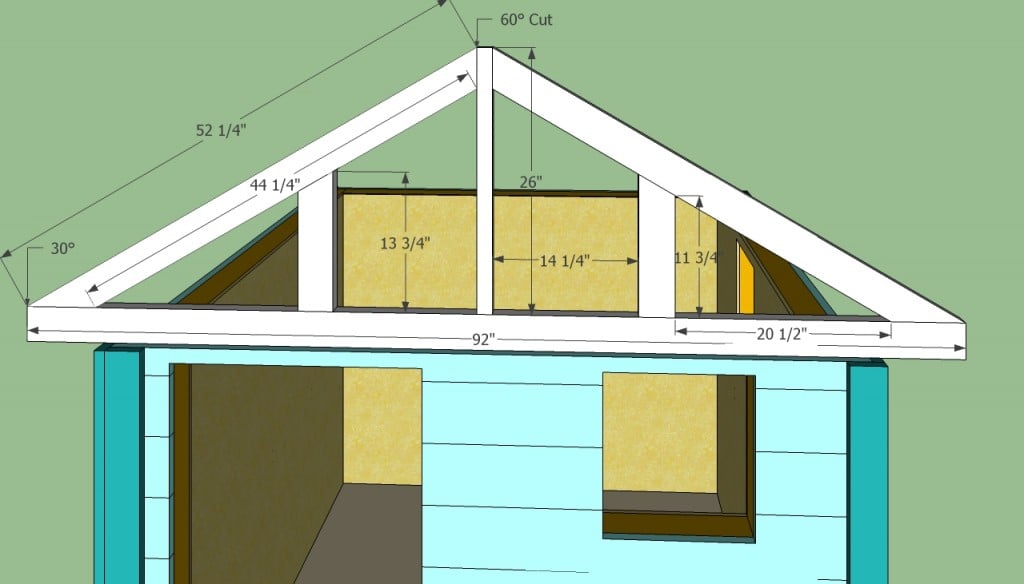
Playhouse roof plans
In order to build a strong roof structure, we recommend you to assemble several A-shaped trusses, using our free plans. Therefore, you have to use 2×4 lumber and to cut the main components, before building the trusses. These plans are for the front and back end trusses.
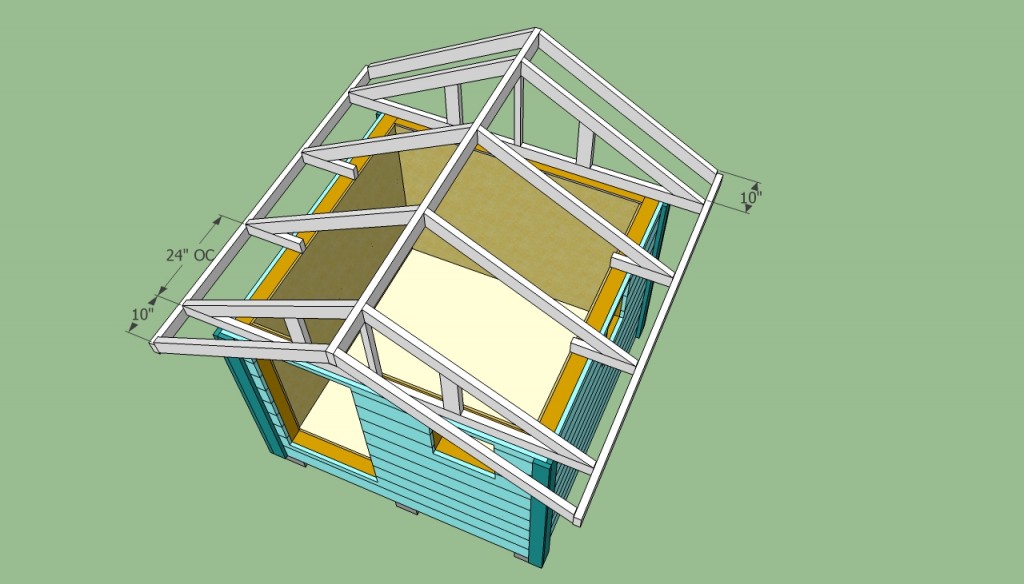
Building the roof of the wooden playhouse
Next, you have to place the trusses into place, every 16” or 24” OC, as you can see in the image. Ask a friend to lift the trusses into place and secure them into place with 6” screws, trough the bottom plate in the wall frame.
In order to protect the playhouse from rain and to obtain a neat look, we recommend you to install trusses that overhang the construction at least 10” on both ends.
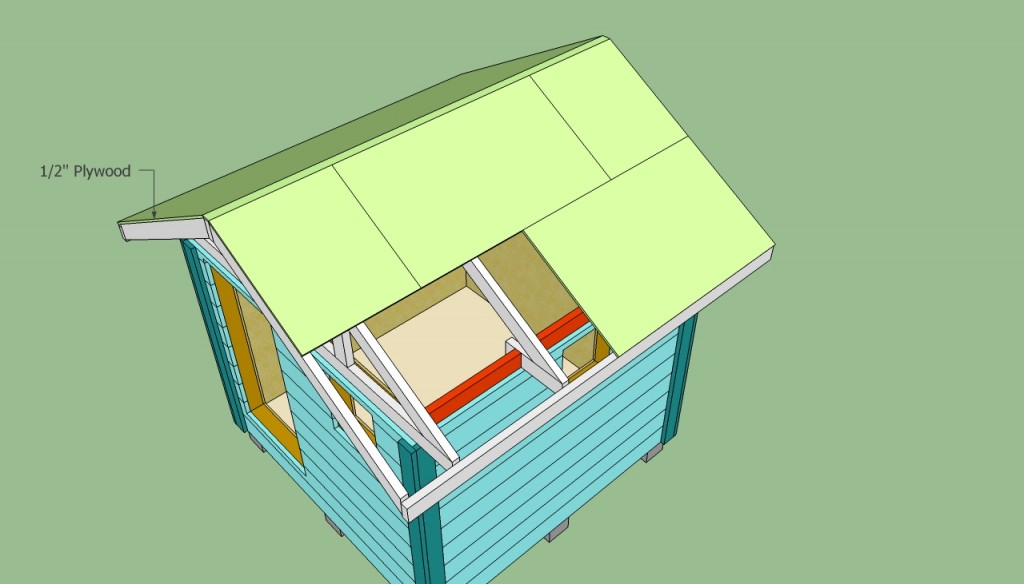
Covering the roof with plywood
Afterwards, install the roofing sheets (3/4” tongue and groove plywood) and secure them into place with 2.5” steel nails. Don’t forget to insert nails every 6” along the rafters. Before driving in the nails, you have to align the sheets accurately
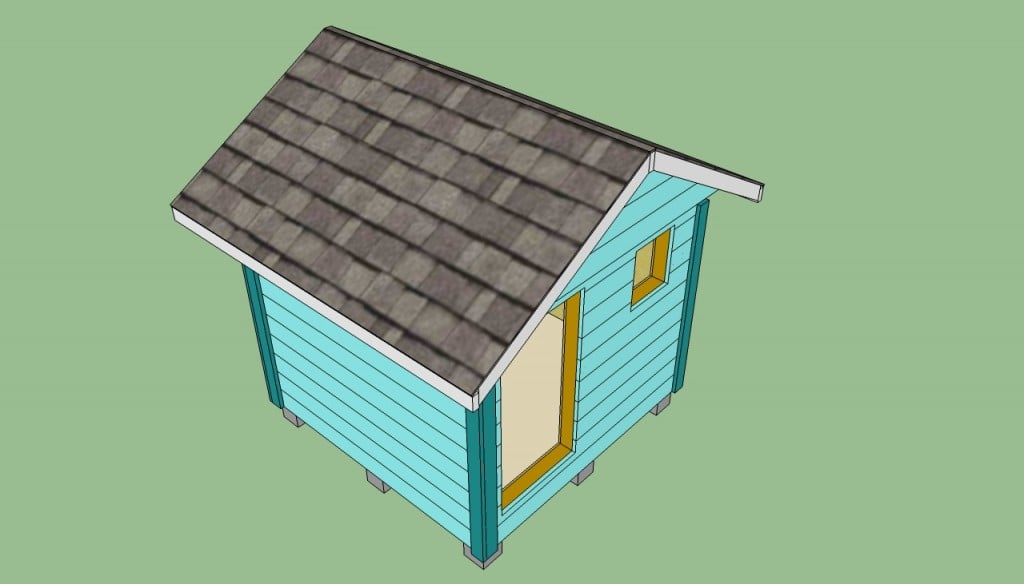
Installing asphalt shingles
Next, you have to attach roofing felt and the asphalt shingles, covering the whole surface, including the trims and fascias. Next, install the shingles from the bottom left corner of the roof, on both sides. The shingles should overhang the edge of the roof by at least 1/2, to drain water properly. Install the shingles with a nail gun, using 1 1/4 roofing nails.
Snap a chalk line at the top of the shingles, to use it as a guideline for the rest of the roof.
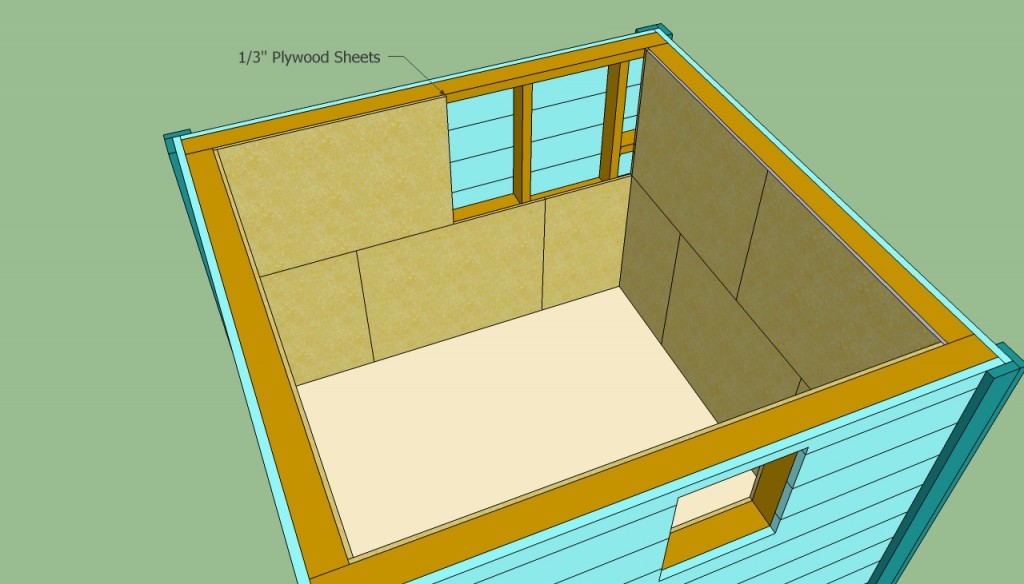
Installing interior cover
After you have built the roof of the playhouse, we recommend you to install 1/3” plywood on the interior faces of construction. In this manner, the playhouse will have a nice look and the kids won’t hurt because of the wall studs.
After you have installed the sheets into place, you could paint the wall with protective varnish or paint, in order to avoid wood decay and to obtain a neat look.
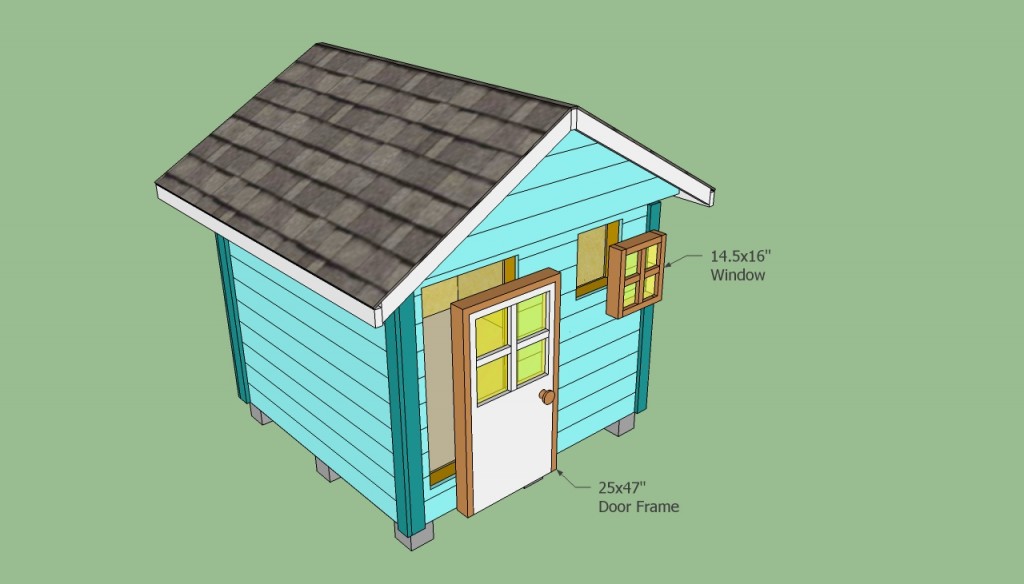
Installing the door and window
After you installed the plywood on the interior of the wooden playhouse plans, you have to fit the door and the windows. If you have followed the plans accurately, these components should fit easily, otherwise you could use a jointer to adjust their size.
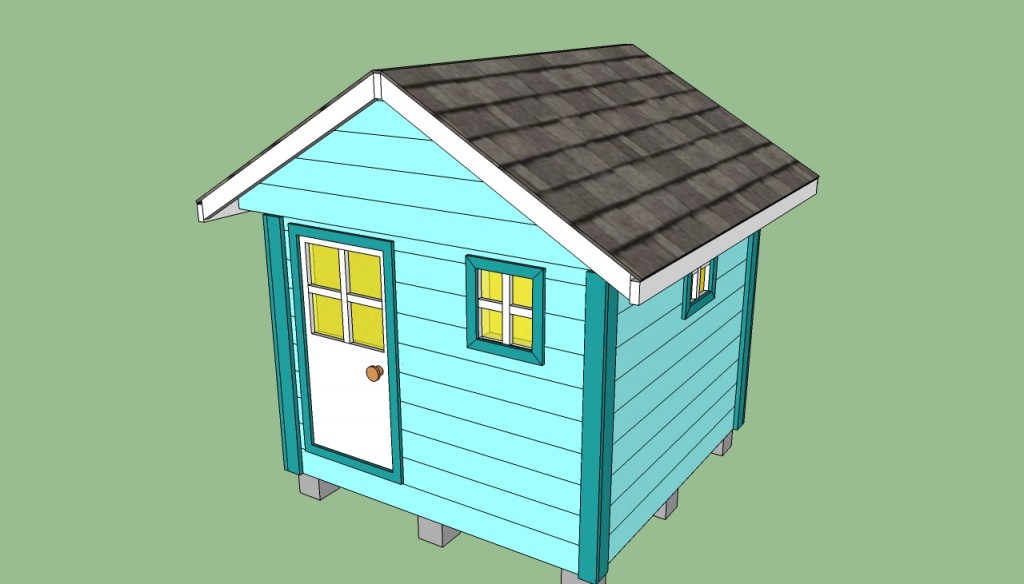
Wooden playhouse plans
Once you have installed the front door and the windows, there are still several finishing touches that remain to be done. Therefore, you should install the fascias and the skirting, in order to obtain a neat look
Thank you for reading our article about wooden playhouse plans free and we recommend you to check out the rest of our projects. Don’t forget to share our projects with your friends, by using the social media widgets.
