This step by step diy project is about how to build a gambrel roof shed. Building a roof for a barn shed with loft will add character to your project and will increase the storage space in your backyard. Follow the instructions and don’t forget to check out the rest of the related projects, if you want to learn how to build the frame of the shed, as well as how to take care of the finishing touches.
If you really want to use the space of the shed efficiently, we recommend you to create a basic loft. In order to get the job done like a professional, you need to fit 2×4 supports at the bottom of the trusses and lock them into place with 2 1/2″ galvanized screws. Work with great care and attention, as to prevent costly mistakes. Plan every aspects of the construction, starting with the materials used, up to the size of the components.
Moreover, it is also important to use quality materials, if you want to build a durable roof. In addition, drill pilot holes trough the components before inserting the galvanized screws, to prevent the wood from splitting. Always align the components at both ends before locking them into place with screws. Plumb the trusses with a spirit level and place them every 24″ on center. Don’t forget to check out the rest of the shed projects HERE. See all my Premium Plans in the Shop.
Made from this plan
In order to build a gambrel roof shed, you need the following:
Materials
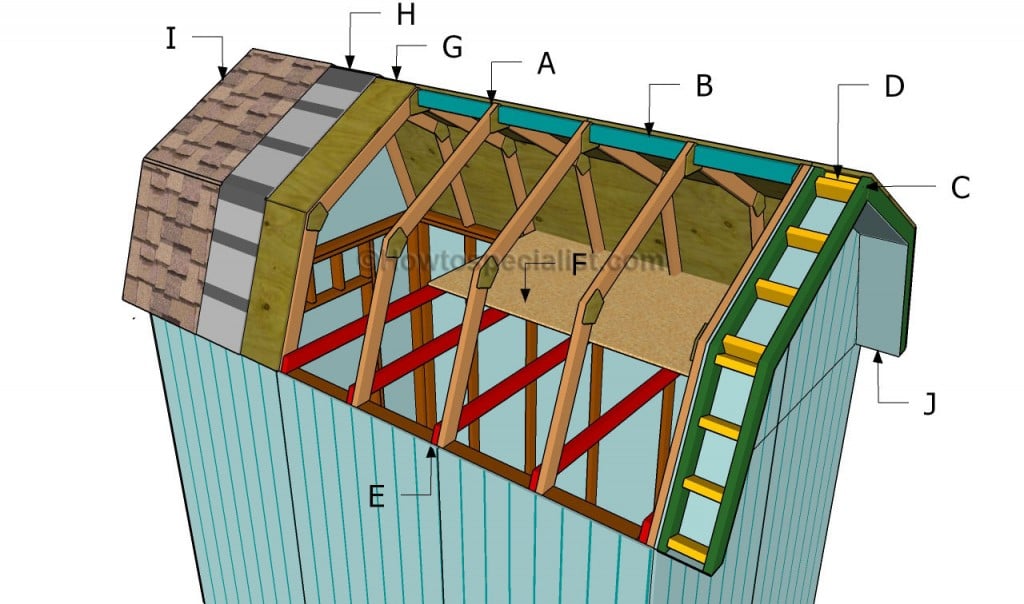
- A – 14 pieces of 2×4 – 36″, 14 pieces of 2×4 lumber – 41 1/4″ TRUSSES
- B – 6 pieces of 2×4 – 22″ long BLOCKINGS
- C – 4 pieces of 2×4 lumber – 36″, 4 pieces of 2×4 lumber – 41 1/4″ OVERHANGS
- D – 32 pieces of 2×4 – 7″ BLOCKINGS
- E – 5 pieces of 2×4 – 96″ SUPPORTS
- F – 2 pieces of 3/4″ tongue and groove plywood – 4’x8′ LOFT
- G – 7 pieces of 3/4″ tongue and groove plywood – 4’x8′ DECKING
- H – 200 sq ft of tar paper UNDERLAYMENT
- I – 200 sq ft of asphalt shingles ROOFING
- 26 pieces of 2×4 lumber – 8 ft
- 9 pieces of 3/4″ tongue and groove plywood – 4’x8′
- 200 sq ft of tar paper, 200 sq ft of asphalt shingles
- 2 1/2″ screws, 4d nails
- stain, putty
- hinges + latch
- tar paper, asphalt shingles
Tools
- Safety gloves, glasses
- Miter saw, jigsaw
- Chalk line, tape measure, spirit level, carpentry pencil
- Drill machinery and drill bits
Tips
- Build a loft to increase the storage space
- Secure the walls temporarily with braces
Time
- One Week
Related
- Part 1: How to build a barn shed
- Part 2: How to build a gambrel shed roof
- Part 3: How to build a shed door
Building a gambrel roof shed
How to build a gambrel roof shed
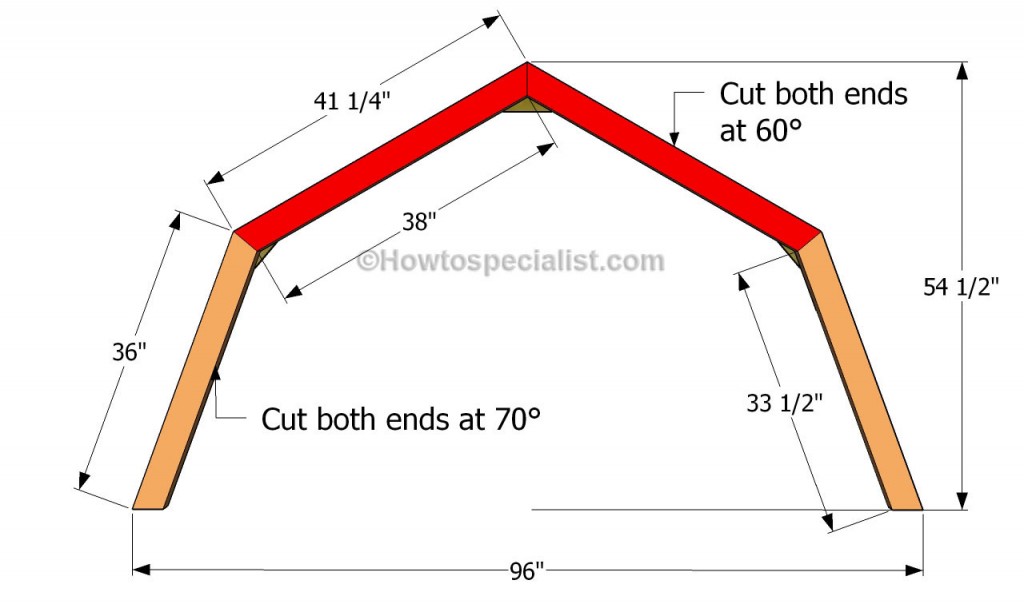
The first step of the project is to build the roof trusses. As you can easily see in the plans, you need to cut the components at the right size and to cut their ends at the right angle. Use a miter saw to get the job done quickly and accurately, but you can also use a circular saw. After locking the components together with screws, you need to reinforce the joints by installing 1/2″ plywood gussets.
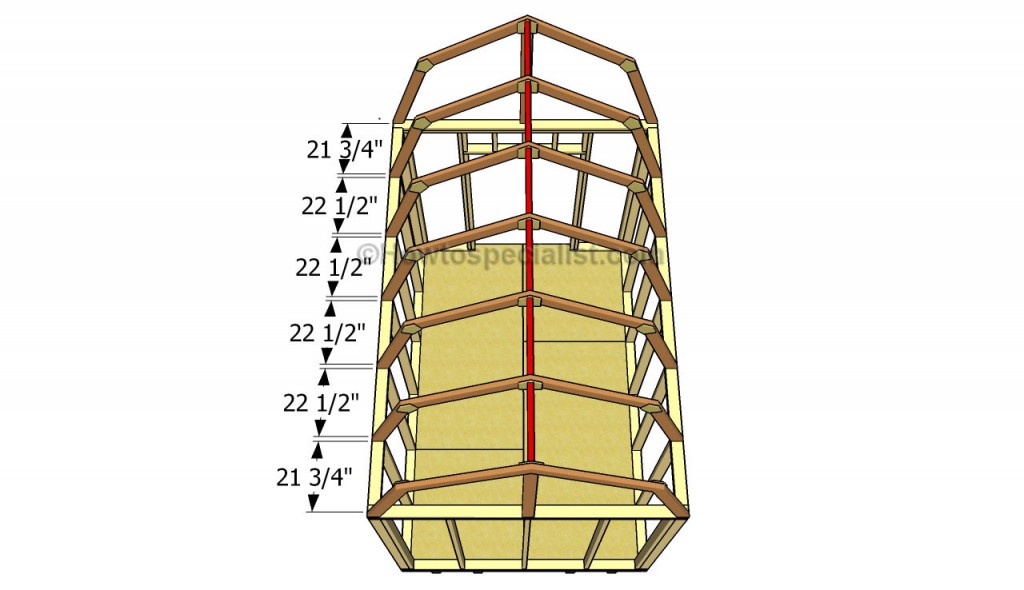
Attach the trusses on top of the plates and lock them into place with galvanized screws, after plumbing them with a spirit level. It is essential to place the trusses every 24″ on center and to align them at both ends, if you want to get a professional result. Work with attention and with great care and fit 2×4 blockings between the trusses, in order to enhance the rigidity of the gambrel roof shed.
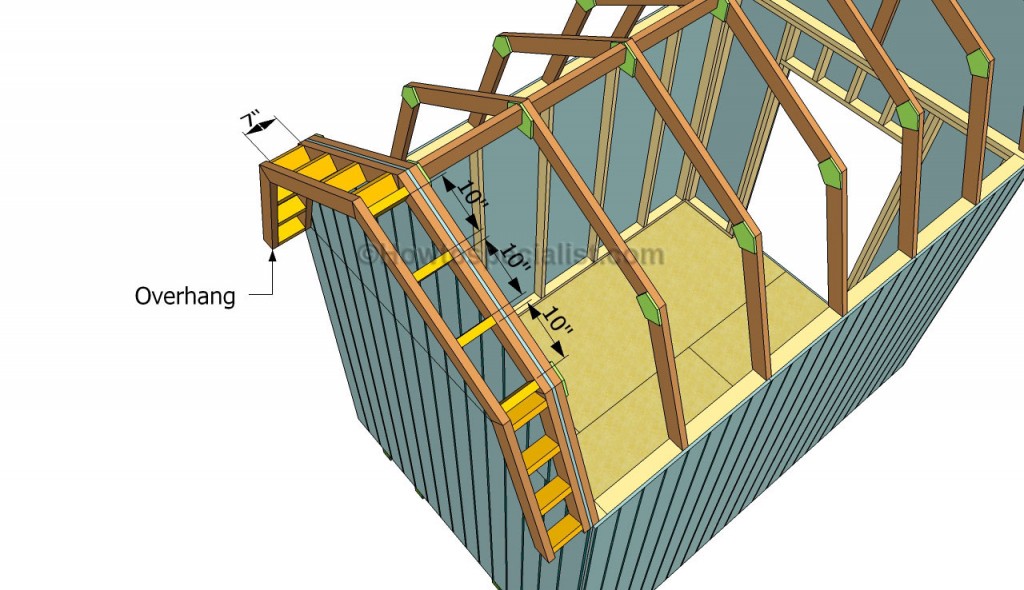
Attach the gambrel ends to the front and to back of the shed, using 5/8″ grooved plywood. Afterwards, we recommend you to install the front and back overhangs to the shed, as to add style to your construction and to protect the components from decay. As you can notice in the image, you need to use regular trusses and to install 7″ blockings, as to get a 10″ overhang. Attach the components to the gambrel ends and secure them to the framing with 3 1/2″ galvanized screws, after drilling pilot holes.
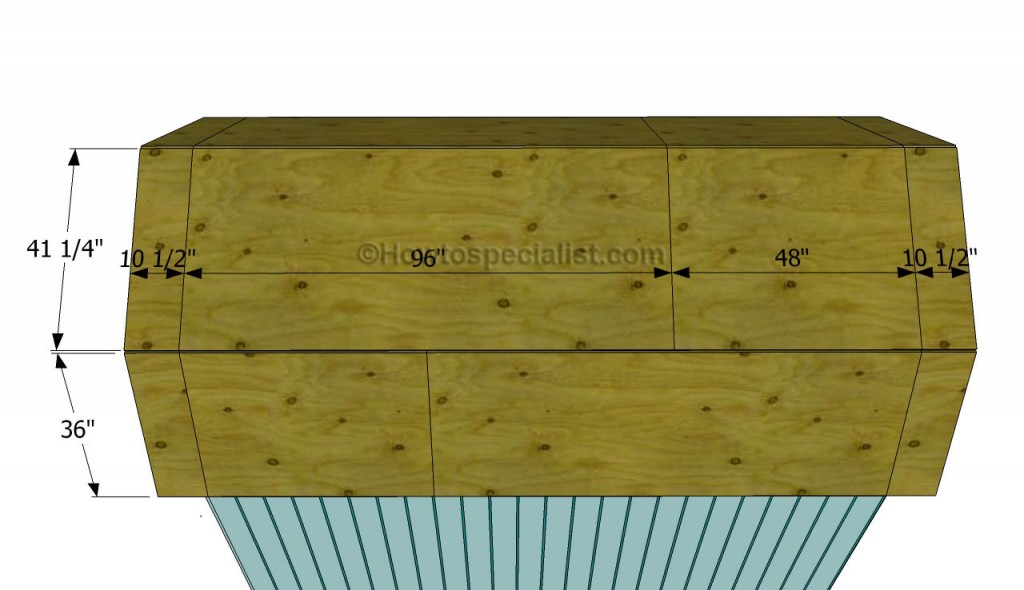
Attach 3/4″ tongue and groove plywood to the roof trusses, following the pattern shown in the image. If you want to get a professional result, we recommend you to adjust the sheets to the right size, using a circular saw with a sharp blade. Place the sheets to the trusses and lock them into place with 1 1/2″ screws / nails, every 6-8″. Cover the other side of the roof shed, in the same manner described above.
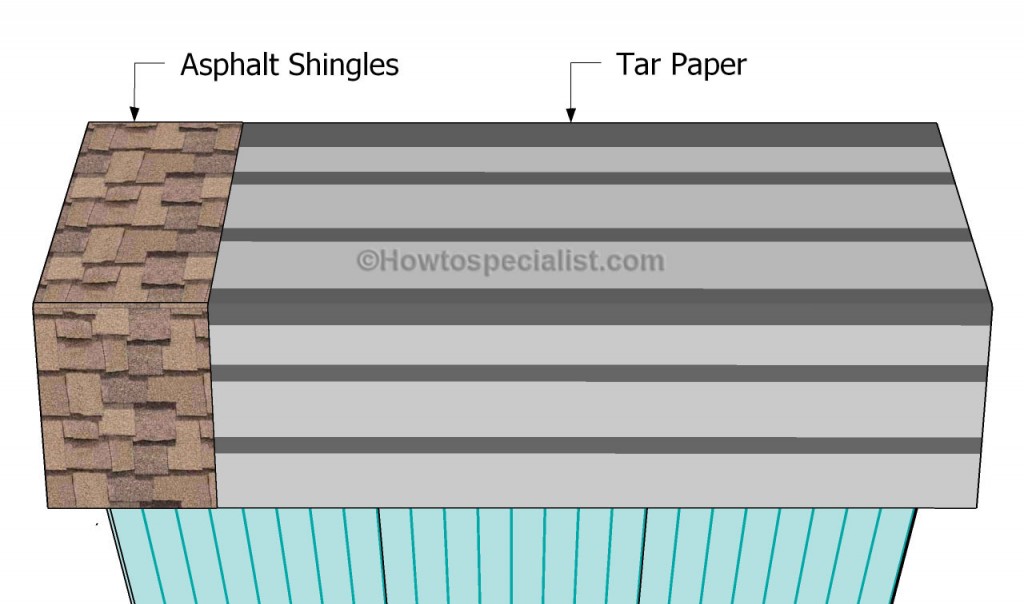
Cover the roof of the shed with roofing felt, making sure the strips overlap at least 2″. Secure the tar paper to the plywood sheets with roofing staples. In addition, cut a 12″ piece for the top ridge. Fit the side drip edges over the roofing felt, while the bottom drip edges should be fit under. Place a starting course at the bottom of the roof, before installing the asphalt shingles. Always read the manufacturing instructions before starting the installation, as there are several aspects that differ.
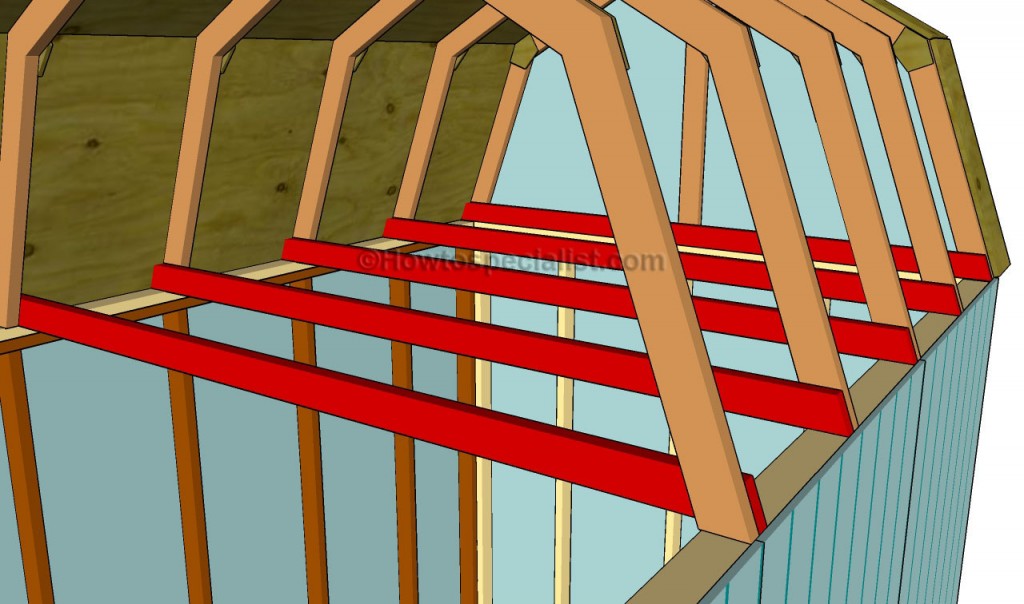
If you really want to increase the storage space of the shed, you need to build a loft. Therefore, attach 2×4 rafters to the bottom of the trusses, as in the image. Drill pilot holes and insert several 3″ screws into the trusses, at both ends.
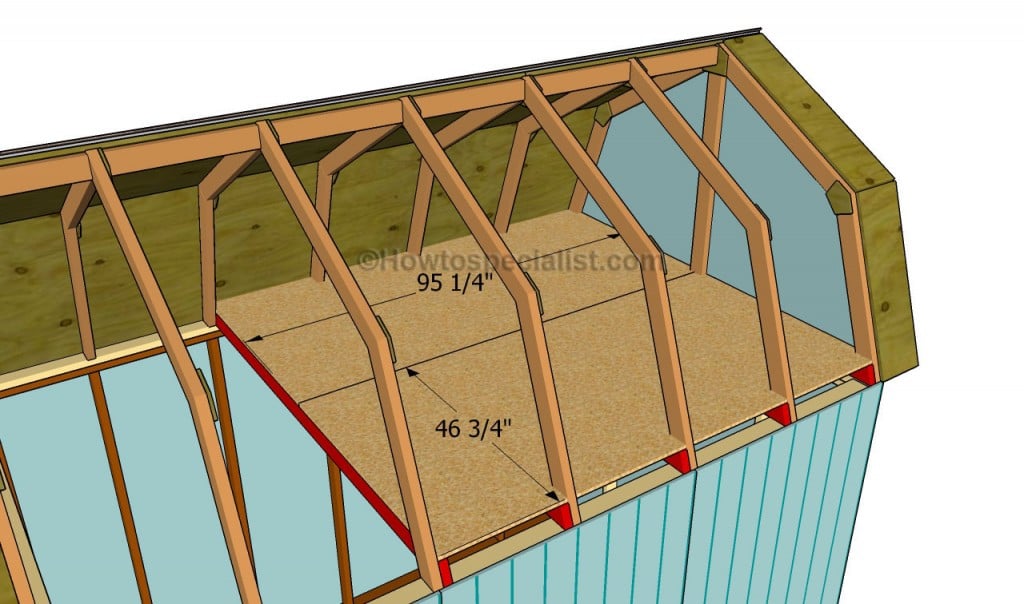
Adjust the size of two 3/4″ plywood sheets and attach them on top of the bottom rafters. Make sure you cut notches around the trusses before laying them into place. Insert 1 1/2″ screws / nails trough the sheets into the rafters, if you want to get a professional result.
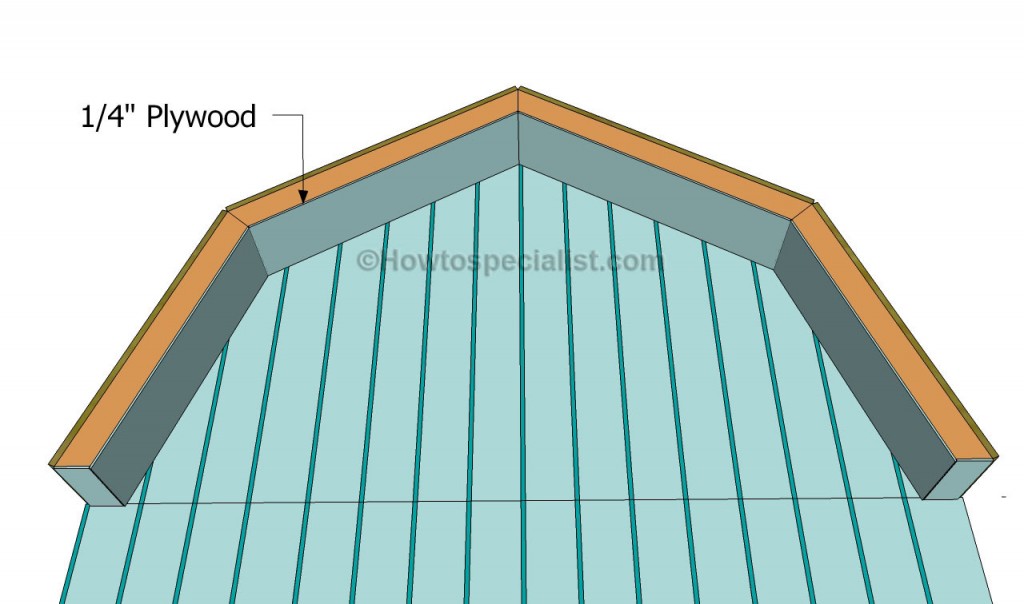
If you want to add add style and character to the gambrel roof shed, you need to cut several pieces of 1/4″ plywood and attach them to the overhangs components. Use 1 1/2″ finishing nails to lock the plywood into place. Continue the project by fitting the soffit on the opposite side of the shed.
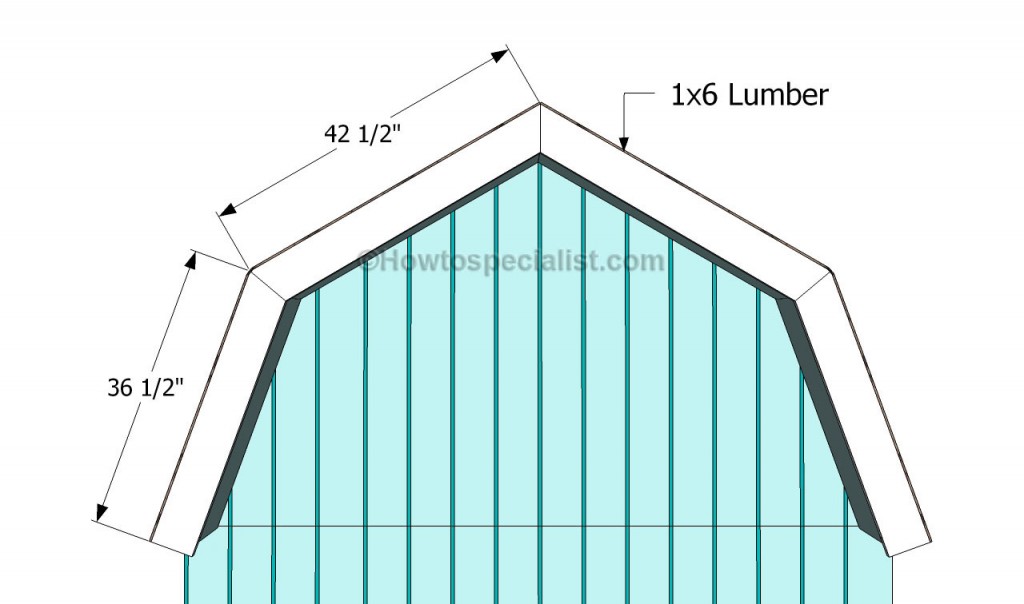
Installing the trims to the front and back faces of the shed is one of the last step of this diy project. As you can notice in the image, you need to use 1×6 lumber and 1 1/2″ finishing nails. Attach the trims to the end rafters and lock them into place tightly.
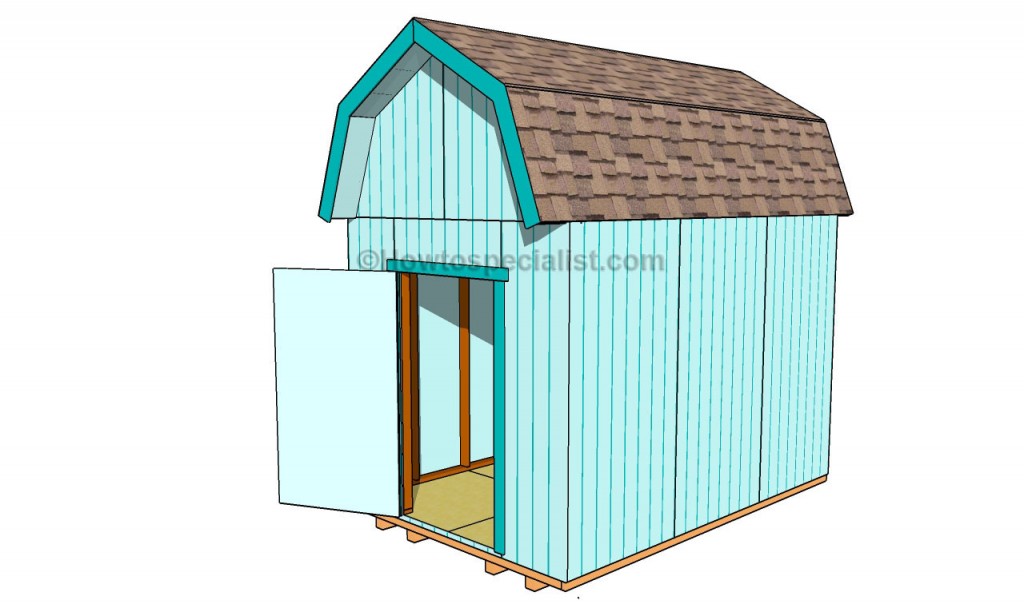
Last but not least, we recommend you to take care of the finishing touches. In order to get a professional result, fill the holes and the gaps with wood filler and let it dry out for a few hours. Check if there top ridge is perfectly horizontal and if the components are locked together tightly.
Thank you for reading our project about how to build a gambrel roof shed and we recommend you to check out the rest of the projects. Don’t forget to LIKE and SHARE our projects with your friends, by using the social media widgets. SUBSCRIBE to be the first that gets our latest ptojects.

4 comments
If we are putting a gambrel roof on our house and want sufficient space for a second floor, what lengths should we use? The house will measure 36×40 and we want a foot overhang on each side.
Thank you,
Teena
Google search “gambrel roof calculator” and you will find calculators that will help you set the size of the rafters.
Do you happen to have plans for this style roof on a 12×20 shed based on your plans from https://howtospecialist.com/outdoor/shed/12×20-shed-plans-free/?
Thank you!
WONDERFUL WORK I LIKE THAT WISDOM