This article is about how to lay a wall with brick blocks. This project covers all the steps involved in the project, starting with preparing the surface, pouring the foundation, making the concrete columns and laying the bricks. This project took us 1-2 days to complete but it was well worth it and I am very pleased with the final result. This brick wall is actually a future garden fence, that will be covered with natural stone. This is Episode 3 of the Fence Series, so make sure you take a look over the rest of the articles for more designs and techniques.
I have built this brick wall as part of a future property fence. As you will see both in the video and in the tutorial, this fence has a super sturdy foundation. I used brick blocks for the wall, because it takes less time to assemble everything together. You can use these techniques to make any kind of wall, even for a house. See all my DIY projects HERE. See all my Premium Plans HERE.
Made from this plan
Building a Wall with Blocks
Materials
- cement, sand, gravel
- bricks
- construction lumber
- rebars
Tools
- Concrete mixer
- Angle grinder
- Hammer Drill
- Drill / Screwdriver
- Hammer, Tape measure, Safety glasses
- Trowel, Trowel
- Wheelbarrow
- Buckets
- Shovel, Shovel
Time
- 4-5 days
Related
- Episode 1: How to build a concrete fence with wooden panels
- Episode 2: How to build wooden fence with concrete base
- Episode 3: How to build a block fence
- Episode 4: How to install natural stone to fence
How to Lay a Brick Blocks
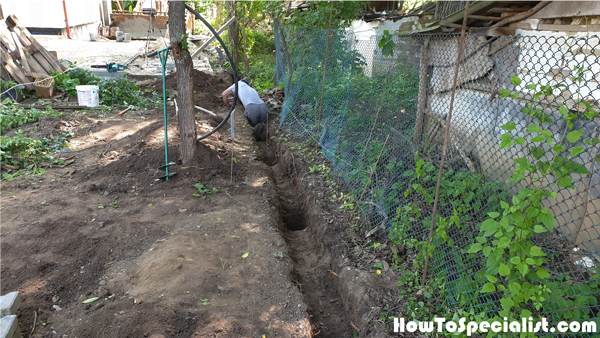
Trench-for-wall-foundation
The first step of the project was to dig the trench for the concrete foundation. The bricks are heavy, so the added weight of wall will exert pressure on the base. We went for 10″ in width and 12″ in depth. We used batter boards and string to make sure the foundation will be perfectly straight.
Make sure you read the local codes so you determine the right size of the foundation for your location.
Digging-the-trench-for-the-wall-foundation
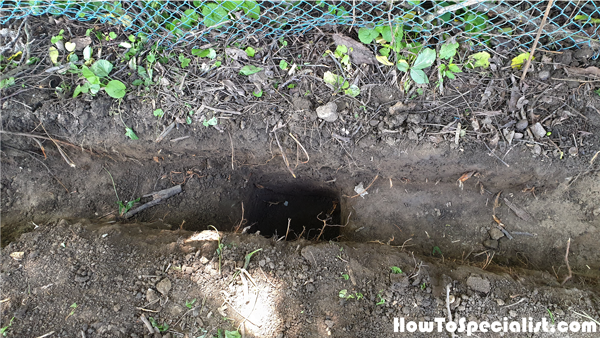
However, we dig an extra 12″ for the columns. The columns will therefore strengthen the wall and anchor it properly.
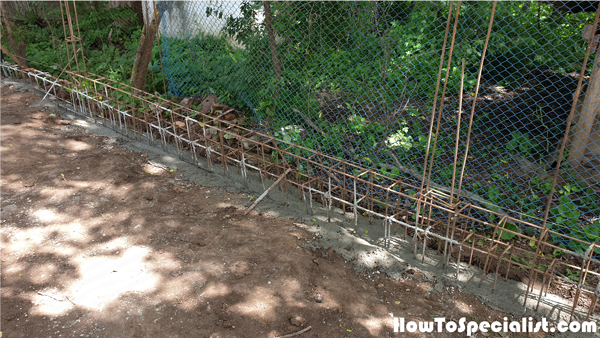
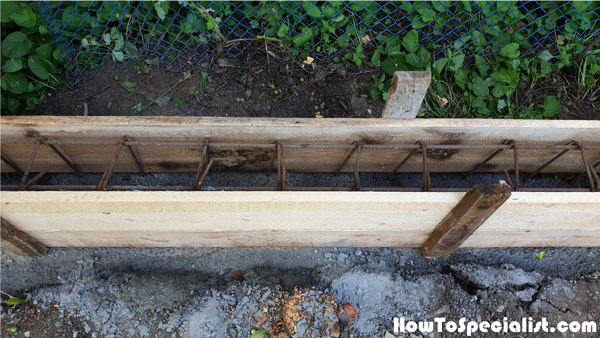
Assembling-the-rebar-beam
We will reinforce the concrete with rebars for better support. Therefore, we assembled a rebar beam that is 8″ wide and 20″ high (it will reinforce the elevation as well). The stirrups are placed every 8″.
Filling-the-trenches-with-concrete
We moved the beam to the trench and then installed the rebars for the columns. We aligned everything and then filled the trench to the ground level with concrete. The concrete takes 2-3 days to set so we took a break and gathered the rest of the materials meanwhile.
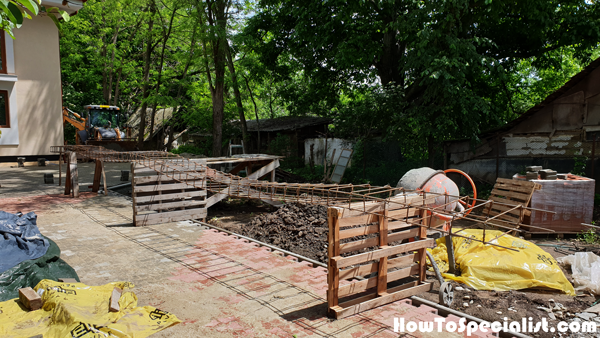
Forming-the-foundation-elevation
We assembled the panels for the elevation forms. Leave about 1″ on both sides of the rebars and use a spirit level to plumb the panels vertically. Use string lines to align the panels perfectly straight.
Formwork-for-foundation-elevation
Use a few stakes to reinforce the forms. This is an important step because when pouring the concrete for the elevation, it will exert pressure on the panels.

Removing-the-formwork-from-the-foundation
We remove the panels the next day, to enhance the drying process for the concrete.
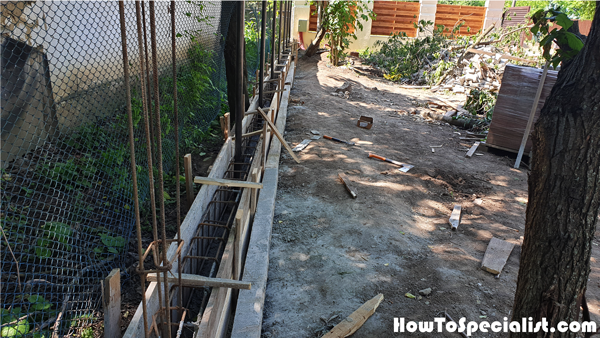
Fitting-the-stirrups-to-the-rebar-columns
You need to install the stirrups to the columns, before laying the bricks.
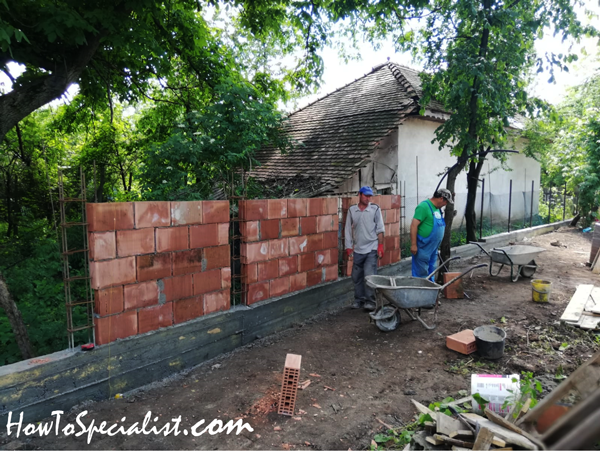
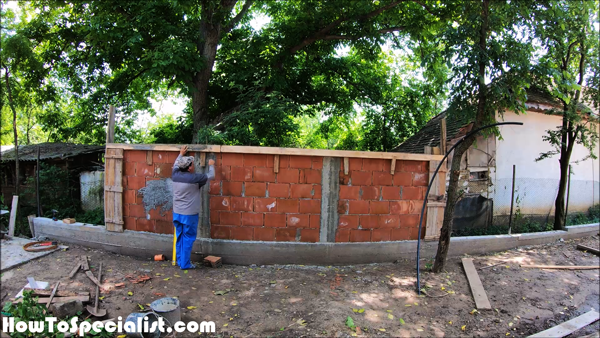
Laying-the-first-layer-of-bricks
Start laying bricks to both ends of the first row. Use a string line so you can set the rest of the bricks perfectly straight. Once you complete the first row, you can move up to the next one. Make sure you start the next row with half a brick.
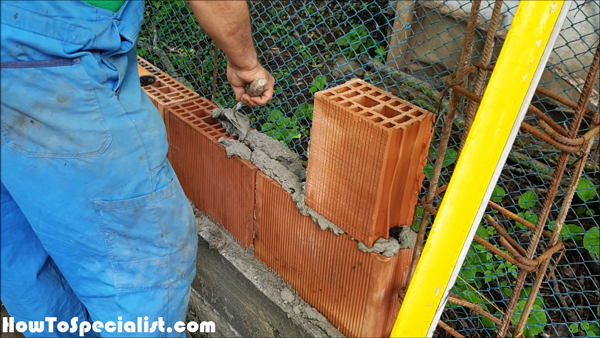
Laying-the-mortar-for-brick-laying
Laying the blocks is a straight forward process if you follow the right steps. First, you need to lay mortar along the base of the foundation or the previous row of bricks. The mortar should be approximately 1/2″ thick,
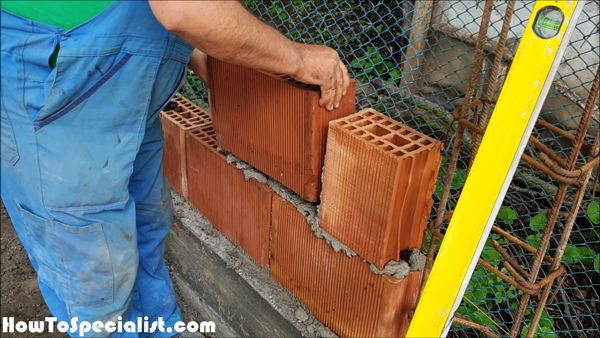
Laying-the-bricks
Next, set the brick to the mortar and press it down slightly. Make sure the brick is aligned with the line and use the spirit level to check if the wall is plumb.
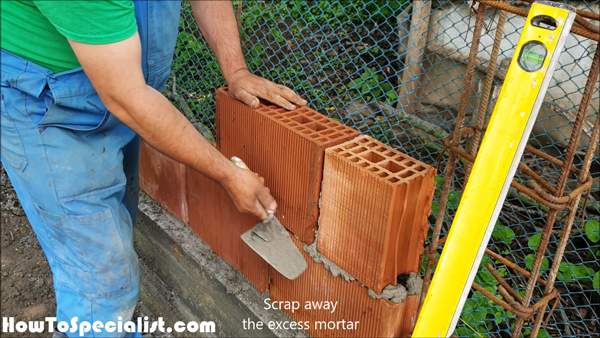
Scrapping-away-the-excess-mortar
Use the trowel to remove the excess material. You can reuse it, if mixed with the rest of the mortar. Make sure you butter the end of the brick before laying the next one.
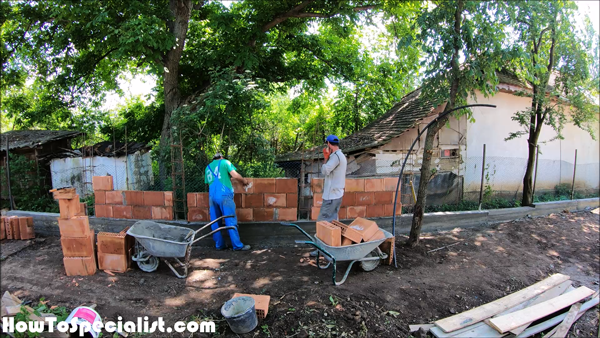
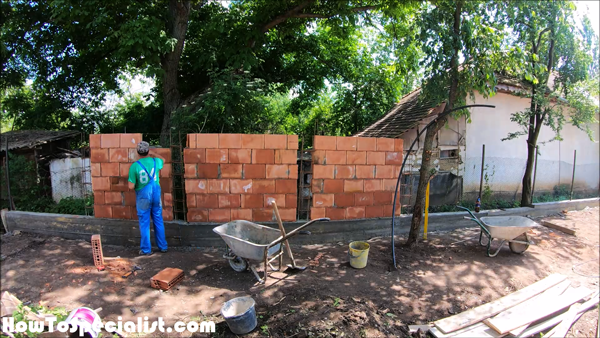
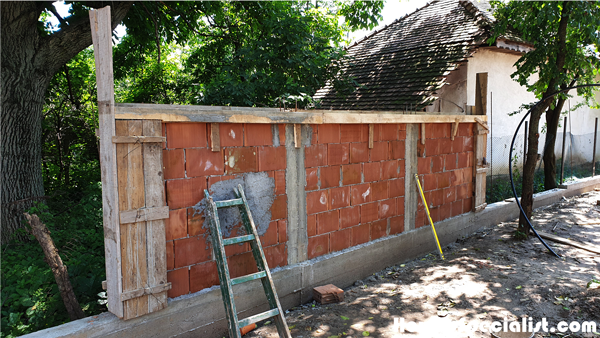
Brick-laying-work
We used an angle grinder with a diamond blade to cut the bricks when needed. Continue laying bricks using the techniques described above. Check regularly if the wall is plumb on both sides (front and back).
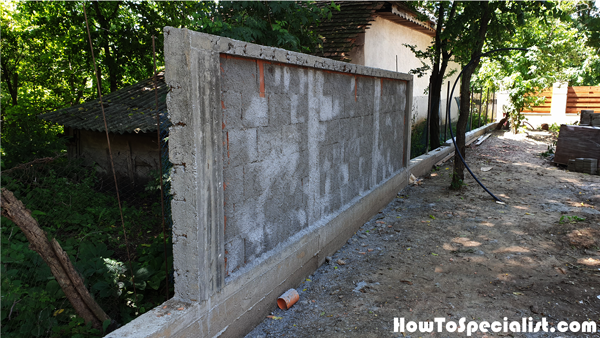
Block-Wall-Construction
Bricklaying-progress
Remember that you need to lay the bricks from the ends inward. This will help you keep the guideline straight and speed up the process. Since we will cover the wall with natural stone we don’t need to have the rows at the same height. We only need them to the plumb.
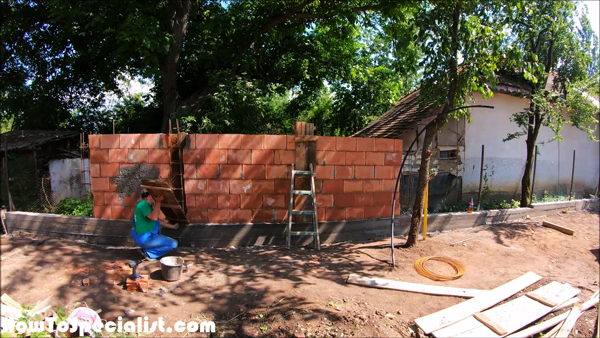
Formwork-for-the-middle-wall-columns
You should leave the mortar for one day to dry before pouring the columns. We started with panels on both sides of the wall. Use construction wide to tighten them together. We poured concrete and gently hit the forms with a hammer at the bottom, so the concrete sets properly.
Removing-the-forms-from-the-middle-columns
Remove the formwork panels from the wall.
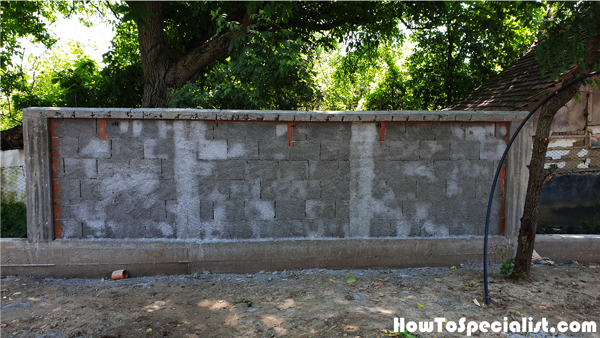
Forming-the-columns-and-top-beam
Next, we installed the formwork panels for the end columns and for the top beam. The top beam will really add strength to the wall and make everything sit tightly together.
Forming-the-columns-of-the-brick-wall
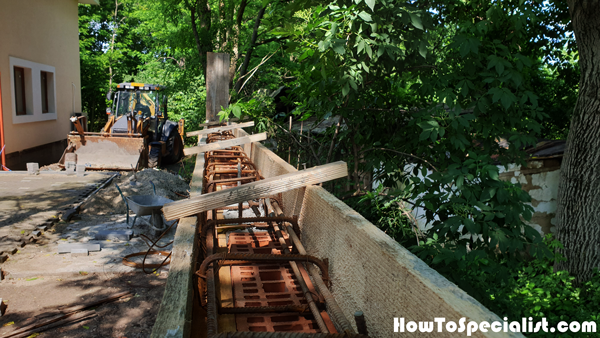
Fitting-the-top-rebar-beam
As we see in the image, we made a small rebar beam to reinforce the concrete. Add stakes to keep the sides of the formwork together.

Building-a-brick-wall
We poured concrete to the end columns and to the top beam.
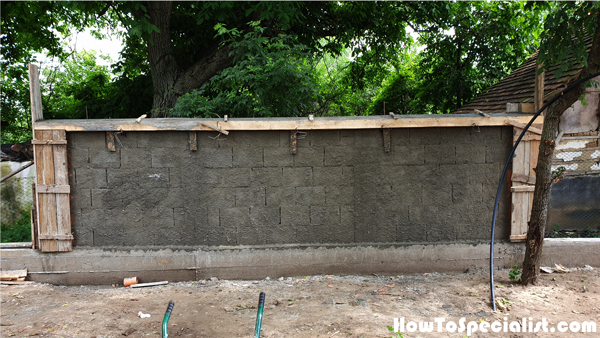
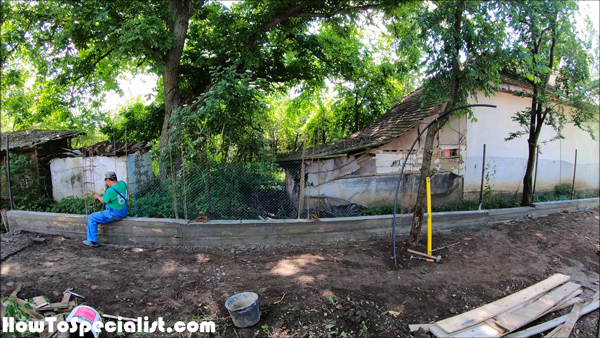
Cement-rendering-the-brick-wall
We cement render the wall so we can have a proper support when installing the natural stone.
How-to-build-a-brick-wall
Let the cement render to dry for a few days before taking care of the finishing touches.
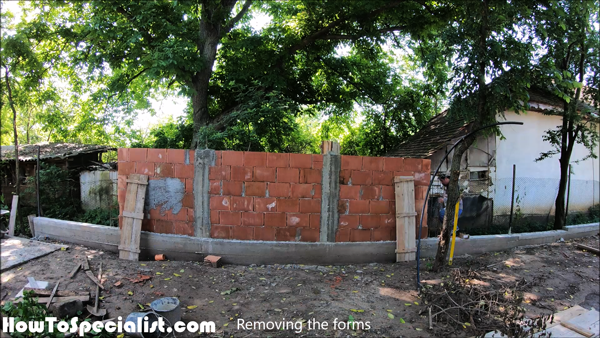
Removing-the-formwork-from-the-brick-wall-columns
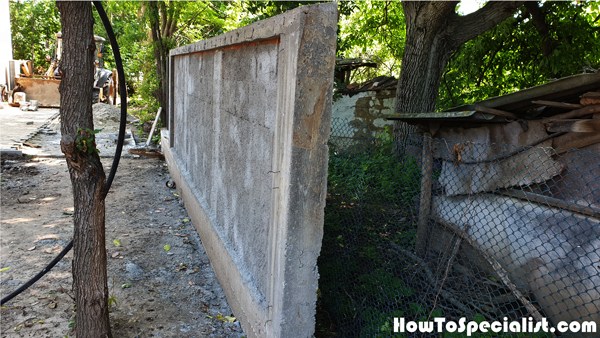
Building-a-simple-brick-wall
If you enjoyed this project make sure you share it with your friend! That helps a lot and I will be able to share more free tutorials! If you like my projects make sure you take a look over the full list HERE.
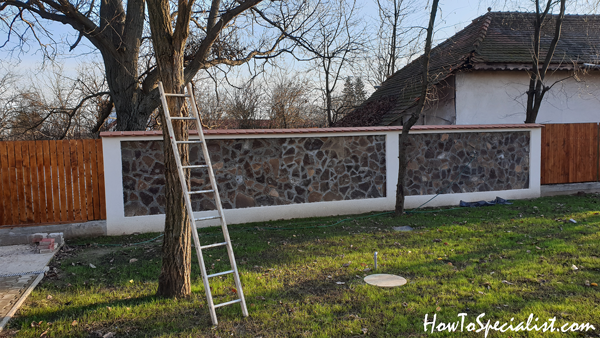
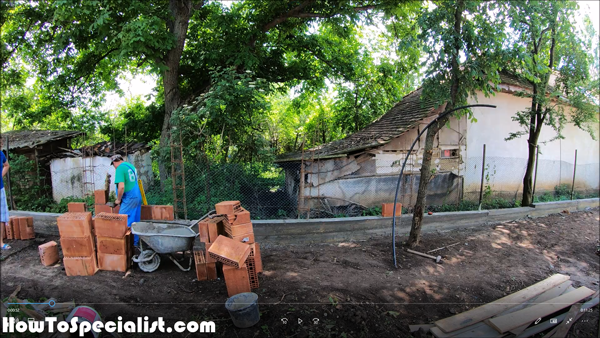
Block-wall-fence-with-natural-stone
In the next Episode I will show you how to add natural stone to the fence and also install shingles to the top and thus protect it from the elements. I also added decorative paint to the base and columns of the fence.
Thank you for taking a look over my article on how to make a brick wall. Make sure you share this project with your friends if you like it and please take a look over the rest of my projects, because I have tons of plans and ideas to choose from. See all my projects HERE.