Tired of juggling laundry baskets and dealing with cluttered spaces? This DIY laundry basket holder plans is the ultimate solution to keep your laundry room tidy and efficient! Designed to accommodate three baskets, this project helps you organize your laundry by sorting clothes, towels, or linens with ease. With its straightforward design and step-by-step instructions, it’s perfect for DIYers of all levels. Let’s transform your laundry area into a functional and stylish space you’ll love!
Building this DIY laundry basket storage shelf is both affordable and quick, making it a great weekend project. The total cost ranges from $50 to $100, depending on the type of lumber and finish you choose. Materials include 2x4s, 2x3s, plywood, screws, and optional paint or stain for a polished look. The project takes about 4-6 hours to complete, including cutting, assembling, and finishing.
We recommend you to invest in the best materials you could afford. Therefore, you should buy weather-resistant lumber, such as pine or cedar. Always take accurate measurements before adjusting the size of the components at the proper size. Drill pilot holes trough the components before inserting the wood screws, to prevent the wood from splitting. My plans come with a full cut / shopping list and they are PDF Download and Print friendly. See all my Premium Plans HERE.
Made from this plan
Pin it for Later!
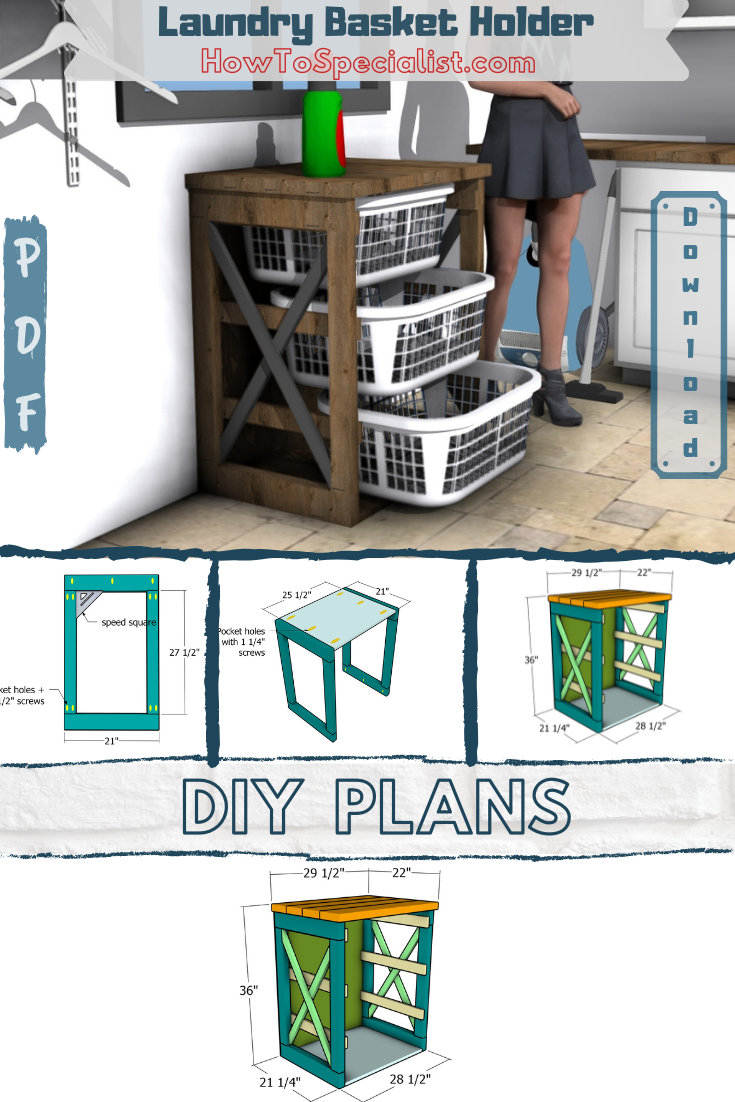
DIY Laundry Basket Holder
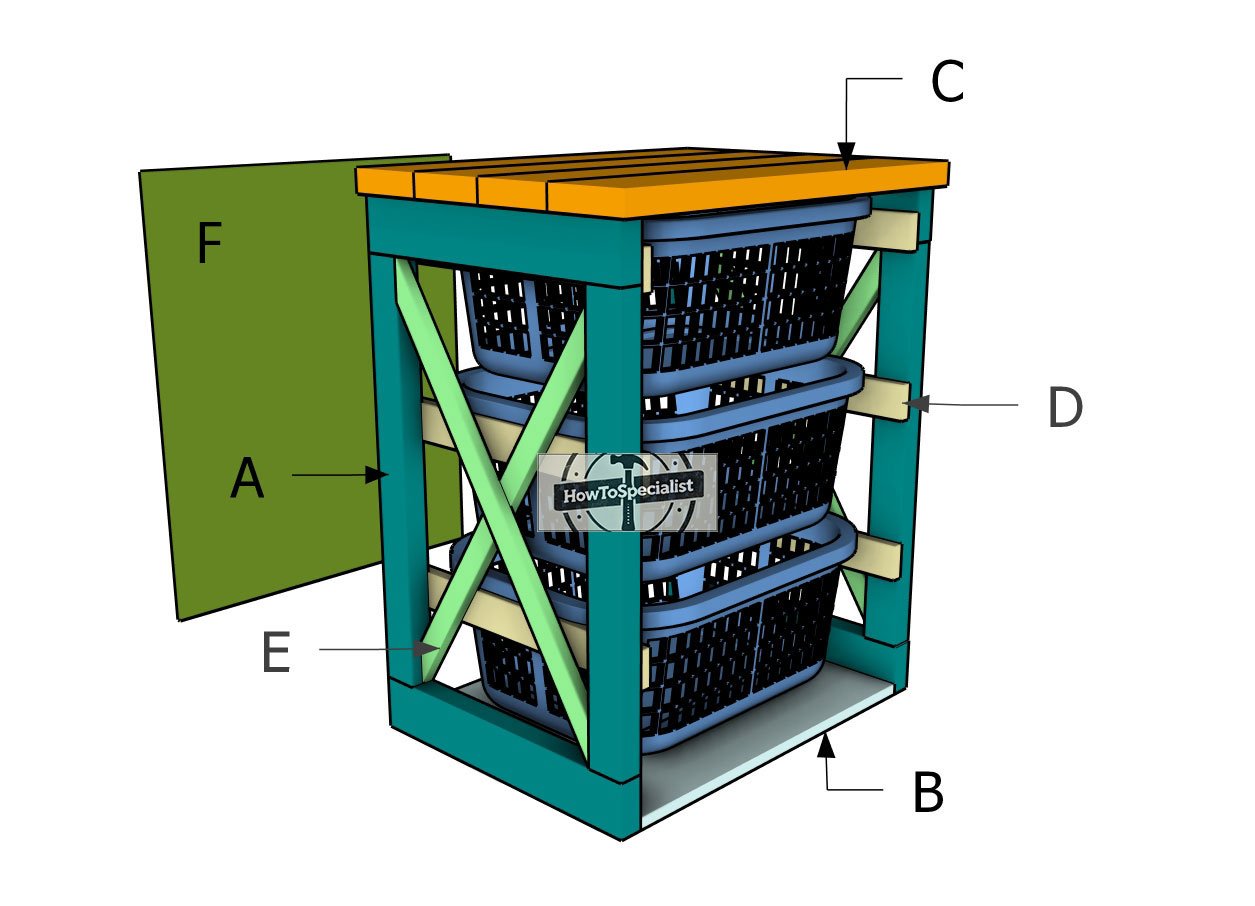
Building-a-laundry-basket-holder
Materials
A – FRAME – 2×3 lumber 27 1/2″ – 4 pieces
A – FRAME – 2×4 lumber 21″ – 4 pieces
B – BOTTOM PANEL – 3/4″ plywood 25 1/2″x21″ – 1 piece
C – TABLETOP – 2×6 lumber 29 1/2″ – 4 pieces
D – CLEATS – 1×3 lumber 21″ – 6 pieces
E – X-TRIMS– 1×2 lumber 31 3/4″ – 4 pieces
F – BACK PANEL – 1/2″ plywood 28 1/2″x 34 1/2″ – 4 pieces
- 1×2 lumber 12 ft – 1 piece
- 1×3 lumber 12 ft – 1 piece
- 2×3 lumber 10 ft – 1 piece
- 2×4 lumber 8 ft – 1 piece
- 2×6 lumber 10 ft – 1 piece
- 3/4″ plywood 2’x3′ – 1 piece
- 1/2″ plywood 3’x3′ – 1 piece
- 30 pieces of 2 1/2″ screws
- 50 pieces of 1 5/8″ screws
- 10 pieces of 1 1/4″ screws
- 20 pieces of 1 1/2″ finish nails
- Laundry baskets – 3 pieces
- Stain / paint – 1 piece
- Glue – 1 piece
Tools
- Miter saw, Pocket hole jig
- Drill machinery, Drill bits, Jigsaw
- Safety gloves, Glasses
- Chalk line, tape measure, spirit level, carpentry pencil
Time
- One week
Related
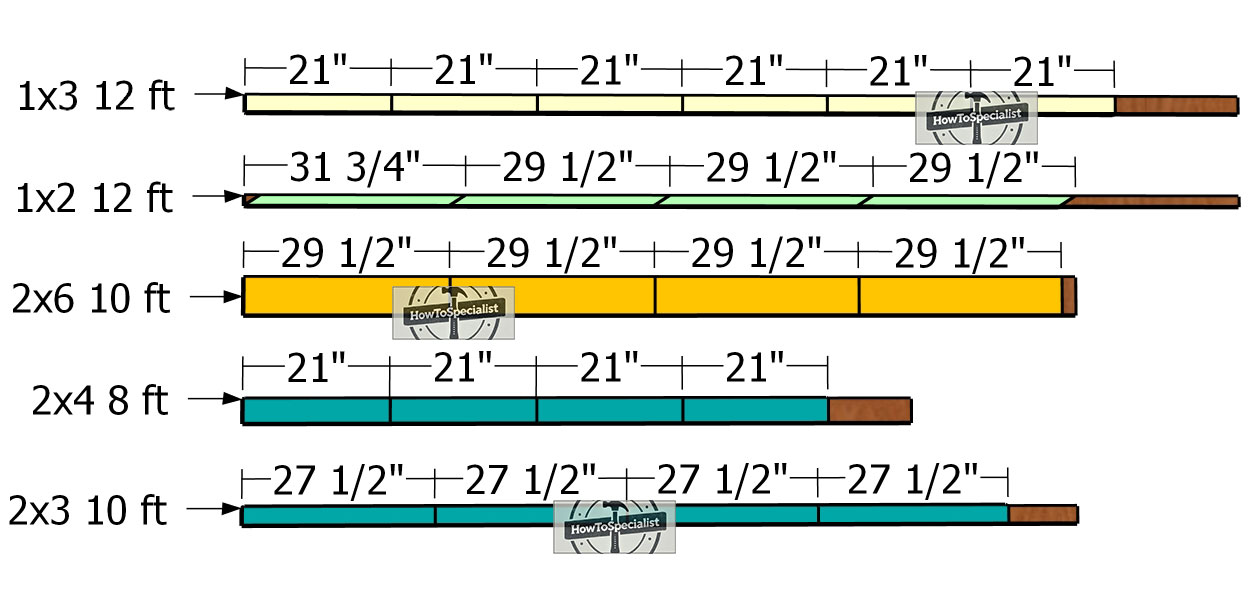
Cut layout diagram
Step 1: Building the main frame
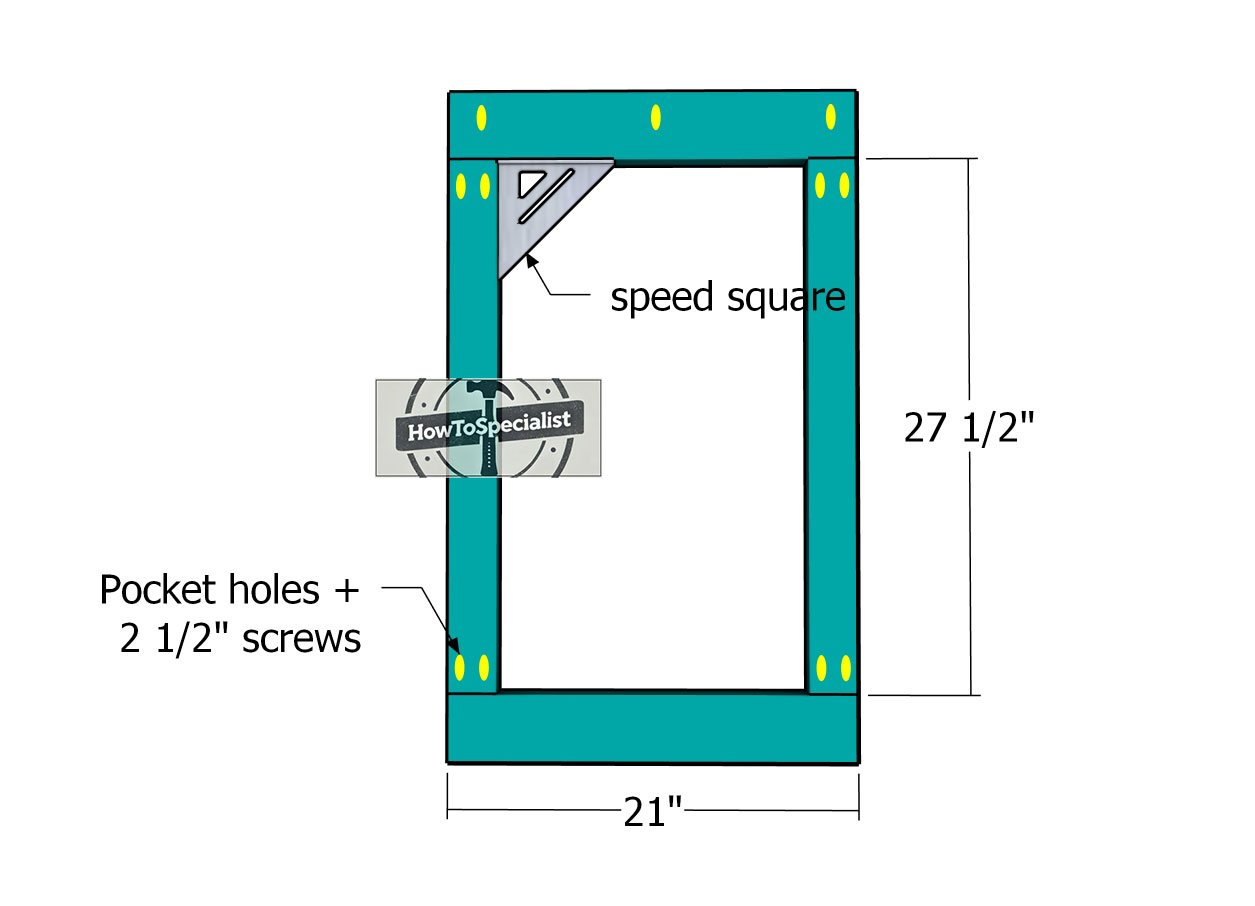
Building-the-side-frames
To kick off the project, start by building the two frames for your laundry basket storage shelves. Use 2×4 boards for the horizontal supports and 2×3 lumber for the uprights. Cut all the components to the dimensions provided in the diagram. Drill pocket holes at both ends of the uprights, and along the top horizontal board to secure the tabletop later.
Lay all the pieces on a level surface, ensuring the edges are flush. Add wood glue to the joints, then assemble the frames by driving in 2 1/2″ screws. This will create sturdy, reliable frames to support the entire shelving unit.
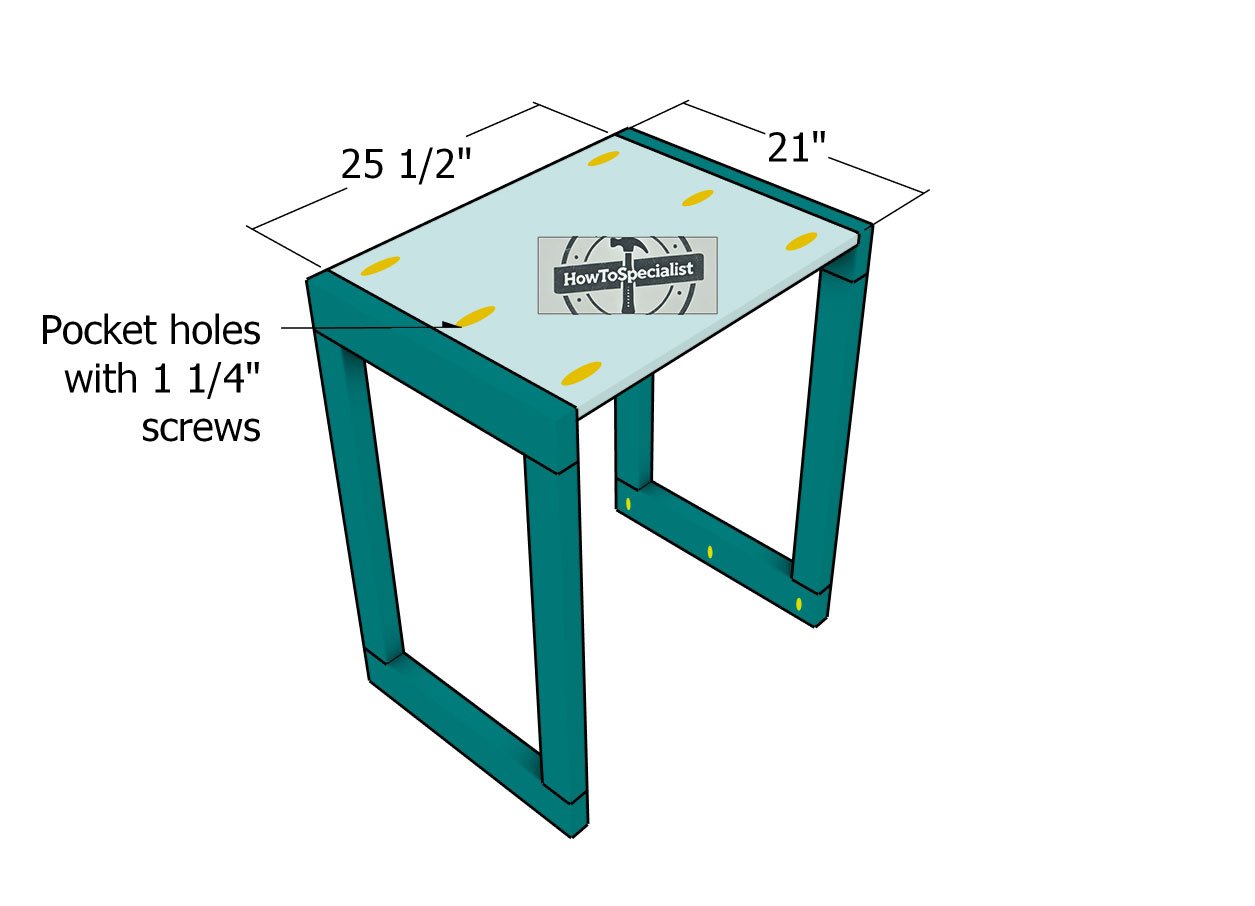
Fitting-the-bottom-panel
Cut the bottom panels from 3/4″ plywood, ensuring they are properly sized for your laundry baskets organizer. Drill pocket holes along the edges of the panels, then align them with the side frames. Secure the panels in place by inserting 1 1/4″ screws through the pocket holes.
Be sure to adjust the width of the panels to fit the specific dimensions of the laundry baskets you’ve purchased. Always buy your baskets before starting the project so you can tailor the design to fit perfectly. Depending on your baskets, you may need to make the panels wider than 25 1/2″ or narrower to ensure the best fit.
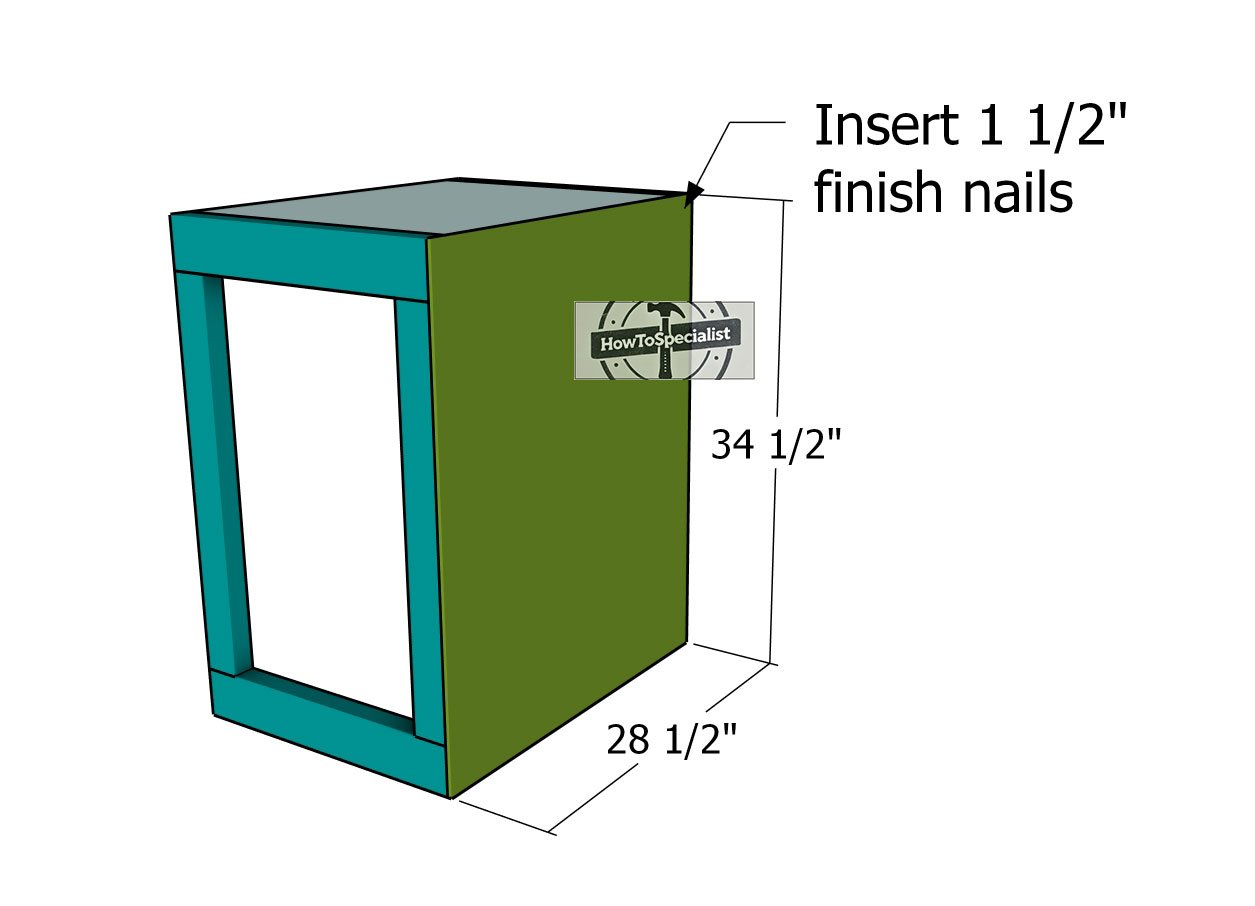
Fitting-the-back-panel
Attach the 1/4″ plywood back panel to the wooden laundry basket rack, making sure the edges are flush for a clean, professional finish. Secure the panel in place by inserting 1 1/2″ finish nails every 8 inches along the edges. This back panel adds stability to the structure while giving it a polished look.
Step 2: Assembling the tabletop
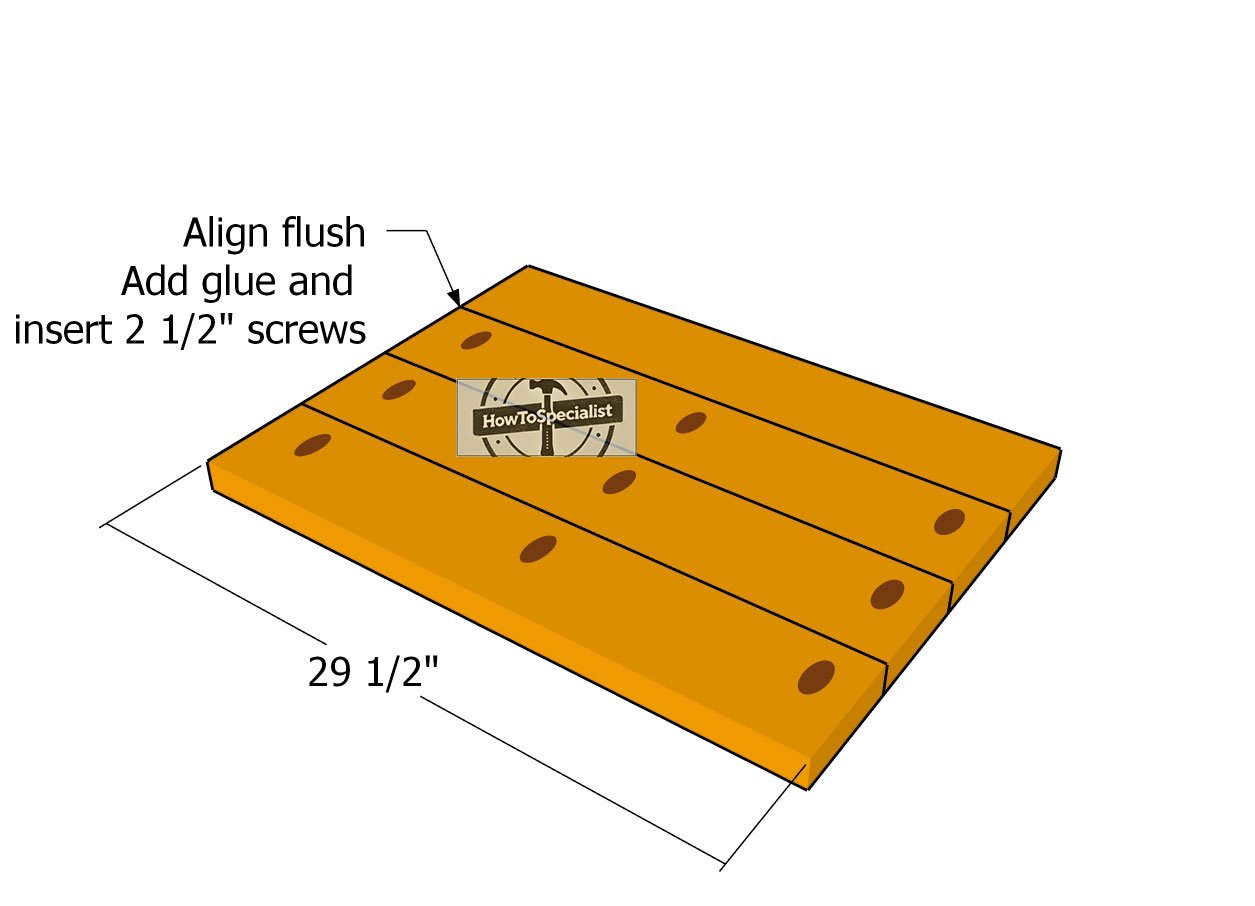
Assembling-the-tabletop
For the tabletop, use 2×6 boards cut to 29 1/2″ long—or adjust the length if you modified the base panel to fit your needs. Drill pocket holes in the boards as shown in the diagram, ensuring precise placement for a sturdy connection.
Lay the boards flat on a level surface, align the edges tightly, and apply wood glue to the joints. Assemble the tabletop by inserting 2 1/2″ screws into the pocket holes, creating a solid and durable surface to complete your laundry basket rack.
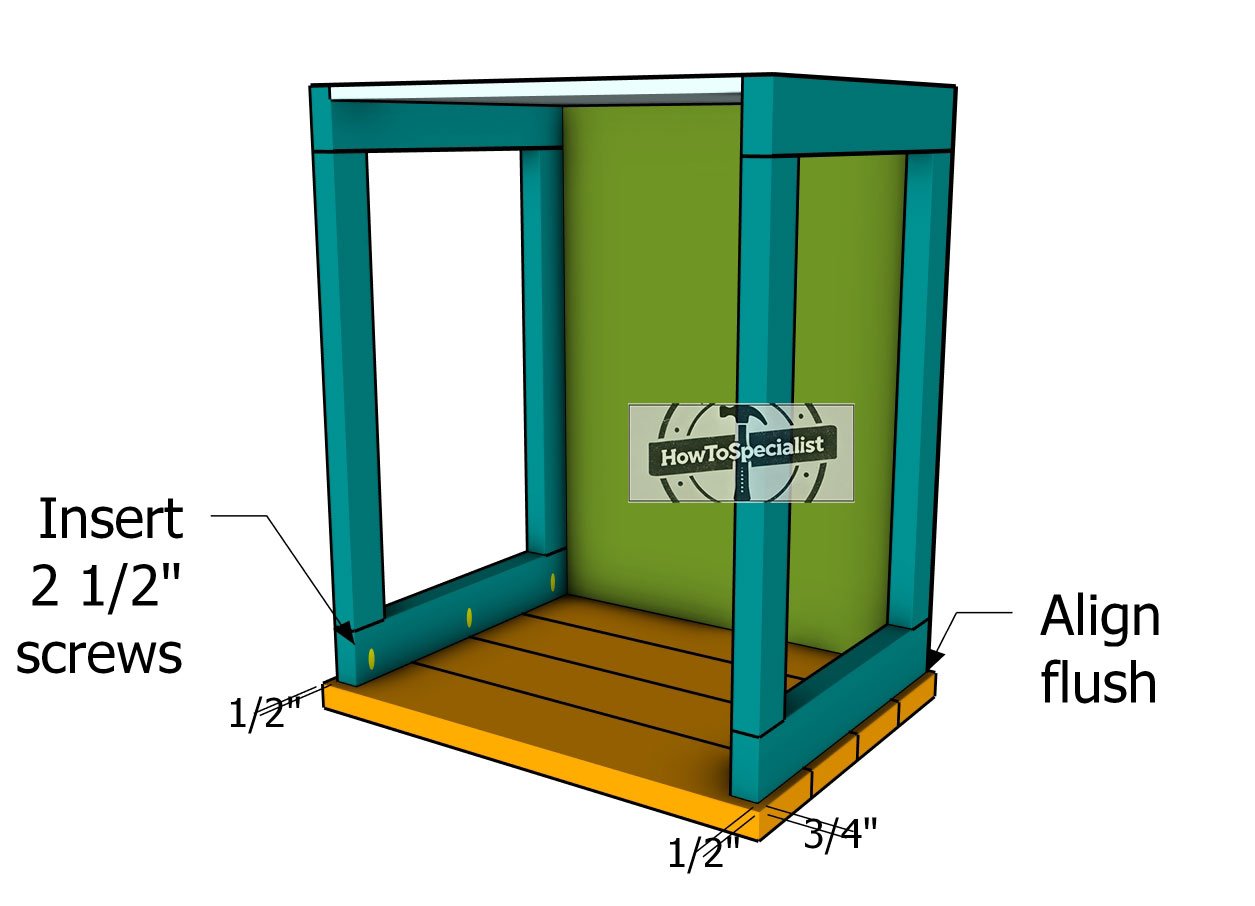
Fitting-the-tabletop
Position the frame on the tabletop, ensuring the back of the frame is flush with the rear edge of the tabletop. Center the frame to create equal overhangs on both sides for a balanced look.
Once aligned, secure the frame to the tabletop by driving 2 1/2″ screws through the top frame components into the tabletop, as shown in the diagram. This will create a sturdy connection and complete the structure of your laundry basket storage rack.
Step 3: Building the seat
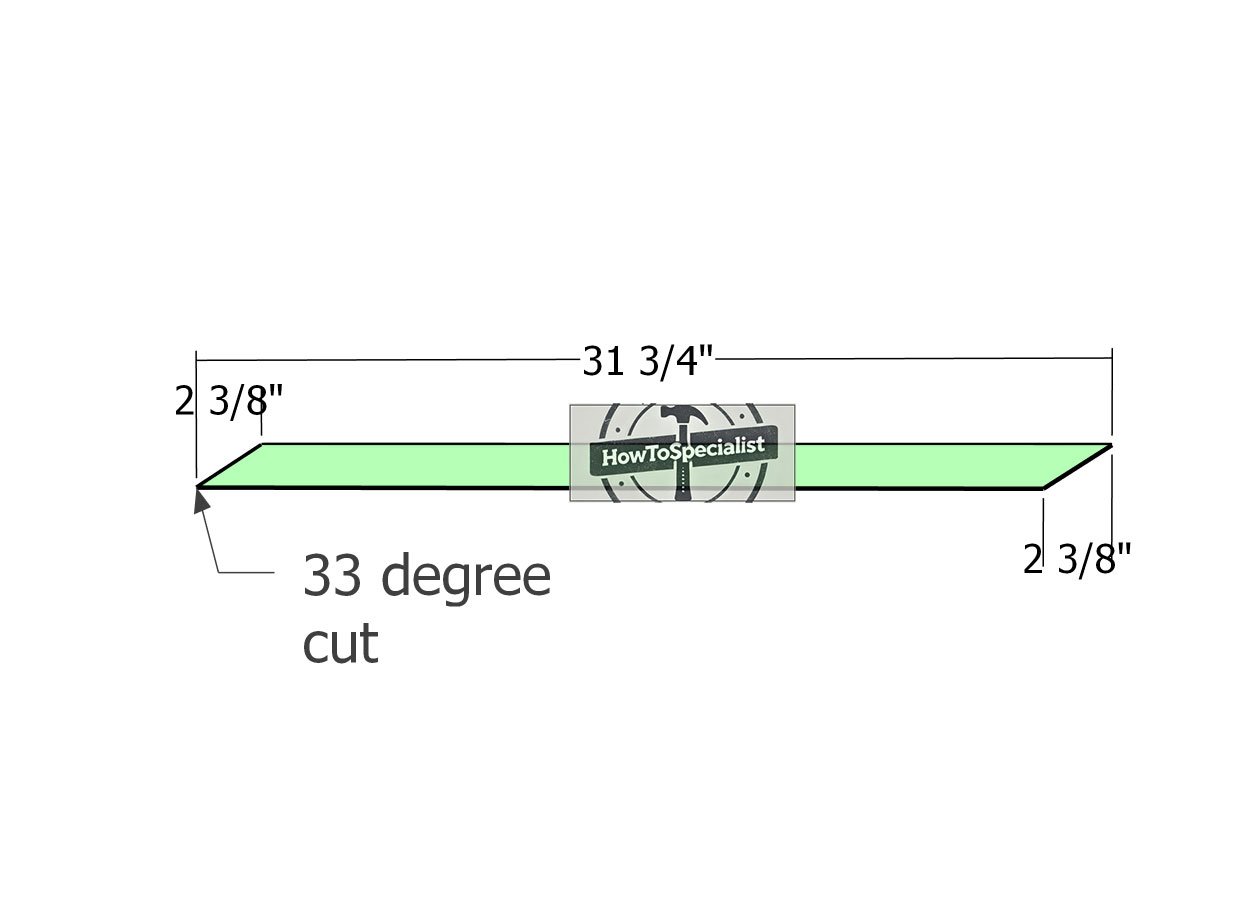
X-trims
Next, it’s time to cut the decorative X-trims for the sides of your storage shelves system. Use 1×2 boards and a miter saw to make precise 33-degree cuts on both ends of each trim piece, as shown in the diagram.
Once the cuts are complete, smooth all the edges with sandpaper to ensure a clean, polished look. These X-trims will add charm and character to your shelving unit!
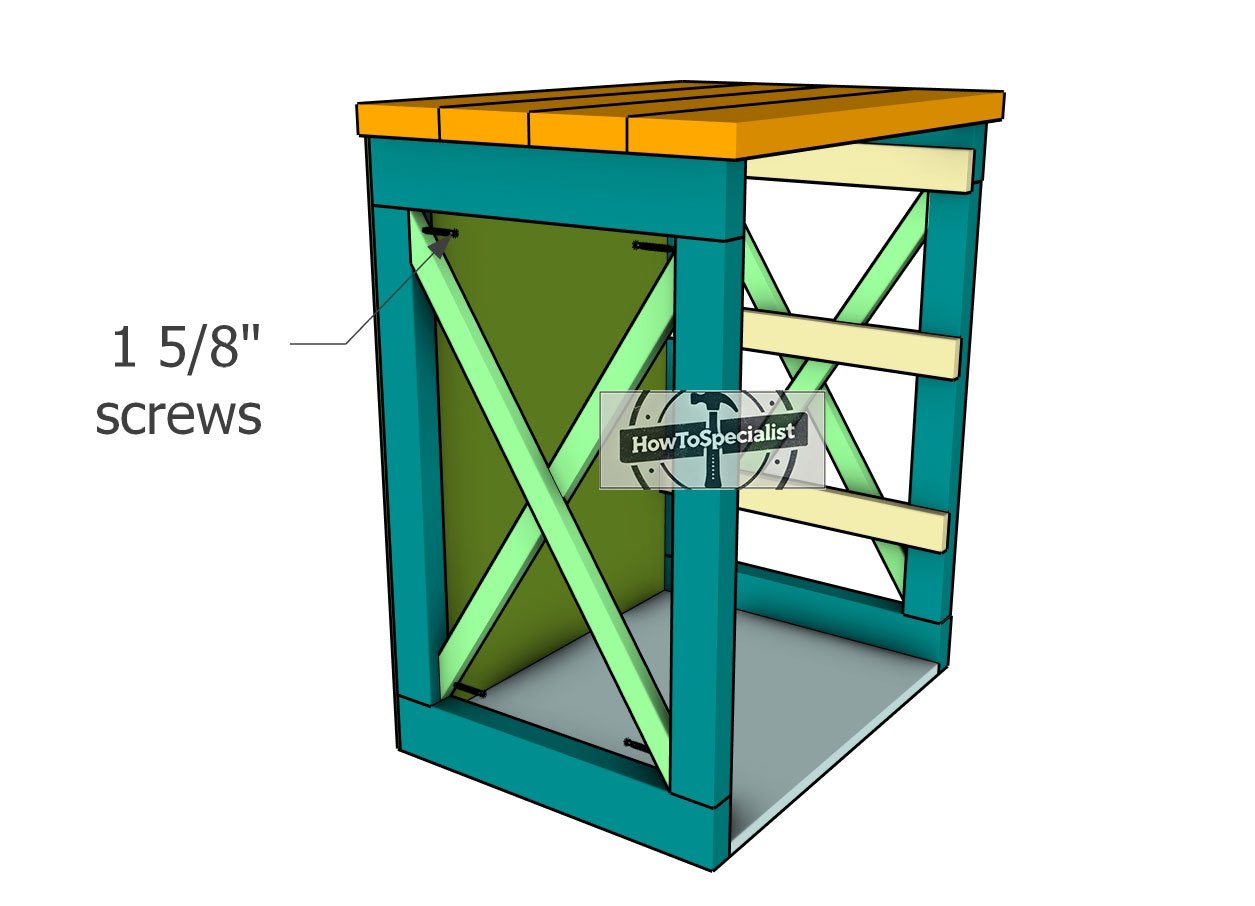
Installing-the-X-trims
Attach the X-trims to the frame of the rack, following the placement shown in the diagram. Align the trims carefully for a symmetrical look, then drill pilot holes to prevent splitting.
Secure the trims to the uprights using 1 5/8″ screws, ensuring they are firmly attached. These decorative X-trims will enhance the visual appeal while adding a touch of rustic charm to your storage system!
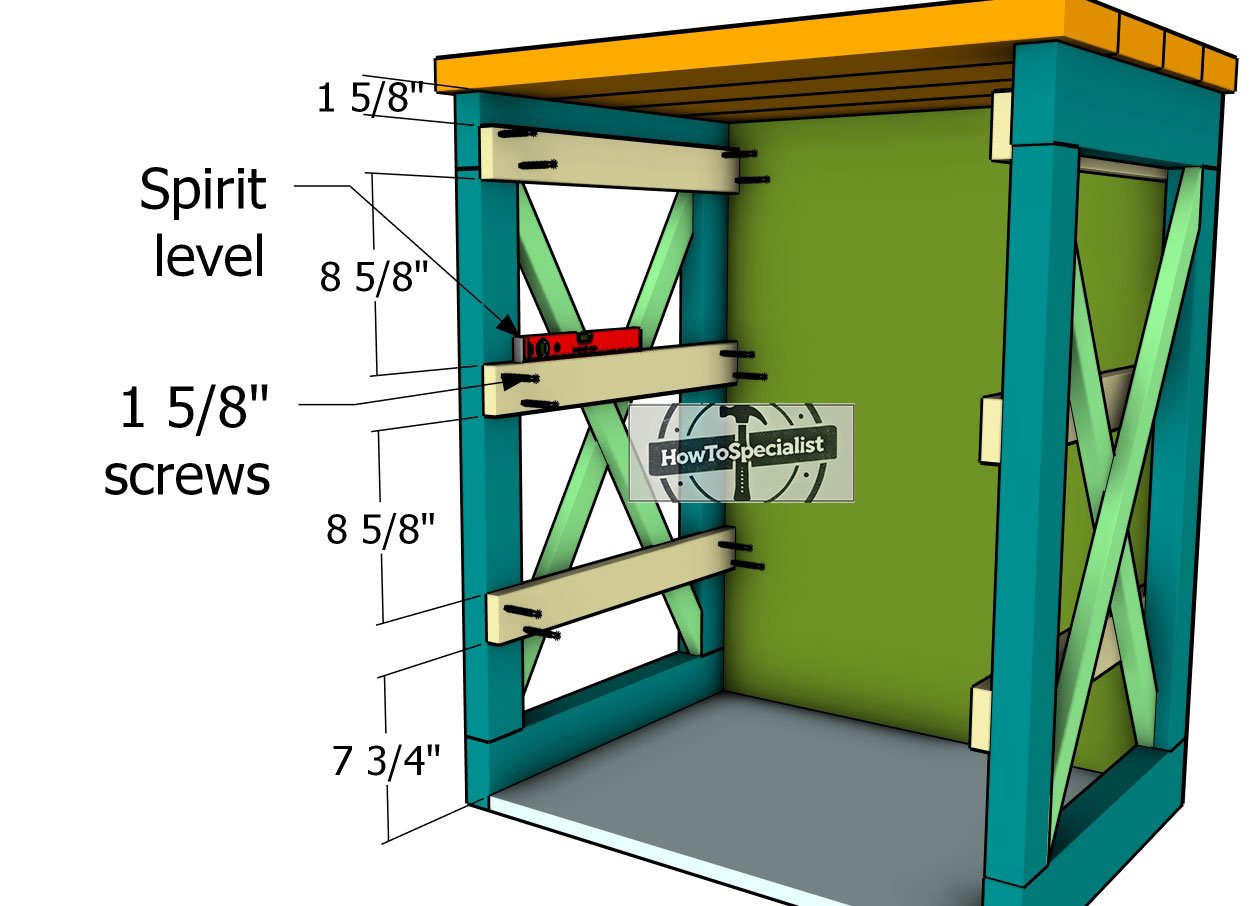
Installing-the-cleats
Attach the 1×3 cleats to the interior sides of the rack, following the diagram for placement. These cleats are designed to support baskets with a height between 10″ and 11″.
If your baskets are taller than 11″, you’ll need to adjust the plans by cutting the uprights longer to accommodate the additional height. Secure the cleats with screws, ensuring they are level and evenly spaced to provide a stable base for the baskets.
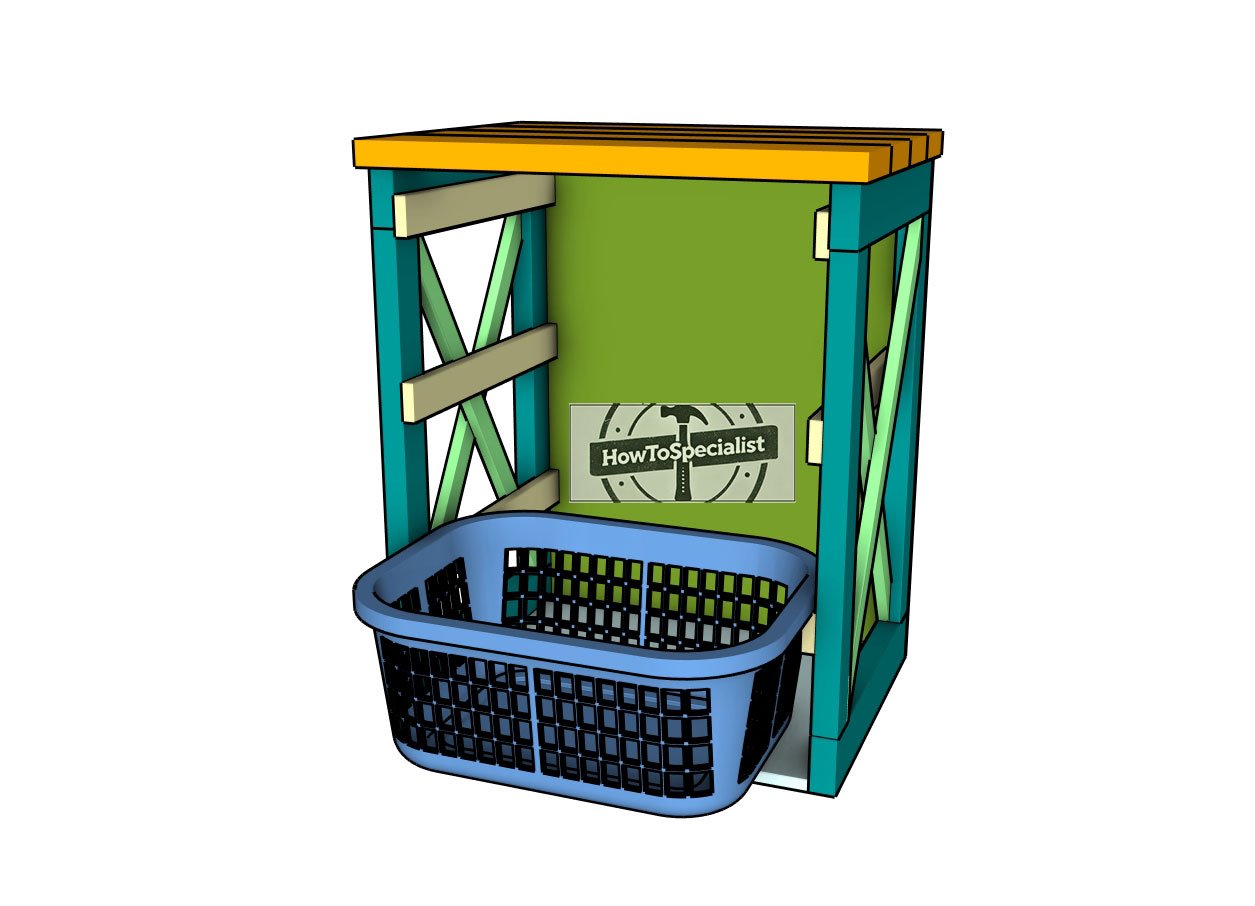
Sliding-in-the-baskets
Slide the baskets into the storage rack and ensure they fit properly within the designated spaces. Check for smooth movement and that the cleats provide adequate support. If adjustments are needed, make them now to ensure a perfect fit for your baskets, completing your functional and organized storage system!
Step 4: Finishing touches
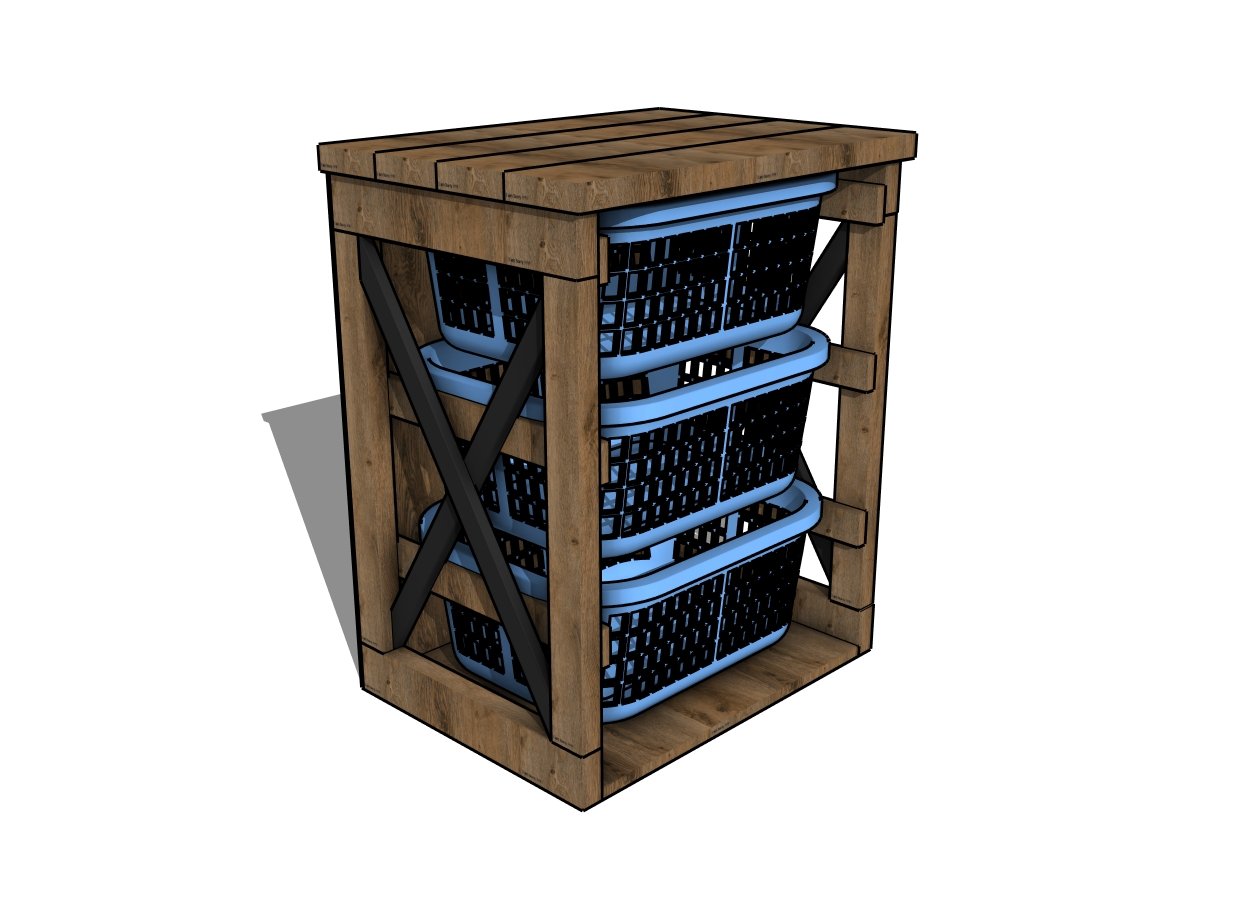
Laundry basked holder plans
For the finishing touches, start by sanding the entire structure to smooth out any rough edges or surfaces, ensuring a clean and professional look. Fill any visible holes or gaps with wood filler and let it dry before sanding again for a seamless finish.
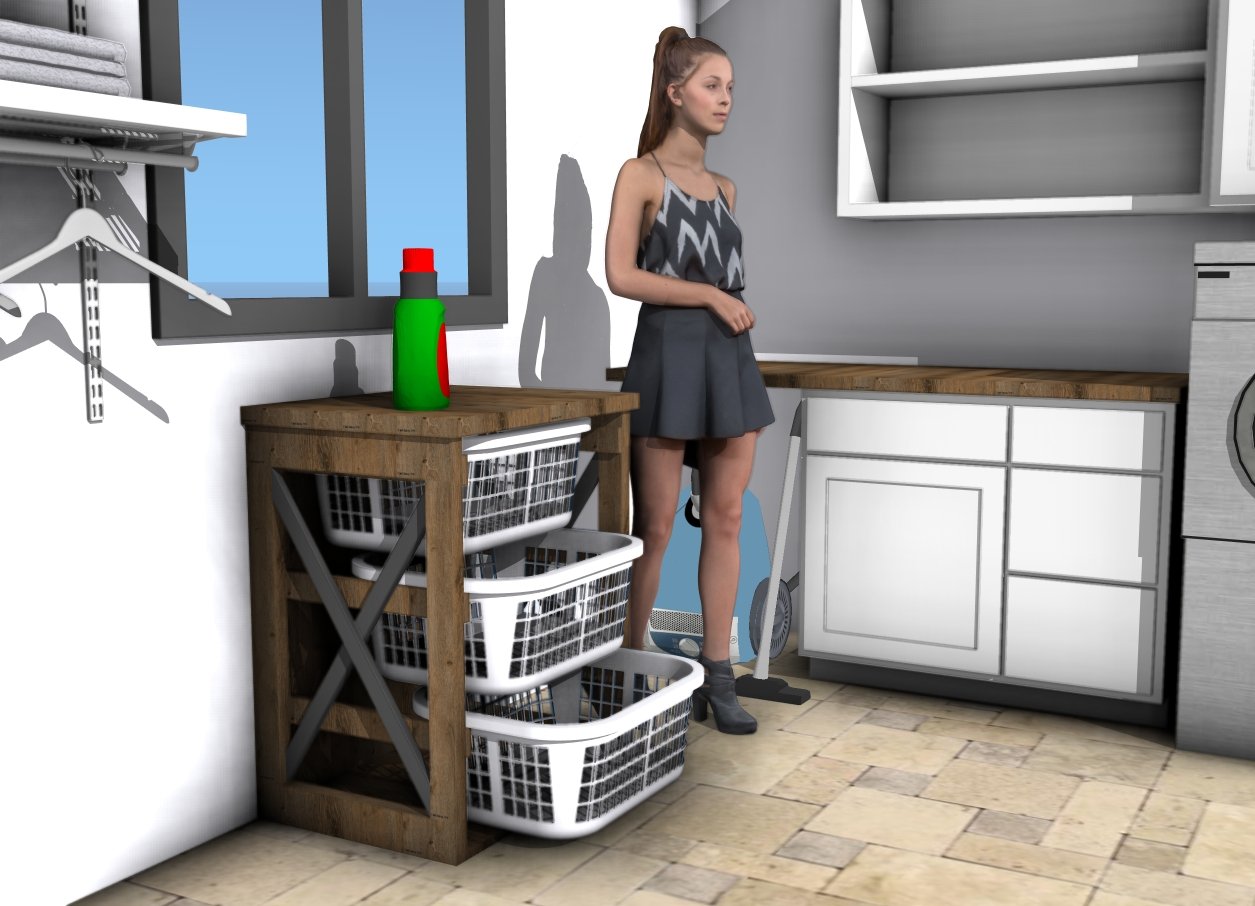
How to build a basket holder
If you want to customize the rack, consider staining or painting it to match your decor, then seal it with a protective clear coat for added durability. Finally, double-check all screws and connections to ensure the rack is sturdy and ready for use. These final steps will give your laundry basket sorter a polished, long-lasting appearance that’s both functional and stylish!
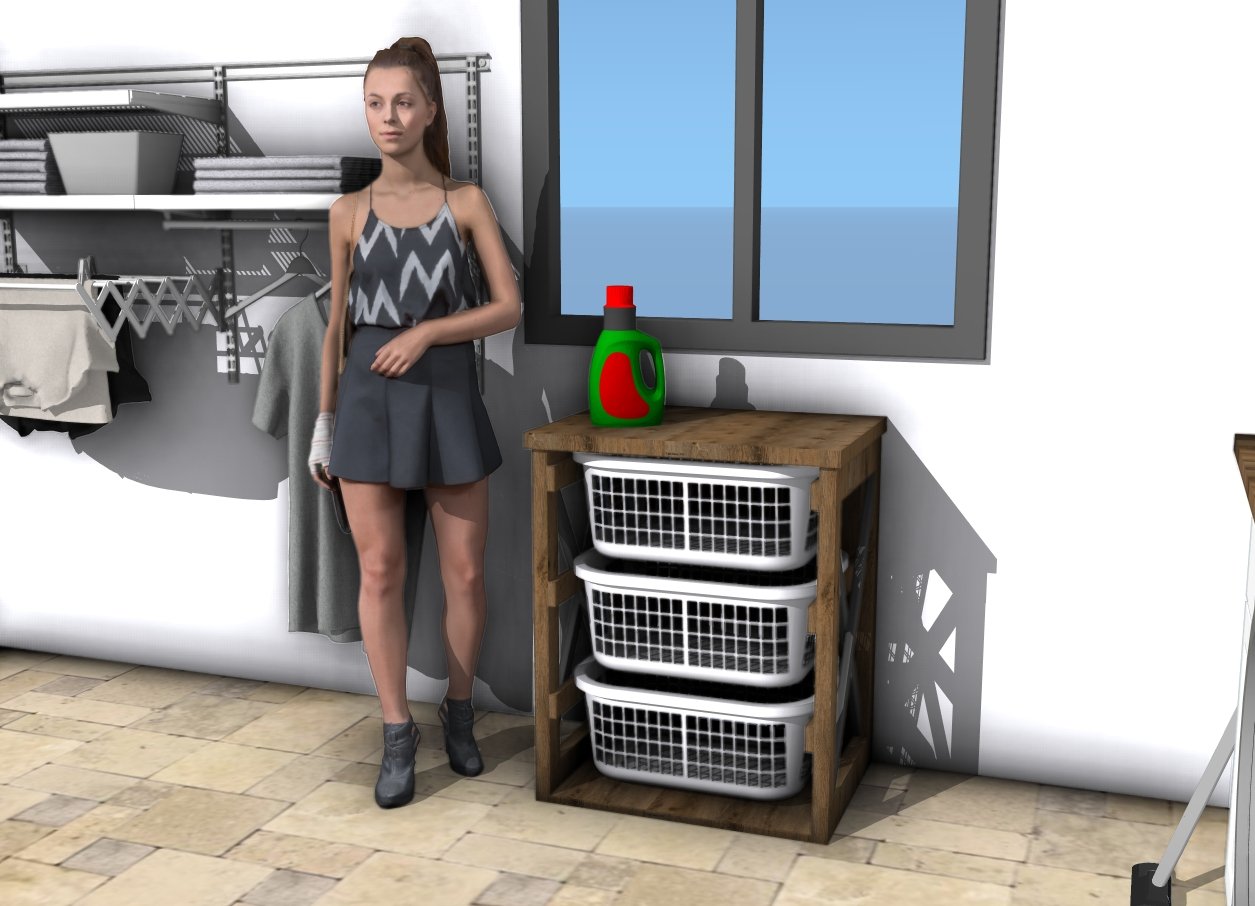
How to make a laundry basket rack
Thanks for checking out my DIY laundry basket rack plans! Be sure to explore my other projects for more fantastic ideas. Don’t forget to hit the LIKE button and SHARE with your friends using the social media links below.
