This article is about simple birdhouse plans. Building a simple birdhouse for your kids is a fun and quick project, which should freshen up the look of your garden and be a great opportunities to pass them down several basic woodworking skills. Even if you are not accustomed to these kind of diy projects, you should get the job done in a professional manner, especially if you use our easy to build plans and follow the step by step tutorial. After you have built the birdhouse with your kids, you should apply several coats of paint to give it a beautiful design. Work with great care, pay attention to details and you will build a beautiful home for the birds in your backyard.
In order to obtain a neat look, we recommend you to use quality wooden boards with a nice finish. However, before building the wooden birdhouse, you have to make sure the wooden boards are not treated with toxic substances, otherwise the birds might be affected on the long run. When buying the wooden boards, you have to choose the best of them, without any visible flaws (the boards must be straight, without twists, splits, wanes, or decays).
In order to fasten the wooden pieces together, you have two main alternatives: on one hand you could use screws, while on the other hand you could try to drive in nails. In most of the cases, we recommend you to insert finishing nails, as they lock the pieces together properly and their heads are almost unnoticeable. Nevertheless, don’t forget to make pilot holes along the edges, before inserting the nails, to prevent wood cracking.
Made from this plan
Materials
Tools
- Safety gloves, glasses
- Jig saw / circular saw (to cut the wooden boards)
- Hammer, spirit level, carpentry pencil, L-square
- Drill machinery with a small drill bit
- Hole saw drill bit
Tips
- Design the wooden birdhouse, before beginning the project
- Use quality wooden boards without visible flaws
- Drill pilot holes before inserting the nails, to prevent splitting the wood
Time
- One hour
Simple birdhouse plans

Simple birdhouse plans
First of all, you have to choose the design and dimensions of the birdhouse from the very beginning. If you want to build a simple birdhouse for the kids, without spending too much money or time, we recommend you to use our free plans.
Building this birdhouse doesn’t require expertise in the field, but just a few basic woodworking techniques, like drilling pilot holes, inserting nails and cutting wooden boards with a circular saw.

Simple bird house plans
The wooden birdhouse shouldn’t be too large nor too small, otherwise the birds might not move in it. In order to cut out the round entrance, you should use a hole saw drill bit or a jigsaw.
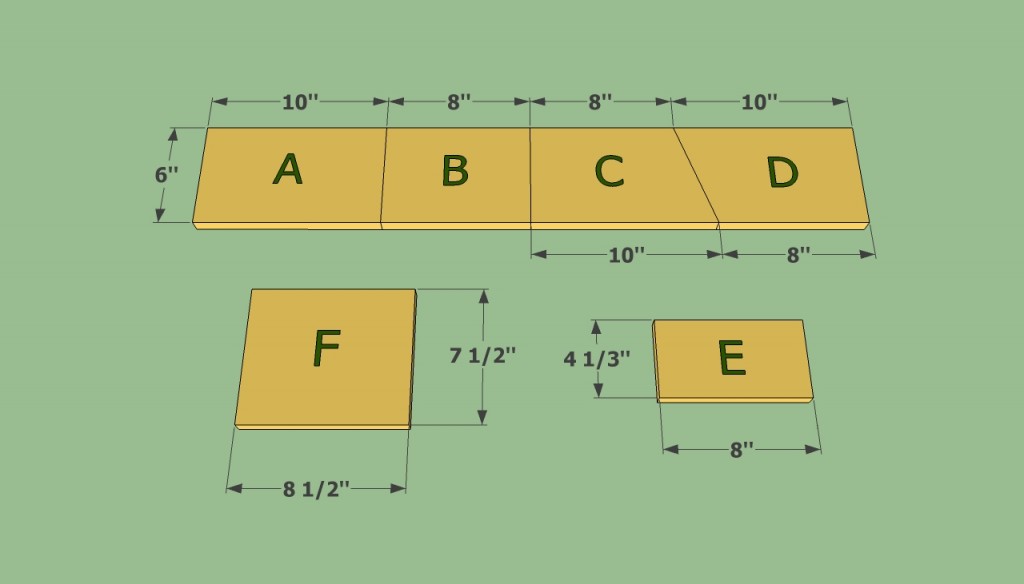
Easy to build birdhouse plans
In order to reduce the cutting waste, you should use a 1×6 wooden board and draw the guidance lines with an L-square. As you can see in the image, you just need to buy a regular wooden board, which shouldn’t cost more than 5 dollars.
Simple birdhouse plans
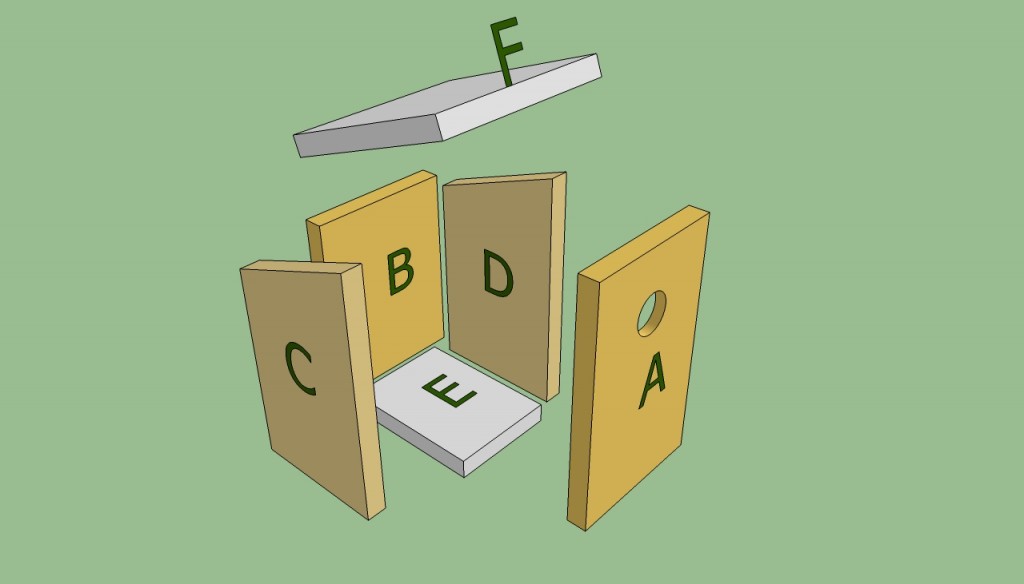
After you have cut all the needed pieces for the final assembly, you should smooth their edges with a sanding block. Next, check if they fit together, before inserting the nails / screws.
As you can see in the image, putting together the simple birdhouse is really easy, if you follow our step by step plans. The radius of the entrance varies according to the birds you plan to host.
How to build a simple birdhouse
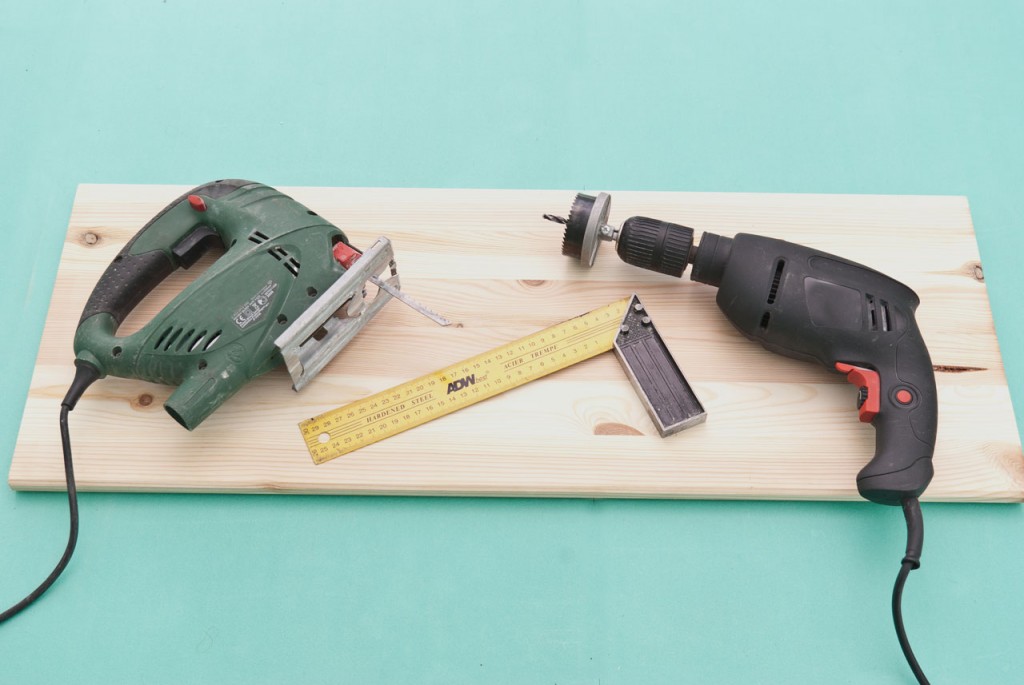
Tools to build a simple birdhouse
Building a simple birdhouse is a straight forward process, if you use the right plans, materials, tools and techniques. Therefore, we recommend you to use a jigsaw / circular saw, drill machinery and an L-square to get the job done like a pro.
Use the L-square to draw straight lines on the wooden board and the jigsaw to cut the pieces accurately. If you haven’t worked with a jigsaw before, we recommend you to clamp a guidance fence on the wooden board.
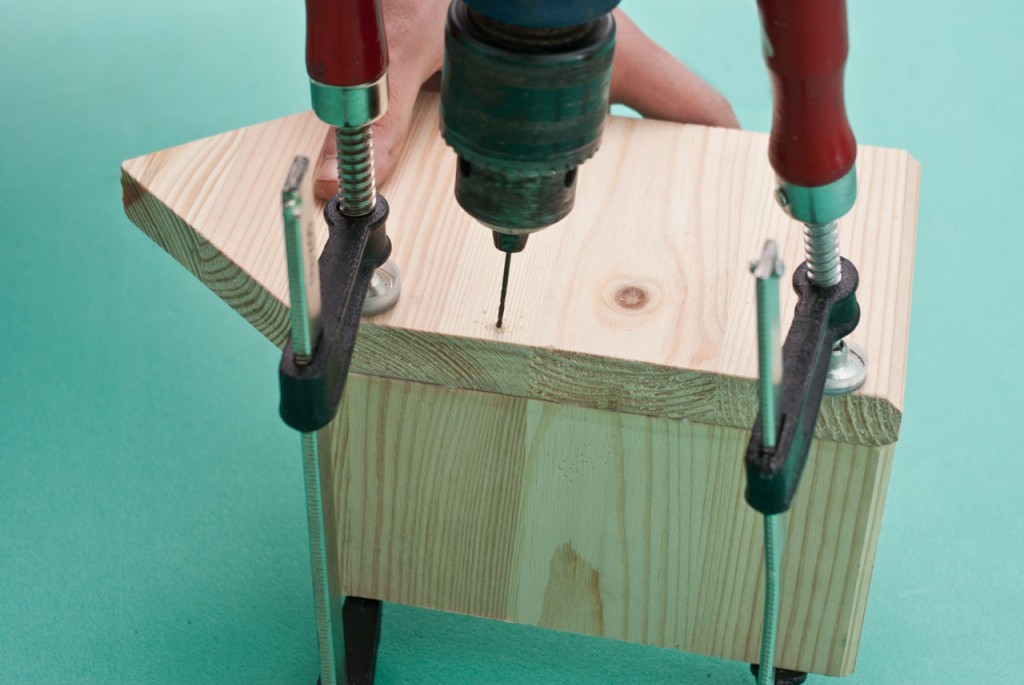
Making pilot holes before inserting the nails
After you have cut the wooden pieces, you have to smooth their edges with a sanding block and to apply wood glue on their edges before locking them together. Afterwards, use several C-clamps to align them together before driving in the screws.
Don’t forget that before driving in the nails / screws, you have to drill several pilot holes. Therefore, use a drill machinery with torque control and a small drill bit to make two holes on each side (leave about 1/2” from the edges, to prevent the wood splitting).

Building simple birdhouse
Next, insert the small nails (1 1/4 – 1 1/2) in the pre-drilled holes and drive them in with a hammer. Make sure you don’t apply too much force, otherwise you could damage the wood.
Work with great care and with patience, to prevent mistakes or other issues. The position and the size of the round entrance varies according to the birds you want to host (if you don’t know these information, you could try to cut a 1-2” hole in diameter, about 2” from top).
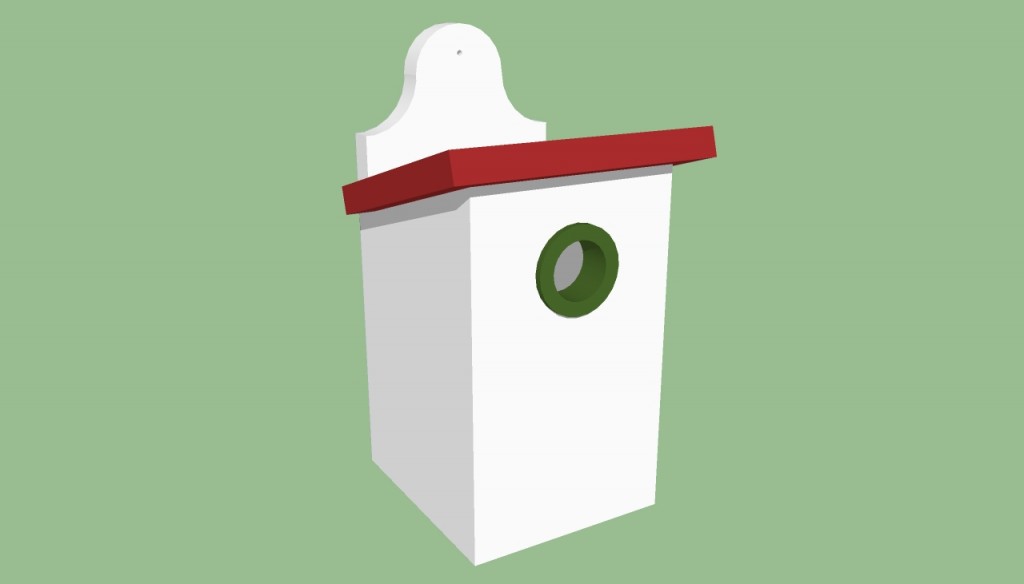
Simple birdhouse for kids plans
Last but not least. you should attach an eye screw to hang the birdhouse to a tree using a chain (at least 6′ high – to keep the cats away). Alternatively, you can build the back of the birdhouse longer, to attach it to a tree with several screws, as you should notice in the image.
Thank you for reading our article about simple birdhouse plans and we recommend you to check out the rest of our projects. Don’t forget to share our articles with your friends, by using the social media widgets.

2 comments
Thank you for all of the instructions and suggestions.
I think that even I can do some of these.
I plan to do this as projects with my grandkids.
It will be exciting to all of us.
Good luck! I’m looking forward to seeing your projects.