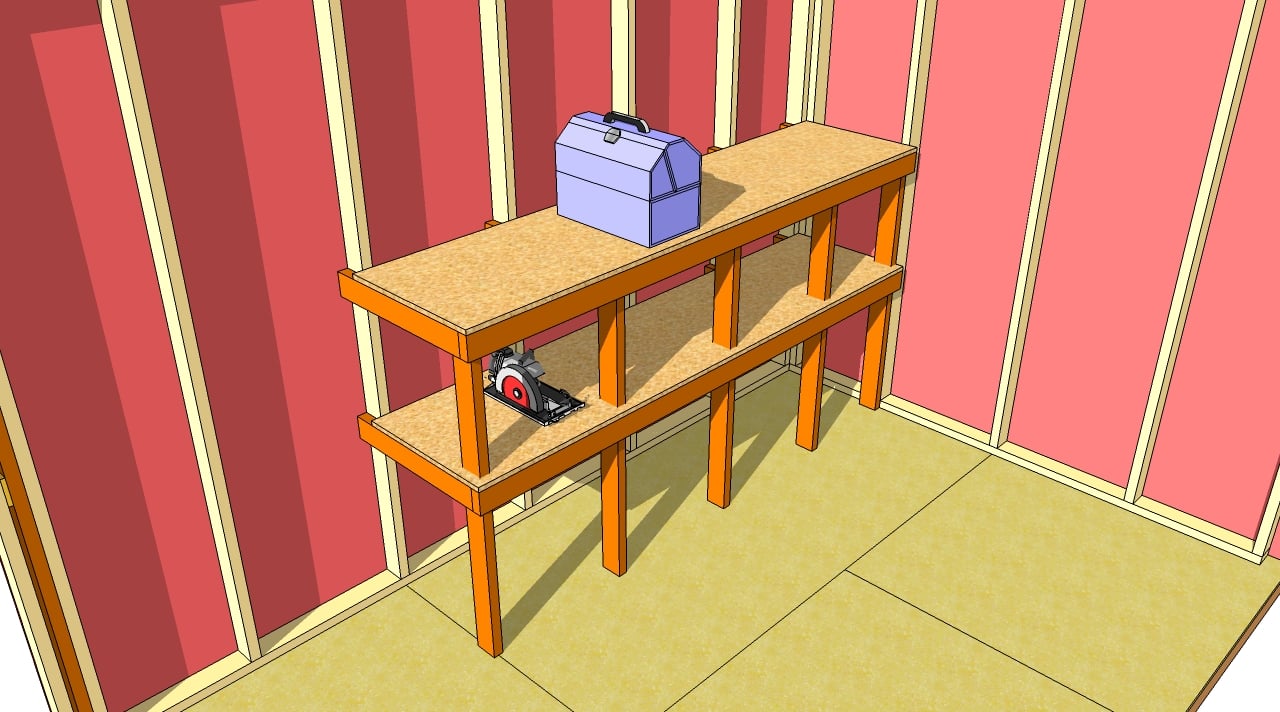
This step by step diy article is about how to build shed shelves. Building heavy duty shelves for your shed is always a good idea, if you have lots of items to store. In order to get the job done by yourself, you can use left over lumber, as it it always best to start a project, rather than throw it to trash. Any homeowner with average woodworking skill can do this project, as you just need to make a few cuts and align the components thoroughly.
If you want to store large and heavy items on the shelves, we strongly recommend you to secure the brackets to the studs and to add front legs. In this manner, the frame of the shelves will be rigid and support a lot of weight, without damaging it. See all my Premium Plans in the Shop.
Made from this plan
In order to build a shed shelves, you needs the following:
Materials
- A – 5 pieces of 2×4 lumber – 50″ LEGS
- B – 10 pieces of 2×4 lumber – 24 3/4″ BRACKETS
- C – 2 pieces of 2×4 lumber – 98 3/4″ BRACES
- D – 2 pieces of 3/4” plywood 22 3/4″x94 3/4″ long SHELVES
- 3” wood screws, 2” wood screws SCREWS
- 1 piece of 3/4″ plywood – 4’x8′
- 7 pieces of 2×4 lumber – 10 ft
- 2 1/2″ screws
- 1 1/4″ screws
- glue, stain
- wood filler
Tools
- Safety gloves, glasses
- Miter saw, jigsaw
- Chalk line, tape measure, spirit level, carpentry pencil
- Drill machinery and drill bits
Tips
- Pre-drill holes in the wooden components, before driving in the screws
- Smooth the exposed edges, by using a router with a 1/4” bit
Time
- 4 hours
Related
Building shelves for a shed
Building shelves for a shed can be done in several ways, so you should choose the alternative that fits your needs. You could attach the brackets at angle and build the shelves without installing the front legs. On the other hand, you can follow our instructions and build some really sturdy shelves.
How to build shed shelves
The first step of the project is to install the front legs and the brackets int place, as in the image. As you can easily notice in the image, you need to use 2×4 lumber and to secure the components to the wooden studs of the shed.
Next, you need to install the braces, as in the plans. In order to get a professional result, you need to make sure the frames are placed equally spaced, bot at top and bottom. Drill pilot holes trough the braces, and insert the 3” wood screws into place.
Afterwards, attach the shelves into place and lock them tightly with 2” screws. As you can see in the image, you can build the shelves either from 3/4” plywood or from 2×4 slats. Align the shelves, making sure they are flush with the edges, before driving in the screws.
Last but not least, you should take care of the finishing touches. Therefore, you could fill the holes with wood filler, as to get a smooth surface. After the compound dries out, you should sand the area, along the grain, using 120-git sandpaper.
Thank you for reading our article about how to build shed shelves and we recommend you to take a look on the rest of our projects. Don’t forget to share our projects with your friends, by using the social media widgets, if you have found the project useful.


