Welcome to my 2-unit garbage container shed enclosure plans! This DIY guide will help you create a stylish and practical solution for hiding your trash cans while keeping your outdoor space neat and organized. With easy-to-follow plans and detailed instructions, you’ll transform your backyard with a functional and attractive structure. Let’s dive in and build this awesome trash can shed that not only looks great but also adds convenience to your daily routine!
Estimating the cost for building your 2-unit trash can shed enclosure is straightforward and budget-friendly. Depending on your choice of materials, you can expect to spend between $150 and $300. This includes high-quality lumber, hardware, hinges, and a durable paint or stain for finishing. By following the detailed plans and using basic tools, you can create a stylish and functional enclosure without breaking the bank. See my other DIY projects HERE. PDF downloadable plans with premium features in the Store.
We recommend you to invest in the best materials you could afford. Therefore, you should buy weather-resistant lumber, such as pine or cedar. Always take accurate measurements before adjusting the size of the components at the proper size. Drill pilot holes trough the components before inserting the wood screws, to prevent the wood from splitting. My plans come with a full cut / shopping list and they are PDF Download and Print friendly. See all my Premium Plans HERE.
Made from this plan
Pin for later!
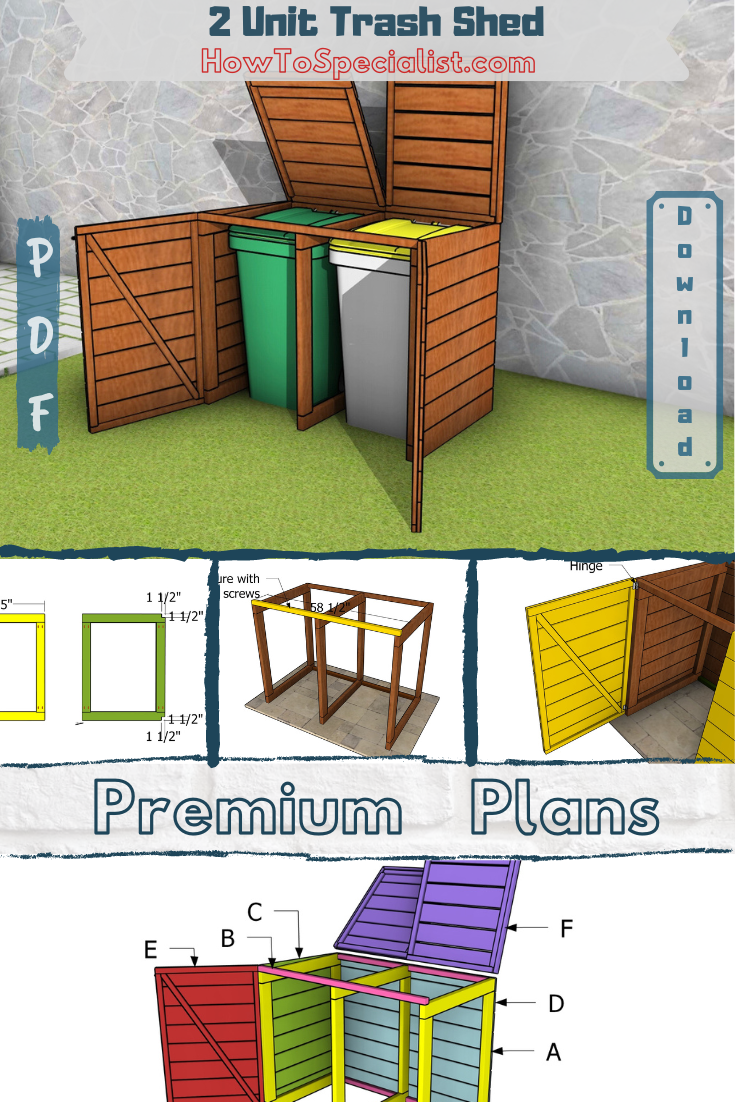
Garbage Container Enclosure Shed Plans
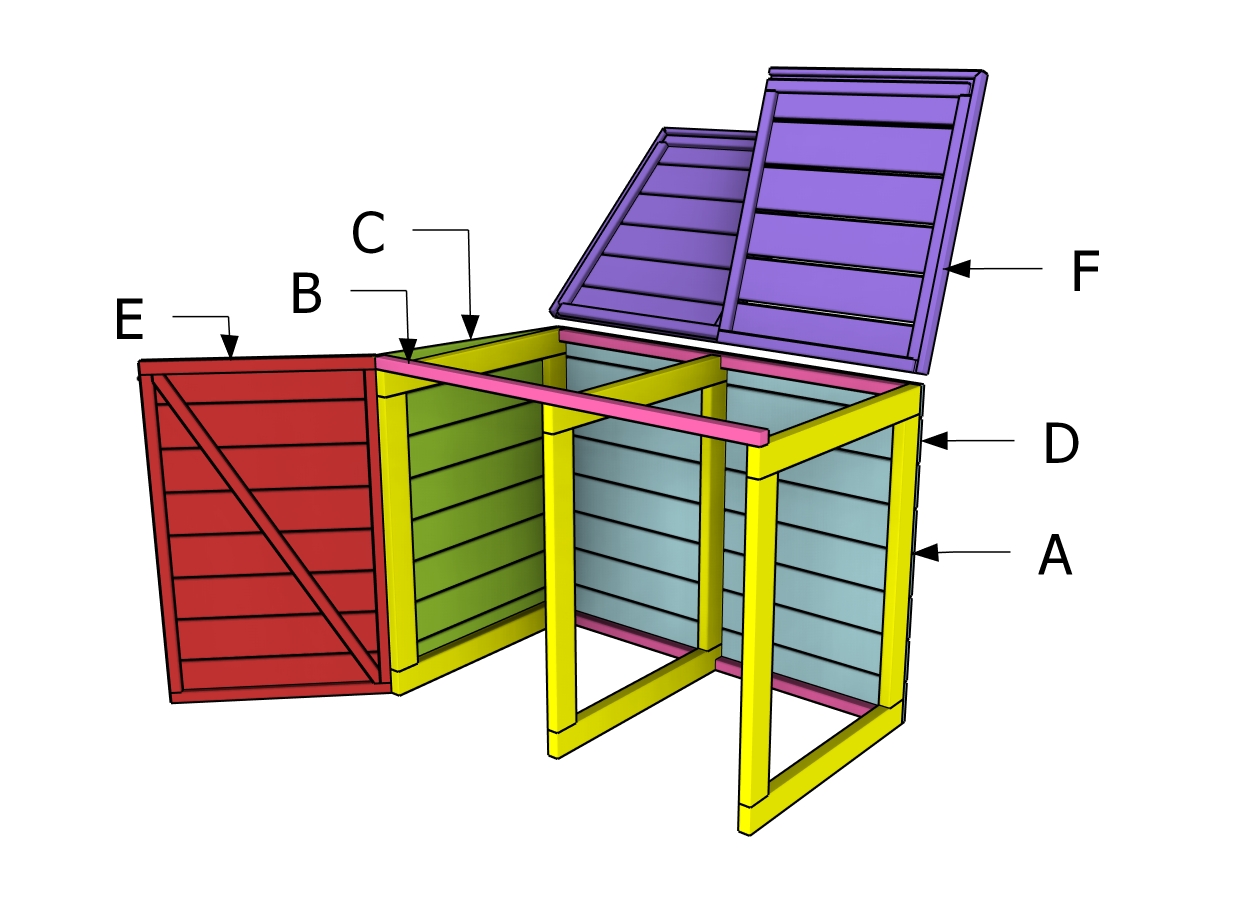
Building a double trash bin shed
Materials
A – FRAMES – 2×4 lumber 35″ – 6 pieces
A – FRAMES – 2×4 lumber 38″ – 6 pieces
B – SUPPORTS – 2×2 lumber 55 1/2″ – 2 pieces
B – SUPPORTS – 2×2 lumber 58 1/2″ – 1 piece
C – SIDES – 1×6 lumber 35 3/4″ – 16 pieces
D – BACK – 1×6 lumber 58 1/2″ – 8 pieces
E – DOOR – 1×6 lumber 29 1/4″ – 16 pieces
E – DOOR – 1×2 lumber 29 1/4″ – 4 pieces
E – DOOR – 1×2 lumber 43 1/2″ – 4 pieces
E – DOOR – 1×2 lumber 50 3/4″ – 2 pieces
F – LIDS – 1×2 lumber 29 1/4″ – 4 pieces
F – LIDS – 1×2 lumber 32 3/4″ – 4 pieces
F – LIDS – 1×2 lumber 30″ – 2 pieces
F – LIDS – 1×2 lumber 36 1/2″ – 2 pieces
F – LIDS – 1×6 lumber 29 1/4″ – 12 pieces
- 2×4 lumber – 8 ft – 6 pieces
- 2×2 lumber – 8 ft – 3 pieces
- 1×6 lumber – 8 ft – 20 pieces
- 1×2 lumber – 8 ft – 8 pieces
- 3″x3″ outdoor hinges – 8 pieces
- Door latch -1 piece
- Handles – 2 pieces
- 2 1/2″ screws – 100 pieces
- 1 1/4″ screws – 100 pieces
- Stain – 1 can
Tools
- Miter saw
- Circular saw
- Drill machinery, drill bits
- Safety gloves, glasses
- Chalk line, tape measure, spirit level, carpentry pencil
Time
- One week
2 Unit Garbage Shed – Building the frame
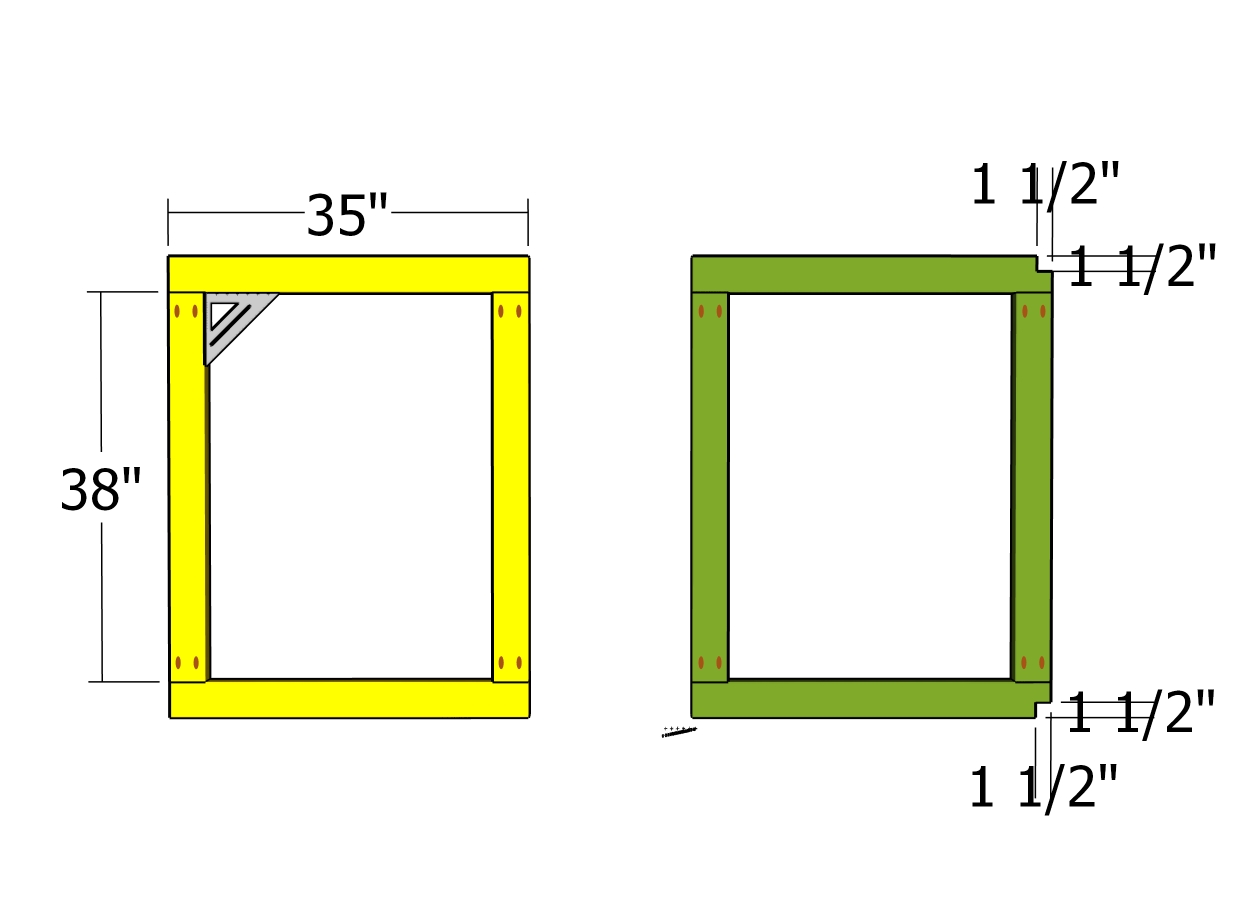
Main frames
The first step of the project is to build the frames for the shed. We need two pieces of yellow frames and one green frame. Drill pocket holes at both ends of the vertical components. Align the edges flush and make sure the corners are square. Insert 2 1/2″ screws to assemble the frames.
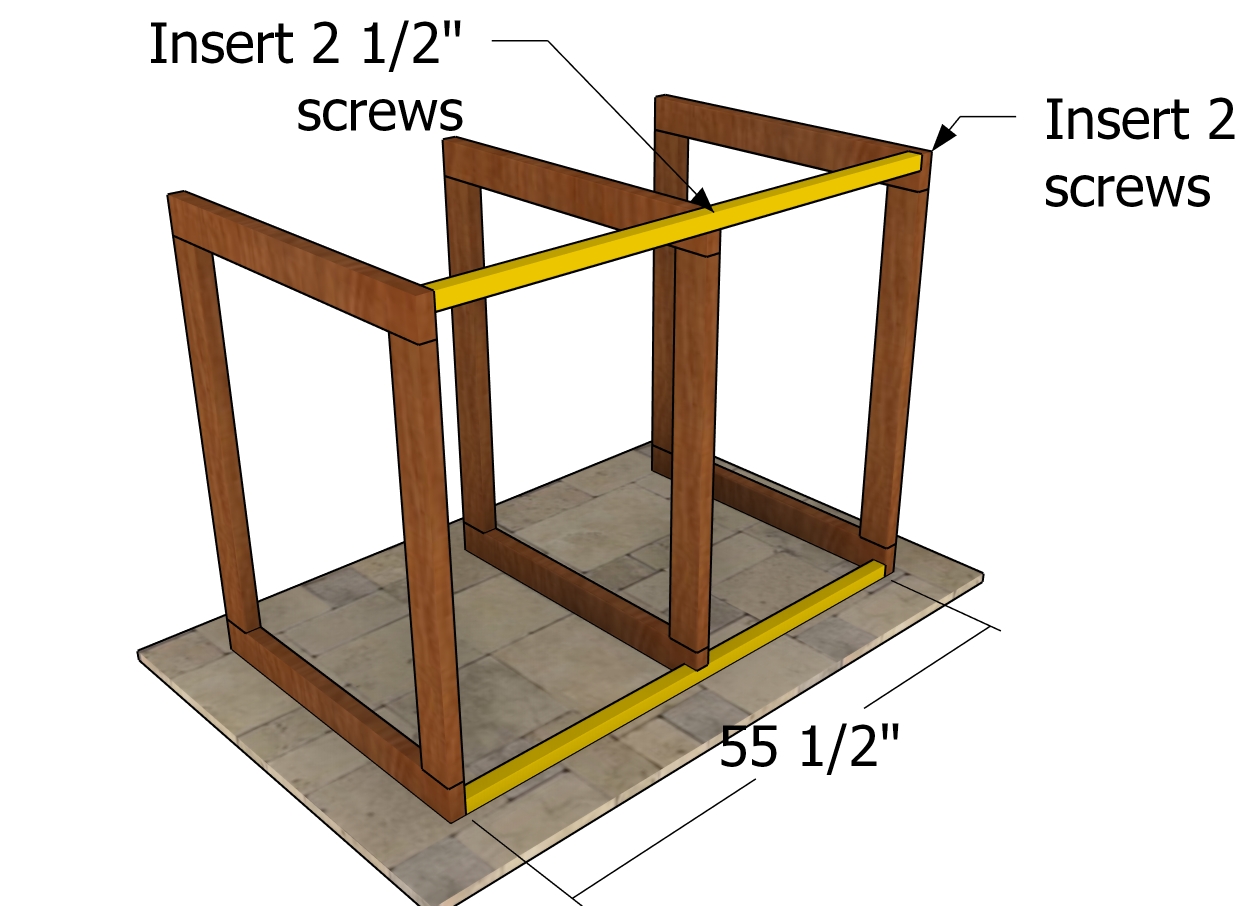
Assembling the frame of the shed
Next, we need to assemble the enclosure shed. Plumb the frames with a spirit level and attach the 2×2 supports, as depicted in the diagram.
Drill pilot holes through the side frames and insert 2 1/2″ screws into the supports. Attach the middle frame with 2 1/2″ screws, as well. Center the middle frame to the supports.
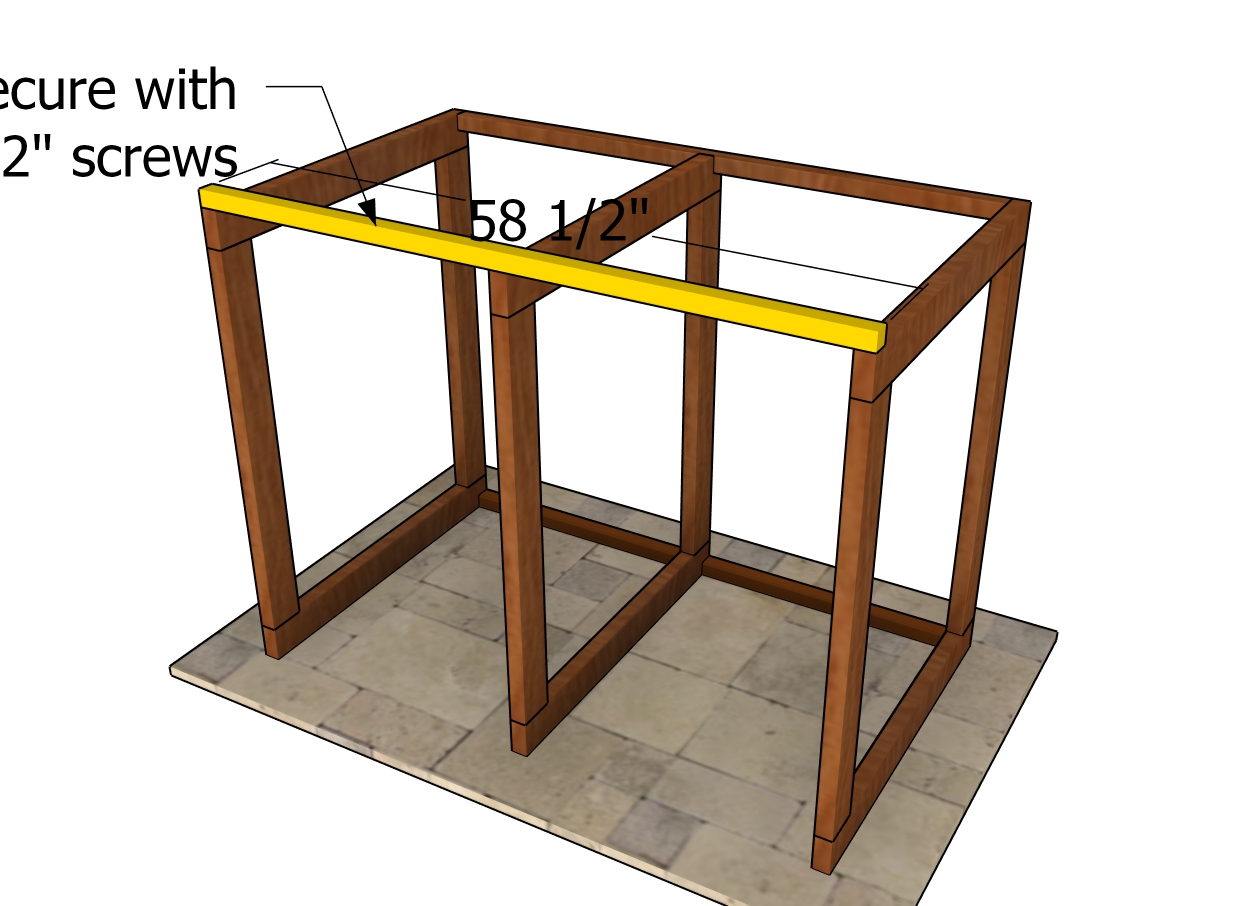
Front support
Attach the 2×2 support to the front of the shed. This support will create the lean to for the trash shed. Drill pilot holes and insert 2 1/2″ screws to lock them into place tightly.
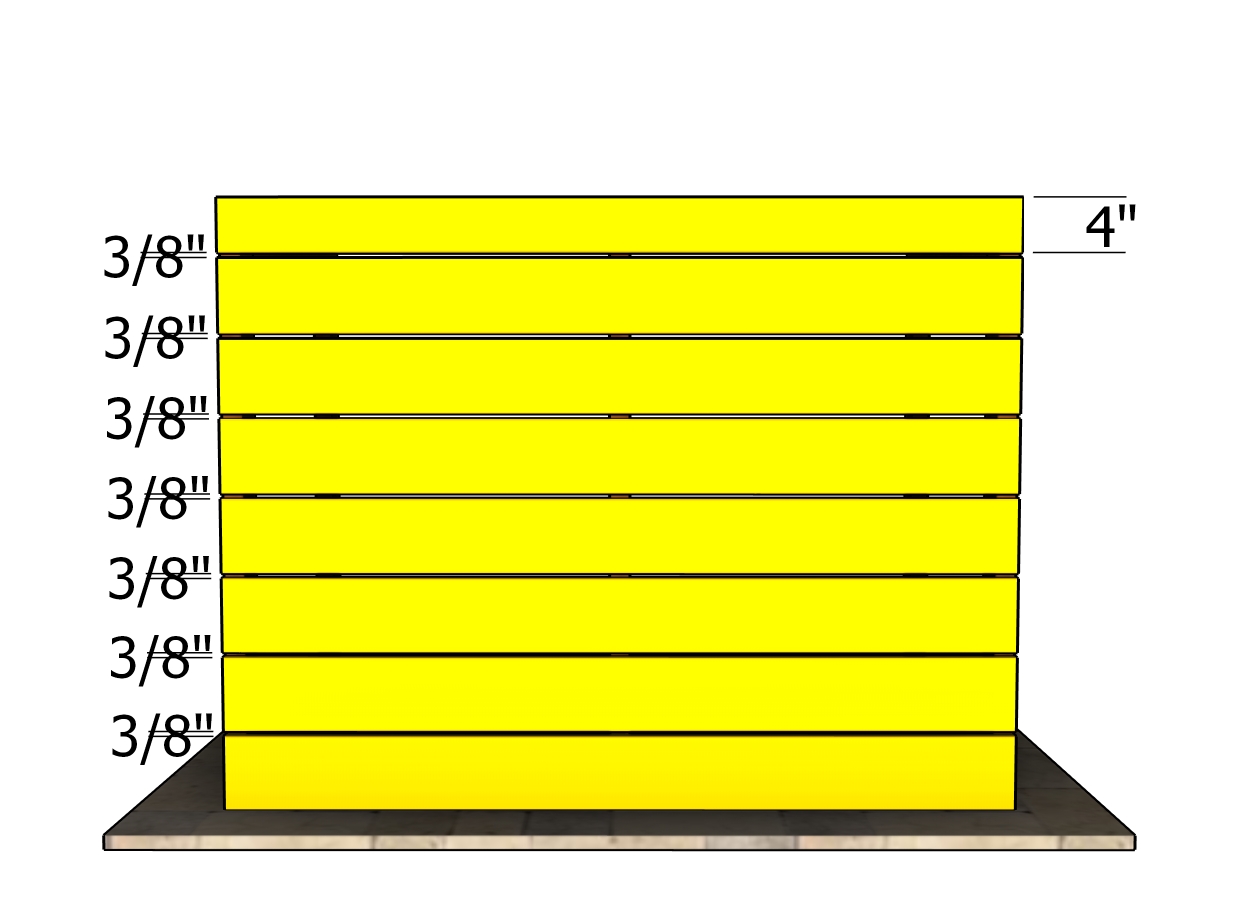
Back wall slats
Attach the 1×6 boards to the back of the shed. Place a 3/8″ spacer between the slats to create even gaps. Align the edges at both ends and secure them to the frame with 1 1/4″ screws.
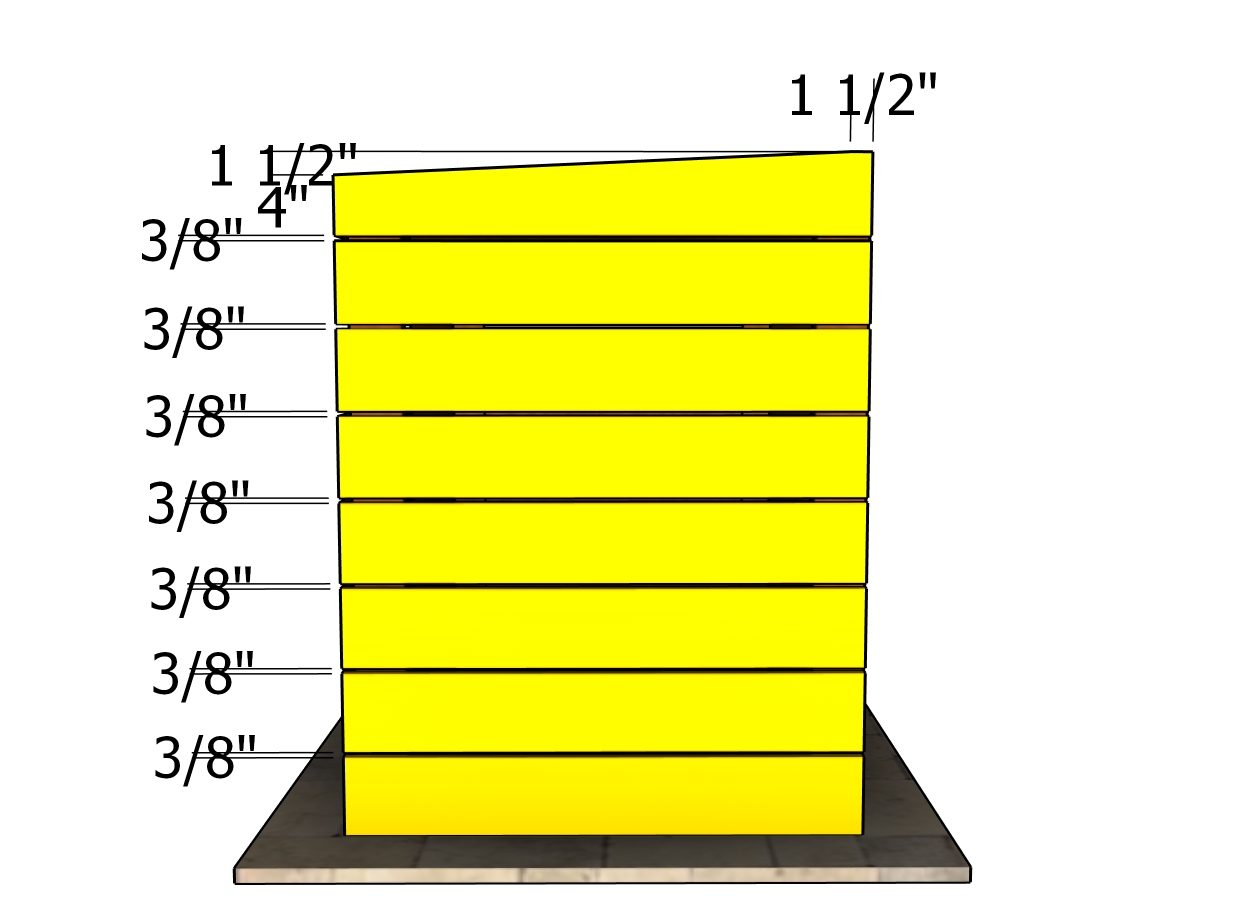
Side slats
Attach the 1×6 boards to the sides of the shed, as shown in the plans.
Building the Lids and Doors
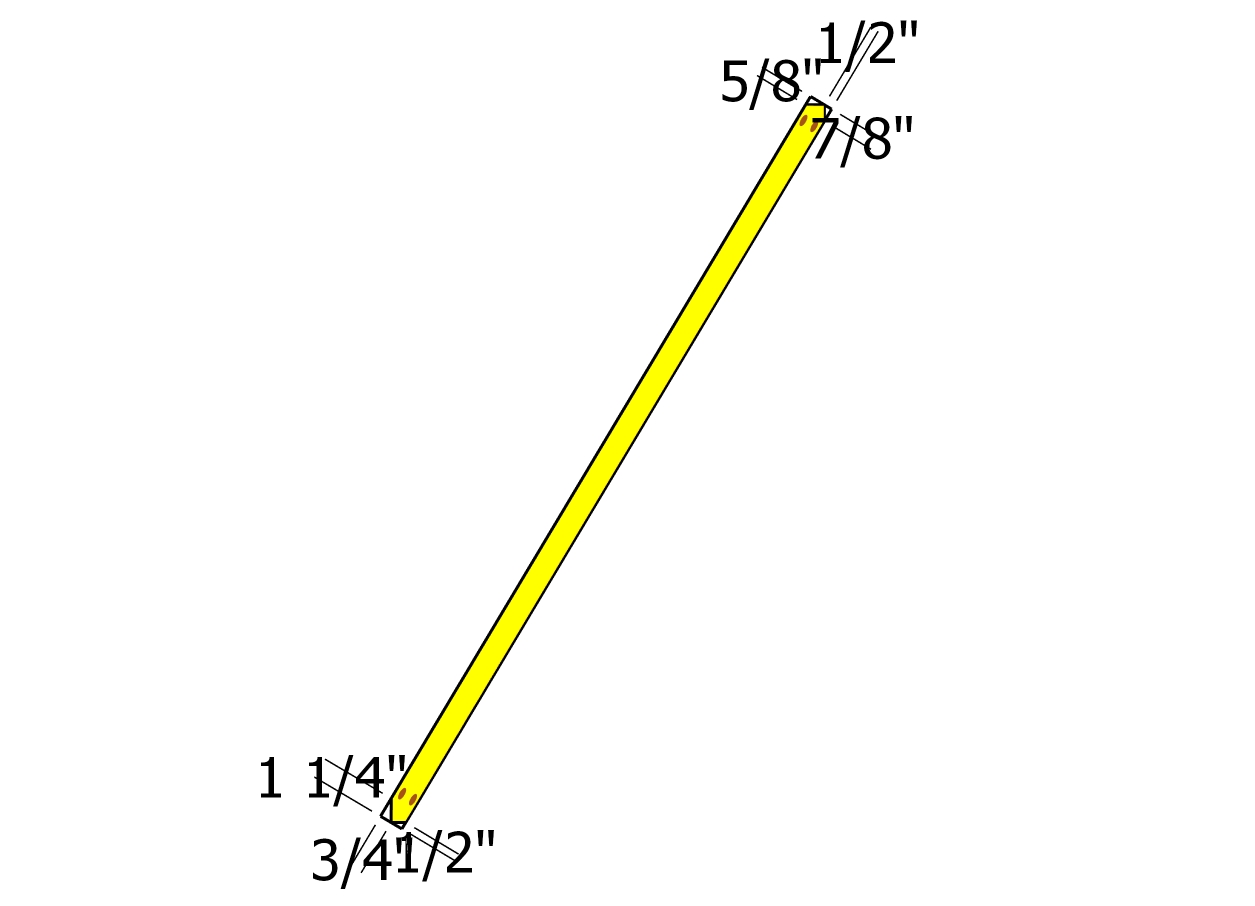
Diagonal brace
Next, we need need to assemble the front double doors. Use 1×2 lumber for the diagonal supports. Make the angle cuts and then drill pocket holes, as shown in the image.
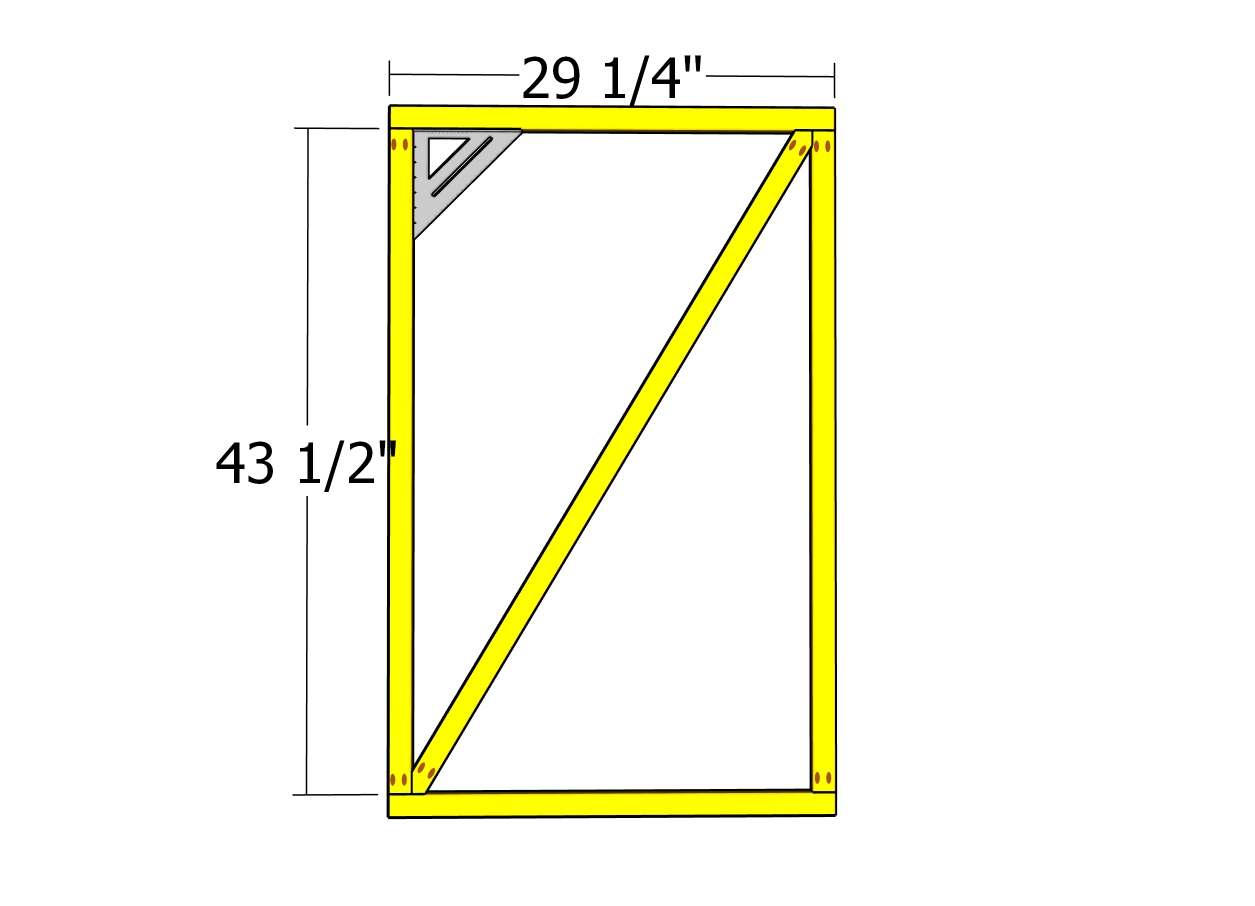
Door frame
Use 1×2 lumber for the other components of the front doors, as well. Make pocket holes to both ends of the vertical parts and then lay everything on a level surface. Align the edges flush and use a speed square to make sure the corners are right-angled. Insert 1 1/4″ screws to assemble the frames. We need two frames, one for each door.
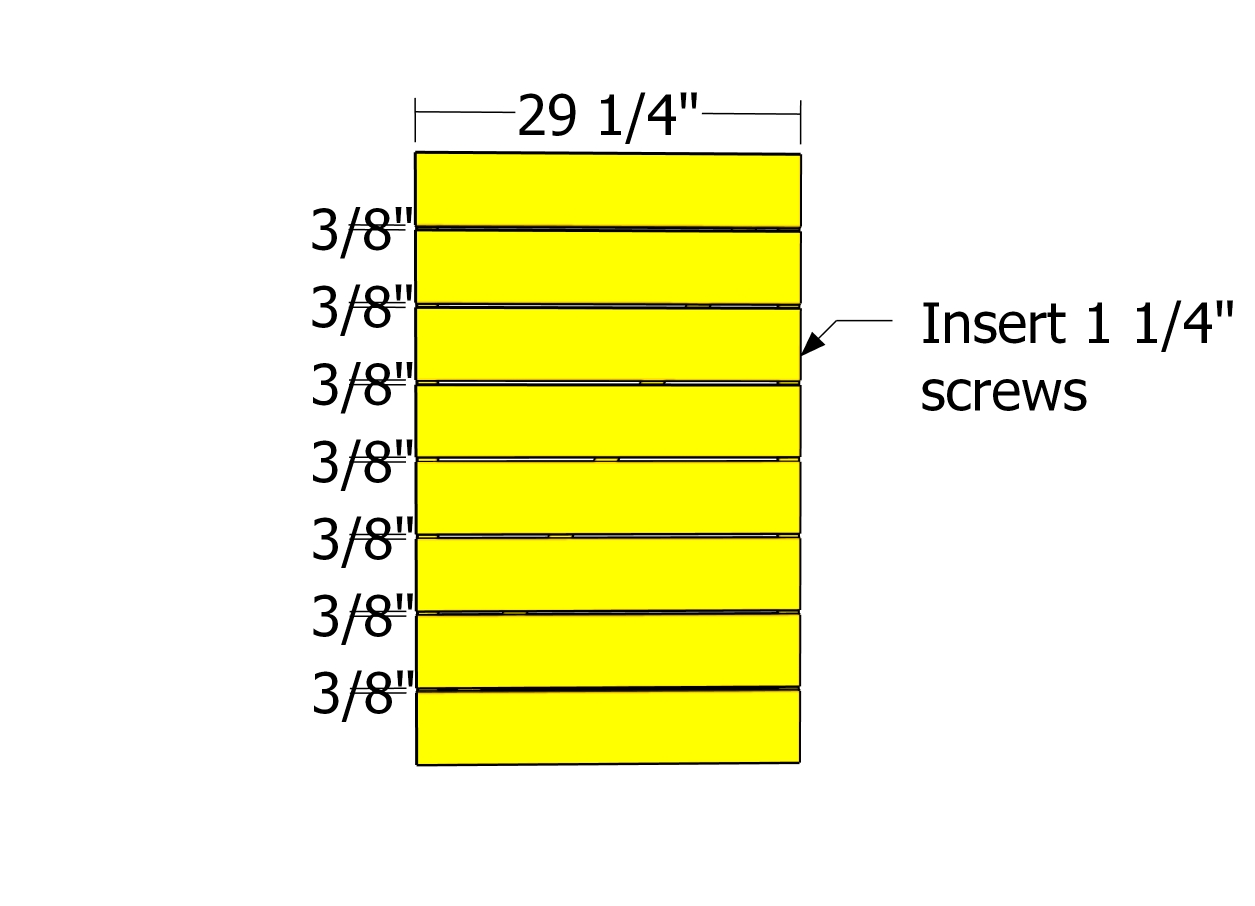
Slats for the double doors
Attach the 1×6 boards to the door frames. Align the edges flush and use 3/8″ blocks of wood as spacers.
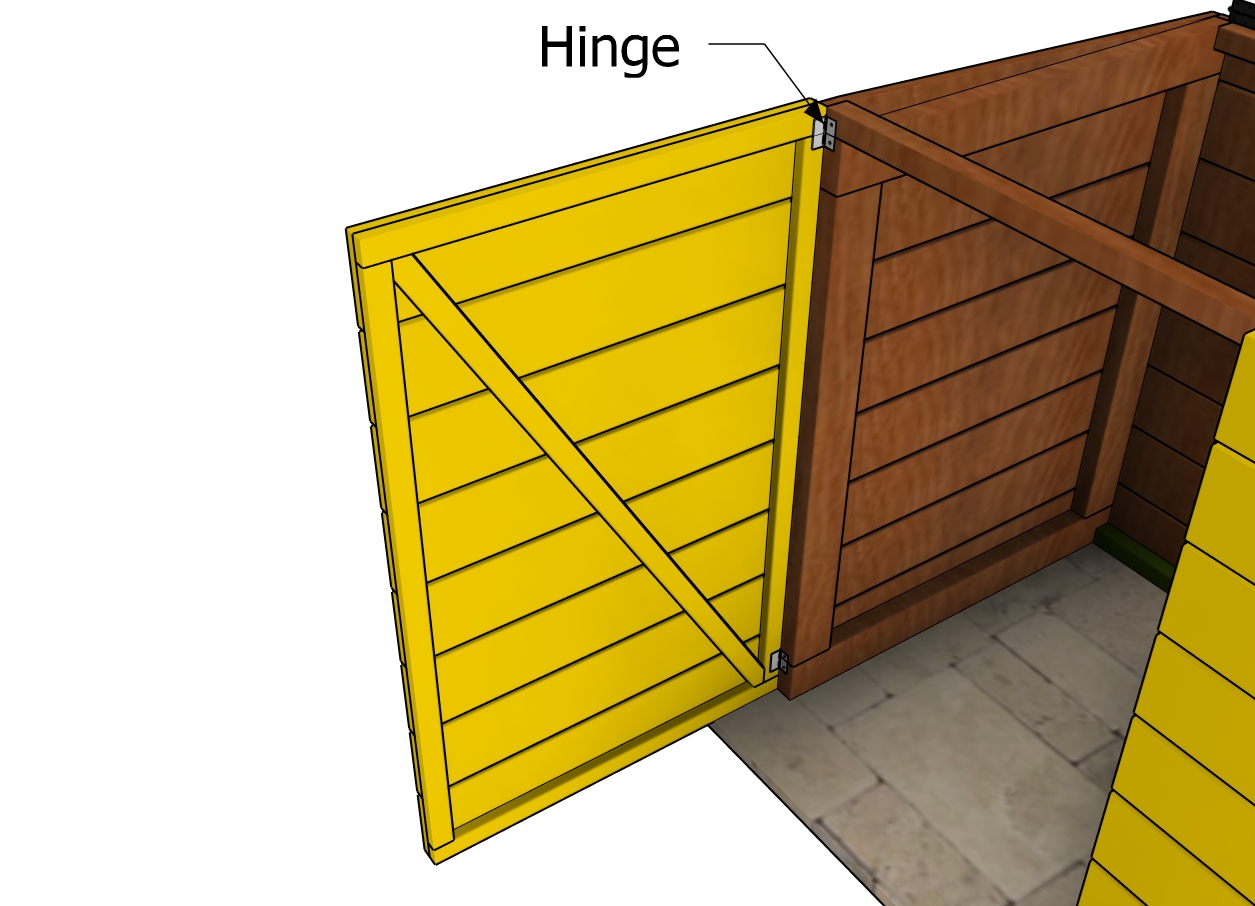
Fitting the front doors
Fit the doors to the shed with two hinges. See the diagram for more details on the hinge position.
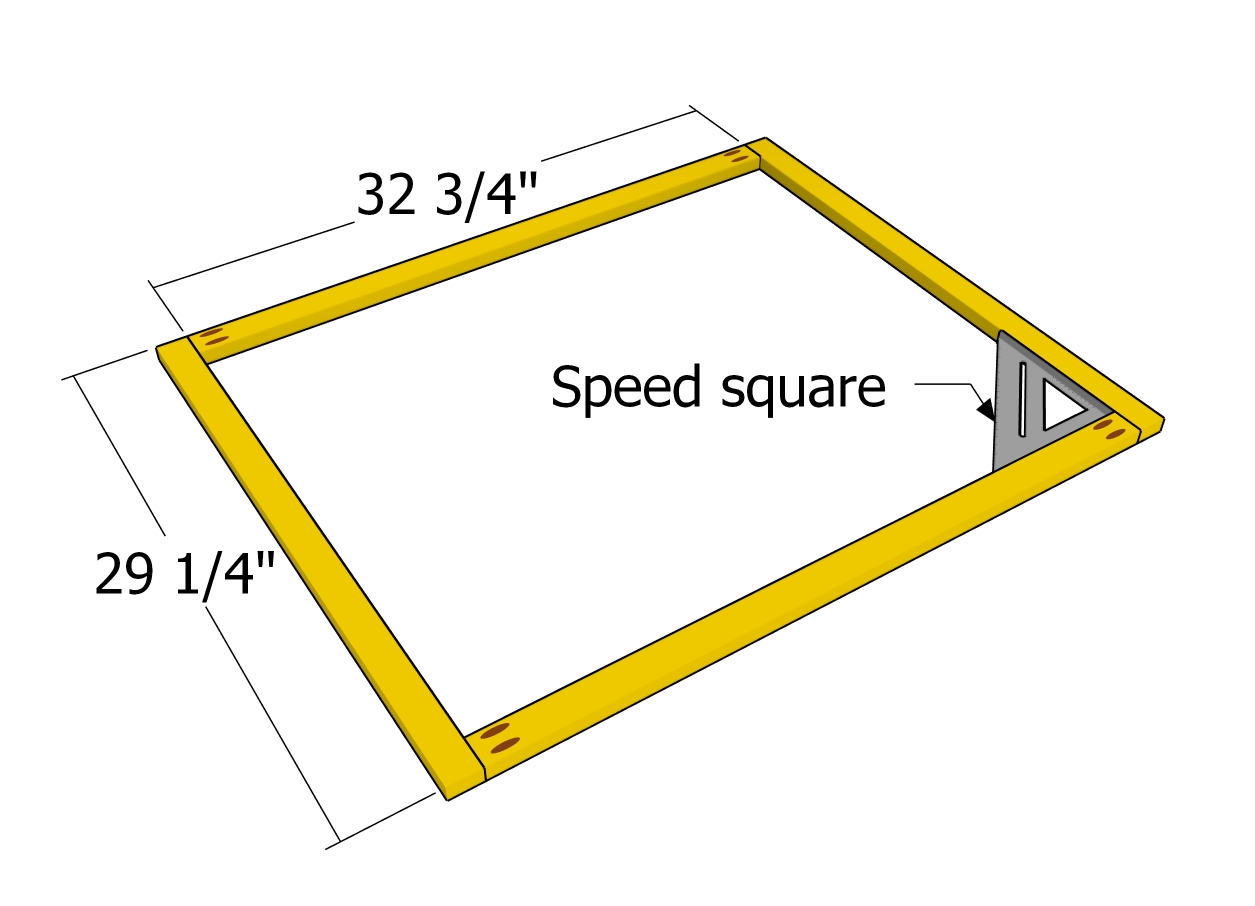
Assembling lid frame
Next up, let’s assemble the lids for your shed using 1×2 lumber for the frame. Drill pocket holes at both ends of the 32 3/4″ long boards, and secure them with 1 1/4″ screws. To ensure your frame is perfectly square, measure the diagonals and make adjustments until they are equal. This step is crucial for a sturdy and well-aligned lid.
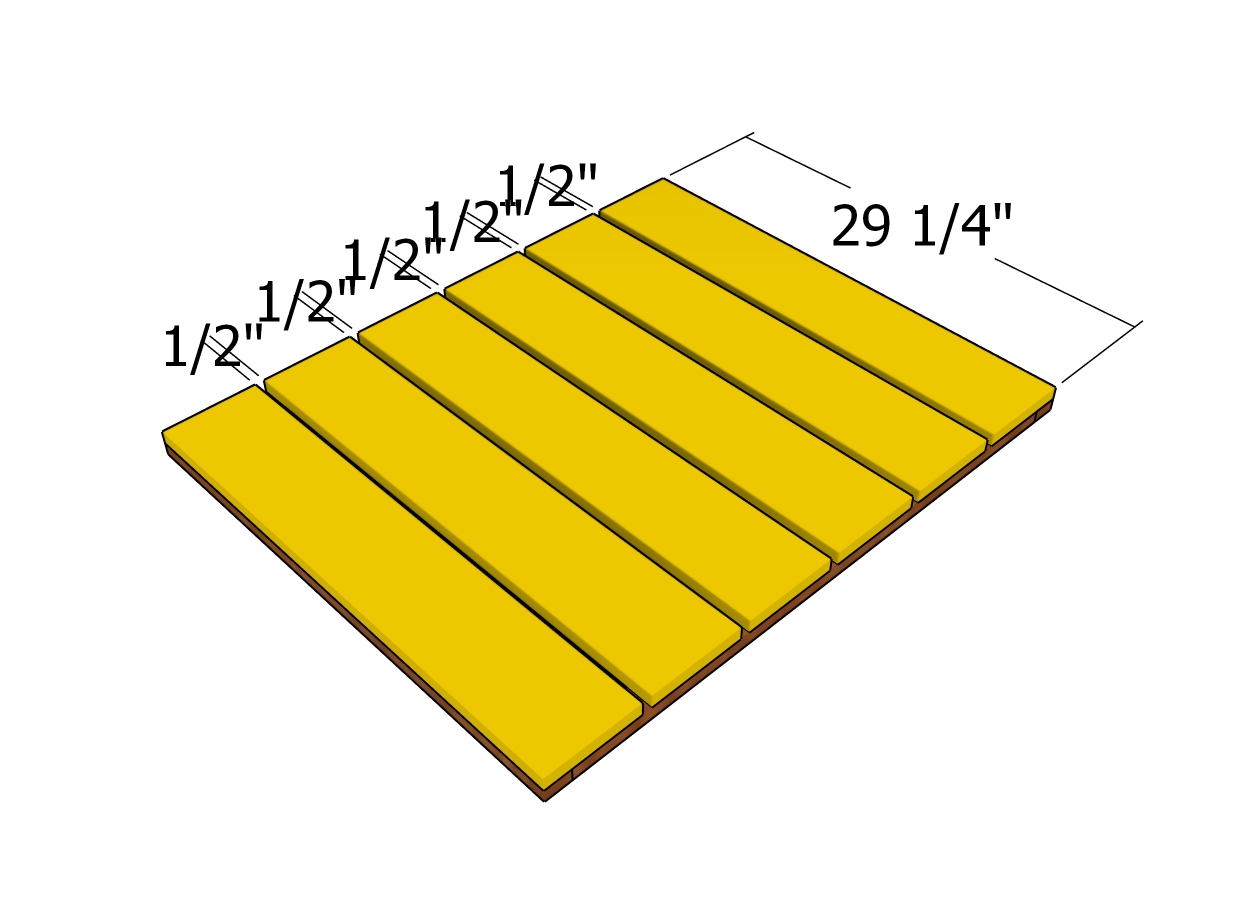
Lid slats
Attach the 1×6 boards to the lid, ensuring even gaps by using 1/2″ spacers. Drill pilot holes and secure the boards with 1 1/4″ screws.
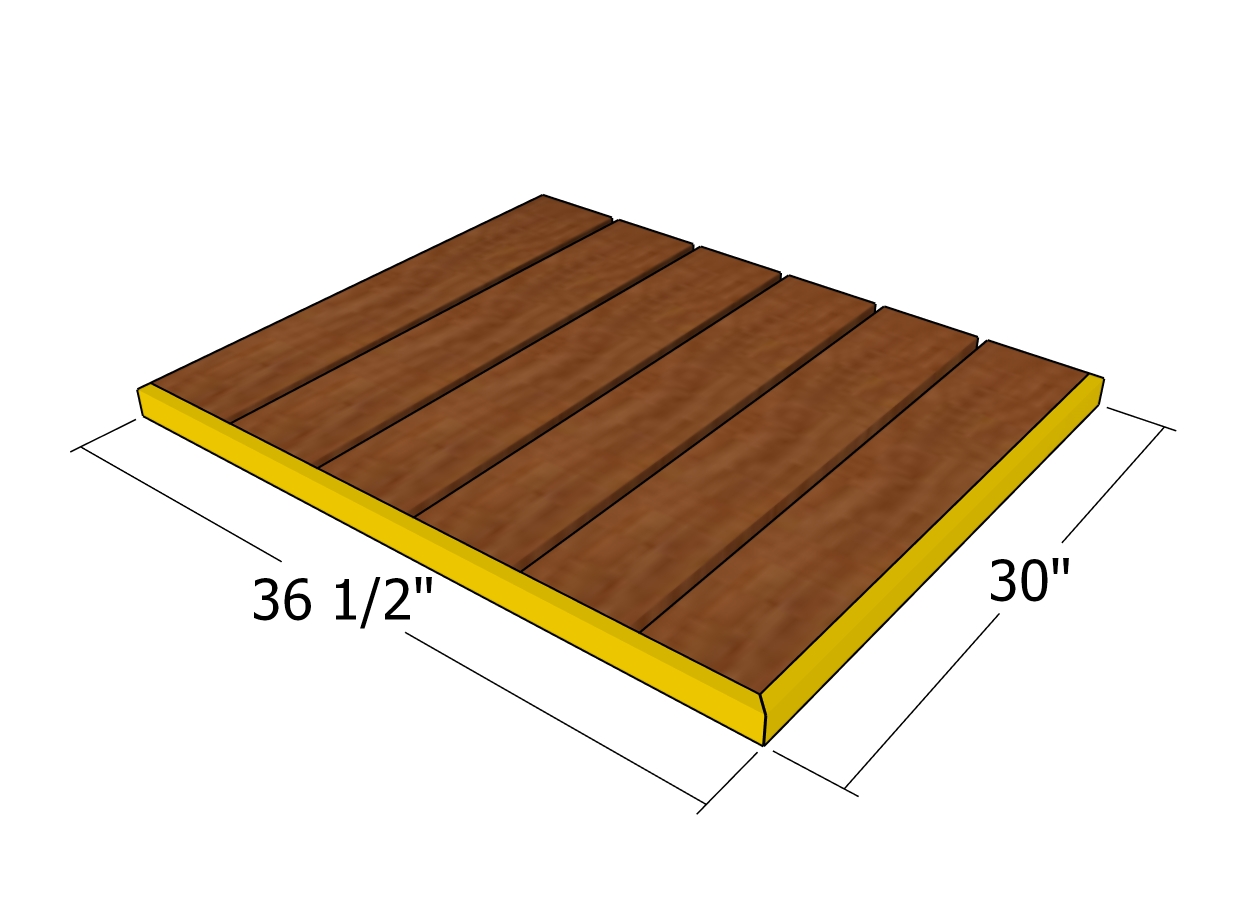
Lid trims
For the trims, use 1×2 lumber and make 45-degree cuts to join them together, as shown in the diagram. Secure the trims to the lids using 2″ nails and wood glue for a clean and professional finish.
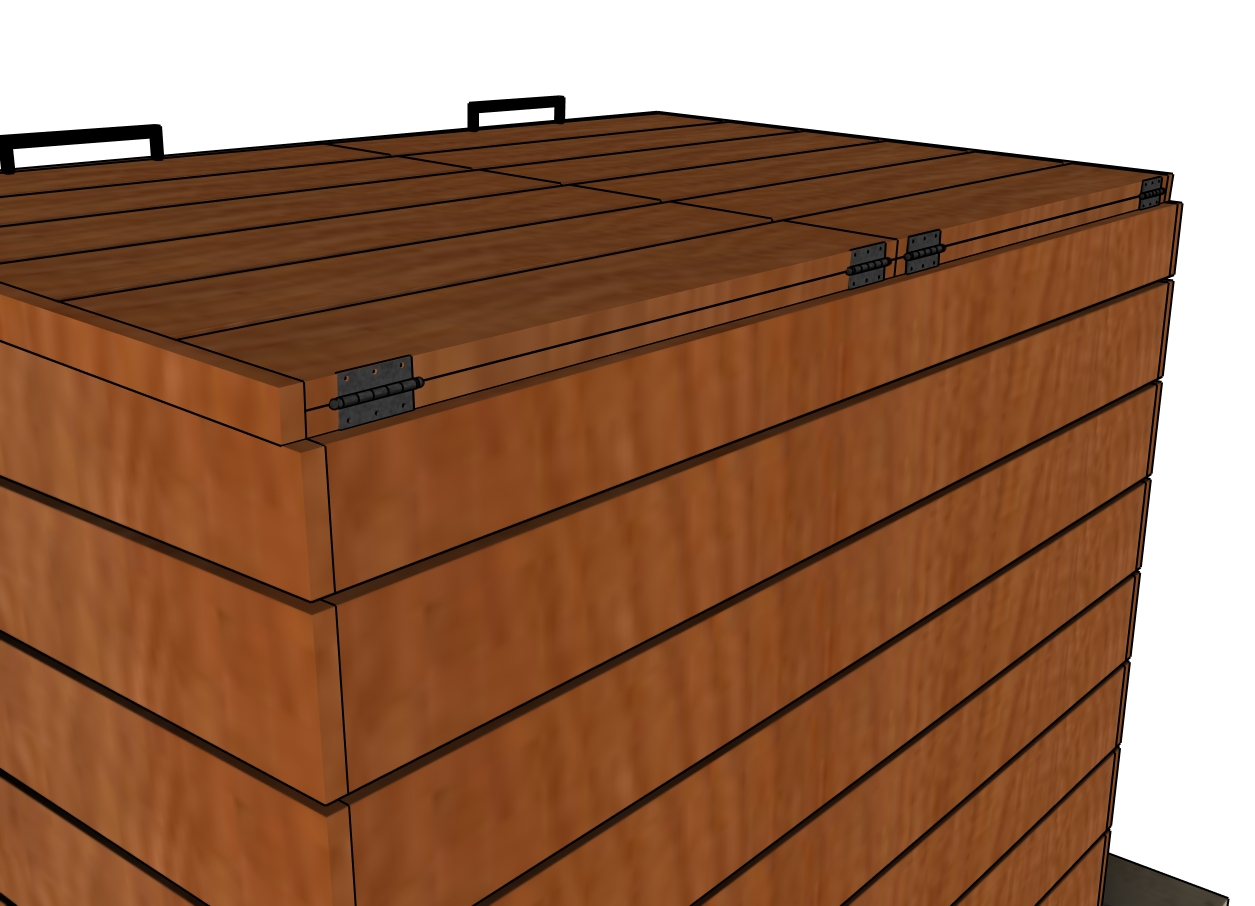
Fitting the lid with hinges
Attach the lids to the top of the shed, making sure the edges are flush. Use hinges to secure the lids to the frame, as shown in the diagram.
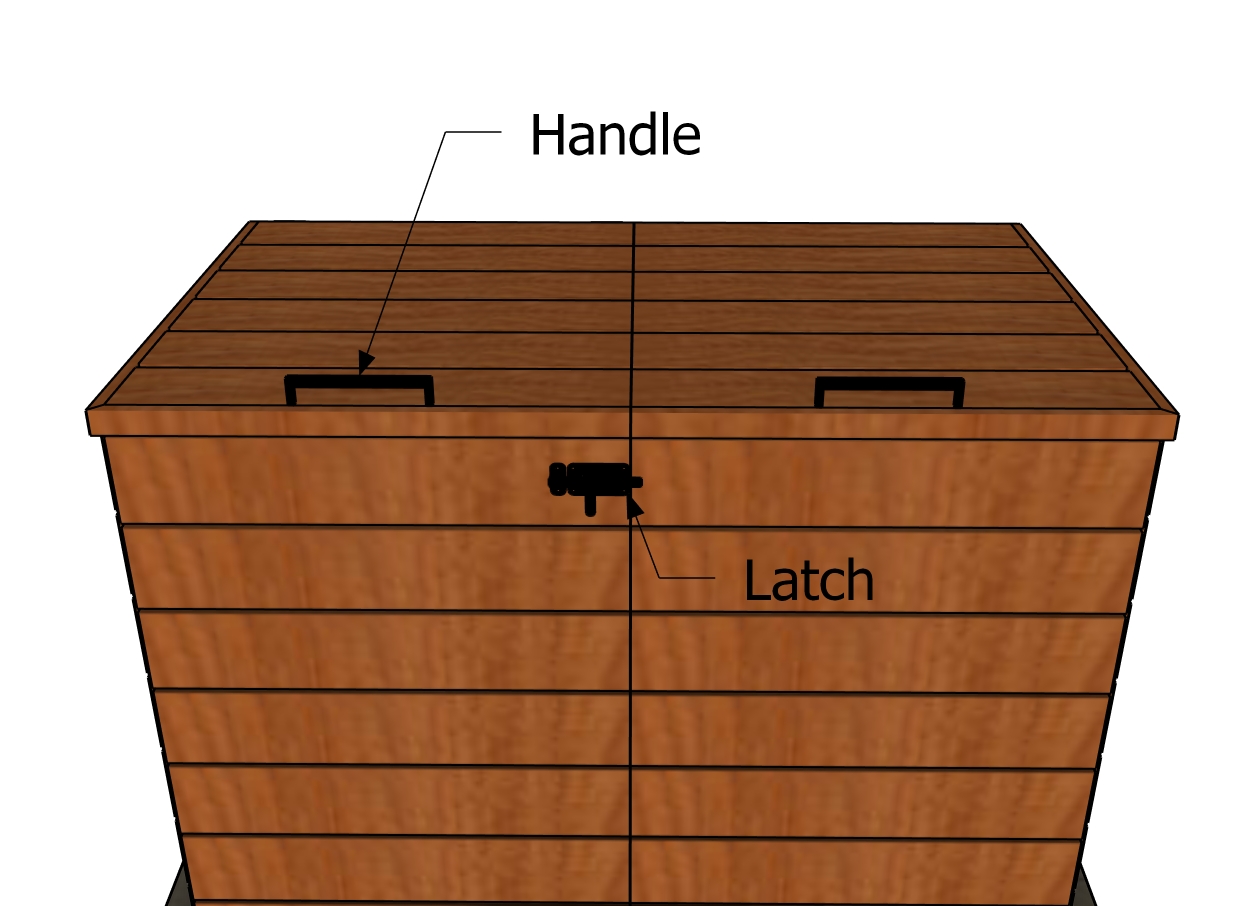
Handles and latch
Install latches on the lids to allow for easy opening and closing. This will ensure your shed is both functional and accessible. Attach a latch to keep the doors locked together tightly.
Finishing Touches
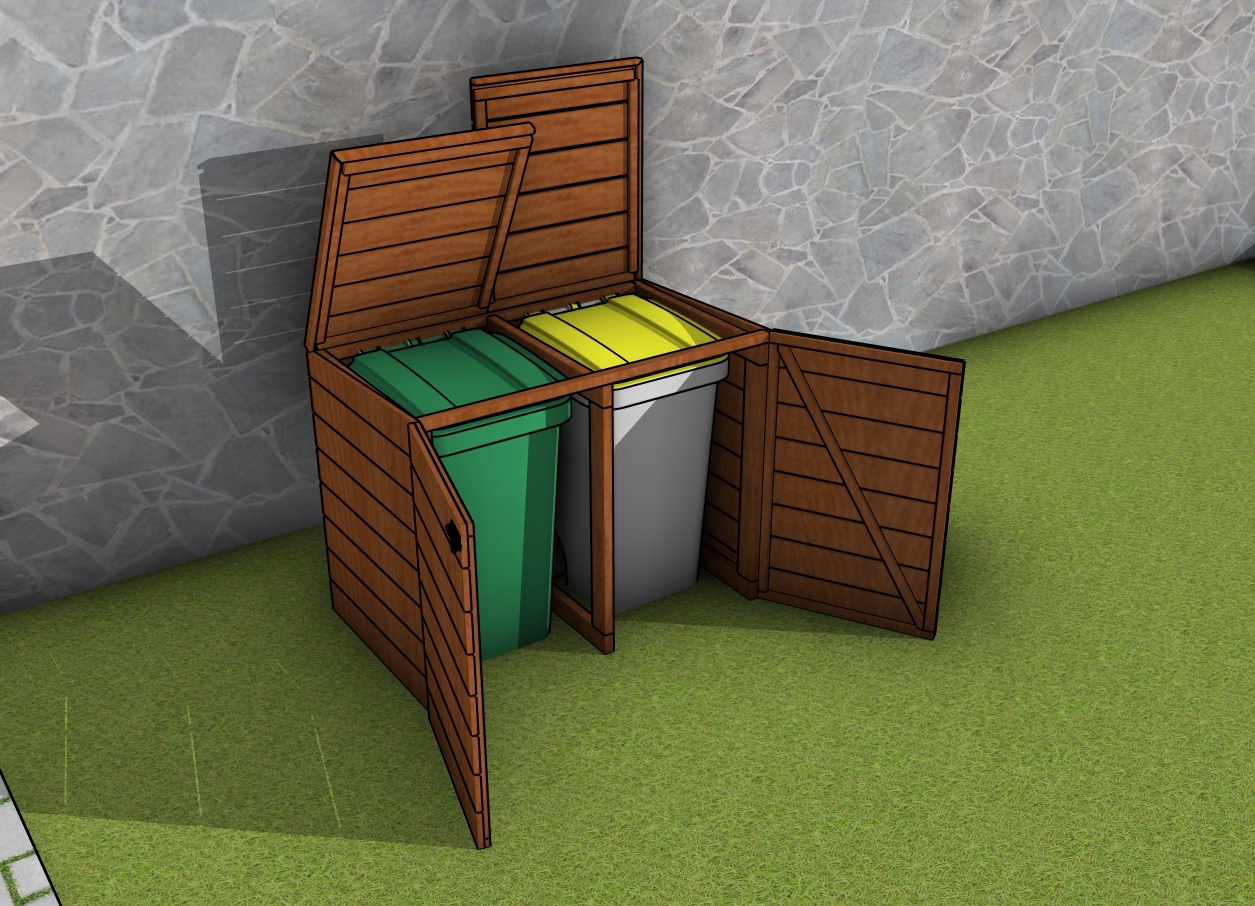
How to build a double garbage bin shed
Building a 2-unit trash can shed offers several key benefits. First, it keeps your outdoor space tidy by providing a dedicated area to store your trash cans, hiding them from view and preventing them from being an eyesore. Second, it allows for customization, so you can paint and style it to match your home’s exterior, adding a cohesive and attractive element to your yard.
Lastly, tackling this project boosts your DIY skills, giving you a sense of accomplishment and transforming your outdoor space into a more functional and stylish area.
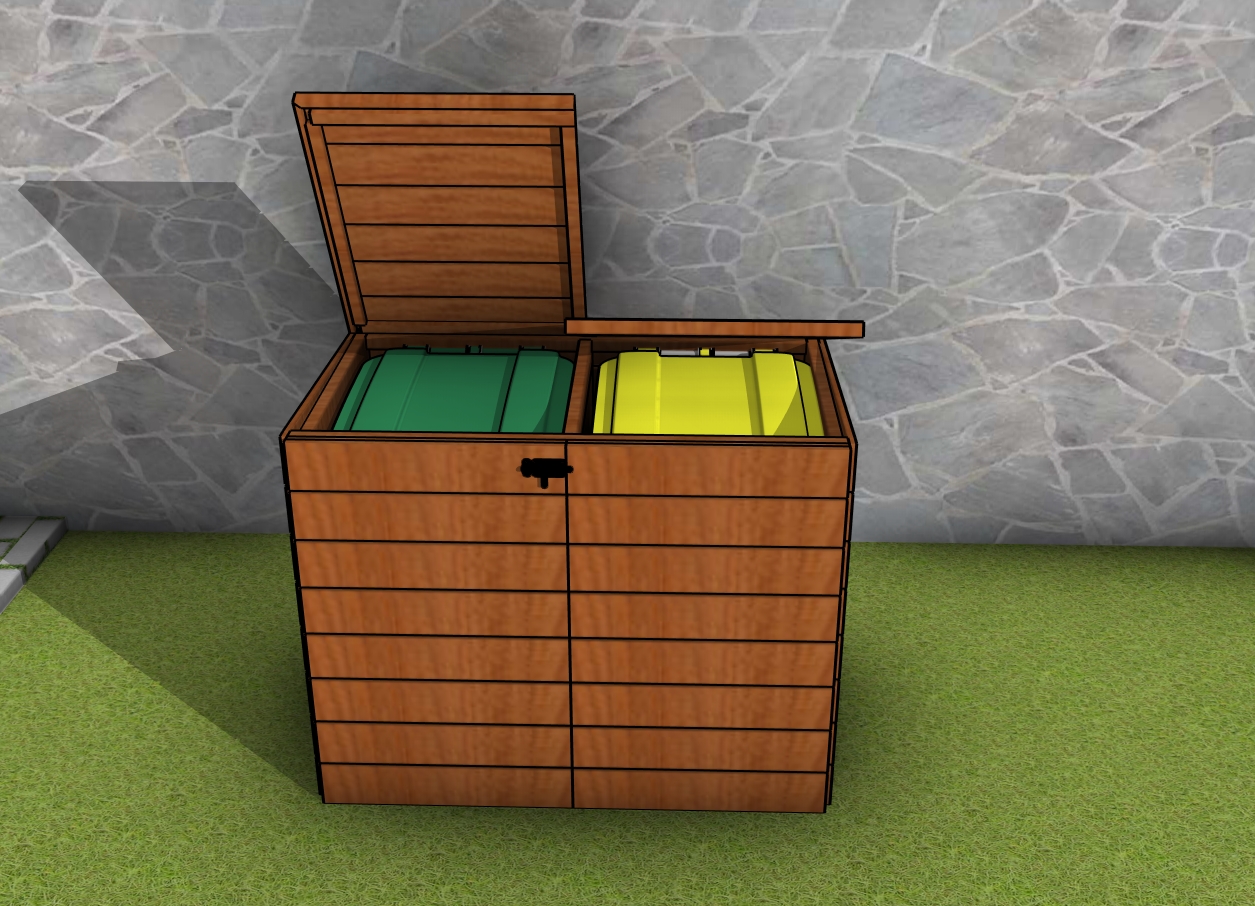
Double Trash cam shed plans
Enhancing your 2-unit trash can shed with add-ons can significantly boost its functionality and appeal. Consider adding garden tool storage with hooks or small shelves inside the shed to keep tools organized and within reach. Attach planter boxes to the sides or top of the shed to incorporate greenery and improve visual appeal.
Installing solar-powered lights can illuminate the shed area at night, making it more accessible and adding a decorative touch. To ensure proper airflow and reduce odors, include small vents. Finally, add a locking mechanism for added security, keeping your trash cans safe from animals and secure.
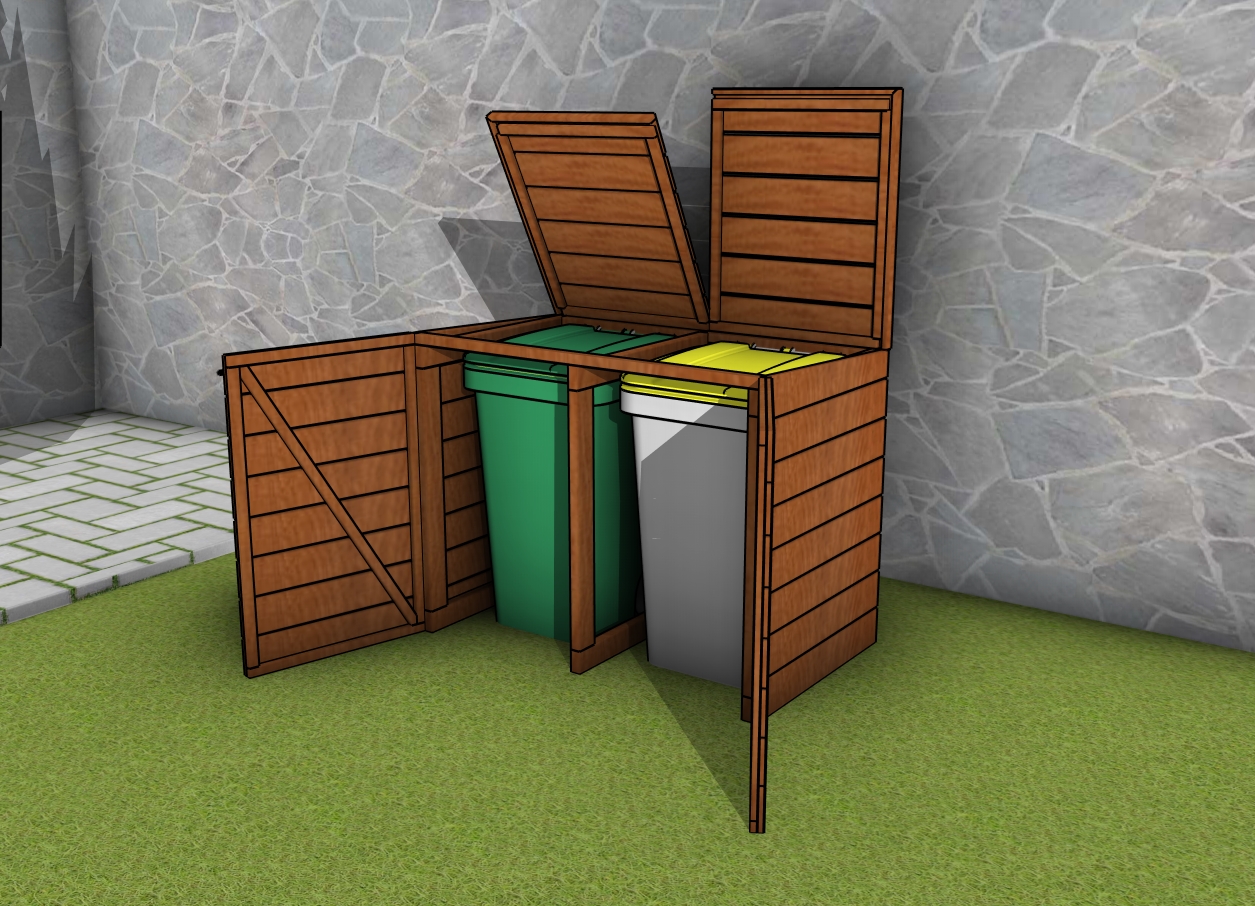
Double garbage container shed plans
Painting or staining your 2-unit trash can shed not only protects the wood from weathering but also allows you to match it to your home’s exterior for a cohesive look. Choose high-quality exterior paint or stain to ensure long-lasting durability and an attractive finish that enhances your outdoor space.
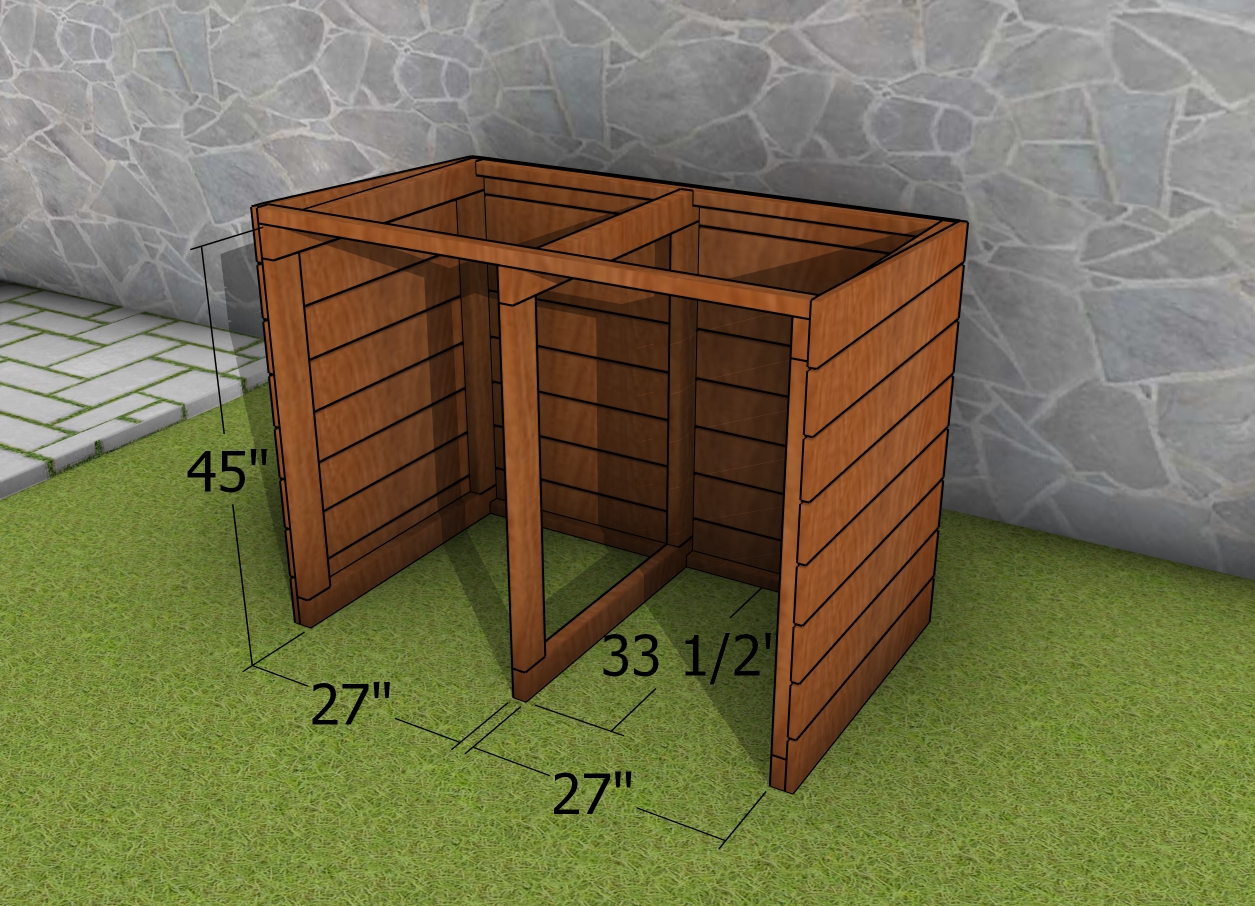
2 unit Trash bin shed plans -dimensions
I hope these shed plans help you create the perfect storage solution for your needs. With a little time and effort, you’ll have a sturdy, functional trash container shed that you can be proud of. See the dimensions of the shed to make sure they will fit your needs!
Thanks for checking out my 2 unit trash contained shed plans! Be sure to explore my other projects for more fantastic ideas. Don’t forget to hit the LIKE button and SHARE with your friends using the social media links below.

1 comment
Trashcan