This step by step woodworking project is about 6×16 firewood shed plans that can hold up to 5 cords. This is a sturdy firewood shed that can be attached to an already existing building and it features a lean to roof. This shed can shelter up to 5 cords of wood. The floor boards and the side walls are spaced so the air flow can go through and dry the firewood properly See my other DIY projects HERE.
We recommend you to invest in the best materials you could afford. Therefore, you should buy weather-resistant lumber, such as pine or cedar. Always take accurate measurements before adjusting the size of the components at the proper size. Drill pilot holes trough the components before inserting the wood screws, to prevent the wood from splitting. See all my Premium Plans HERE.
Made from this plan
Attached Woodshed for 5 cords – Free DIY Plans
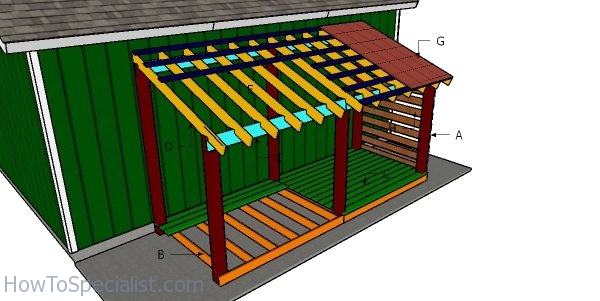
Building an attached shed for 5 cords of wood
Materials
- A – 3 pieces of 6×6 lumber – 9′ long, 3 pieces – 7′ long POSTS
- B – 2 pieces of 2×6 lumber – 8′ long, 2 pieces – 87 3/4″ long, 12 pieces – 70 1/2″ long FLOOR FRAME
- C – 24 pieces of 2×6 lumber – 8′ long FLOOR BOARDS
- D – 13 pieces of 2×6 lumber – 90″ long RAFTERS
- E – 4 pieces of 2×6 lumber – 8′ long SUPPORTS BEAMS
- F – 12 pieces of 1×4 lumber – 84″ long PURLINS
- G – 140 sq ft of metal roofing ROOFING
- H – 18 pieces of 1×6 lumber – 72″ long SLATS
- 3 pieces of 6×6 lumber – 8′
- 3 pieces of 6×6 lumber – 10′
- 45 pieces of 2×6 lumber – 8′
- 6 pieces of 2×6 lumber – 12′
- 4 pieces of 2×8 lumber – 8′
- 9 pieces of 1×6 lumber – 12′
- 140 sq ft of metal roofing
- 2 1/2″ screws
- 3 1/2″ lag screws
- 3 1/2″ screws
- rafter ties
- stain, wood filler, wood glue
Tools
- Safety gloves, glasses
- Miter saw, jigsaw
- Chalk line, tape measure, spirit level, carpentry pencil
- Drill machinery and drill bits
Time
- One Weekend
How to build a firewood shed for 5 cords
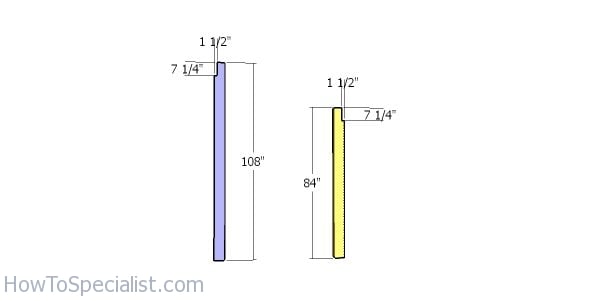
Posts for the firewood shed
The first step of the project is to build the posts for the attached firewood shed. Use a circular saw to make the notches to the top of the posts.
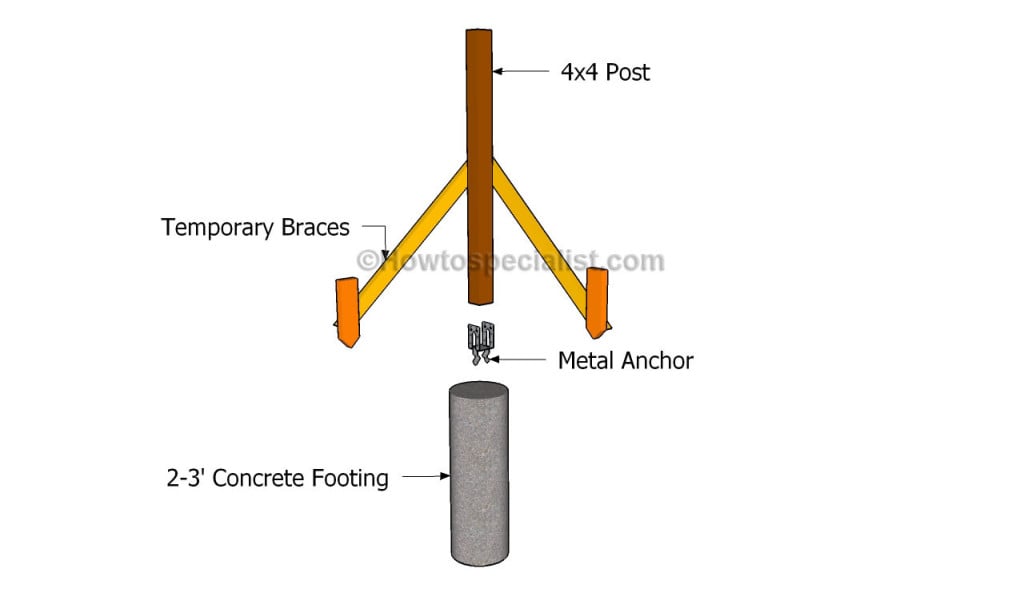
Anchoring the posts
Dig 2-3′ deep holes and then pour concrete. Set the post anchors, making sure you align then properly one with another. Let the concrete to dry out for a few days before setting the posts into place.
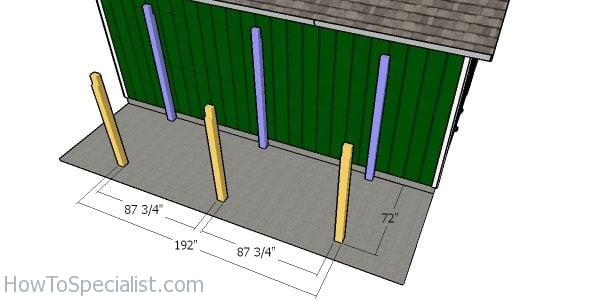
Laying out the posts – attached firewood shed
Set the posts to the anchors and then plumb them with a spirit level. Use lag screws to secure the posts to the anchors. Set temporarily braces to hold the posts plumb.
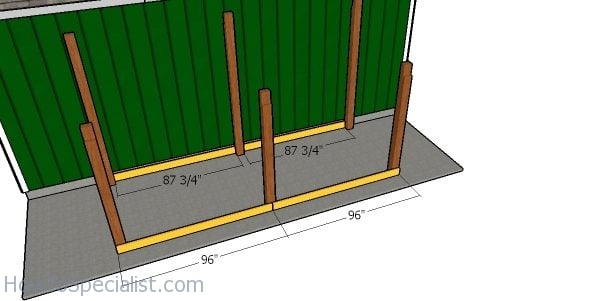
Rim joists – 6×16 firewood shed
Use 2×6 lumber for the joists. Fit the joists to the posts and insert lag screws to lock them into place tightly. Drill pocket holes at both ends of the back joists and insert 3 1/2″ screws to lock them to the posts.
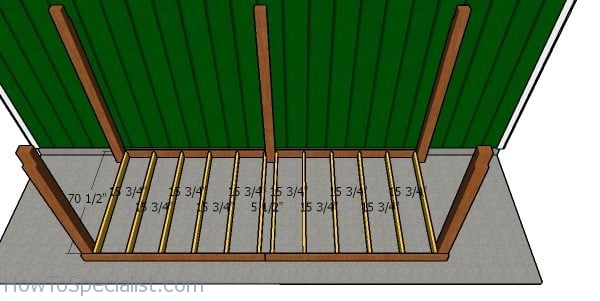
Fitting the joists – 6×16 firewood shed plans
Cut the rest of the joists from 2×6 lumber, as well. Drill pilot holes and insert 3 1/2″ screws to lock them into place tightly.

Fitting the slats to the floor of the firewood shed
Fit the 2×6 boards to the floor frame. Align the edges and place a piece of 3/4″ plywood between the boards, to create even gaps. Drill pilot holes and insert 2 1/2″ screws to lock them into place tightly.
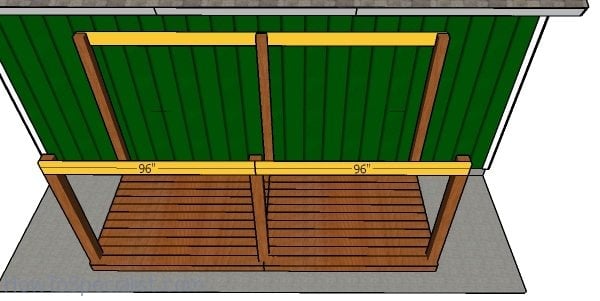
Fitting the top support beams – 6×16 woodshed
Use 2×8 lumber for the support beams. Center the beams to the top of the posts, making sure they have equal overhangs on both sides. Drill pilot holes and insert 3 1/2″ screws to lock them into place tightly.
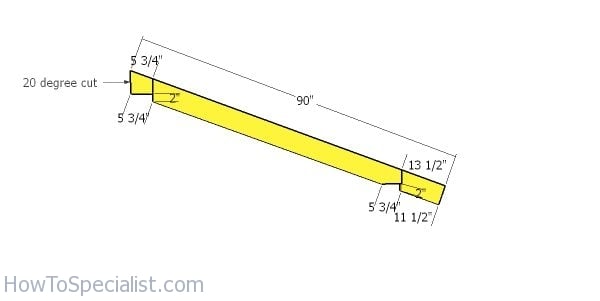
Building the rafters – 6×16 lean to shed
Use 2×6 lumber for the rafters. Mark the cut lines and get the job done with a circular saw.
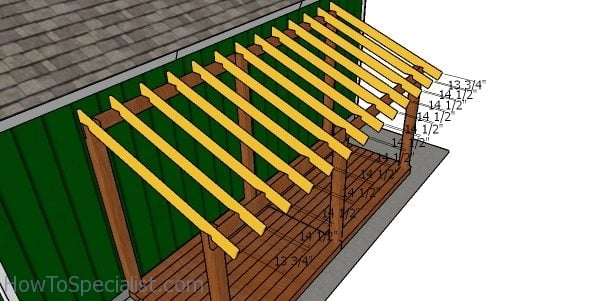
Fitting the rafters – 6×16 firewood shed
Fit the rafters to the top of the shed and place them every 16″ on center. Use rafter ties to secure the rafters to the support beams.
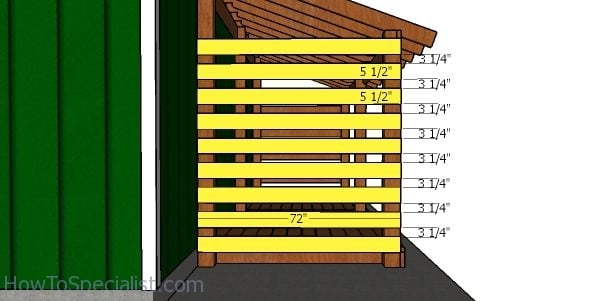
Fitting the slats to the sides of the wood shed
Use 1×6 slats for the sides of the firewood shed. Align the edges flush and place a 3 1/4″ wood block between the slats. Insert 1 5/8″ screws to lock the slats into place tightly.
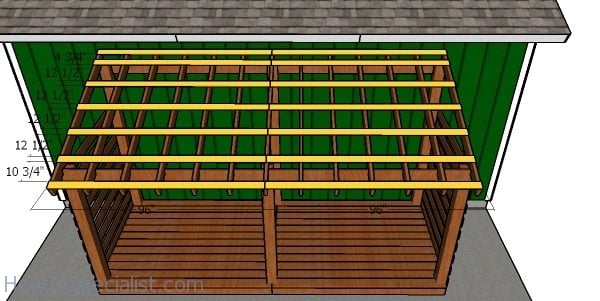
Fitting the purlins
Fit the 1×4 purlins to the top of the roof. Align the edges and insert 1 5/8″ screws.
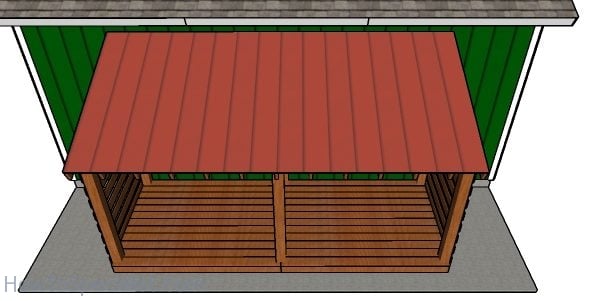
Fitting the metal roof – 6×16 firewood shed
Fit the roof sheets to the top of the shed. Alternatively, you can opt for plywood sheets and asphalt shingles, but I have displayed the budget option which is purlins and roofing sheets.
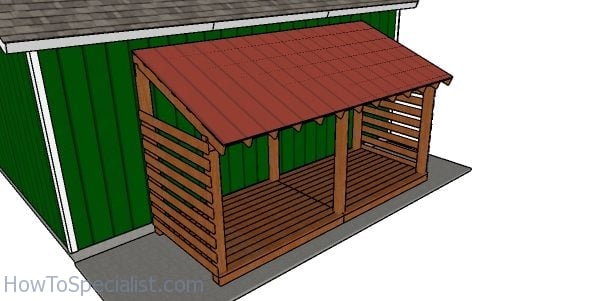
Attached Woodshed for 5 cords Plans
Last but not least, take care of the finishing touches. Apply a few coats of paint / stain over the components to enhance the look of the shed and to protect the components from decay.
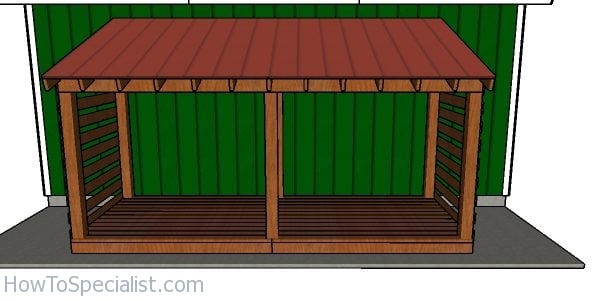
Attached Woodshed for 5 cords Plans – Front view
You can see the rest of my shed plans HERE. If you like my project, don’t forget to SHARE it on Facebook and Pinterest. This is a simple firewood shed that can shelter up to 3 cords of wood, but you can stack a few of these together for more room.
Thank you for reading our project about 6×16 firewood shed plans and I recommend you to check out the rest of the projects. Don’t forget to LIKE and SHARE our projects with your friends, by using the social media widgets. SUBSCRIBE to be the first that gets our latest projects.