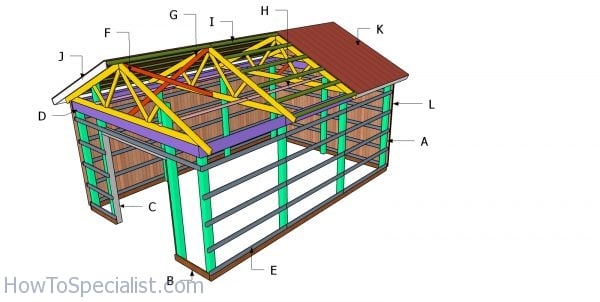
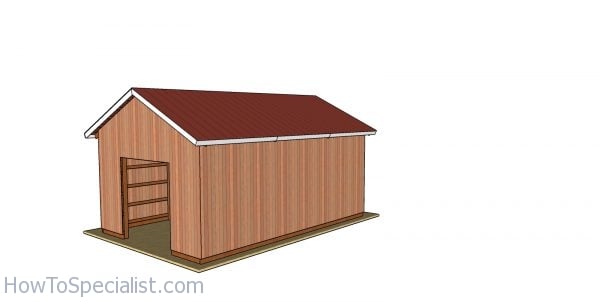
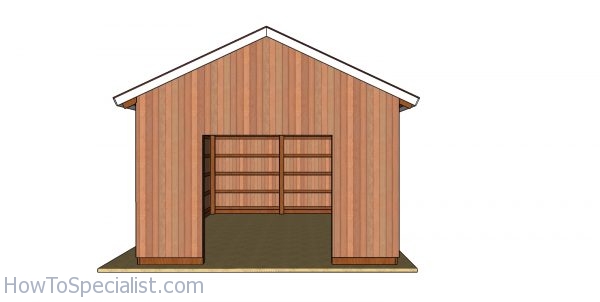
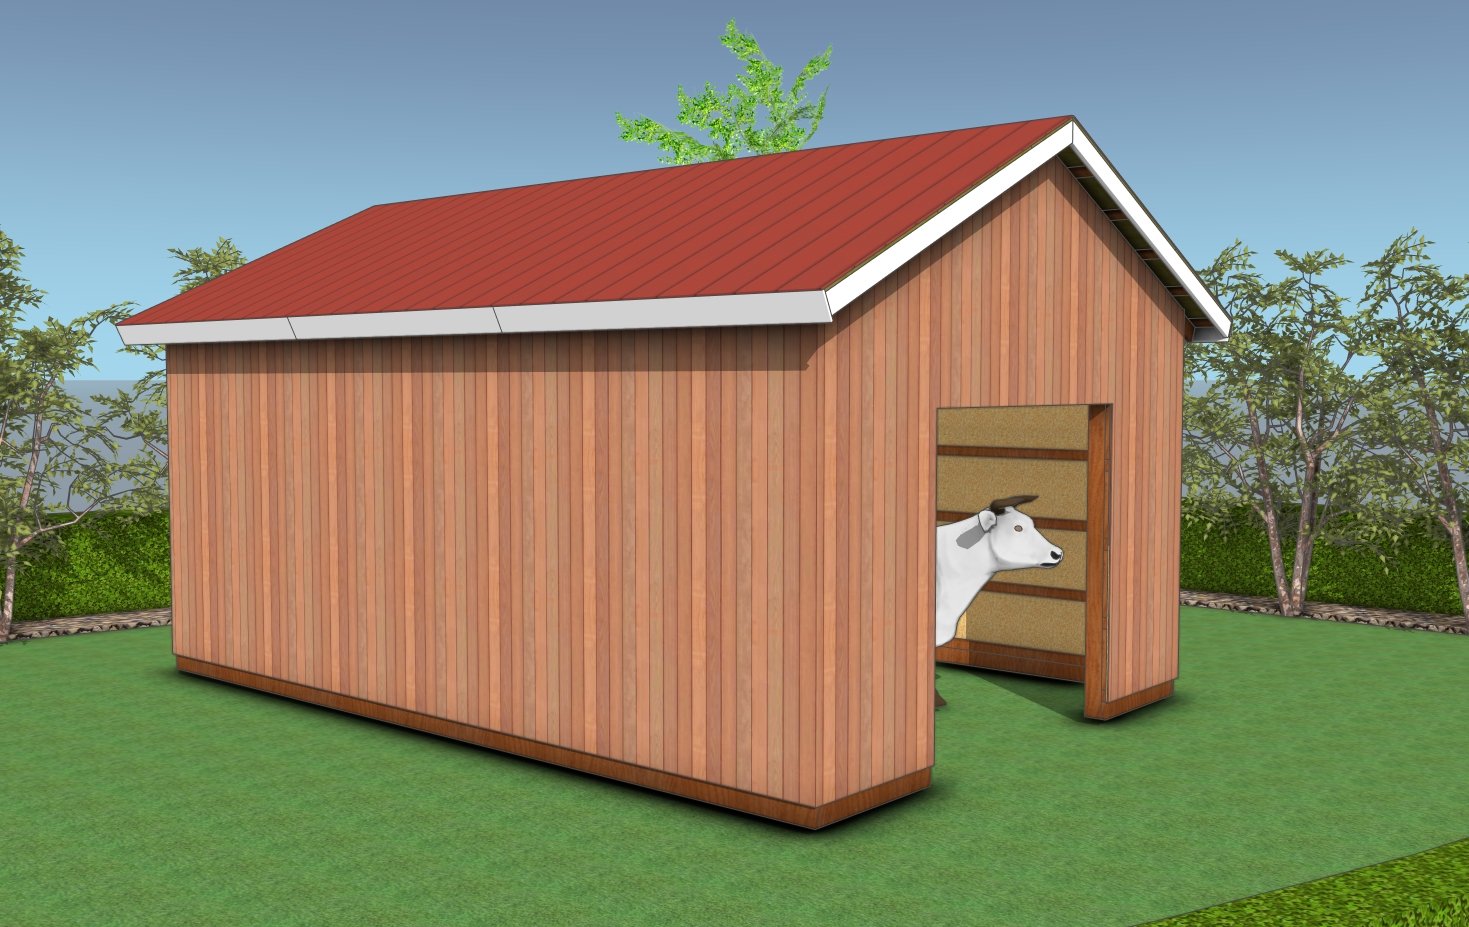
This step by step woodworking project is about 16×24 gable pole barn plans. This pole barn is built on a sturdy 6×6 post framing and it features a gable roof. The shed comes with 10 ft walls, so it will have a roomy interior. This pole barn features a large 8 ft opening to the front. Read the local codes before starting the project, so you comply with the requirements. See my other DIY projects HERE.
We recommend you to invest in the best materials you could afford. Therefore, you should buy weather-resistant lumber, such as pine or cedar. Always take accurate measurements before adjusting the size of the components at the proper size. Drill pilot holes trough the components before inserting the wood screws, to prevent the wood from splitting. My plans come with a full cut / shopping list and they are PDF Download and Print friendly. See all my Premium Plans HERE.
Made from this plan
16×24 Shed Plans – DIY Gable Shed
Building a pole barn
Materials
- A – 8 pieces of 6×6 lumber – 10 ft, 2 pieces – 12 ft, 1 piece – 14 ft POSTS
- B – 2 pieces of 2×6 lumber – 24 ft, 2 pieces – 46 1/2″ long, 1 piece – 16 ft SPLASH BOARDS
- C – 2 pieces of 2×6 lumber – 8 ft, 1 piece of 6×6 lumber – 99″ long DOOR OPENING
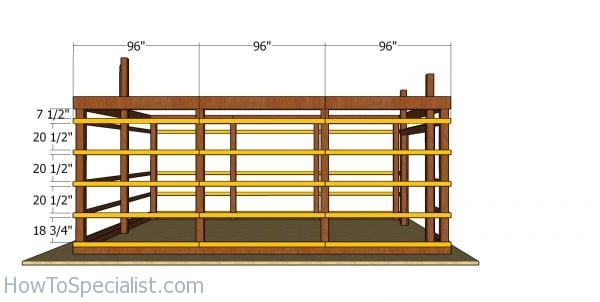
- D – 2 pieces of 2×10 lumber – 189″ long, 2 pieces – 16 ft, 2 pieces – 8 ft, 2 pieces – 190 1/2″ long, 2 pieces – 94 1/2″ long TRUSS CARRIERS
- E – 30 pieces of 2×4 lumber – 8 ft, 8 picees – 46 1/2″ long, 6 pieces – 20 1/2″ long, 2 pieces18 3/4″ long, 6 pieces – 189″ long GIRT BOARDS
- 9 pieces of 6×6 lumber – 10 ft
- 2 pieces of 6×6 lumber – 12 ft
- 1 piece of 6×6 lumber – 14 ft
- 3 pieces of 2×6 lumber – 8 ft
- 1 piece of 2×6 lumber – 16 ft
- 2 pieces of 2×6 lumber – 24 ft
- 36 pieces of 2×4 lumber – 8 ft
- 6 pieces of 2×4 lumber – 16 ft
- 6 pieces of 2×10 lumber – 16 ft
- 4 pieces of 2×10 lumber – 8 ft
- 11 pieces of post anchor
- 2 1/2″ screws, 3 1/2″ screws, 1 5/8″ screws
- 3 1/2″ lag screws
- 8d nails
- wood filler , wood glue, stain/paint
Tools
- Miter saw
- Circular saw
- Drill machinery, drill bits
- Safety gloves, glasses
- Chalk line, tape measure, spirit level, carpentry pencil
Time
- One week
16×24 Gable Pole Barn – Free DIY Plans
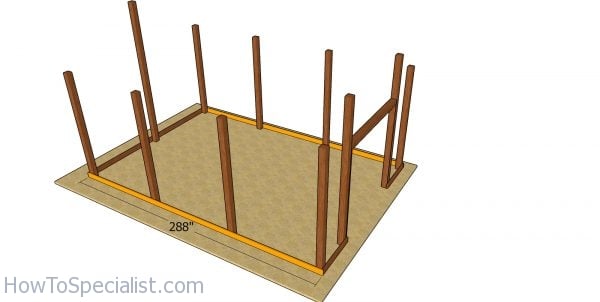
Laying out the posts for the pole barn
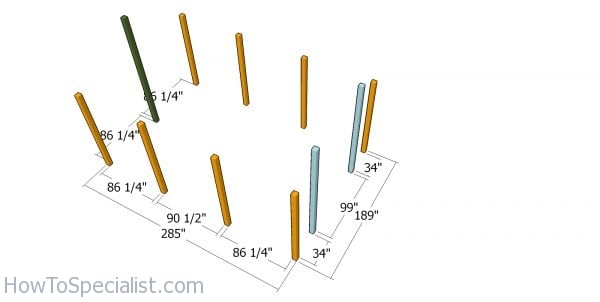
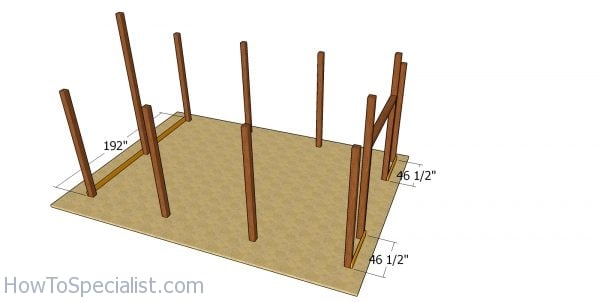
The first step of the project is to lay out the posts for the pole barn. Therefore, use batter boards and string to lay out the posts. Measure the diagonals and make adjustments until the are equal. Use 3-4-5 rule to the check if the corners are square. We will be using 6×6 posts for this pole barn.

Posts for pole barn
Use the color code for the posts. Therefore, we will be needing 10 ft, 12 ft and 14 ft long posts.
Fitting the posts
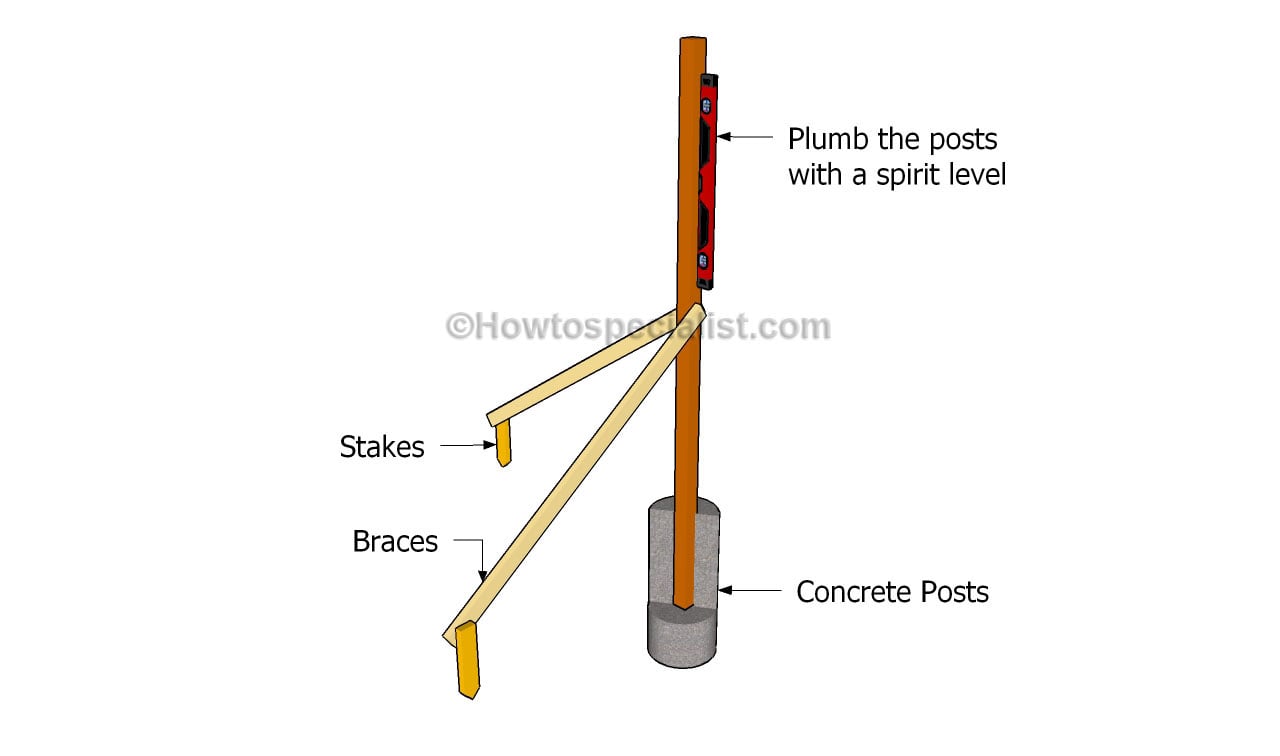
You can set the 6×6 posts in concrete or you can pour footings and secure them in place with anchors. Dig 2-3′ deep holes and 16″ in diameter and then compact a layer of gravel to the bottom. Fit the 12″ tubes and set the 6×6 posts into place (or fit the anchors). Use a spirit level to plumb the posts and then secure them into place with temporarily braces. Pour the concrete in the tube forms and let it dry out for several days.
Remember that in my case, the plans are designed considering you will lock the posts using anchors. If you plan to lock the posts in concrete, just add 3′ to all the posts.

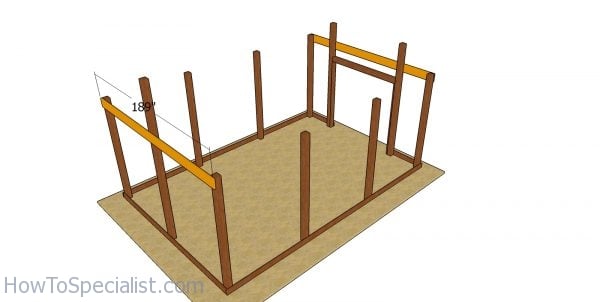
Framing the door opening
Use 2×6 lumber for the header supports. Attach the boards to the posts with 3 1/2″ screws. Attach the header into place with screws. Use a spirit level to check it’s perfectly horizontal.
Front and back splash boards
Fit the 2×6 splash boards to the base of the pole barn. That’s why it is important for you to level the ground, so you can install these beams and have no gaps between the ground and them. Drill pilot holes and insert 3 1/2 screws to lock them to the posts.
Side splash boards
Fit the splash boards to the sides of the pole barn.
Fitting the front and back truss carriers
Next, attach the truss carriers to the front and back of the pole barn. Use a spirit level to check if the beams are horizontal. Plumb the posts with a spirit level. Use 3 1/2″ lag screws to lock the beams to the top of the 6×6 posts.
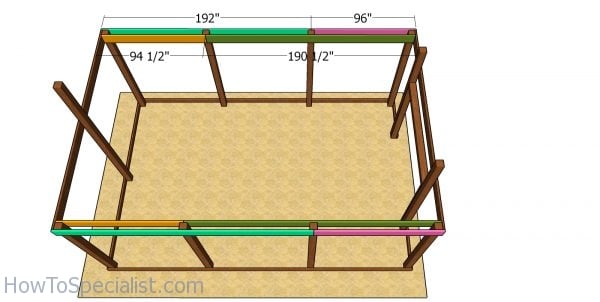
Side truss carriers
Attach the truss carriers to the sides of the pole barn. Follow the color code, so you can attach the beams to the sides of the pole barn. You can use 24 long beams, if you have access to them and if you are willing to support the high cost. Use 3 1/2″ lag screws to secure the beams to the side posts.

Front wall girt boards
Use 2×4 girt boards to the front of the pole barn. The girt boards will be a support for the exterior metal sheets. Use 2 1/2″ screws to secure the girt boards to the post frame structure.
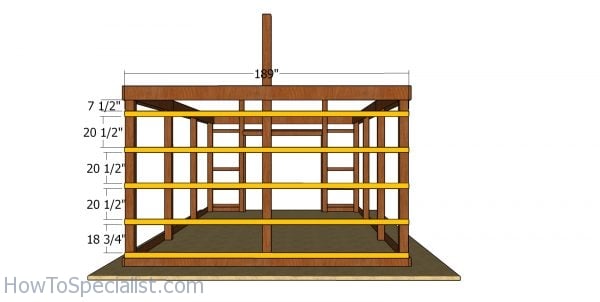
Back wall girt boards
Attach the 2×4 girt boards to the back of the shed.
Girt boards
Attach the girt boards to the sides of the pole barn.
16×24 Pole Barn Plans
Make sure you take a look over PART 2 of the project, where I show you how to build the roof for the post frame barn.
Front view – Pole barn plans
If this post frame structure is too large for your needs, you should take a look over my other design: plans for a 16×20 pole barn.
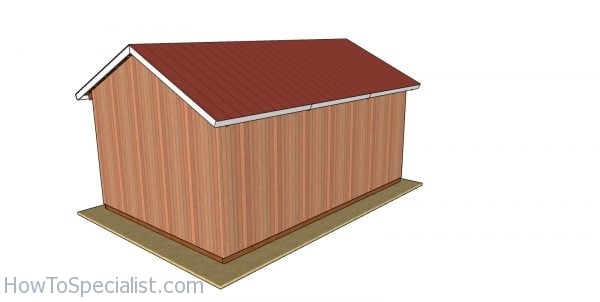
16×24 Pole Barn Plans – back view
This 16×24 pole barn is sturdy and ideal for homestead activities. This post frame structure has been designed so you can save a ton of money and have a shelter that will help you for many years in a row.

16×24 Pole Barn Plans dimensions
16×24 pole barn plans
If you want to download the plans. just click on the GET PDF PLANS button bellow.

Thank you for reading our project about free 16×24 pole barn plans and I recommend you to check out the rest of the projects. Don’t forget to LIKE and SHARE our projects with your friends, by using the social media widgets. SUBSCRIBE to be the first that gets our latest projects.
<< Previous | Next >>