This step by step woodworking project is about how to build a simple outhouse. I have built this simple and temporarily outhouse for my countryside property. This is super easy to build and it cost me under $150 to make. I built this project in about one week, but I only worked a few hours a day. This is Episode 3 of a long series of projects I plan to build for this property, so feel free to come back to see the progress. See the rest of the countryside projects HERE. This project only requires common materials and super basic tools, so anyone can get the job done in one weekend. Make sure you check out all my other DIY tutorials HERE.
We recommend you to invest in the best materials you could afford. Therefore, you should buy weather-resistant lumber, such as pine or cedar. Always take accurate measurements before adjusting the size of the components at the proper size. Drill pilot holes trough the components before inserting the wood screws, to prevent the wood from splitting. See all my Premium Plans HERE.
Made from this plan
Simple Outhouse Plans
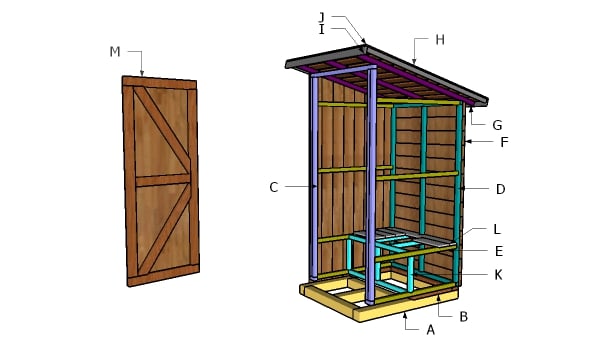
Building a simple outhouse
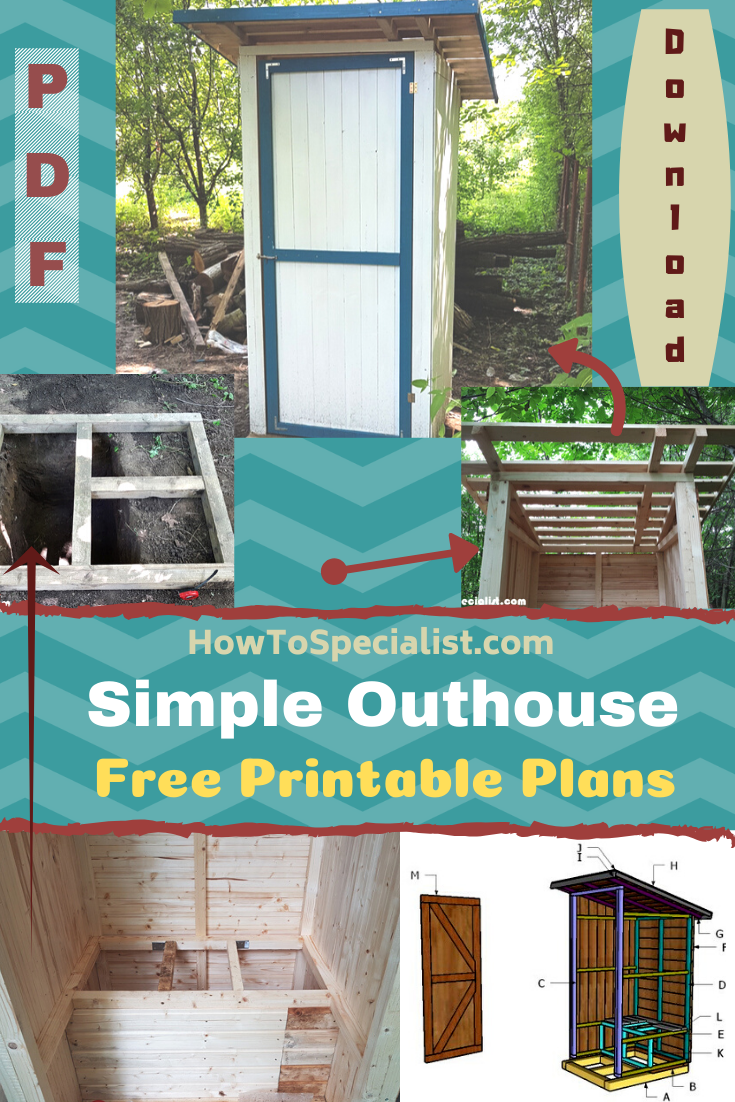
If you want to build this outhouse, then this is your lucky day. I have free plans that you can print or download on MyOutdoorPlans.com. Check out the step by step plans HERE.
How to build a simple outhouse
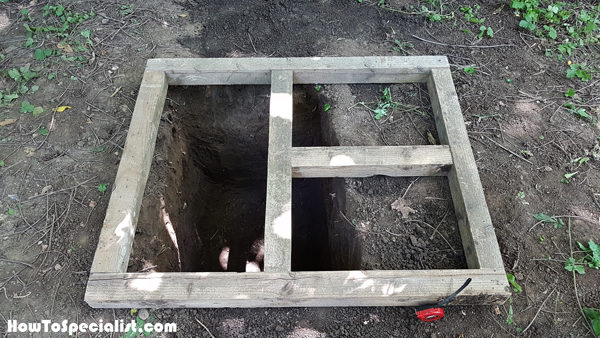
Base-frame
The first step of the outhouse project was to assemble the base. I cut the 4×4 beams at the right dimensions, I drilled pilot holes and then inserted the 6″ screws. Make sure the corners are square are align the edges flush.
As you can see in the image, you also need to dig the 2-3′ deep hole for the outhouse. Considering this will be a temporarily outhouse, I decided not to pour concrete or to fit a plastic barrel. However, if you plan on using the outhouse for a larger period of time, I really suggest you document on the subject and to choose the right solution for your needs.
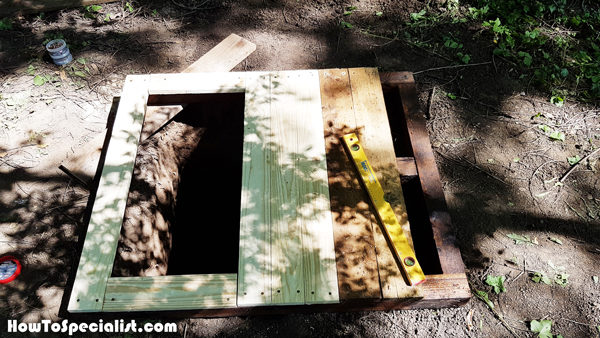
Fitting-the-slats-to-the-base
Use a spirit level to check if the base frame is horizontal on all directions. Align the base over the hole and then attach the boards into place. Drill pilot holes and insert the screws to lock the slats into place.
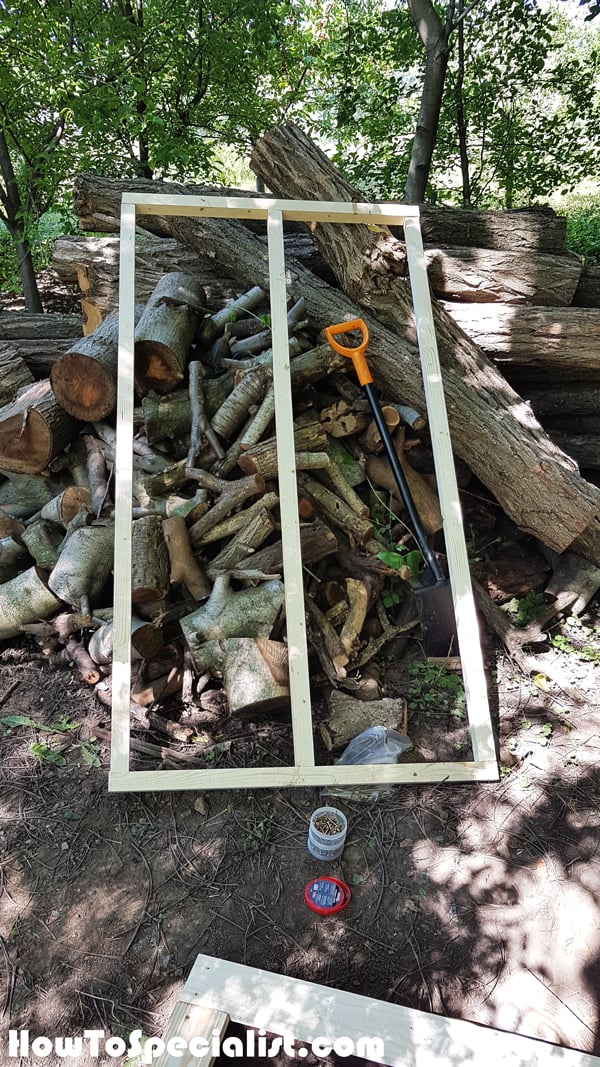
Back-wall-frame
Build the back wall frame from 2×2 lumber. Cut all the components and then drill pilot holes through the plates. Insert 2 1/2″ screws to secure the studs to the plates. Make sure the edges are aligned and double check if the corners are square.
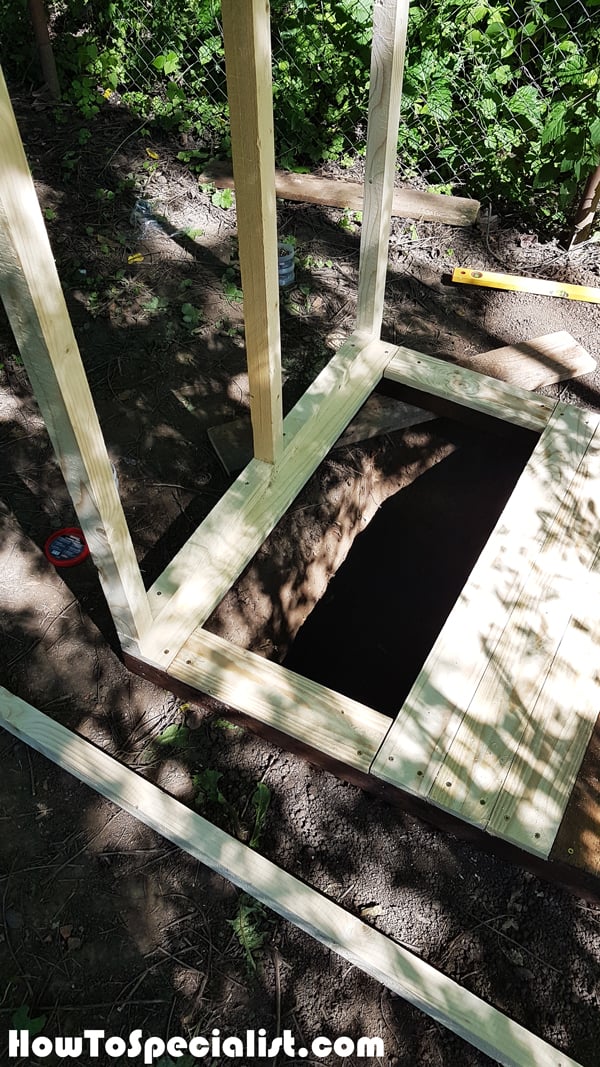
Fitting-the-back-wall
Fit the back wall frame to the base and align the edges. Use a spirit level to plumb the frame, drill pilot holes through the bottom plates and insert 3 1/2″ screws to secure the wall into place.
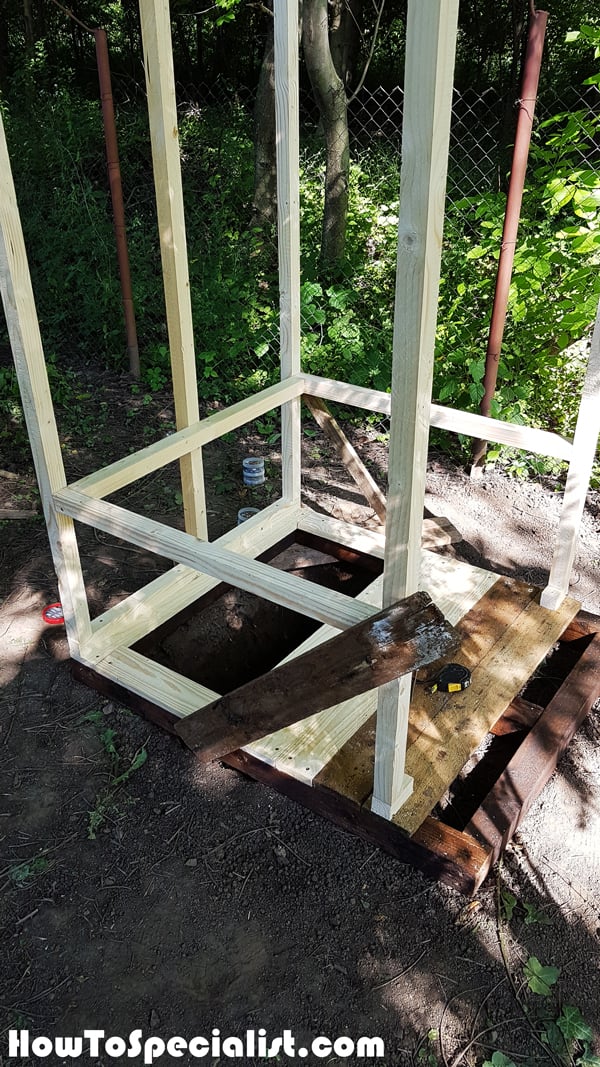
Braces
I continued the project by fitting the front wall frame, using the same techniques described above. As you can see in the image, I used some temporarily braces so I can secure the walls tightly while fitting the side supports.
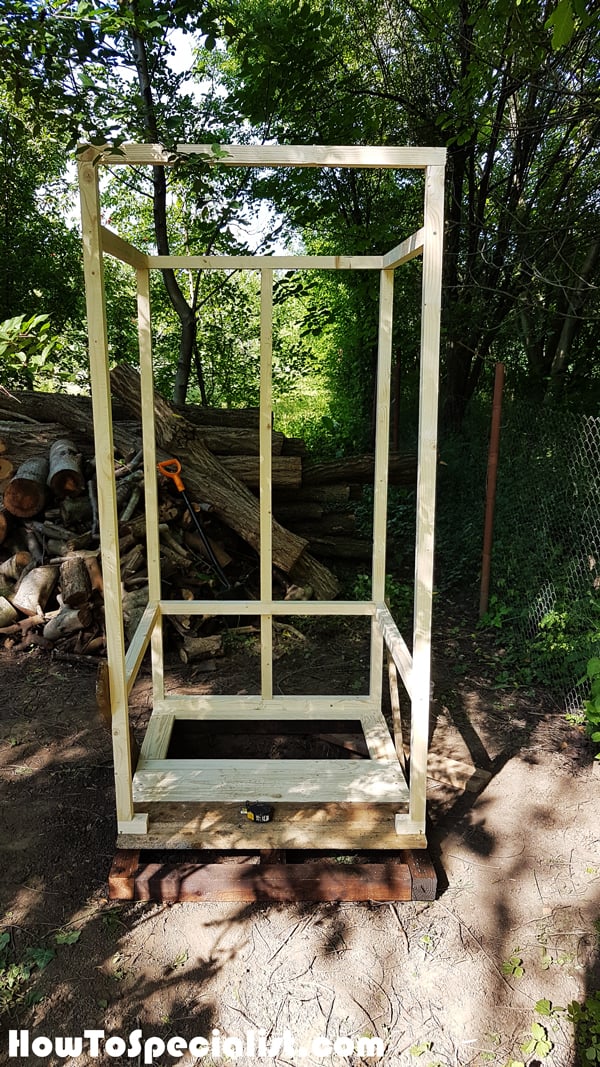
Outhouse-frame
Once the wall frames were installed, the outhouse started to take shape. But we’re not quite there yet. A lot more work ahead.
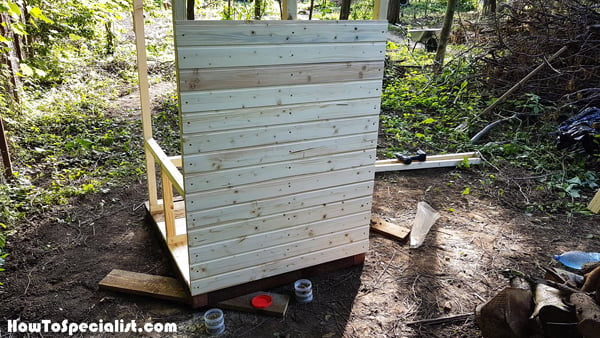
Attaching-the-slats-to-the-back-of-the-outhouse
Moving the back of the outhouse, I installed the tongue and groove boards to the frame. I just aligned the edges and then used nails to lock the boards into place tightly.
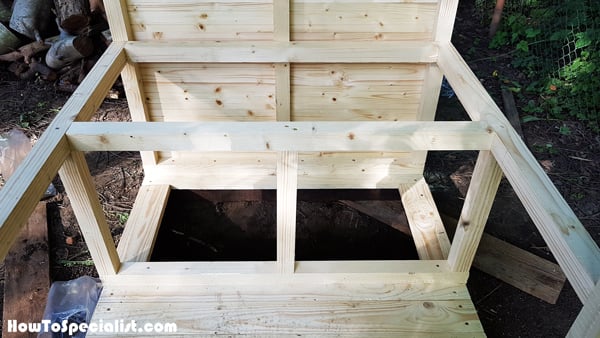
Framing-the-seat
Next, I built the seat frame from 2×2 lumber. I aligned everything with attention, drilled pilot holes and inserted 2 1/2″ screws to lock the supports into place tightly.
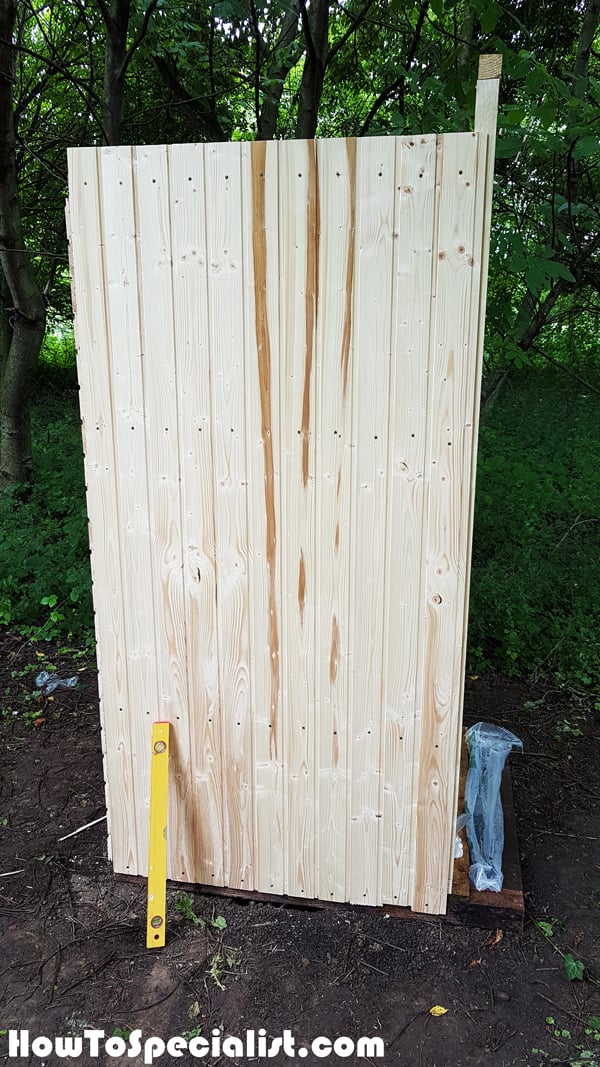
Fitting-the-slats-to-the-sides-of-the-outhouse
Next, I attached the boards to the sides of the outhouse, this time vertically. I aligned the boards to the top and fitted them one by one.
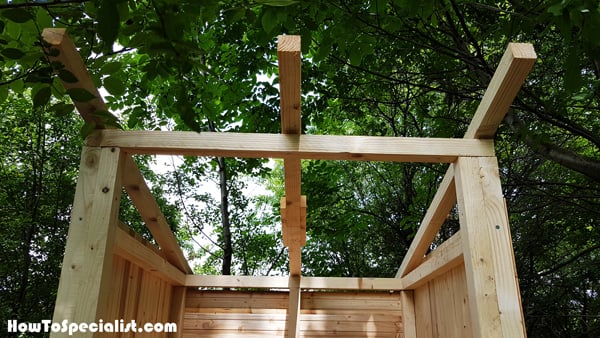
Fitting-the-rafters
I fitted the 2×2 rafters to the top of the outhouse frame. Align the rafters so you get a more generous overhang to the front. Drill pilot holes and insert 2 1/2″ screws to lock the rafters into place tightly.
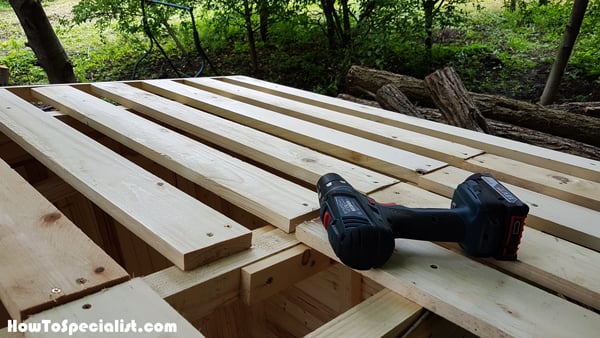
Fitting-the-slats-to-the-roof
I fitted the boards to the rafters. I will install a plastic roof sheet so I needed to create some support underneath it. I used my drill to insert the screws through the boards into the rafters.
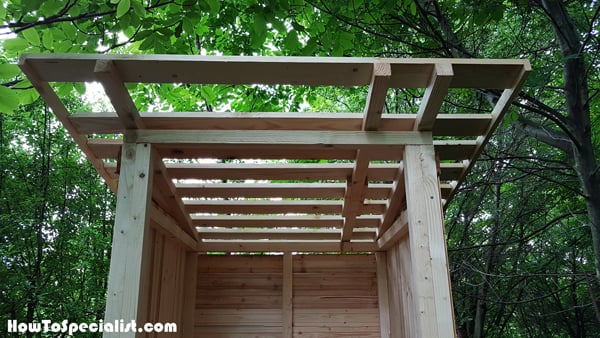
Outhouse-roof-frame
You might notice that the middle rafter is not perfectly centered into place. There is a simple reason for that. In my case I used materials I already had around, so I had to adjust the location of the middle rafter accordingly. The middle rafter is where the boards join together. If you buy the lumber, center the middle rafter into place.
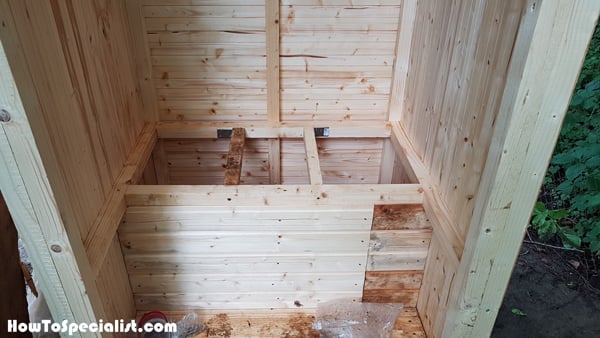
Fitting-the-slats-to-the-seat-frame
Next, I attached the tongue and groove boards to the front of the seat frame. I cut the boards and then used nails to secure them into place tightly.
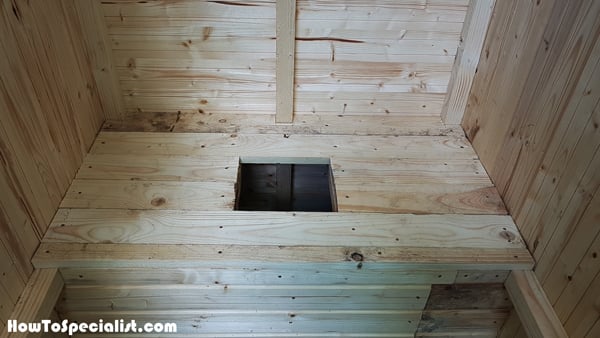
Fitting-the-slats-to-the-top-of-the-seat-frame
I attached the slats to the top of the seat frame, as well. As you can see in the image, you need to create a hole through the top, so you can fit the toilet seat.
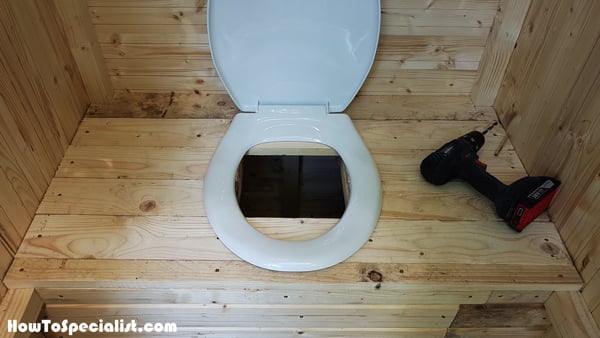
Fitting-the-toilet-seat
Fit the toilet seat and mark the cut lines to the slats. I really recommend you to adjust the size of the seat frame to the dimensions of the plastic cover you are going to use. My plans were designed for my needs and for the products I bought, so you might need to make a few changes.
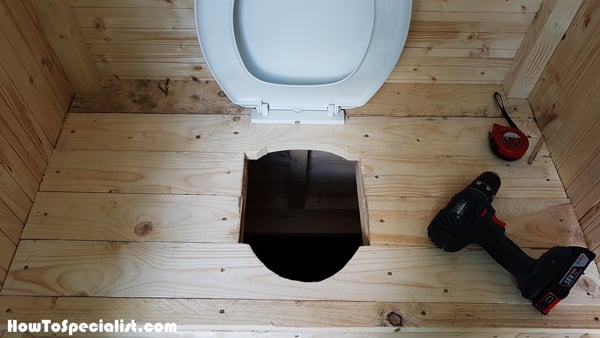
Cutting-the-toilet-hole
Use a jigsaw to make the curved cuts and then smooth the edges with a sander.
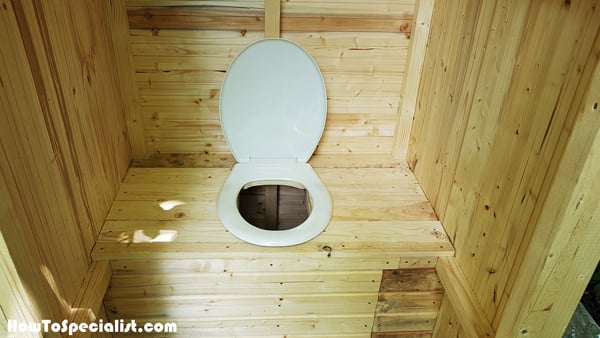
Toilet-seat
Install the toilet seat to the top, making sure you read the manufacturer’s instructions.
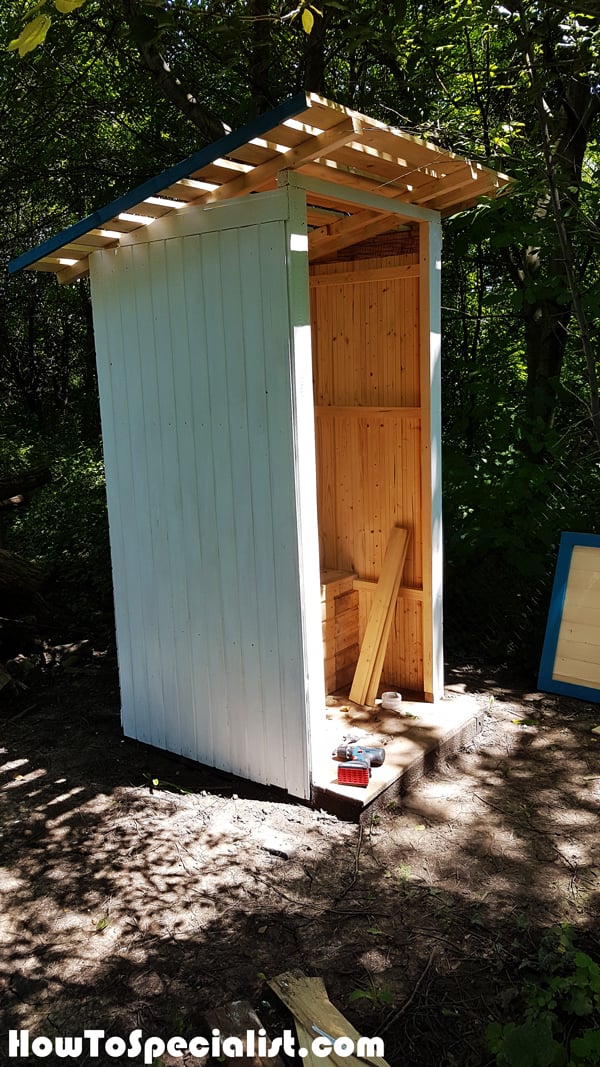
Painting-the-outhouse
I applied a few coats of white paint over the exterior of the outhouse. I also painted the roof trims blue. Two coats were enough to cover the surface evenly.
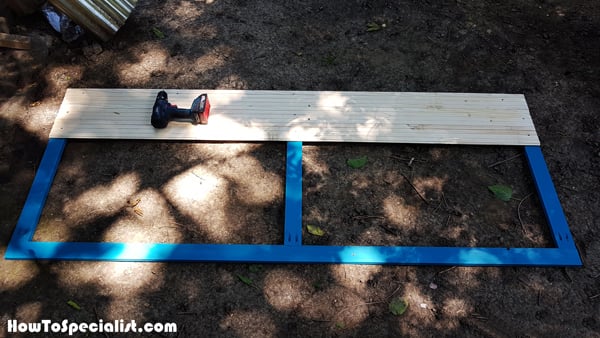
Fitting-the-door-panel
Building the door for the simple wooden outhouse was a straight forward job. I used 1×4 lumber for the trims and used pocket holes to lock them together tightly. Then, I attached the tongue and groove boards to the frame with nails.
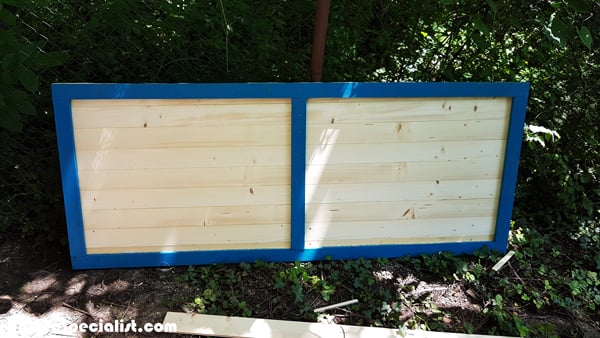
Outhouse-Door
I painted the door frame blue before attaching the boards to the back.
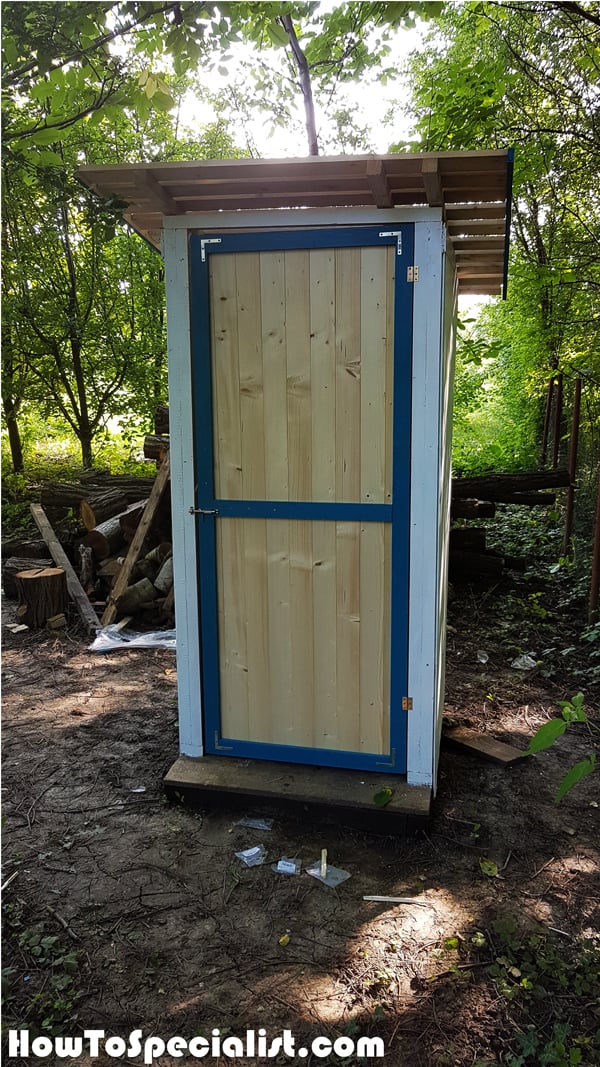
Fitting-the-door-to-the-outhouse
I fitted the door to the opening and use hinges to secure it to the front wall frame. Everything went smoothly, as I let gaps on all side of the door. I also installed the latch and the corner brackets to enhance the rigidity of the door.
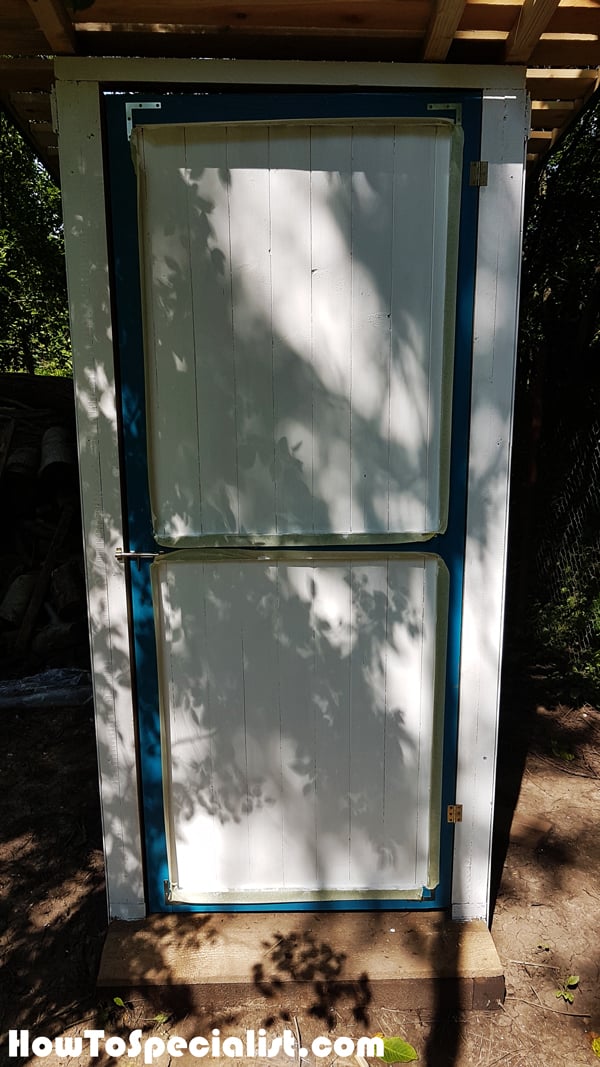
Using-masking-tape-to-paint-the-door-panels
Next, I used masking tape to cover the door frame while painting the panels white. Everything went great, so I am really pleased with the end result.
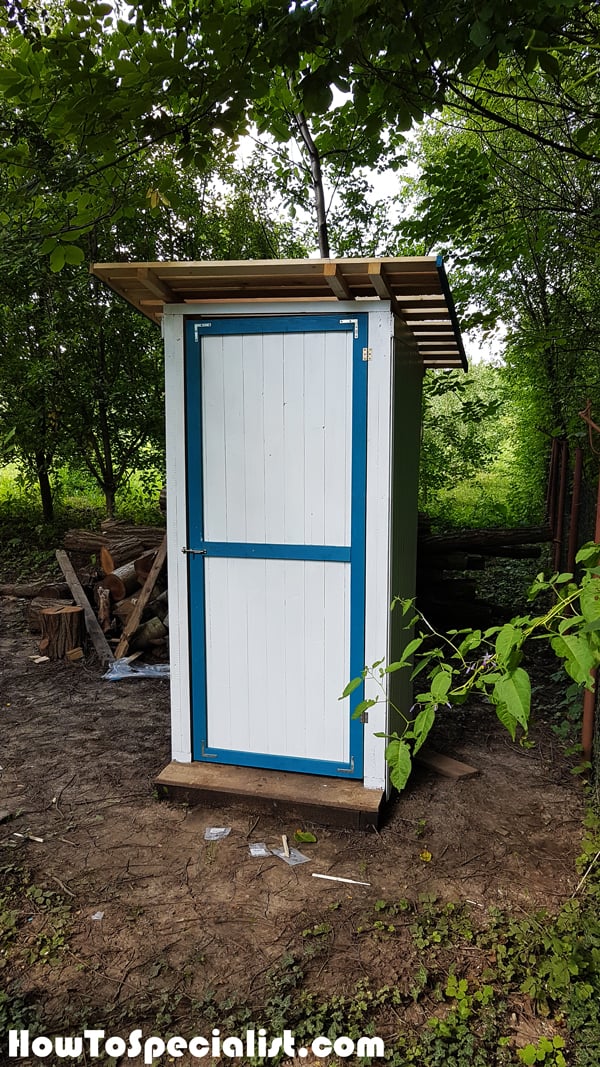
DIY-Simple-Outhouse
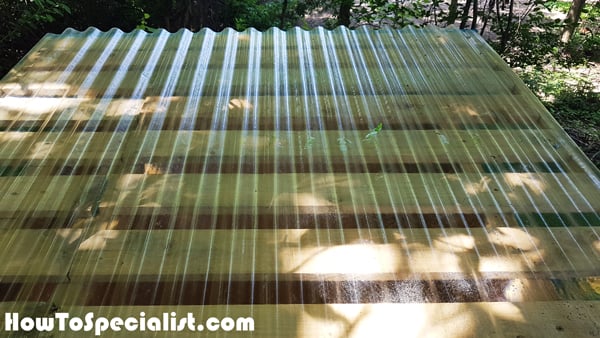
Fitting-the-roofing-sheet
One of the last steps of the project was to waterproof the outhouse by attaching the roof sheet. Align the edges with attention and then drive the screws in.
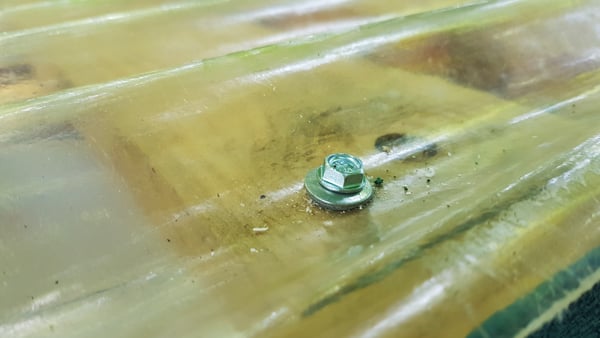
Roof-screws
I used 3/4″ roof screws to secure the sheet to the slats.
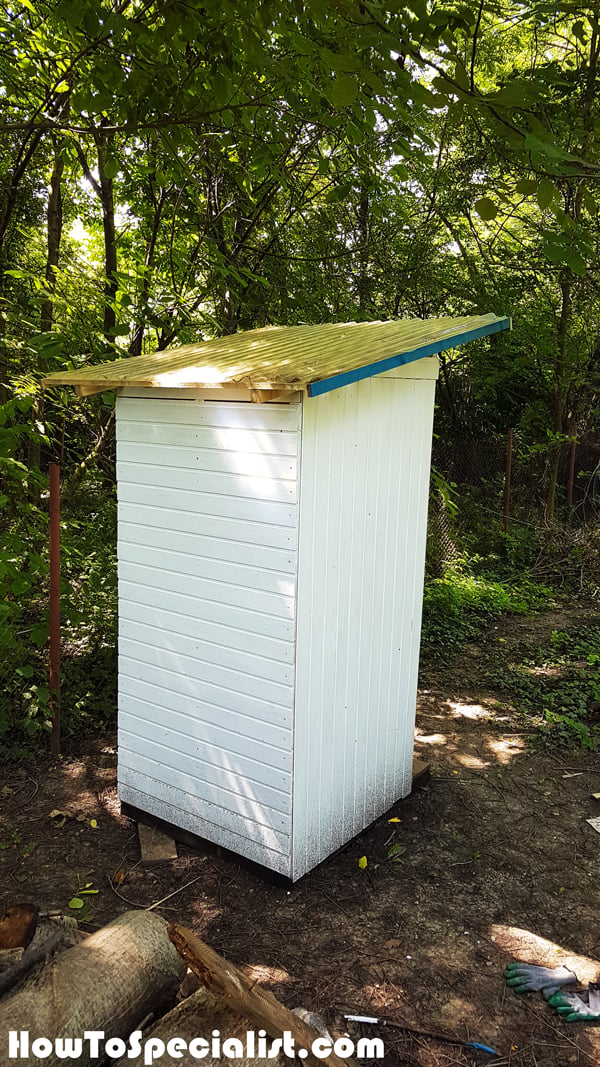
DIY-Outhouse—Back-view

How-to-build-an-outhouse
Overall, this was simple project but it took longer than I’ve anticipated, due to the weather conditions. I am so pleased with the end result that I consider transforming the outhouse into a garden shed, once I no longer need it. If you like my project, don’t forget to SHARE it on Facebook and Pinterest.
My best tips on building a wooden outhouse:
A wooden outhouse is a practical and rustic addition to any off-grid property, campsite, or rural home. Building your own gives you the freedom to design it to your needs while creating a structure that’s both functional and visually appealing. Here are my best tips for building a sturdy and efficient wooden outhouse that will last for years to come.
1. Plan and Design the Outhouse
- Choose the Location: Pick a location that’s away from your main living space, but not too far for convenience. Consider factors like wind direction, drainage, and accessibility. Make sure the area is well-drained to avoid any standing water near the base of the outhouse.
- Check Local Regulations: Before starting, check with local authorities regarding any regulations for building outhouses. Some areas require permits, and there may be guidelines on how far the outhouse needs to be from water sources like wells or streams.
- Design: Decide on the size and style of your outhouse. A common size is around 4 feet by 4 feet, but adjust based on your needs. Most outhouses are simple single-seat designs, but you can customize the interior with storage shelves, ventilation systems, and aesthetic details like rustic windows or decorative cutouts.
2. Gather Your Materials and Tools
- Pressure-Treated Lumber: Use pressure-treated wood for the frame, siding, and roof to protect against rot and weather damage.
- Roofing Material: Corrugated metal, shingles, or asphalt sheets work well for a durable roof that can withstand the elements.
- Ventilation Pipe: A small vent pipe helps eliminate odors by allowing airflow.
- Tools: You’ll need a post hole digger, saw, hammer, nails, screws, level, measuring tape, and a shovel for digging the pit.
3. Dig the Pit
- Pit Depth: The pit should be at least 3-5 feet deep, depending on how much the outhouse will be used. Make sure to choose an area with well-draining soil to avoid the pit filling with water.
- Size the Pit Appropriately: The pit should be wide enough to accommodate the waste but small enough to ensure the structure above remains stable. Around 3 feet by 3 feet is common.
- Line the Pit: You can line the pit with gravel to aid drainage or use bricks or cinder blocks to shore up the sides for added stability.
4. Build the Outhouse Frame
- Construct the Base: Build a sturdy wooden base that sits securely over the pit. Use 4×4 pressure-treated posts set in the ground with concrete for stability. This will form the foundation for the rest of the structure.
- Frame the Walls: Use 2×4 lumber to frame the walls. Make sure the height of the outhouse provides enough headroom—7 feet is a good minimum height.
- Cut an Opening for the Door: Leave space for a door at the front, typically about 2 feet wide and 6 feet tall.
- Install Cross Bracing: For extra strength, add cross braces between the wall frames to prevent the structure from shifting.
5. Install Siding and Roof
- Add Siding: Use wood planks or plywood sheets for siding. Cedar, pine, or pressure-treated boards work well for outdoor durability. Overlap the boards to ensure rainwater runs off properly, and secure them with weatherproof screws or nails.
- Build the Roof: A slanted or peaked roof helps shed water and snow. Use corrugated metal, asphalt shingles, or wooden boards for the roof. Ensure that the roof has a slight overhang to protect the sides of the outhouse from rain.
- Roof Vent: Install a vent pipe that extends from the pit to above the roofline. This helps with airflow, keeping the outhouse odor-free.
6. Add the Door and Seating
- Door Installation: Use a simple wooden door with hinges, and add a latch for privacy. A diagonal cross brace on the inside of the door will help keep it from warping over time.
- Decorative Cutout: Consider adding a decorative cutout, like a classic crescent moon or heart shape, on the door to let in light and add a touch of charm.
- Build the Seat Box: Inside the outhouse, build a sturdy wooden seat over the pit. The seat box should be around 16-18 inches high for comfort. Cut a round hole in the top of the seat, and use a toilet seat to make it more comfortable.
7. Add Finishing Touches
- Ventilation: Ensure there is proper ventilation by leaving a small gap under the roof or at the top of the walls to allow airflow.
- Hand Sanitizer or Wash Station: Attach a shelf for hand sanitizer or build a simple outdoor handwashing station nearby for convenience.
- Storage Shelves: Install small shelves inside the outhouse for essentials like toilet paper, hand sanitizer, or a small lantern.
- Lining the Pit (Optional): Consider adding a natural pit lining, such as lime or sawdust, to help reduce odors and improve the composting process.
8. Outhouse Maintenance
- Add Pit Materials: Periodically add materials such as ash, sawdust, or lime to the pit to reduce odors and aid decomposition.
- Pit Management: Once the pit is nearly full, you may need to move the outhouse to a new location, fill in the old pit with dirt, and start the process again. If the outhouse is used frequently, consider installing a removable waste bucket for easier cleaning.
- Maintain the Structure: Inspect the wooden structure annually for signs of weathering or damage. Reapply wood sealer or stain to protect the wood from moisture and UV rays.
Building a wooden outhouse can be a simple and rewarding DIY project that adds function and character to your off-grid or rural space. By following these tips, you’ll create a sturdy and durable outhouse that meets your needs while blending seamlessly into its surroundings. Don’t forget to plan carefully, use quality materials, and ensure proper ventilation to keep it clean and odor-free for years to come.
Thank you for reading our project about how to build a simple wooden outhouse and I recommend you to check out the rest of the projects. Don’t forget to LIKE and SHARE our projects with your friends, by using the social media widgets. SUBSCRIBE to be the first that gets our latest projects.

8 comments
You forgot to carve a crescent moon symbol into the front of the door.
my husband paid $8.00 for the plans for an outhouse, but when we tried to print them, some pages only printed half a page, others were blank, some had the plan. He was printing using his phone so I am on the computer thinking that maybe it would print correctly from my pc. He purchased this on 3/17/21. Is there a way I can print them from my computer?
Sure, he must have downloaded the plans, therefore send them to your computer via email / google drive etc. The plans are ok, they should print properly. The issue is not on my end
If the plans are free why don’t you put the measurements on the boards as you are building it.
You clearly didn’t read the article. This is a How To posts, you have the link to the plans in the article: http://myoutdoorplans.com/shed/simple-outhouse-plans/
Love your simple but very cool plans for Outhouse..Thank you..I’m building one too.😃NZ
Thank you for your information. Just read your post here but can figure out my own measurements. I only want the plans for the size your doing but I’m building my little crippled chicken a home out of weather. Thanks again
I would add a metal or plastic chute under the toilet seat to prevent poop, urine, or toilet paper from getting stuck or hung up on the wooden walls and ledges below the seat. There’s no good way to clean that area once it gets dirty, and it will just smell and draw flies. To make a chute, cut the bottom out of a 5-gallon plastic bucket and screw the top edge of the bucket to the edges of the hole in the bench top. Then, if someone has a “bad day” in the john, you can always clean the chute with a little soapy water and a toilet brush.