This article is about brick oven plans. Building a brick oven and a barbecue is a dream which can become reality if you use plans that suits your needs and follow our step by step guidelines. In this project we will show you how to choose the location of the brick oven and bbq, how to build the base and the bread dome. From our experience, we recommend you to choose the best materials you can afford, as you will notice the difference on the long term. If you don’t have any experience in working with bricks and concrete or you don’t have the needed skills, we recommend you to hire a qualified professional (it will most likely double the total cost of your project, but it will be durable). Nevertheless, if you want to undertake the construction on your own, you will save a significant amount of money therefore you should invest them in quality materials.
The location of your brick oven is very important, therefore we recommend you to consult the local building codes before starting the project. In most of the cases, you have to place the oven and bbq far away from inflammable substances. In addition, you are not allowed to build your brick oven near fences or the windows of your neighbors houses. From our own experience, we recommend you to take into account placing the construction under the shade of a big tree, to enjoy the hot summer days together with your family and friends.
If you want to get the job done in a professional manner, you have to make the plans from the very beginning. Therefore, you should decide the dimensions and design of the brick oven to ease the building process. You have many alternatives, so you can use bricks and concrete to build the brick oven, or you can apply decorative stone to enhance the look. It all depends on your tastes, budget and creativity, as you can build stunning ovens even with a low budget. See HERE more similar projects.
Made from this plan
Materials
- A – 2×6 lumber and 2×4 lumber FORMWORK
- B – reinforcement bars no 8 REBARS
- C – sand, gravel and cement CONCRETE
- D – 100 pieces of blocks CONCRETE BLOCKS
- E – 500 regular bricks, 40 firebricks BRICKS
- F – 100 sq ft of firestone CLADDING
Tools
- Safety gloves, glasses
- Wet saw (to cut the bricks)
- Hammer, spirit level, carpentry pencil
- Concrete mixer
Tips
- Read carefully our other articles related to pizza oven construction
- Place the wood fired pizza oven far away from flammable substances or constructions
- Work with attention, otherwise the construction won’t have the desired look.
Time
- Two weekends
Related
Building a brick oven
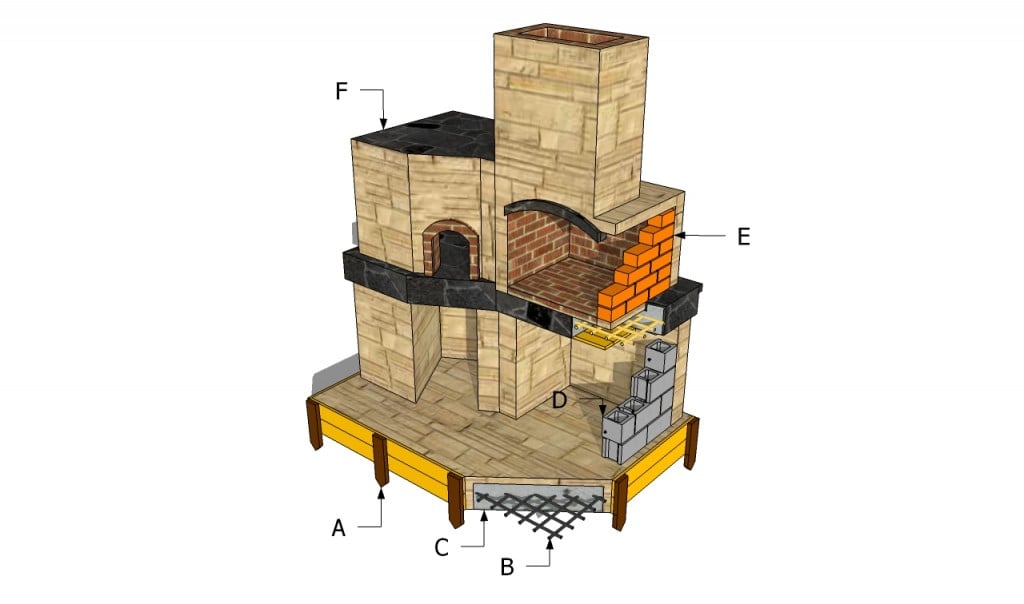
Building a brick oven
Smart tip: Building a brick barbecue adjacent to the outdoor bread oven is a good idea, as you will enhance the look of your construction, while keeping costs at a decent level. From our experience, building these two constructions together is easier and will decrease costs up to 50%, as compared to making the brick oven and barbecue in different locations. Therefore, we recommend you to take into account this option, as it will not only improve the look of your outdoor kitchen, but it will also make it more practical.
Brick oven foundation plans
Brick oven foundation plans
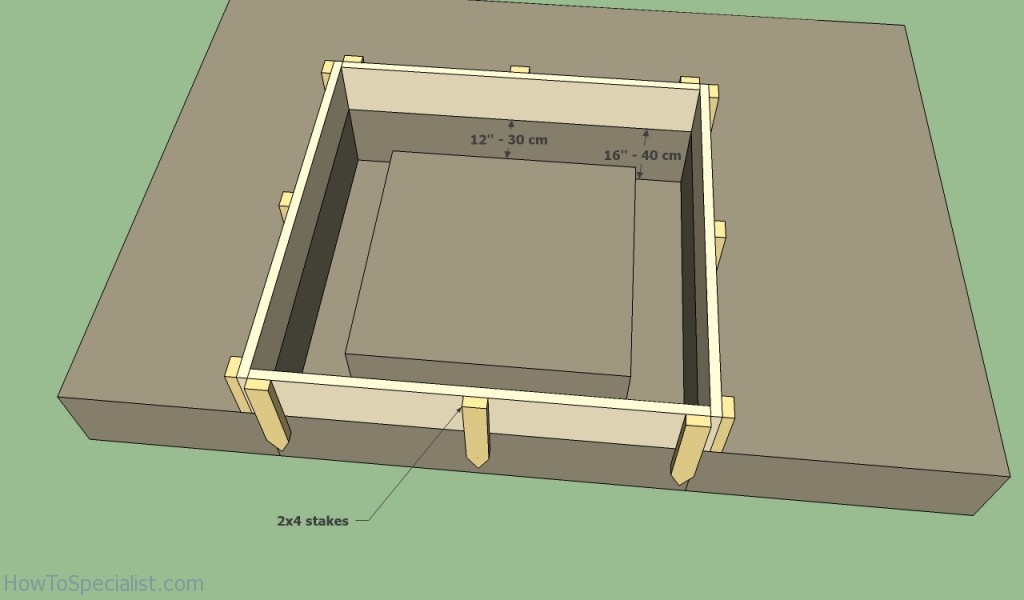
First, lay out the foundation of the brick oven. Therefore, you have to use batter boards and string to lay to foundation on the selected location. Afterwards, use a shovel to dig the trenches. In most of the cases, you have to dig about 1-1 1/2′ (40 cm), but it can vary according to the soil structure. Nevertheless, it would be best to consult a structural engineer, if you have no experience in this field. Use the 3-4-5 rule to make sure the corners of the foundation are right-angled.
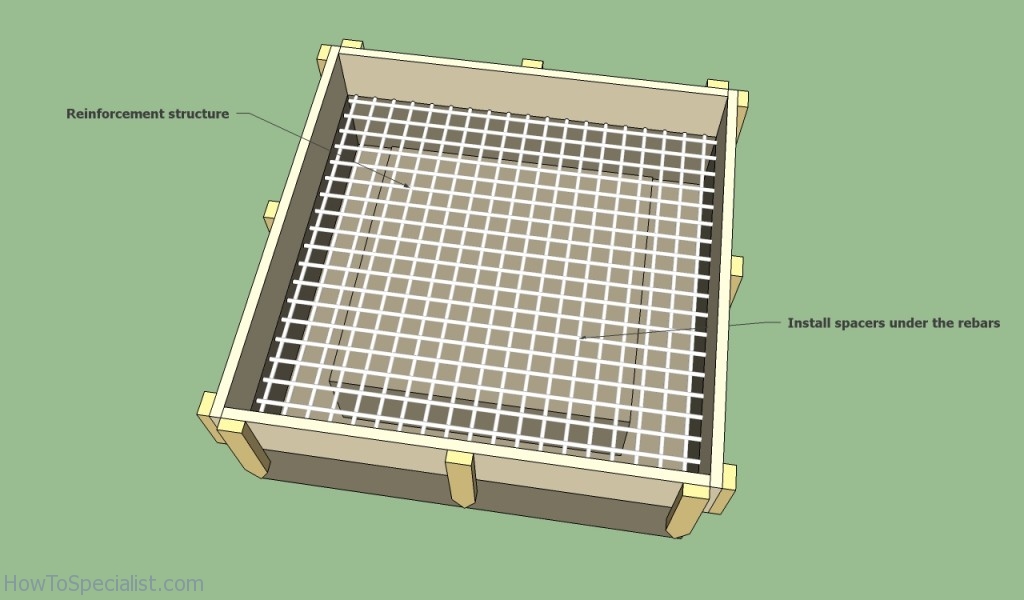
Bread oven foundation plans
Next, you have to build and install the formwork, along the trences. We usually use 2×10 wooden boards for the form and 2×4’s for the stakes. The elevation of the foundation should be higher than 10 inches, as to protect the base of the oven from rain and snow.
Install the structure of rebars to reinforce the concrete. Don’t forget to place spacers under the rebars, before pouring in the concrete. In order to mix the concrete, use the following recipe: 2 parts cement, 3 parts sand, 4 parts gravel and water.
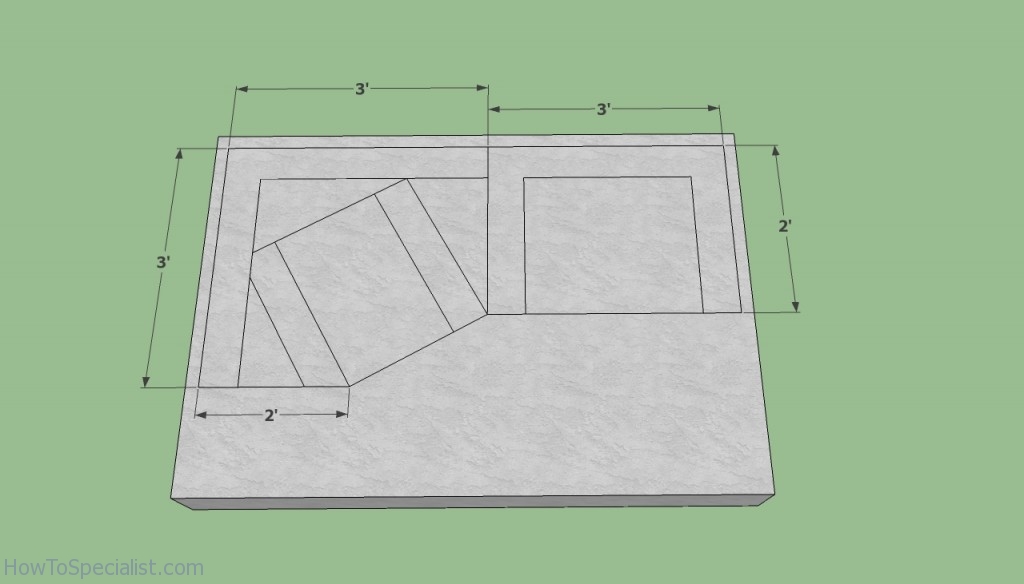
Foundation brick oven plans
Use a power mixer to get the right consistency. Pour the concrete in the form and level it using a straight edge. The procedure is straight-forward, just pull the straight edge along the form, like sawing.
Building the base of the brick oven
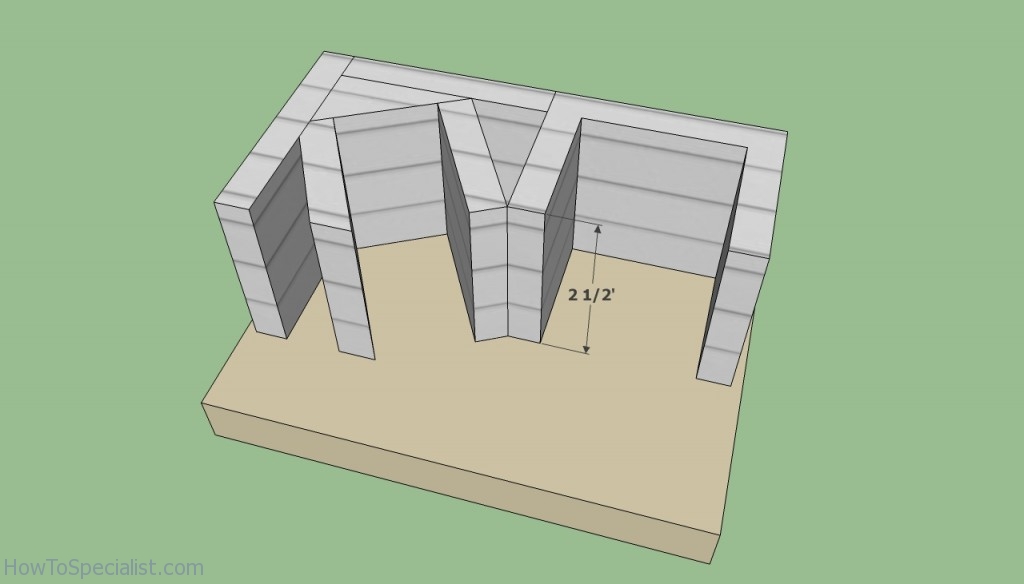
Base brick oven plans
Building the base of the brick oven is not hard if you use quality concrete blocks, the right mortar and a spirit level. Place concrete blocks at the beginning and end of the row and use a string to align the rest of them. When, you have completed the row, use the same technique to lay the concrete blocks.
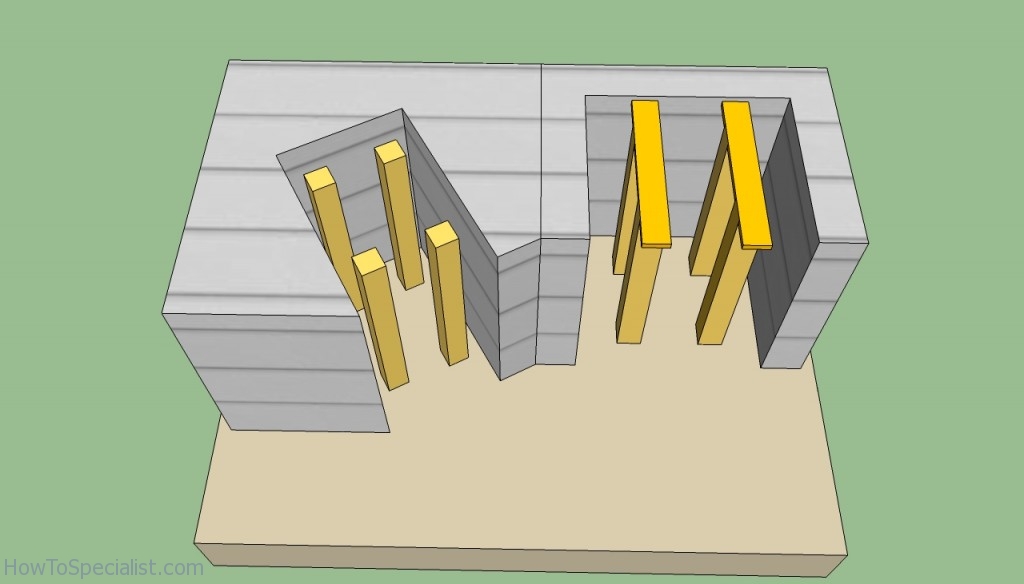
Base oven plans
Use a spirit level to make sure the walls are perfectly plumb. After you have completed the base of the brick oven and barbecue, you should install the form for the concrete ceiling.
Therefore, use 4×4 posts and place them on the foundation, as in the image. The height of the posts should be equal to the height of the base minus 4”, as you have to place two 2×4 boards on top of them and afterwards lay the form (2×4 boards).
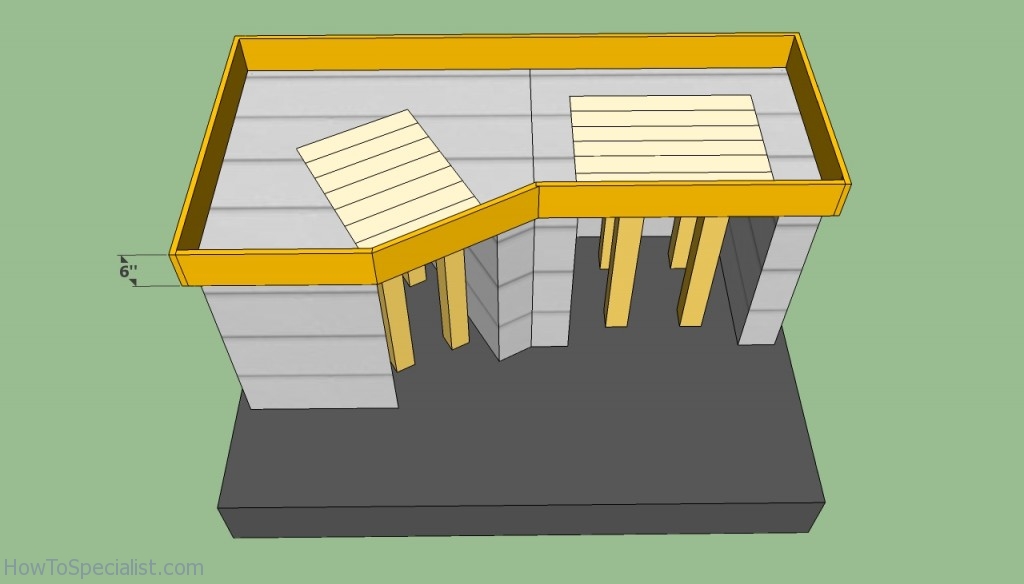
Countertop brick oven plans
The concrete countertop should should be 6” thick, therefore you should use 2×6 wooden boards to build the sides of the form. Work with great care and secure the sides of the form with screws (it will be easier to remove the boards).
Next, install a structure of rebars over the form. We recommend you to tie the rebars with construction wire and to place the whole structure on spacers, at least 1-2” from the formwork.
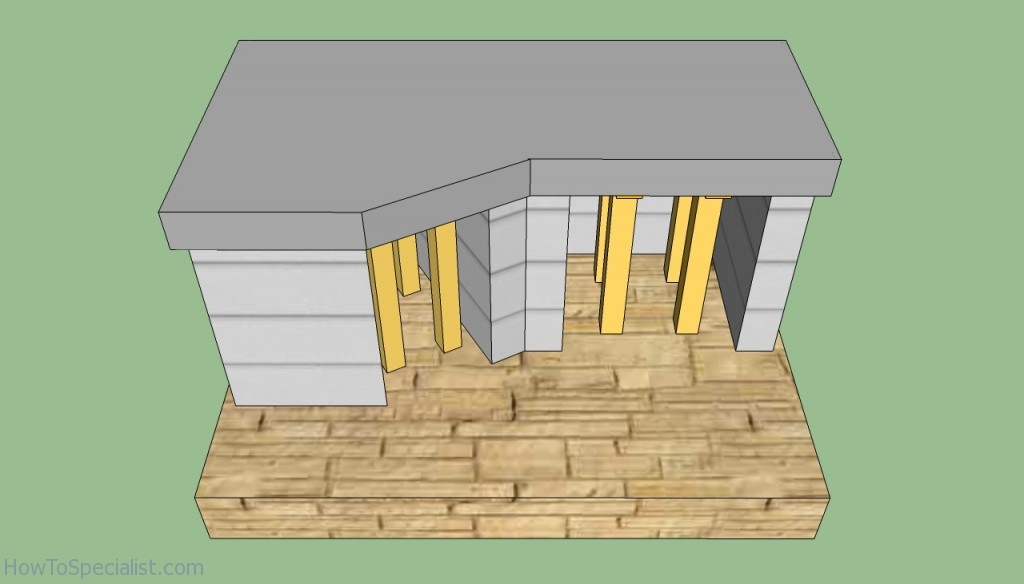
Oven countertop
Pour the concrete in the form and hit gently the sides of the form to remove the pockets of air (or use a concrete vibrator). Mix thoroughly 3 parts cement, 2 parts sand, 4 parts gravel and water until you get a compound wit the consistency of cream.
Brick oven and barbecue plans
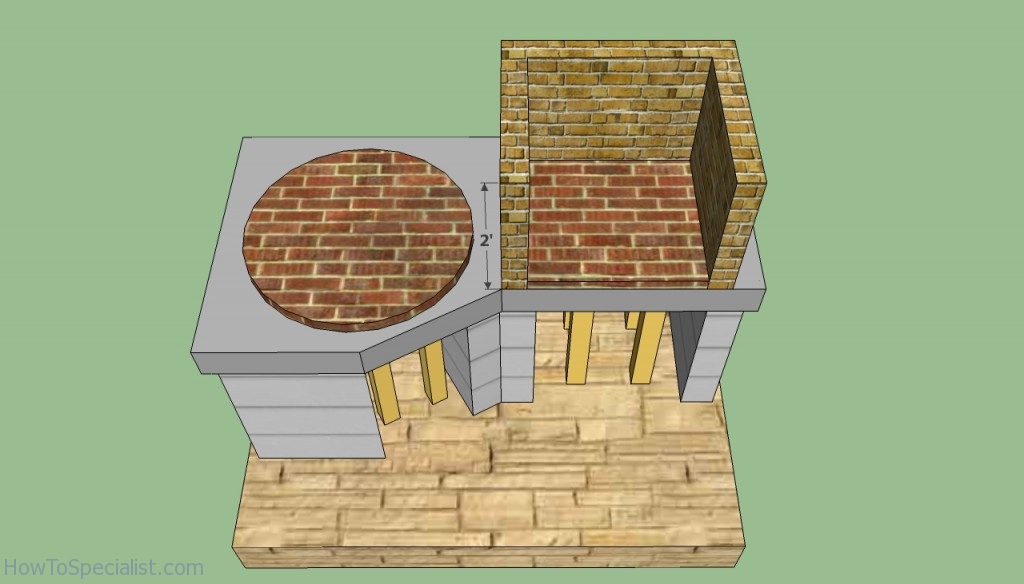
Brick oven and bbq plans
Lay the cooking floor of the bread oven, using refractory bricks and build the brick walls of the barbecue, using regular bricks. Work with patience and with great care, and use a spirit level to make sure the walls are plumb and the cooking floor is perfectly horizontal.
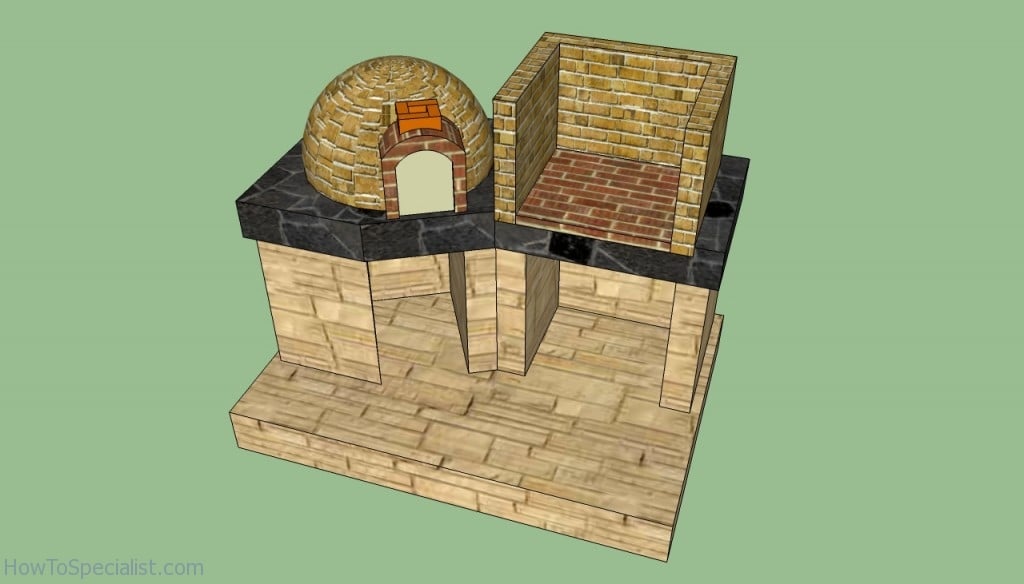
Brick oven and barbeque plans
Continue laying the bricks using clay mortar, to build the brick oven. Remember that you should also build the arched entrance to the bread oven, therefore we recommend you to use a polystyrene or plywood template.
The opening of the entrance should be around 1′ wide, but you can adjust its width and height according to your needs and tastes. Leave enough space at the top, to lead the smoke out.
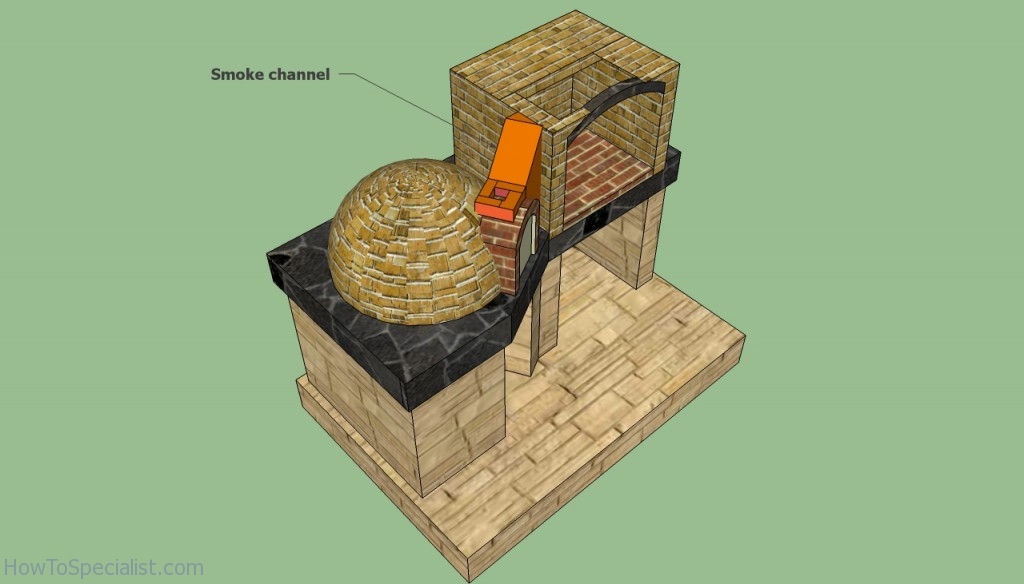
Brick oven smoke chimney
As you can notice in the image, at the top of the oven’s entrance there is a hole to let the smoke out. You have to build a brick channel to direct the smoke to the chimney. Install a stone lintel at the top of the barbecue or pour a concrete lintel.
In order to save material and get a better design, we will construct a common chimney for both the oven and brick barbecue. If you like it, you should use our brick oven plans and build it in your backyard.

Build bread oven plans
Next, build the chimney using regular bricks and cement based mortar. As you can see in the image, you have to lay the bricks over the lintel, therefore make sure it is locked firmly into position.
On the other hand, you also have to build the channel to direct the smoke from the brick oven to the chimney. If don’t plan to apply stone over the bricks, we recommend you to clean the mortar off the bricks, with a damp sponge.

Brick oven dimensions
If you aim for a traditional design, you should let the bricks exposed, otherwise you could install stone. Therefore, choose the material to fit with the rest of the brick oven and install the stones, using cement based mortar.
In addition, you should also cover the countertop with flagstone, marble or granite, in order to get an unique design. Tap the pieces of stone into place with a rubber mallet, making sure you leave even gaps between them.
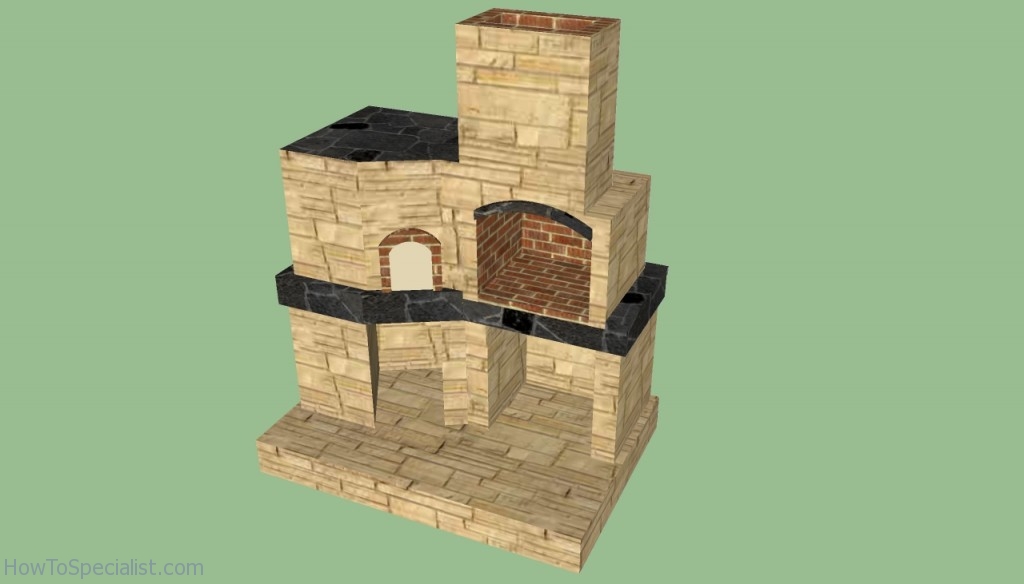
Brick oven plans
After you have finished the brick oven and barbecue, using our free plans, you should let the mortar dry out for at least one week, before making the first fire and backing bread. If you don’t allow it enough time to dry out properly, it might even collapse.
If you want to protect the construction against rain or snow, you could build a basic wooden roof and cover it with asphalt singles.
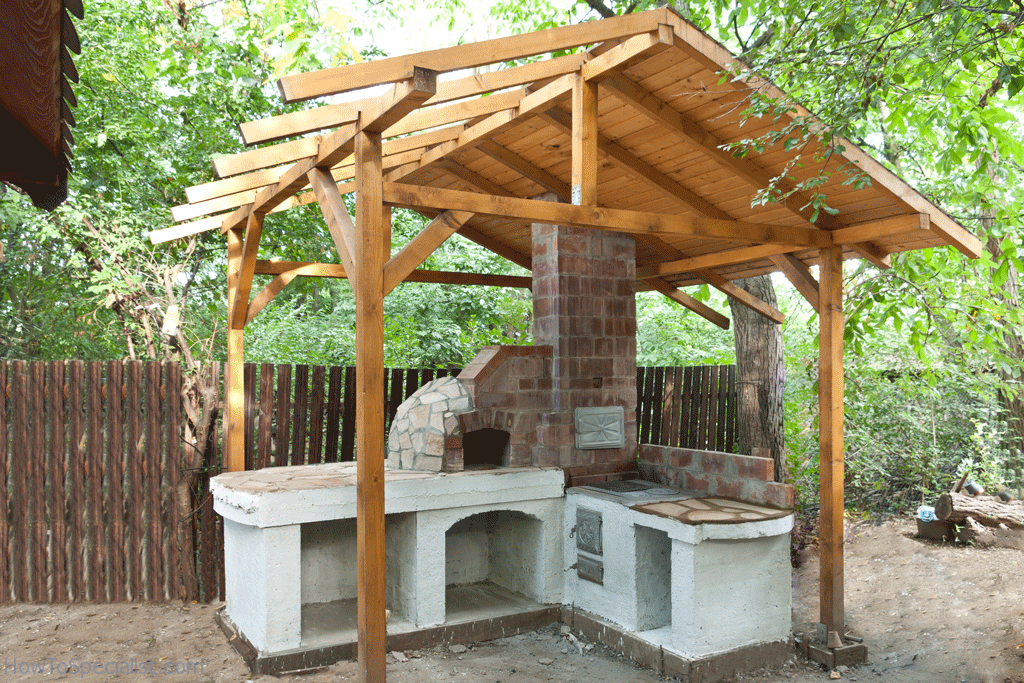
Brick oven plans
If you want to get the job done quicker, you could try to build a brick pizza oven and a stove. As you can see, they have a similar design, as the materials required for the job are: bricks, stone and concrete blocks. Check out the rest of the projects for a detailed tutorial.
Thank you for reading our article about brick oven plans and we recommend you to check out the rest of our projects. Don’t forget to LIKE and SHARE our articles with your friends by using the social media widgets. SUBSCRIBE to be the first that gets our latest projects.
