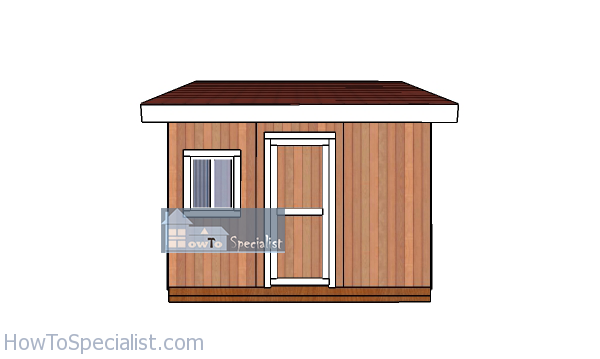
This step by step woodworking project is about free 12×12 lean to shed plans. This compact shed features a 32″ door to the front and a 24″x30″ window, so you get plenty of light inside. In addition, the outdoor shed has a lean to roof with a 3:12 pitch. The plans are PDF downloadable and come with full Cut / Shopping lists. Remember that you need to read the local building codes before selecting the right location for the shed and before building the shed. See my other DIY projects HERE. See all my shed plans HERE.
We recommend you to invest in the best materials you could afford. Therefore, you should buy weather-resistant lumber, such as pine or cedar. Always take accurate measurements before adjusting the size of the components at the proper size. Drill pilot holes trough the components before inserting the wood screws, to prevent the wood from splitting. See all my Premium Plans HERE.
Made from this plan
It’s that simple to build a square lean to shed!
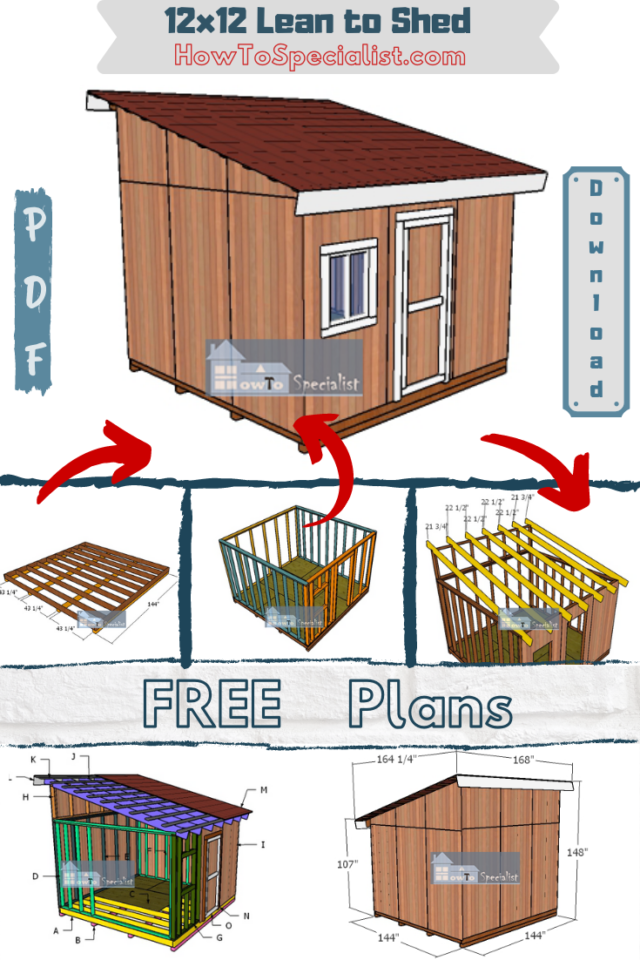
12×12 Lean to Shed Plans – PDF Download
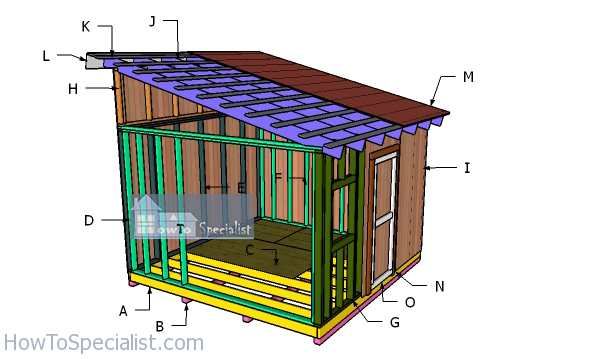
Building-a-12×12-shed
Materials
- A – 2 pieces of 2×6 lumber – 12 ft long, 10 pieces – 141″ long FLOOR
- B – 4 pieces of 4×4 lumber – 12 ft long SKIDS
- C – 3 pieces of 3/4″ plywood – 48″x96″ long, 3 pieces – 48″x48″ long FLOORING
- D – 2 pieces of 2×4 lumber – 137″ long, 1 piece – 144″ long, 7 pieces – 90″ long 2xSIDE WALL
- E – 2 pieces of 2×4 lumber – 144″ long, 1 piece – 137″ long, 9 pieces – 90″ long BACK WALL
- G – 1 piece of 2×4 lumber – 144″ long, 1 piece – 137″ long, 2 pieces – 56″ long, 11 pieces – 90″ long, 2 pieces – 84 1/2″ long, 3 pieces – 35 1/2″ long, 2 pieces – 30″ long, 3 pieces – 17 1/2″ long, 4 pieces – 27″ long, 2 pieces of 2×6 lumber – 35″ long FRONT WALL
- H – 2 pieces of 2×4 lumber – 144″ long, 9 pieces – 32″ long TOP WALL FRAME
- 12 pieces of 2×6 lumber – 12 ft
- 4 pieces of 4×4 lumber – 12 ft
- 1 piece of 2×6 lumber – 8 ft
- 5 pieces of 3/4″ plywood – 4’x8′
- 13 pieces of 2×4 lumber – 12 ft
- 46 pieces of 2×4 lumber – 8 ft
- 250 pieces of 2 1/2″ screws
- 1000 pieces of 3 1/2″ screws
- 1000 pieces of 1 5/8″ screws
- 500 pieces of 6d nails
- 8 rafter ties
- 1 box of 1 1/2″ structural screws
- wood filler , wood glue, stain/paint
Tools
- Safety gloves, glasses
- Miter saw, jigsaw
- Chalk line, tape measure, spirit level, carpentry pencil
- Drill machinery and drill bits
Time
- One week
Step 1: How to build a 12×12 lean to shed floor
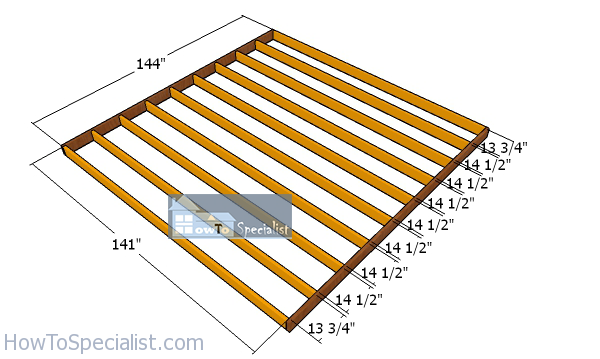
Floor-frame-for-shed
The first step of the project is to build the floor frame for the large lean to garden shed. Cut the joists at the right dimensions from 2×6 lumber. Drill pilot holes through the long joists and then drill pilot holes. Also, insert 3 1/2″ screws into the perpendicular components.
In addition, make sure the corners are square. Place the joists every 16″ on center. Measure the diagonals and check if they are equal. It is essential to assemble the shed floor on a level surface, otherwise the diagonals won’t equal up.
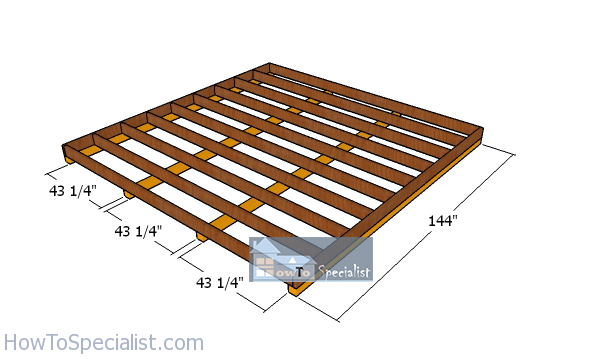
Fitting-the-skids-to-the-shed-floor
Next, fit 4×4 skids under the frame, as shown in the diagram. Use rafter ties to lock the skids to the floor frame. The skids will lift the floor frame from the ground and thus protect the components from moisture. I also recommend you to remove the vegetation layer under the shed. Level the surface and apply a layer of gravel, to help with drainage.
Use the rafter ties along with 1 1/2″ structural screws to lock the skids to the floor frame. Use at least 2 ties for each skid.
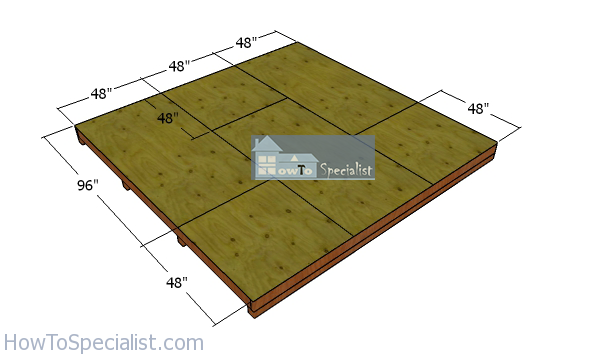
Fitting-the-floor-sheets
Also, attach the 3/4″ plywood sheets to the floor frame. Align the edges flush and leave no gaps between them. Insert 1 5/8″ screws every 8″ along the framing.
Step 2: How to build the shed wall frames
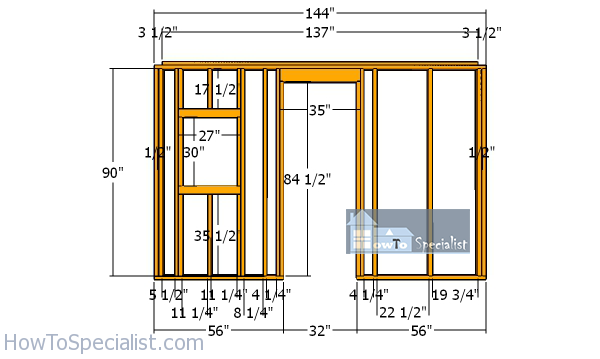
Front-wall-frame
The next step of the project is to build the front wall frame for the storage shed. Cut the components at the right dimensions and then lay them on a level surface. Drill pilot holes through the plates and insert 3 1/2″ screws into the studs.
Also, use 2×6 lumber for the double header. Sandwich a piece of 1/2″ plywood between the headers, add glue and insert 2 1/2″ screws from both sides. You can adjust the size of the openings to suit your needs.
Notice the door opening and the 24″x30″ window openings. You can play with the location for the window, if you want something different. Also, you can set double doors, if you want to have more space for tools or furniture.
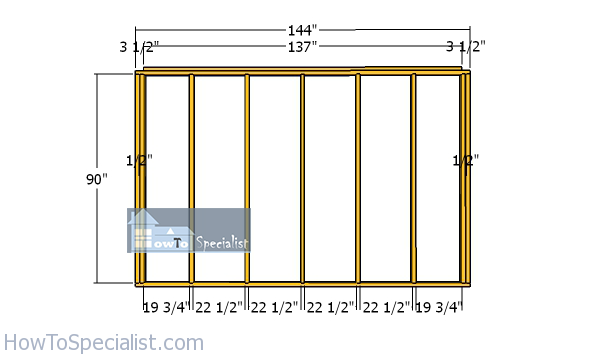
Back-shed-wall-frame
Furthermore, build the back wall frame from 2×4 lumber. Drill pilot through the plates and insert 3 1/2″ screws into the studs. Place the studs every 24″ on center, as shown in the diagram. Notice the double studs at both ends of the wall. In addition, place 1/2″ plywood pieces between the double studs.
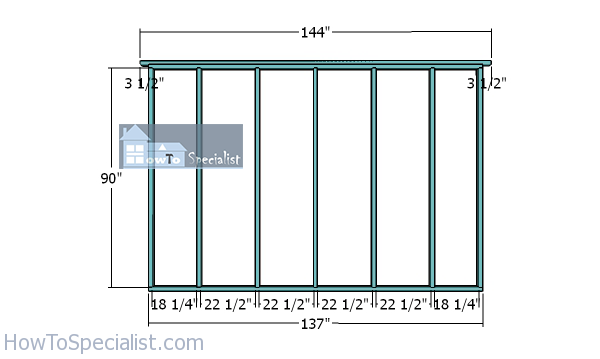
Side-wall-frames-for-12×12-shed
Build the side wall frames for the shed in the same manner described above. Drill pilot holes through the plates and insert 3 1/2″ screws into the studs. For this design the side walls are identical, however you can change that by adding doors or windows to the sides.
Step 3: Assembling the shed frame
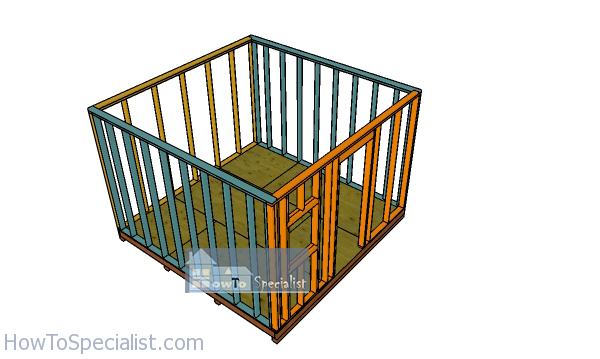
Assembling-the-shed-frame
Continue the project by fitting the wall frames to the floor frame of the shed. Align the edges flush and plumb them with a spirit level. Drill pilot holes through the bottom plates and insert 3 1/2″ screws into the floor.
In addition, lock the adjacent wall frames together tightly with 2 1/2″ screws. It is important to have a shed frame well put together, so don’t make economy with the wood screws.
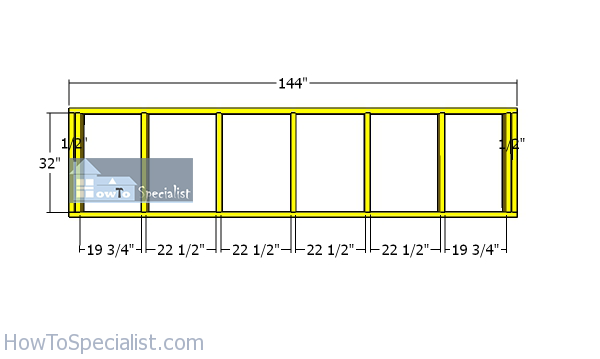
Top-wall-frame
Use 2×4 lumber for the top back wall. This frame will help you create the lean to for the garden shed. Drill pilot holes through the plates and insert 3 1/2″ screws into the studs. You can adjust the size of the studs and thus influence the slope of the shed. This shed has a roof pitch of 3:12, but you can change that by making these studs taller or shorter. For example, if you want a 4:12 lean tom just add 12″ to the studs (this will also change the shape and size of the rafters).
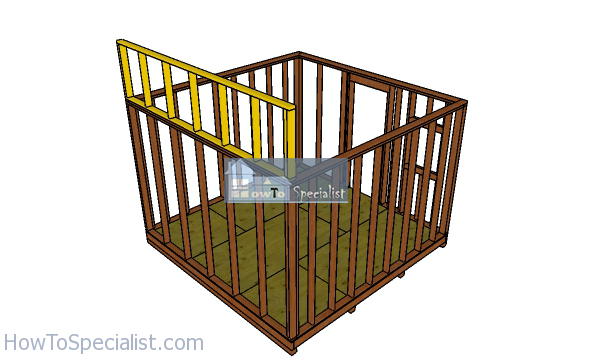
Fitting-the-top-wall-frame
Next, fit the frame to the back of the shed. Align the edges flush, drill pilot holes and insert 3 1/2″ screws to lock it into place tightly. Also, you have to plumb the frames with a spirit level.
Step 4: Finishing touches

How-to-build-a-12×12-lean-to-shed
This is a simple storage shed with a metal sheet roof with generous overhangs on all sides. Also, you need to know that this garden shed has a 144 sq ft floor surface and a maximum height of 12′ 4″.
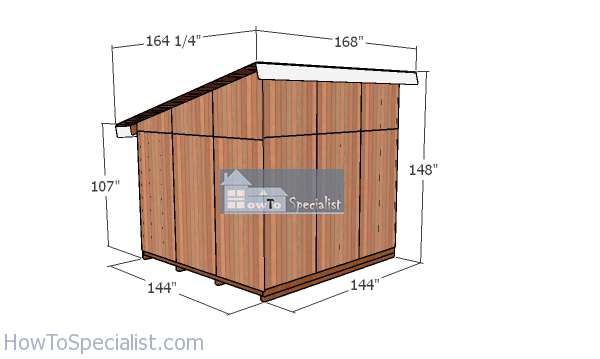
12×12-lean-to-shed-plans–dimensions
In my opinion, this large backyard shed is ideal for a workshop or for a hobby room. The estimated cost for this storage shed is 1500+ usd, but the good thing is you will create tons of new space for your tools and toys. You can build this shed next to the property line or close to an already existing building (make sure your local codes are ok with that).
If you want a slightly smaller shed, you should check out the free plans for this 10×12 lean to shed.
12×12-lean-to-shed-plans
Last but not least, see how to frame the roof for this 12×12 garden shed, in PART 2 of the project. If you like my project, don’t forget to SHARE it on Facebook and Pinterest.
If you want to download the plans. just click on the GET PDF PLANS button bellow.
Thank you for reading our project about free 12×12 lean to shed plans and I recommend you to check out the rest of the projects. Don’t forget to LIKE and SHARE my projects with your friends, by using the social media widgets. SUBSCRIBE to be the first that gets our latest projects.
<< Previous | Next >>

