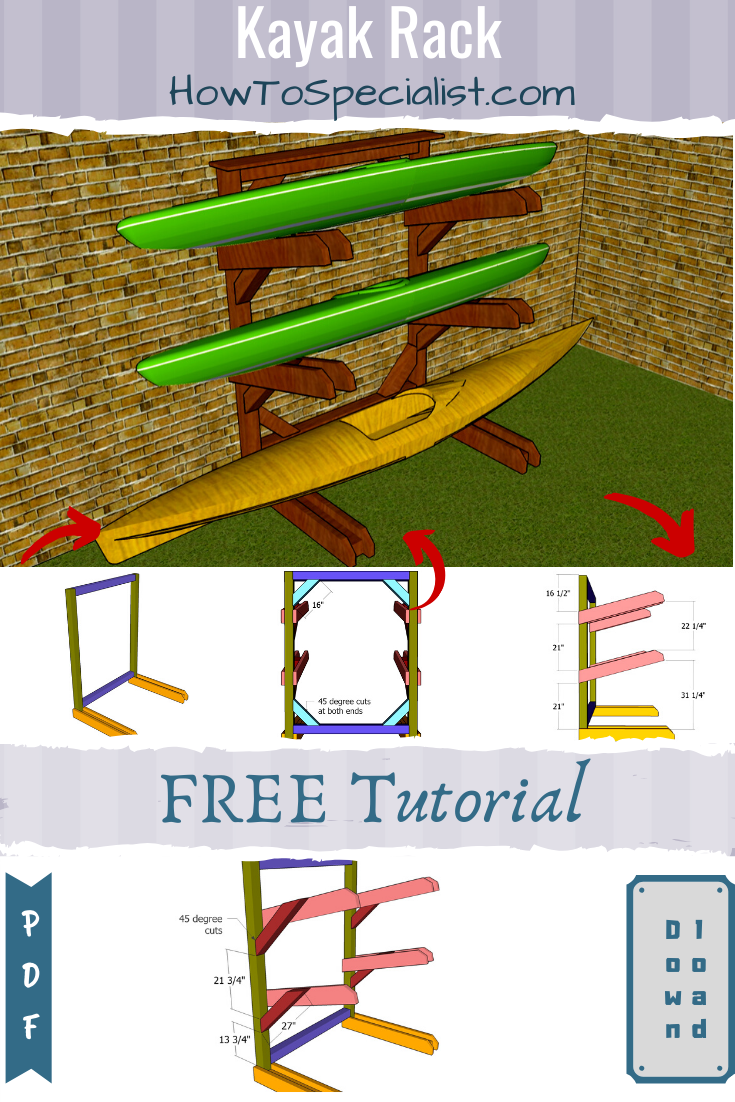
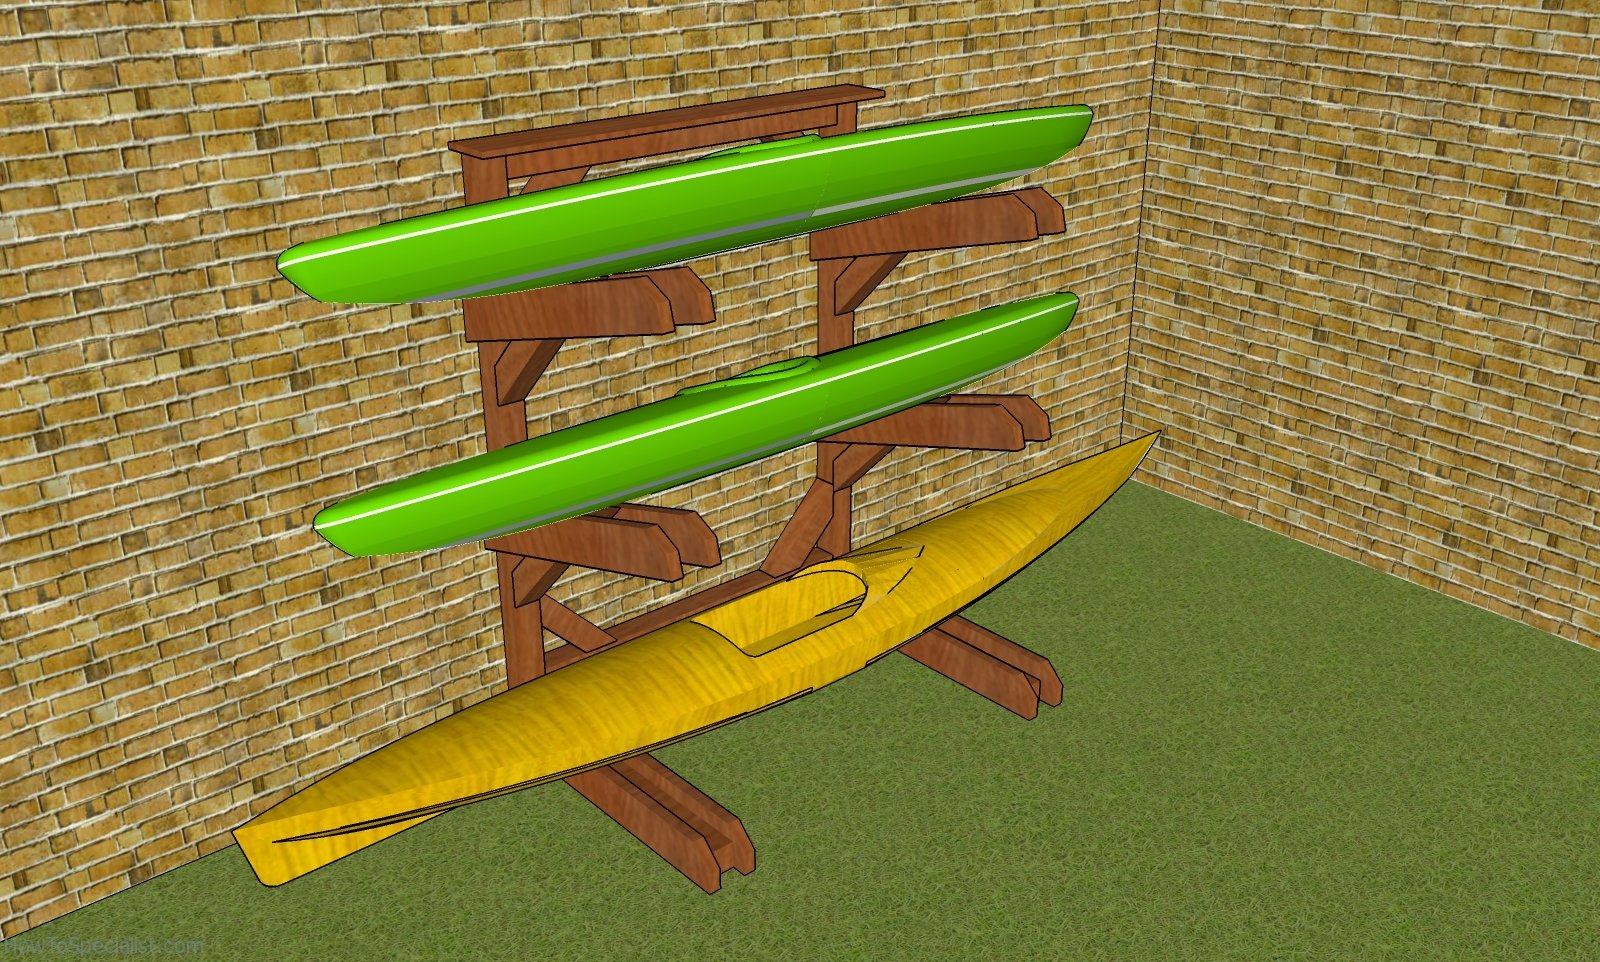
This step by step diy project is about how to build a kayak rack. If you have several kayaks and you want to save space by storing them in an elegant manner, this is the solution for your needs. This rack is super sturdy, easy to build and it can accommodate 3 kayaks. In addition, I have added a shelf for the kayak storage stand, so you can organize smaller items. This project comes with everything you ever wanted to know, including a full Cut & Shopping list. You can easily Print or Save the plans as PDF file. PDF downloadable plans, for this project, with premium features in the Store.
You should always plan everything from the very beginning, in order to prevent costly mistakes and to save time. In most of the cases, you need a friend to give you a hand when assembling the wooden rack. Invest in high quality lumber and plywood, as the components will be exposed to bad weather. Protect the components with appropriate paint or stain.
There are a few tips that you should take into account, if you want to get a professional result. Therefore, take accurate measurements and use professional tools when making the cuts or when drilling pilot holes. Align the components at both ends and add waterproof glue to the joints, if you want to create a rigid structure.
Made from this plan
Pin it for later!
Kayak Rack – Free DIY Plans
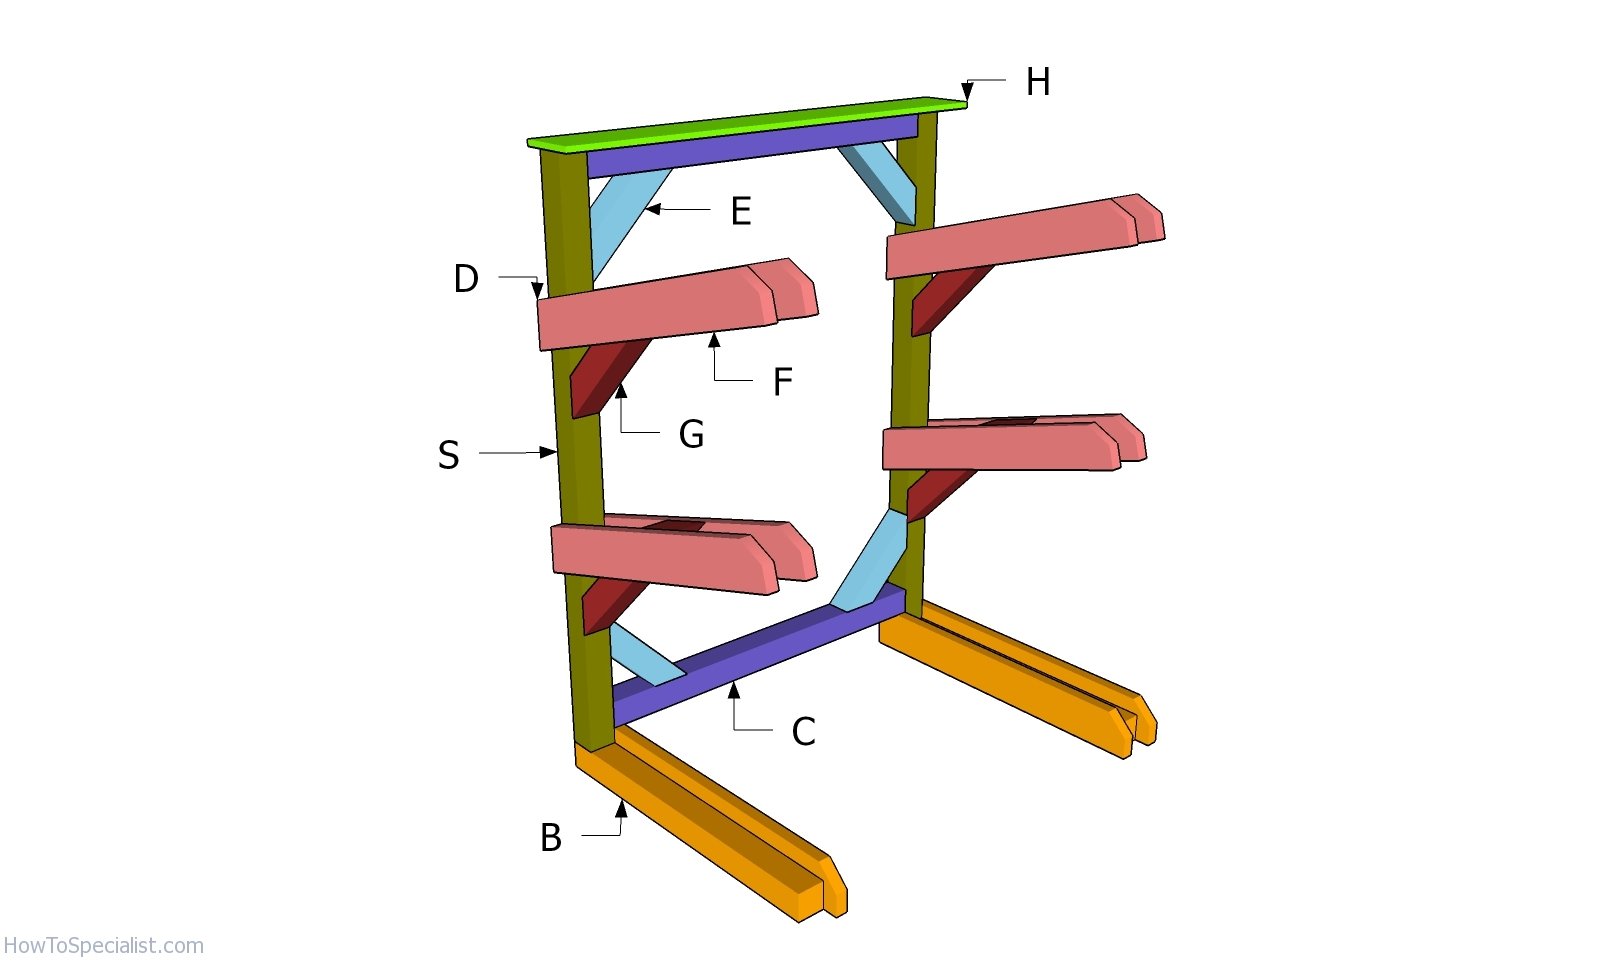
Materials
- A – 2 pieces of 4×4 lumber – 72″ long POSTS
- B – 2 pieces of 4×4 lumber – 42 1/2″ long BASE
- B – 4 pieces of 2×6 lumber – 43 1/2″ long BASE
- C – 2 pieces of 4×4 lumber – 50″ long FRAME
- D – 8 pieces of 2×6 lumber – 40″ long SUPPORTS
- E – 4 pieces of 4×4 lumber – 16″ lumber BRACES
- G – 4 pieces of 4×4 lumber – 27″ lumber BRACES
- H – 1 piece of 1×8 lumber – 5 ft SHELF
- 6 pieces of 4×4 lumber – 8 ft
- 1 piece of 1×8 lumber – 6 ft
- 6 pieces of 2×6 lumber – 8 ft
- construction glue
- stain, wood filler
- 1 5/8″ screws, 3 1/2″ screws
- 2 1/2″ pocket holes
- 7″ carriage bolts
Tools
- Safety gloves, glasses
- Miter saw, jigsaw
- Pocket Hole Jig
- Chalk line, tape measure, spirit level, carpentry pencil
- Drill machinery and drill bits
Time
- One Week
Related
Build a Kayak Rack Plans
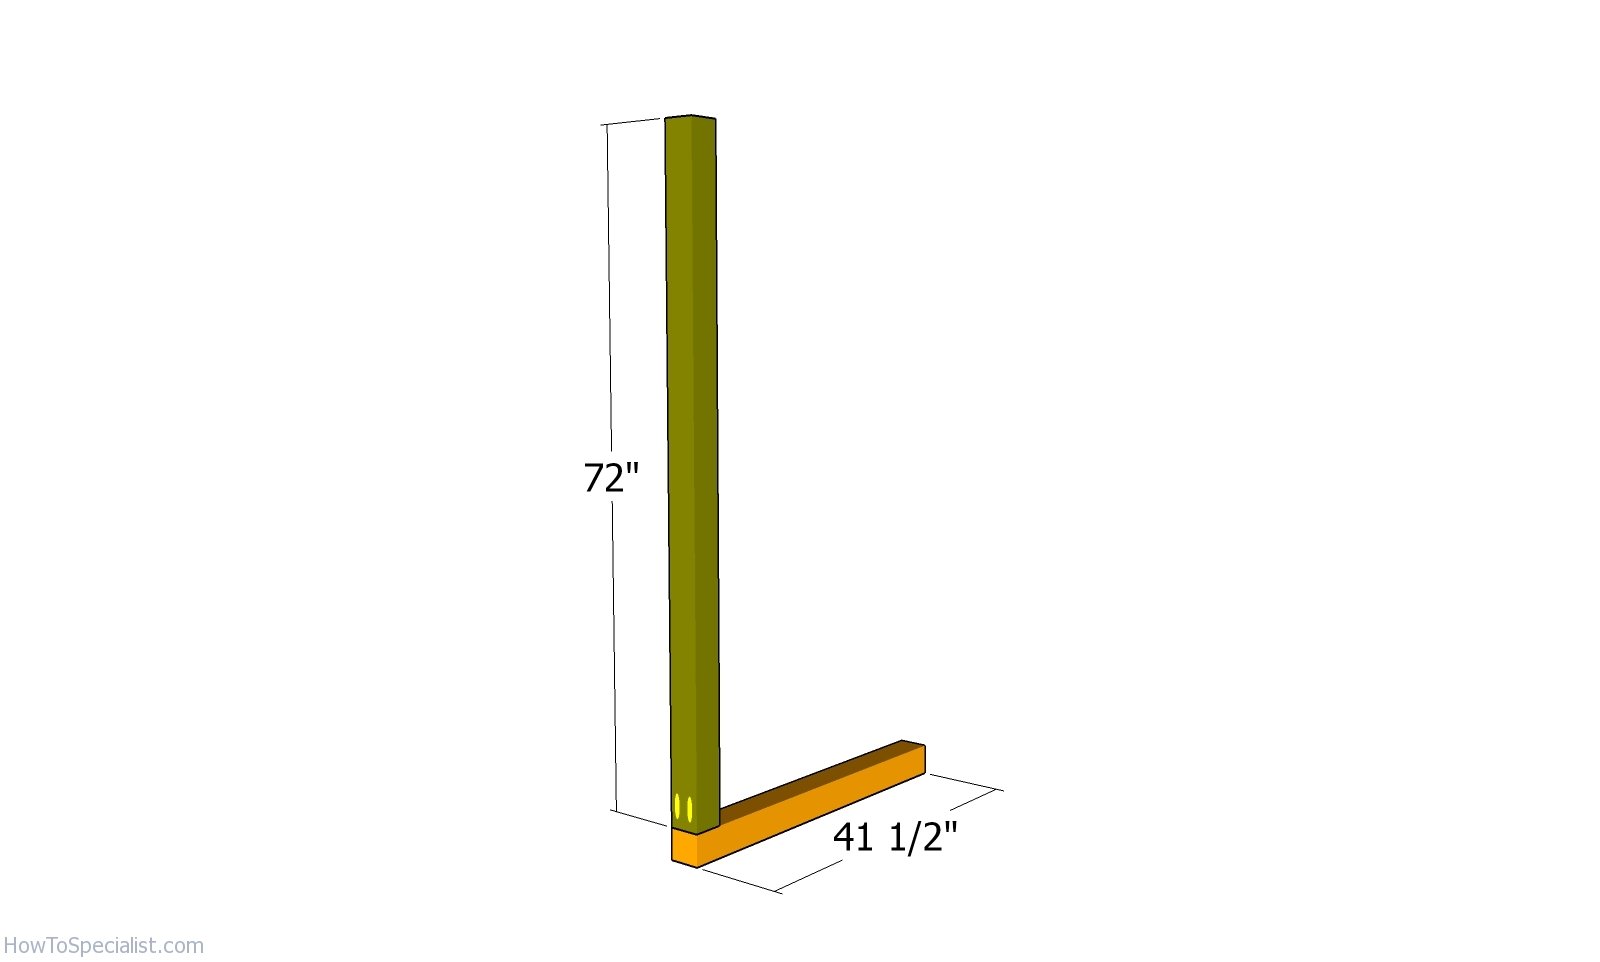
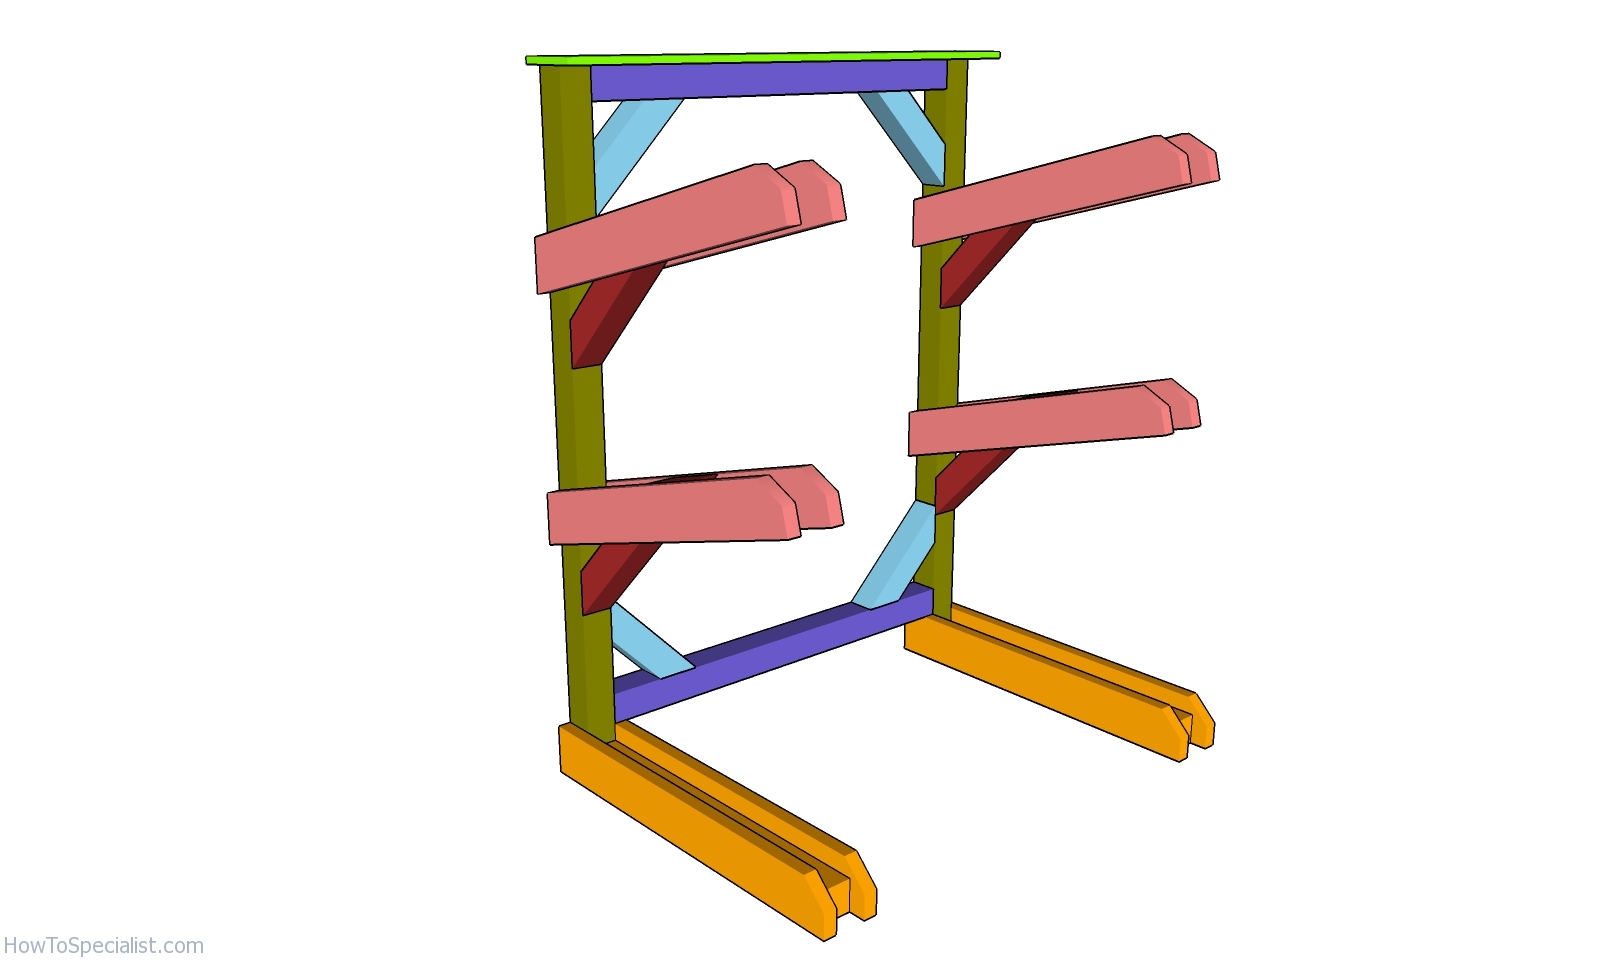
Assembling the sides of the kayak rack
The first step of the project is to build the sides for the kayak rack. Cut the components from 4×4 lumber as shown in the diagram. Align the edges flush and make sure the corners are square. Add construction glue to the joint and insert 2 1/2″ screws.

Assembling the frame of the kayak stand
Next, assemble the kayak rack. Join the two side frames for the rack by attaching the horizontal supports. Drill pocket holes at both ends of the supports and insert 2 1/2″ screws into the vertical components. Add glue to the joints and check if the corners are square.
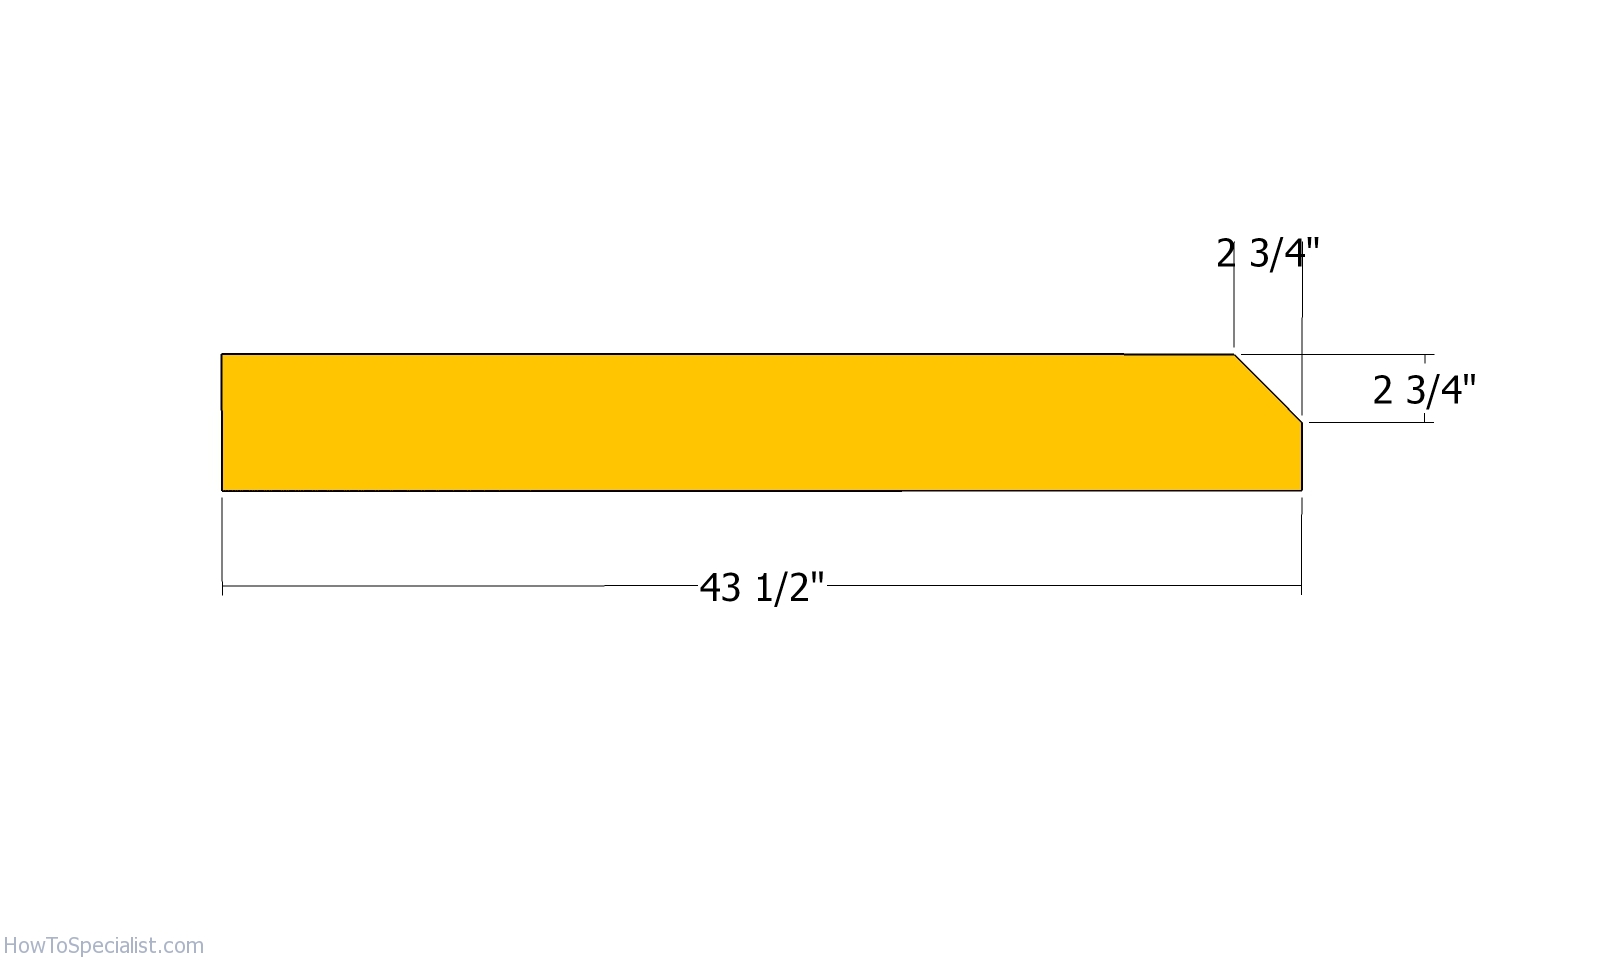
Base beams
Use 2×6 lumber for the base of the rack. Make a decorative cut to one end of the beam. Smooth the edges with sandpaper.
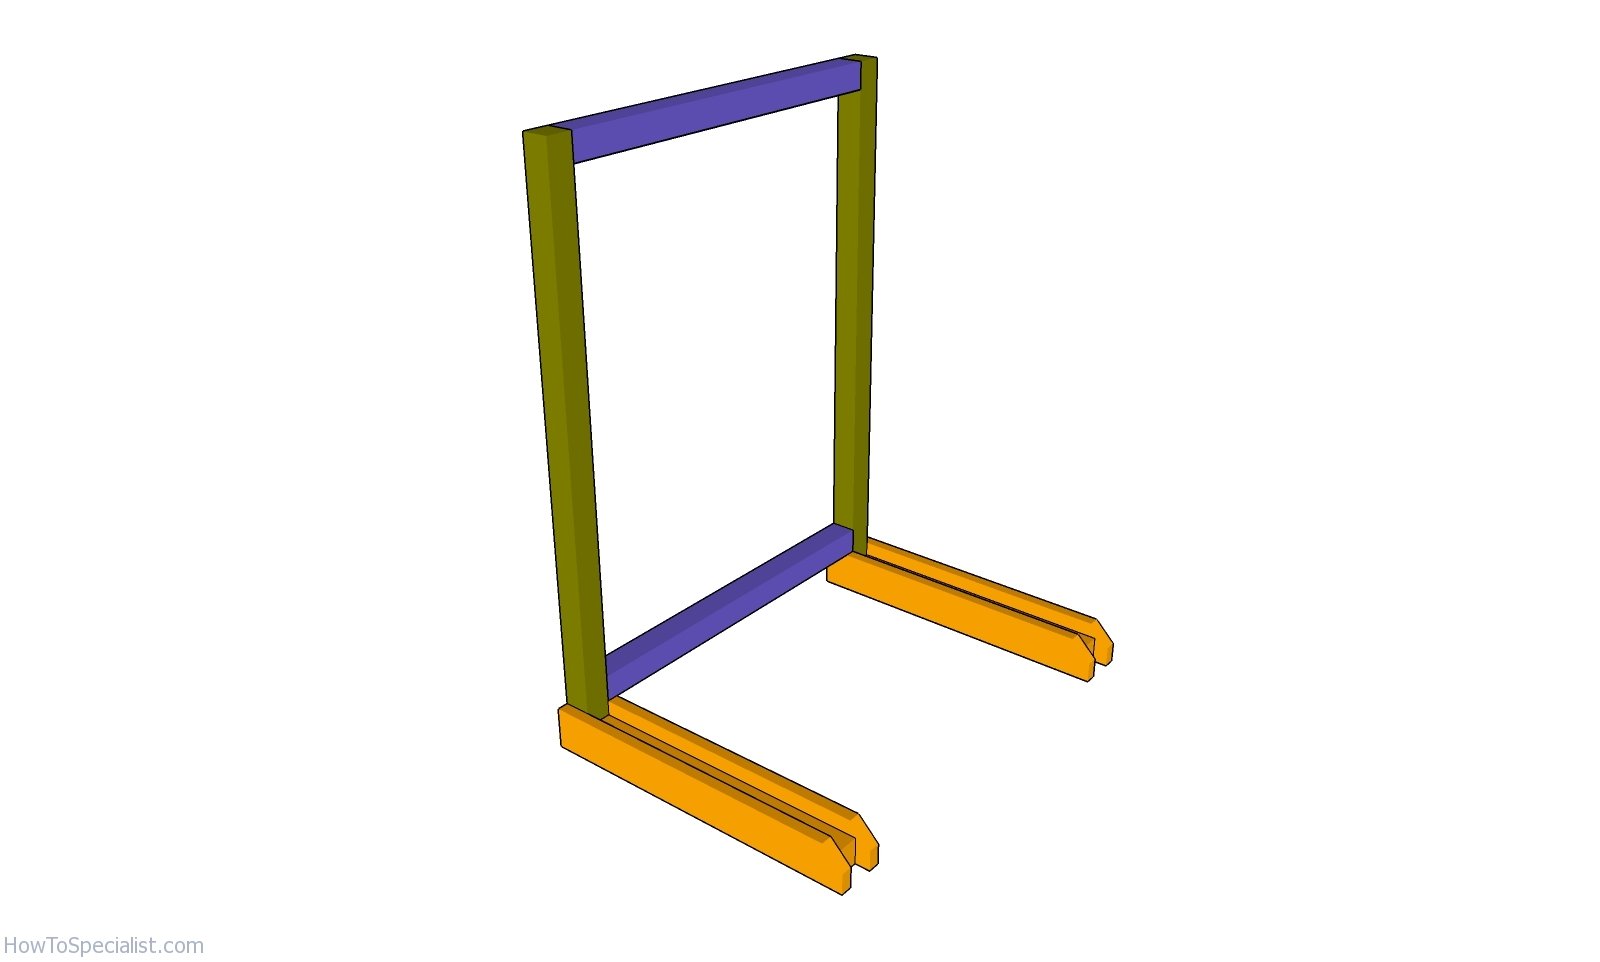
Attaching the base beams
Attach the beams to the base of the kayak. Align the edges flush and add construction glue to the joints. Drill pilot holes through the beams and insert 3 1/2″ screws on both sides.
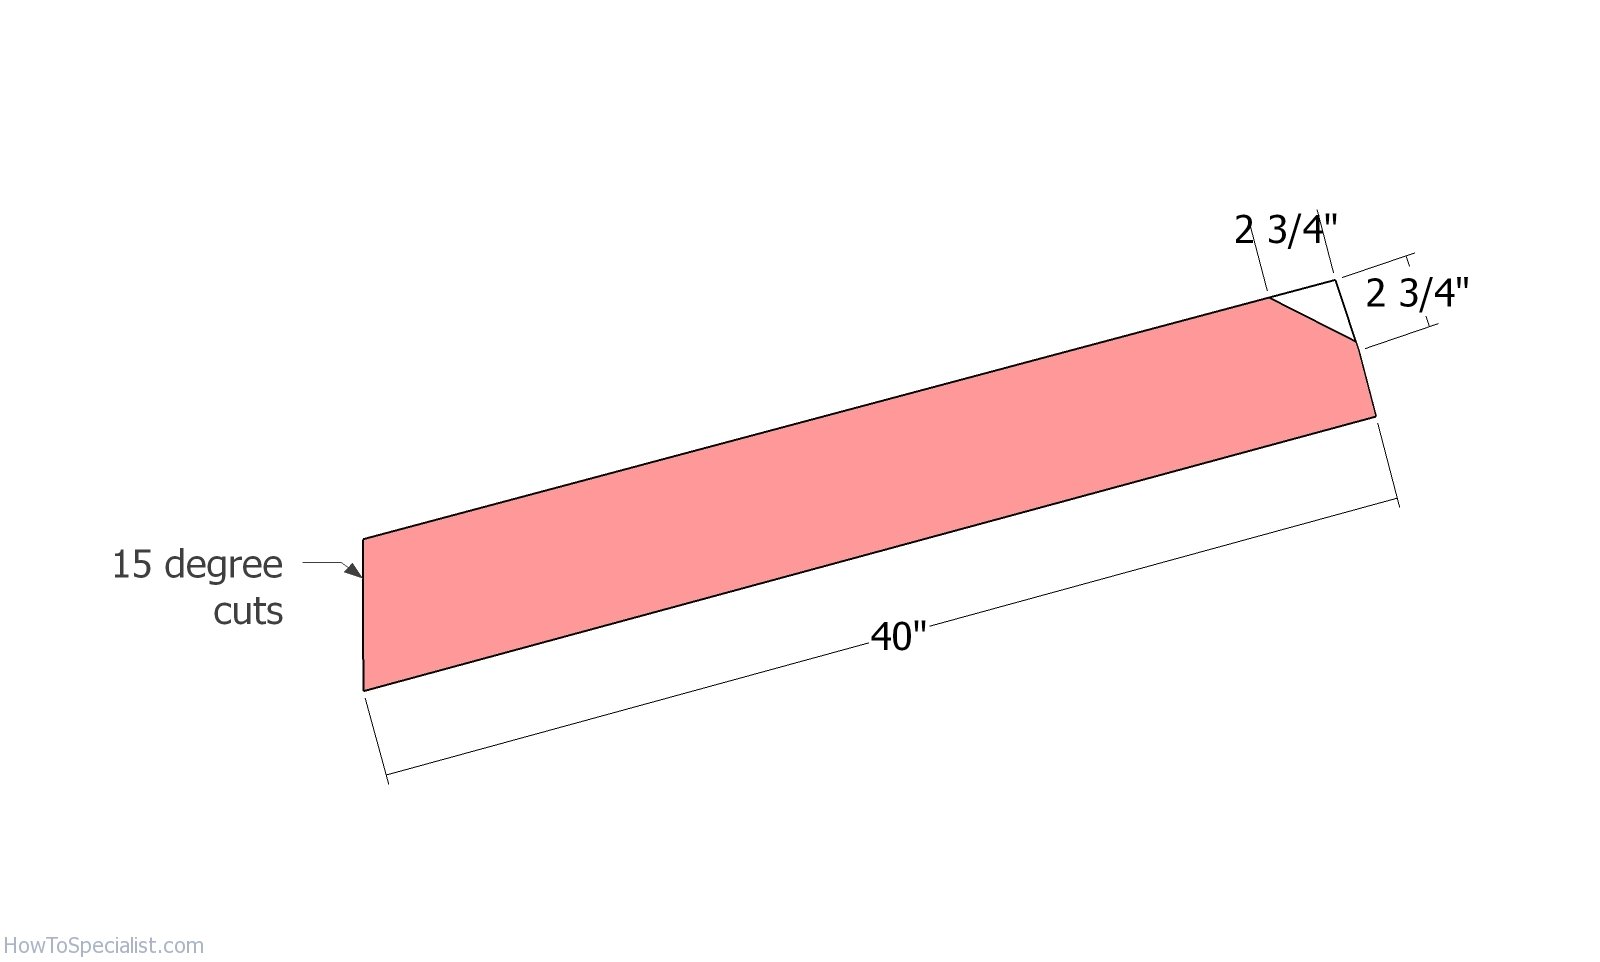
Supports
Use 2×6 lumber for the supports. Make a 15 degree cut to one end of the supports. Make a decorative cut to the opposite end. Smooth the edges with sandpaper.
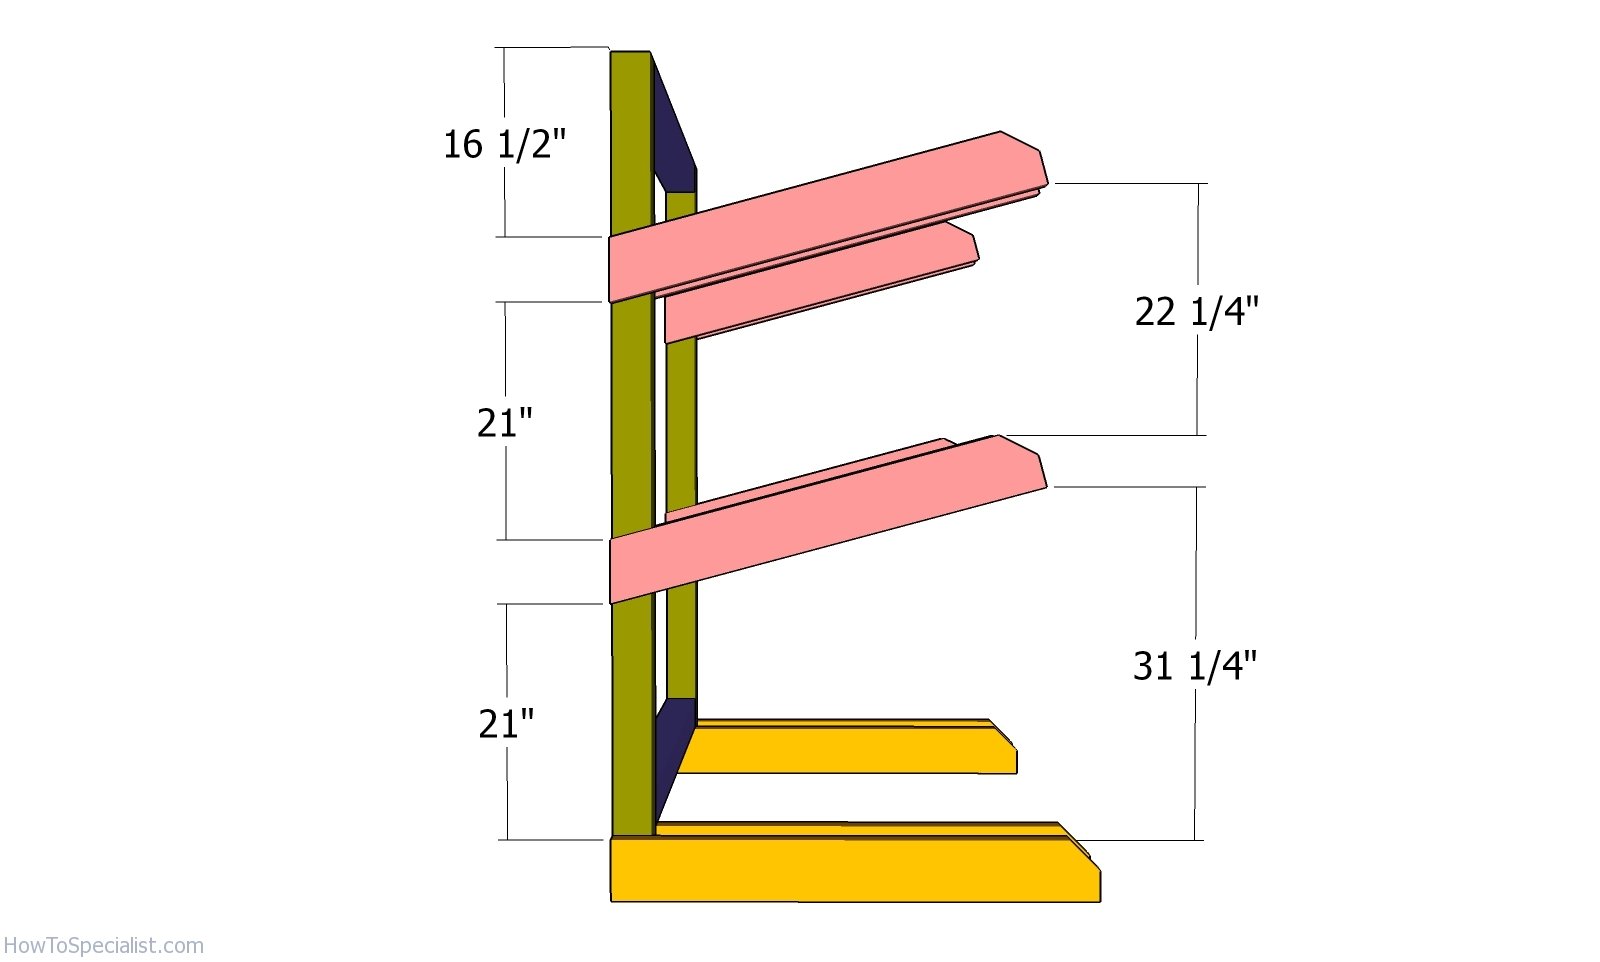
Attaching the supports for the kayaks
Fit the supports to the vertical posts. Clamp the supports to the posts after aligning the edges flush. Drill pilot holes through the supports and through the post. Insert 7″ carriage bolts to lock the supports into place. Use 2 bolts for each joint.
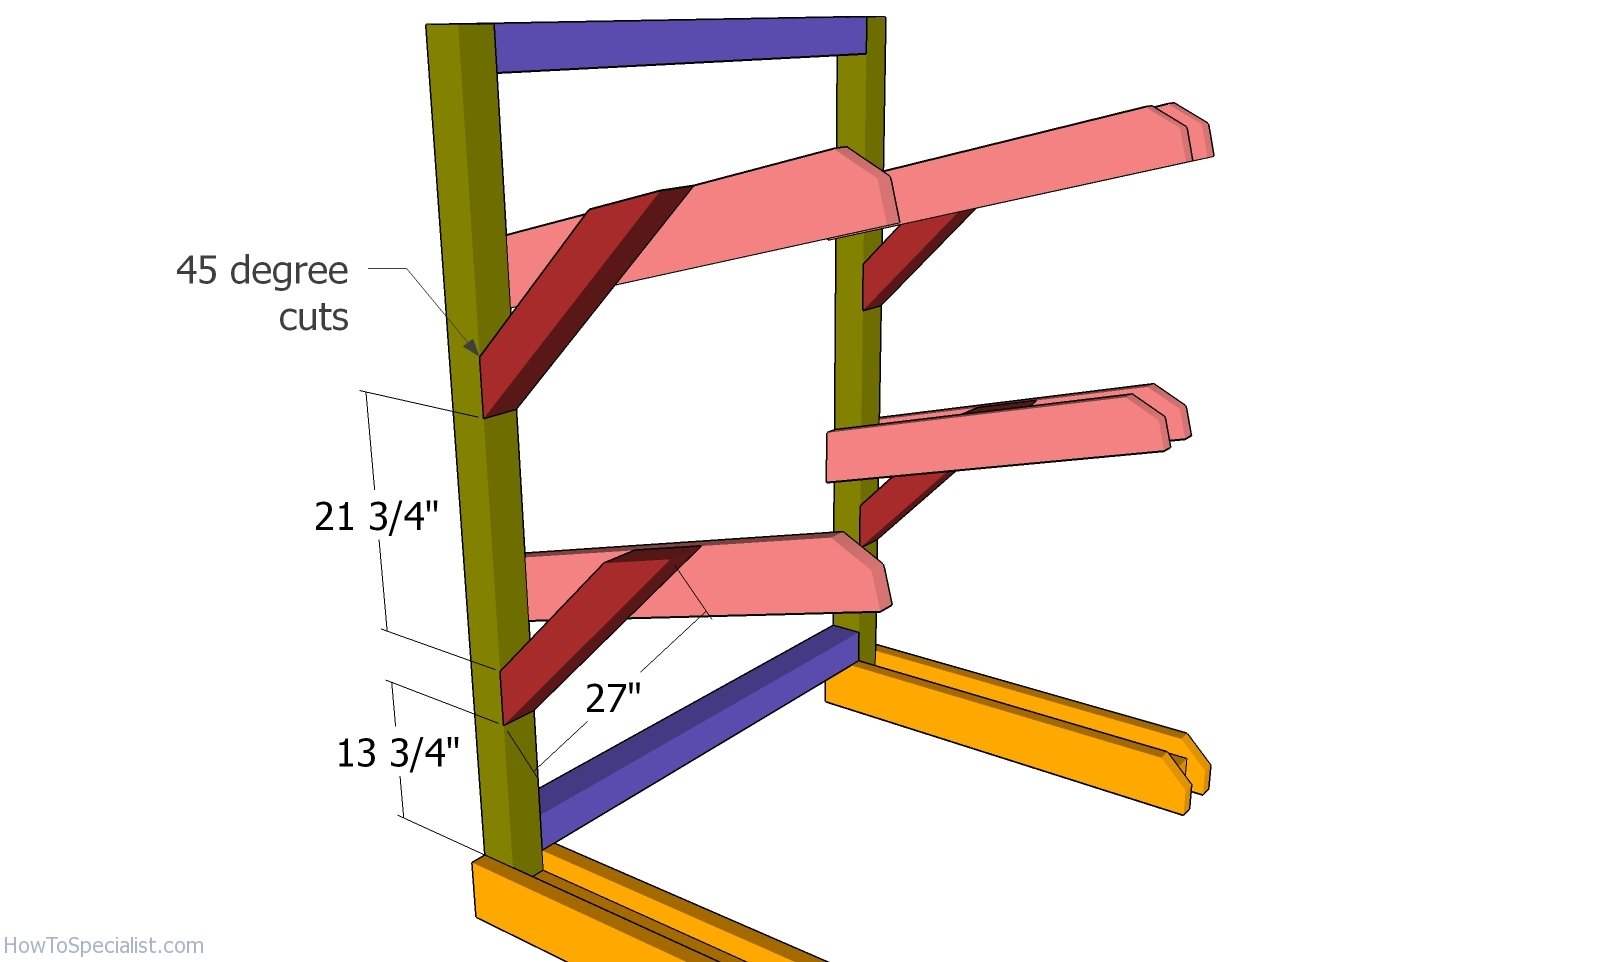
Braces for the kayak supports
Use 4×4 lumber for the braces. Make 45 degree cuts at one end of the brace and a 60 degree cut at the other end. Fit the brace to the rack, drill pilot holes and insert 3 1/2″ screws to lock them into place tightly.

Braces for the kayak rack
Use 4×4 lumber for the braces. Make 45 degree cuts at both ends of the braces and attach them to the back frame of the kayak rack. Make sure the corners are square and align the edges flush. Drill pilot holes and insert 3 1/2″ screws to lock the braces into place tightly.
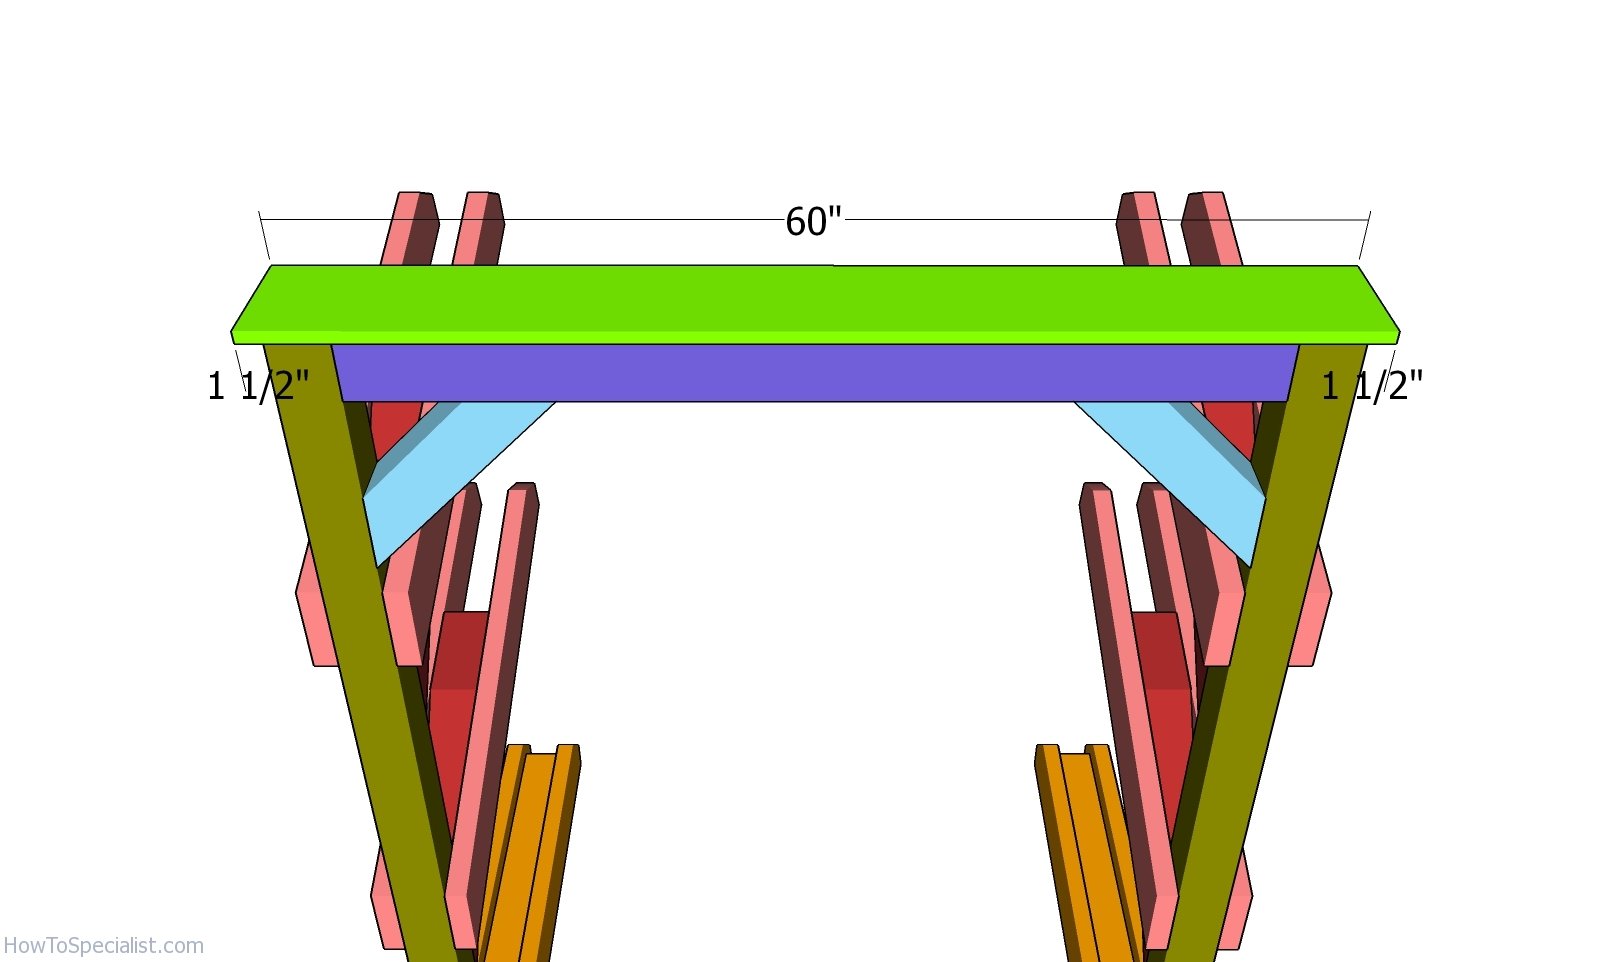
Fitting the top slat
Fit a piece of 1×8 lumber to the top of the kayak rack. Center the slat into place and align it to the back of the rack. Drill pilot holes and insert 1 5/8″ screws to lock it into place tightly.
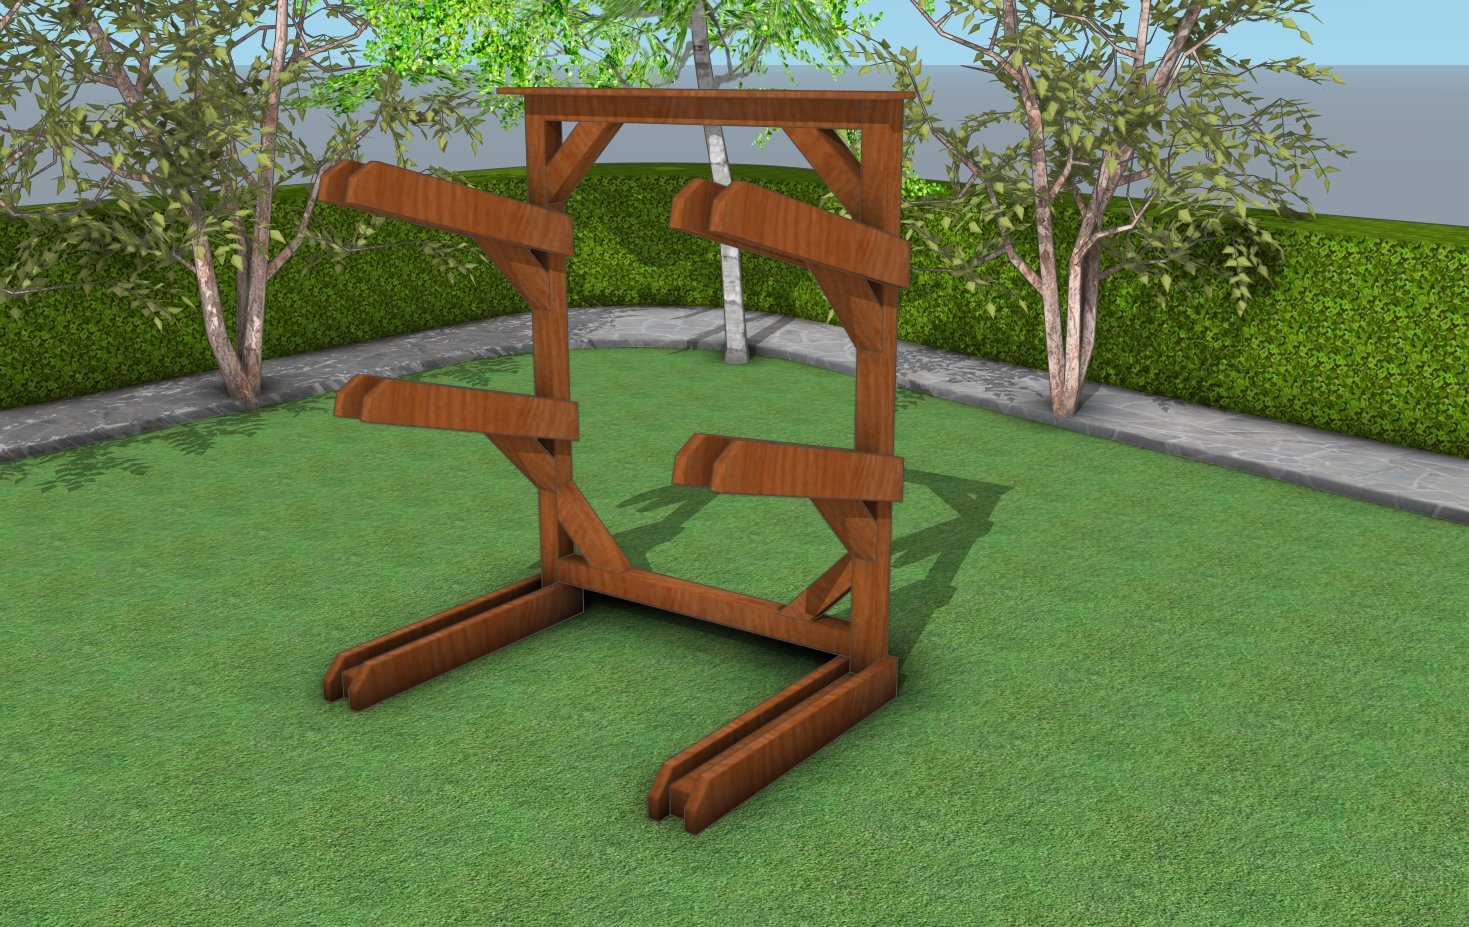
Kayak rack plans – Wood stand
The top slat is designed for storage. You can use it as a shelf for storing small items. I like to make the most of my designs, so every space needs to be used.
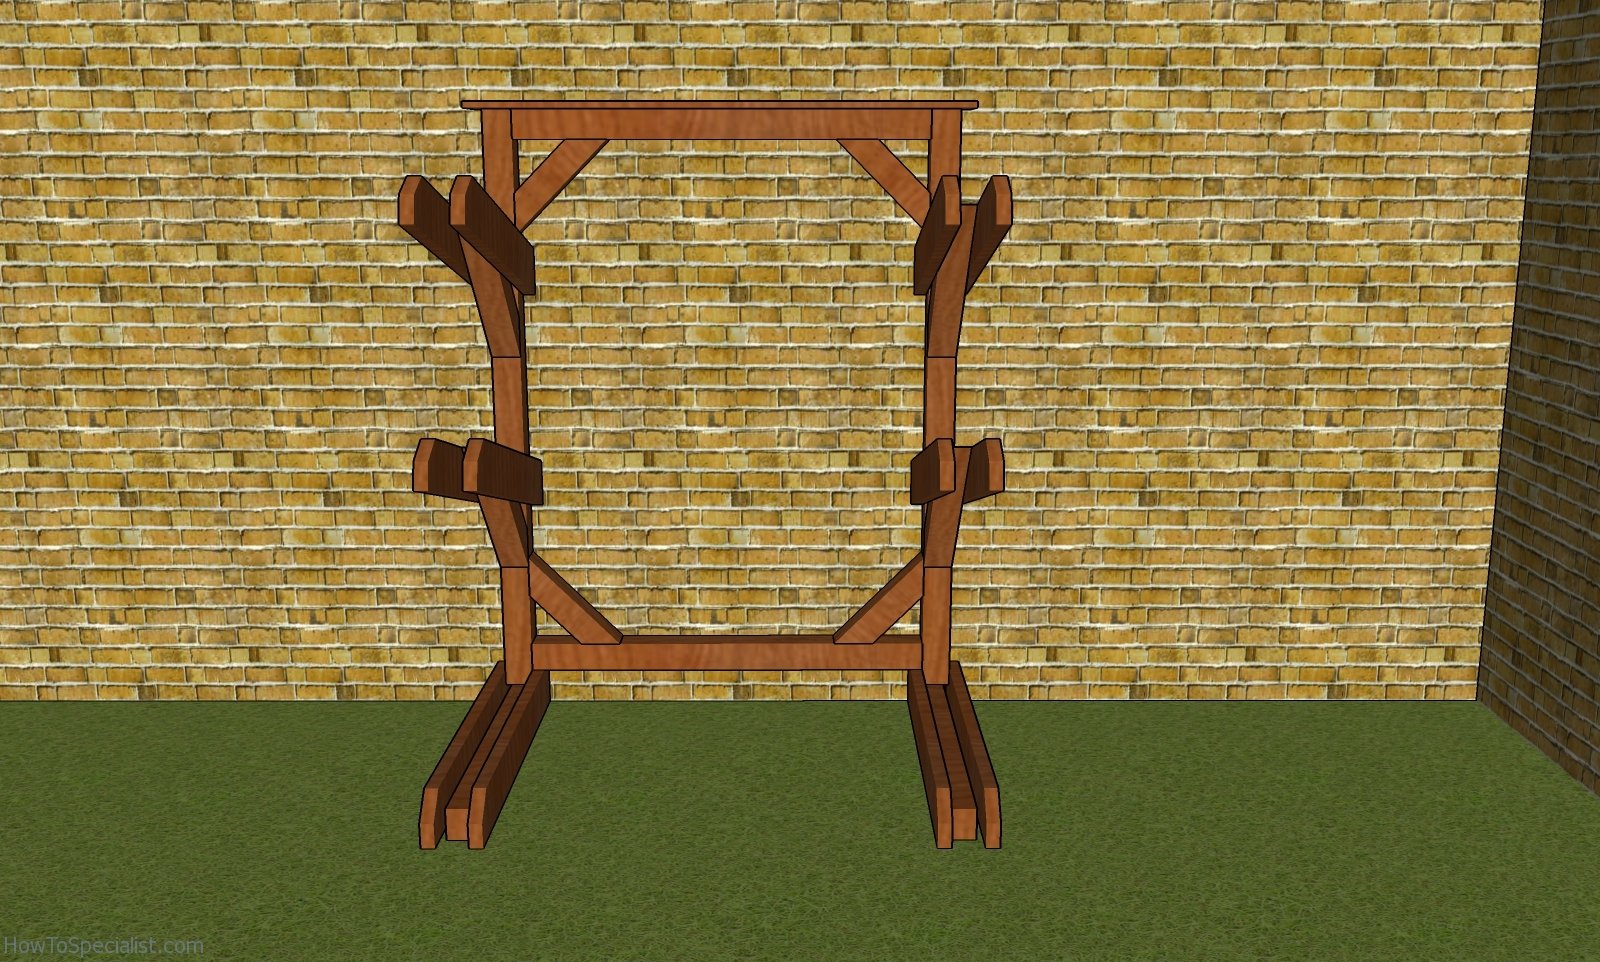
How to build a kayak rack
You can fit the kayak rack against a wall to save space. In addition, you can use a few lag screws to lock the vertical posts to the wall framing. If you are already here, you might as well take a look over my free set of plans for this A-frame ladder stand.
Kayak rack plans
Last but not least, we recommend you to take care of the finishing touches. In order to get a professional result, fill the holes and the gaps with wood filler and let it dry out for a few hours. Check if there are protruding screws and fix this issue, if necessary. All that is left to do is choose that amazing view so you can enjoy this swing at its true value.
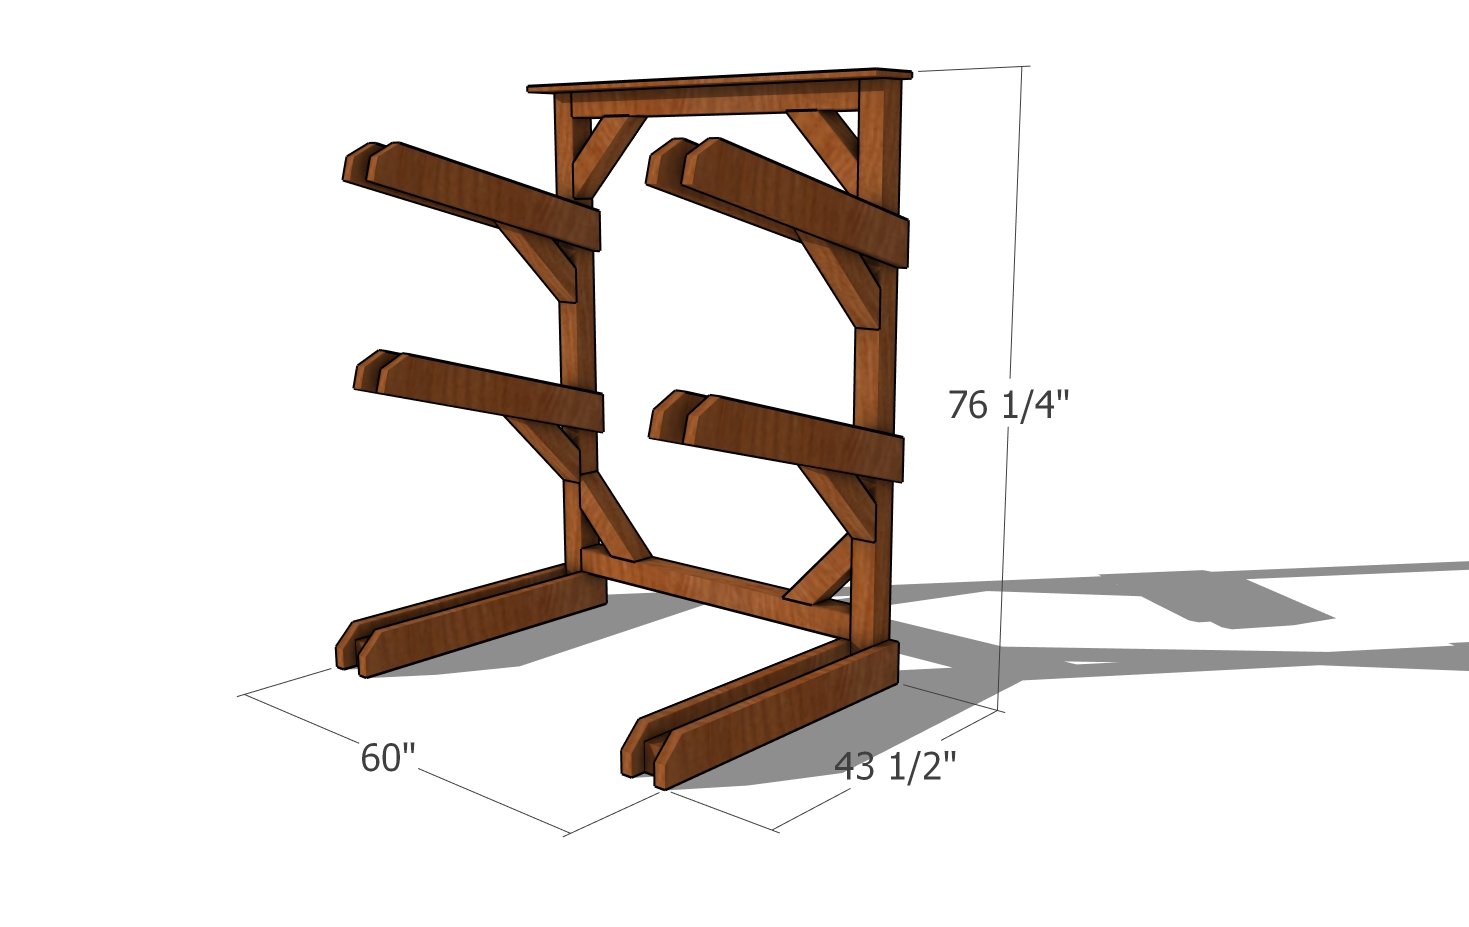
Dimensions – kayak rack
DIY kayak rack plans

Thank you for reading our project about kayak rack plans and we recommend you to check out the rest of the projects. Don’t forget to SHARE and LIKE my projects with your friends, by using the social media widgets, if you want to help us keep adding free woodworking plans.
5 comments
When I first read the estimate was 1 day, I thought for sure that was an over-estimate. Alas, after building this, it took me 7 hours and I haven’t even stained it yet. I substituted 2×6 for the posts and 2×4 for the braces and frame, and add a 2×6 for structure to keep it from twisting. Great plan and instructions, and it looks good, and works great!
Thanks for the plans. I built this based on what I read here. Everything went together quite quickly. Three issues I had with the design (and it’s possible it is addressed in the downloadable plans) and two deal with the the attachment of the support legs and the other is with the carriage bolt length. The plans state to drill pocket holes on the backside of the vertical supports and secure them to the legs. I used 2-1/2 inch exterior blue coated Kregs screws. They did not hold the weight of the legs. I added two more pocket screws to the front with the same problem. I worry that even with construction adhesive, that will not support the structure for any length of time. It was already wobbly. The kayak support arms are secured with two carriage bolts each. If I rebuilt this, I would add 3-1/2 inches to the vertical 4×4 supports (for a total of 75.5 inches) and use two carriage bolts to secure the 2×6 supports to it. I’d probably also would then secure the 43 inch 4×4 support legs with an additional two carriage bolts through the 2x6s and the leg 4x4s. Speaking of carriage bolts, the design calls for 7 inch long 1/2 diameter carriage bolts. There should be a 1/2 inch clearance to secure the nut. But since I was drilling into it with the backside on the ground, I must have angled the hole enough that I didn’t have enough to screw the nut on. I ended up getting 8 inch carriage bolts. It left extra sticking out but it made it easier.
I made it as a surprise Christmas gift for my foster mom and her husband. So when they stopped by, they were very surprised and pleased. They decided to mount it directly to the wall and don’t need the legs so I am removing the legs completely. If they decided to keep it on the ground, I would have shifted the bottom 50 inch cross beam up another 2.5 inches and left everything else the same.
Thanks again!
Very Respectfully,
Narrie
@TheNarSide
Very clear instructions. Would this work as a stand-alone stand (not leaning against a wall) and not tip over? Thank you.
Great instructions. The only thing that’s incorrect is you’ll need 8″ carriage bolts. Using 7″ won’t give you enough bolt sticking out for the nut to grip the threads when using a washer.
Thanks, but that’s incorrect. The thickness is 6 1/2″, therefore you can get by using 7″ screws.