This step by step woodworking project is about how to build a wood potting tray. If you are looking for a quick woodworking project or for a simple gift idea, this wooden tray could be the project. You can adjust the design of the tray, so that you give it another purpose. Make sure you browse through the rest of the projects, as you can find more building inspiration.
We recommend you to invest in the best materials you could afford. Therefore, you should buy weather-resistant lumber, such as pressure-treated lumber, pine or cedar. Always take accurate measurements before adjusting the size of the components at the proper size. Drill pilot holes trough the components before inserting the wood screws, to prevent the wood from splitting.
Made from this plan
Building a potting tray
Materials
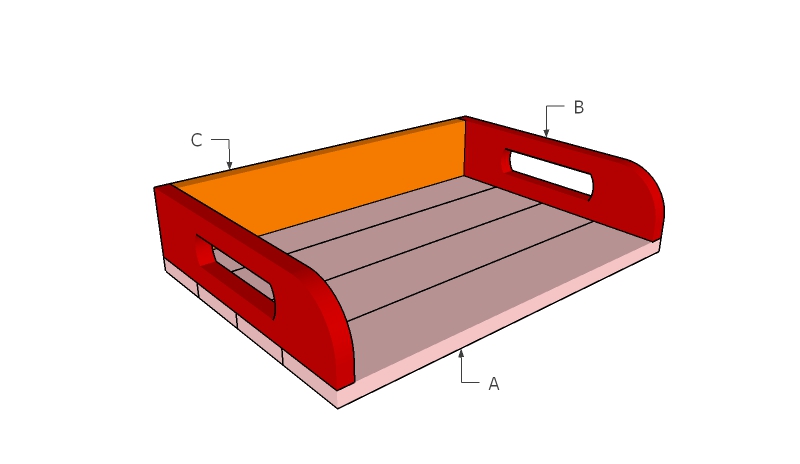
- A – 4 pieces of 1×4 lumber – 20″ long BASE
- B – 2 piece of 1×4 lumber – 14″ long SIDES
- C – 1 piece of 1×4 lumber – 18 1/2″ long BACK
- 2 pieces of 1×4 lumber – 8 ft
- 1 1/4″ screws
- 1 5/8″ screws
Tools
- Safety gloves, glasses
- Miter saw, jigsaw
- Chalk line, tape measure, spirit level, carpentry pencil
- Drill machinery and drill bits
Tips
- Adjust the size of the beam to suit your needs
Time
- One Weekend
How to build a wood potting tray

Building the components
The first step of the project is to build the components for the bottom and the back. Mark the cut lines on the 1×4 slats and get the job done with a circular saw.
Building the sides
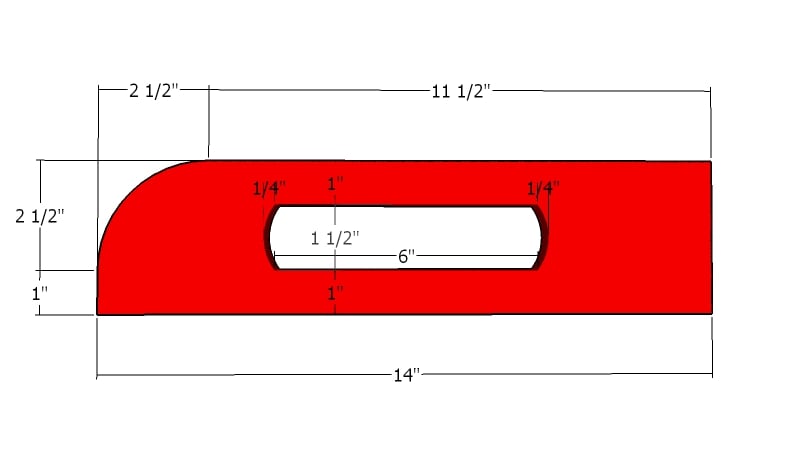
Mark the cut lines for the handle hole. In addition a curved corner will add more appeal to the tray.
Assembling the bottom
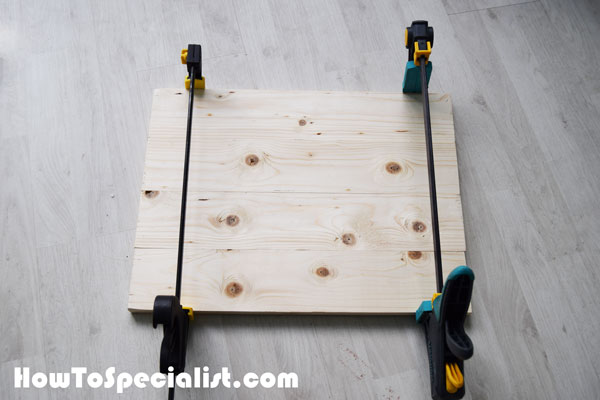
Apply glue to the edges of the bottom slats and clamp them together tightly. Make sure the edges are aligned and check if the surface is smooth.
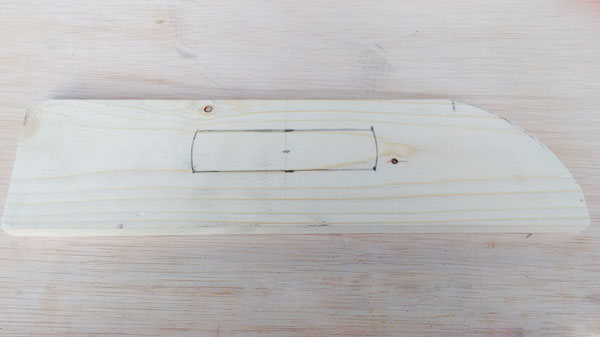
Marking the handle holes
Cut the slats for the sides and mark the finger hole cut lines.
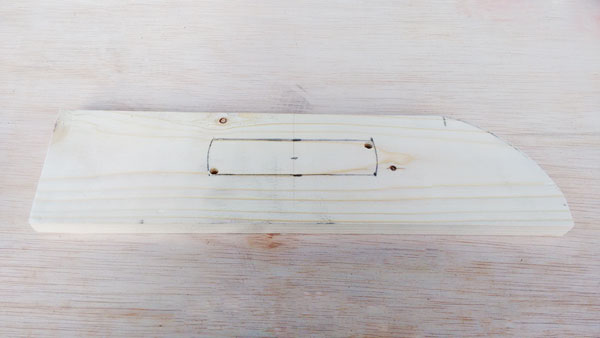
Drilling starting holes
Drill starting holes inside the marked area. Use a jigsaw to make the cuts and smooth the surface with fine-grit sandpaper.
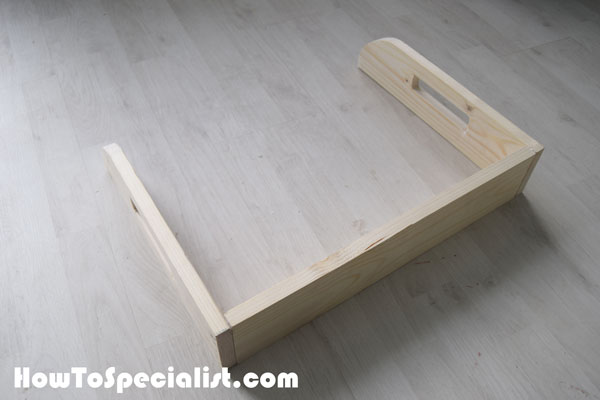
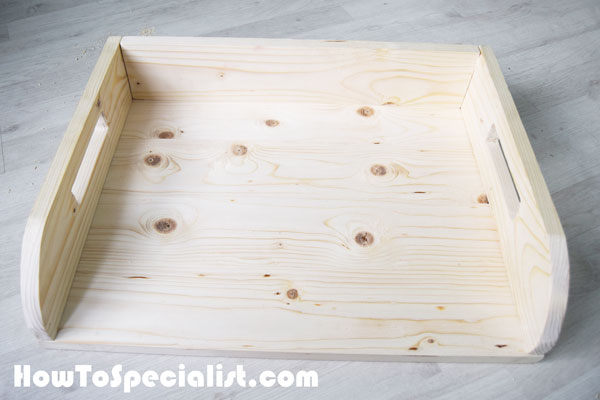
Assembling the frame
After I cut the components for the frame, I had to assemble them together. I applied glue to the joints and inserted a few 1 1/4″ brad nails. Make sure the edges are flush and double check if the corners are right-angled.
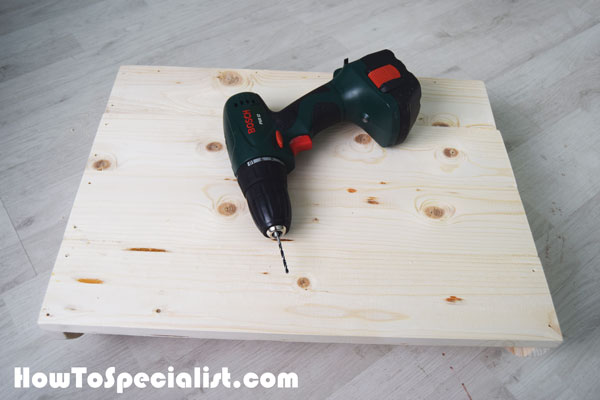
Drilling the pilot holes
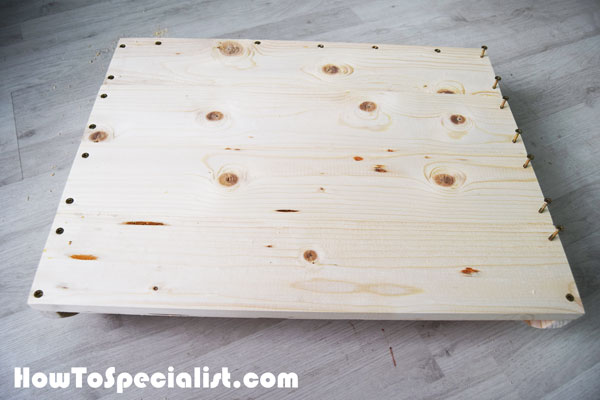
Lay the frame on a level surface and attach the bottom. Align the edges, making sure the bottom fits into place easily. I drilled pilot holes for the 1 1/4″ screws. This is an outdoor project, so the main concern was to add a lot of support to the joints. If you want to make this project for indoor, you can just add glue and insert 1 1/4″ brad nails.
Assembling the tray
I inserted the screws. Two screws for each joint are enough to secure the joints properly.
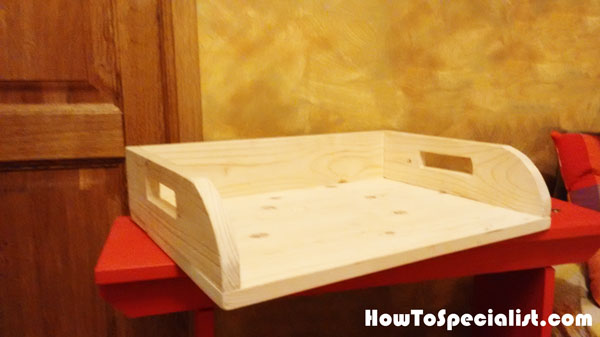
Wooden Potting Tray
I used different grit sandpaper to smooth and even out the surface. It took me about 10 minutes to get a nice surface, so the extra work really paid off.
DIY Potting Tray
Wood Tray Plans
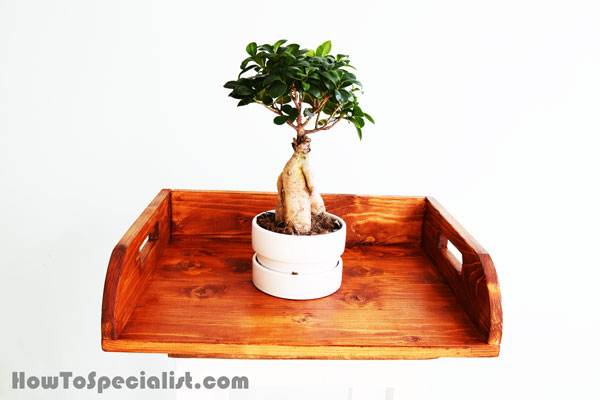
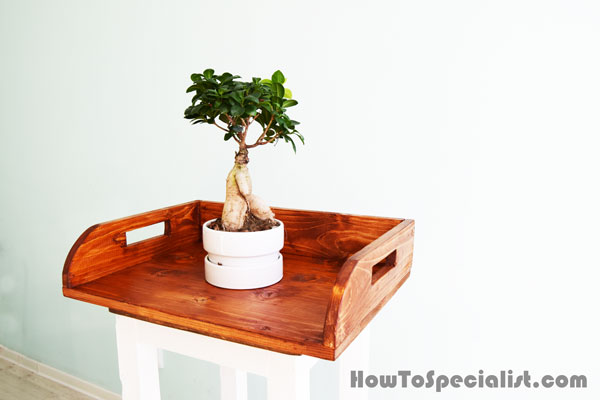
I stained the tray and applied a second layer after a few hours. The color is teak.
DIY Wood Potting Tray
Thank you for reading our project about DIY potting tray plans and we recommend you to check out the rest of the projects. Don’t forget to LIKE and SHARE our projects with your friends, by using the social media widgets. SUBSCRIBE to be the first that gets our latest projects.