This step by step diy project is about how to build a planter bench. Building a bench with a planter is a fun outdoor project, as it will add value to your garden and it doesn’t require complex skills or tools. Nevertheless, we recommend you to plan everything from the very beginning, starting with the size of the bench, up to its design. Don’t forget to check out the rest of the outdoor projects, as there are many things you could do to enhance the look of your garden.
It is essential to use quality and weather-resistant materials for this easy woodworking project. Therefore, anything from cedar, pine or redwood are excellent choices, as they have a exquisite natural look and are resistant to water damage. Always pre-drill the wooden components before inserting the galvanized screws, to prevent the wood from splitting. In addition, apply several coats of exterior paint to the components.
Use a router and a 3/4″ bit to round the exposed edges of the bench. Work with great attention and with good judgement, as to get a professional result. If you don’t have previous expertise in woodworking, you might also like to check out the rest of the outdoor furniture plans. It is essential to be accustomed with the carpentry techniques before starting any project. See all my Premium Plans in the Shop.
Made from this plan
In order to build a planter bench, you need to use the following:
Materials
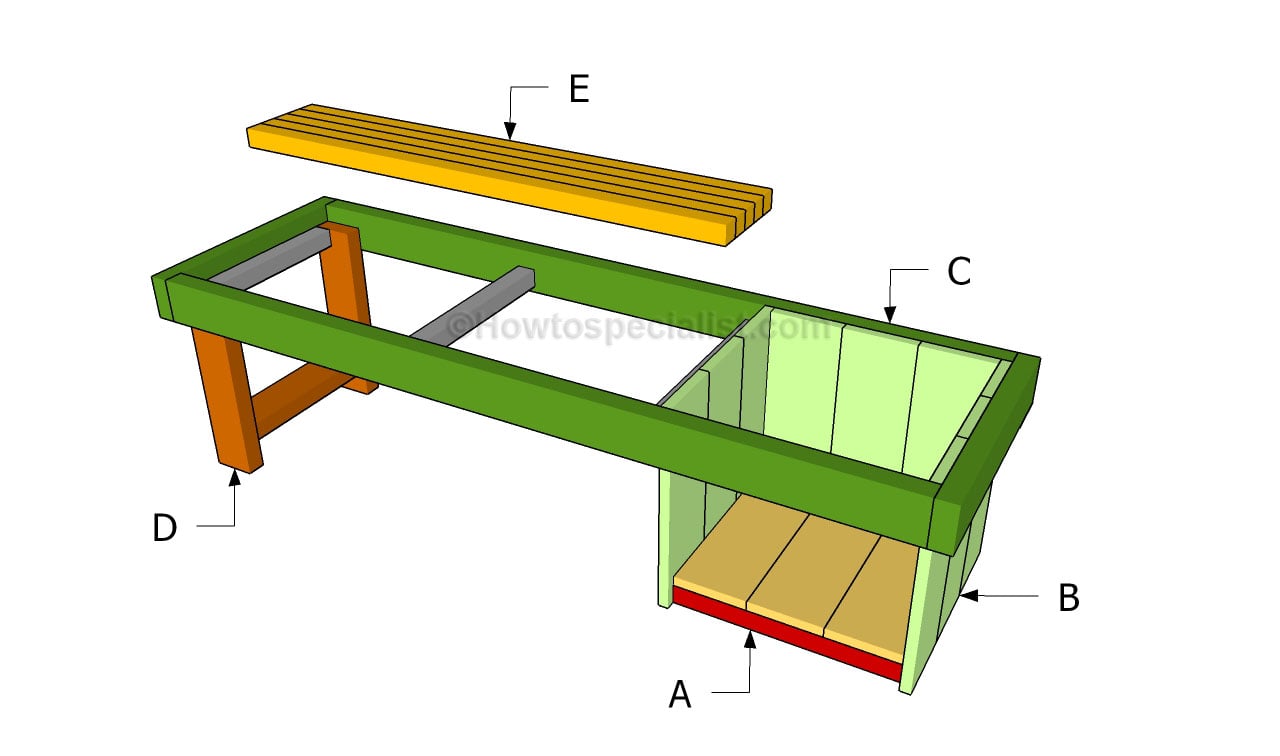
- A – 2 pieces of 2×2 lumber – 12″, 2 pieces – 16 1/2″, 3 pieces of 1×6 – 15″ PLANTER FLOOR
- B – 12 pieces of 1×6 lumber – 16″ PLANTER WALLS
- C – 2 pieces of 2×4 lumber – 60″, 2 pieces – 21″ FRAME
- D – 2 pieces of 2×4 lumber – 14 1/2″, 1 piece – 15″ LEGS
- E – 12 pieces of 2×2 lumber – 43 1/2″ SEAT
- 7 pieces of 2×2 lumber – 8 ft
- 3 pieces of 1×6 lumber – 8 ft
- 3 pieces of 2×4 lumber – 8 ft
- 2 1/2″ screws
- 1 1/4″ screws
- glue, stain
- wood filler
Tools
- Safety gloves, glasses
- Miter saw, jigsaw
- Chalk line, tape measure, spirit level, carpentry pencil
- Drill machinery and drill bits
Tips
- Apply several coats of wood stain to the wooden components
- Fill the holes with wood filler and smooth the surface
Time
- One Day
Related
Building a planter bench
Building a planter bench
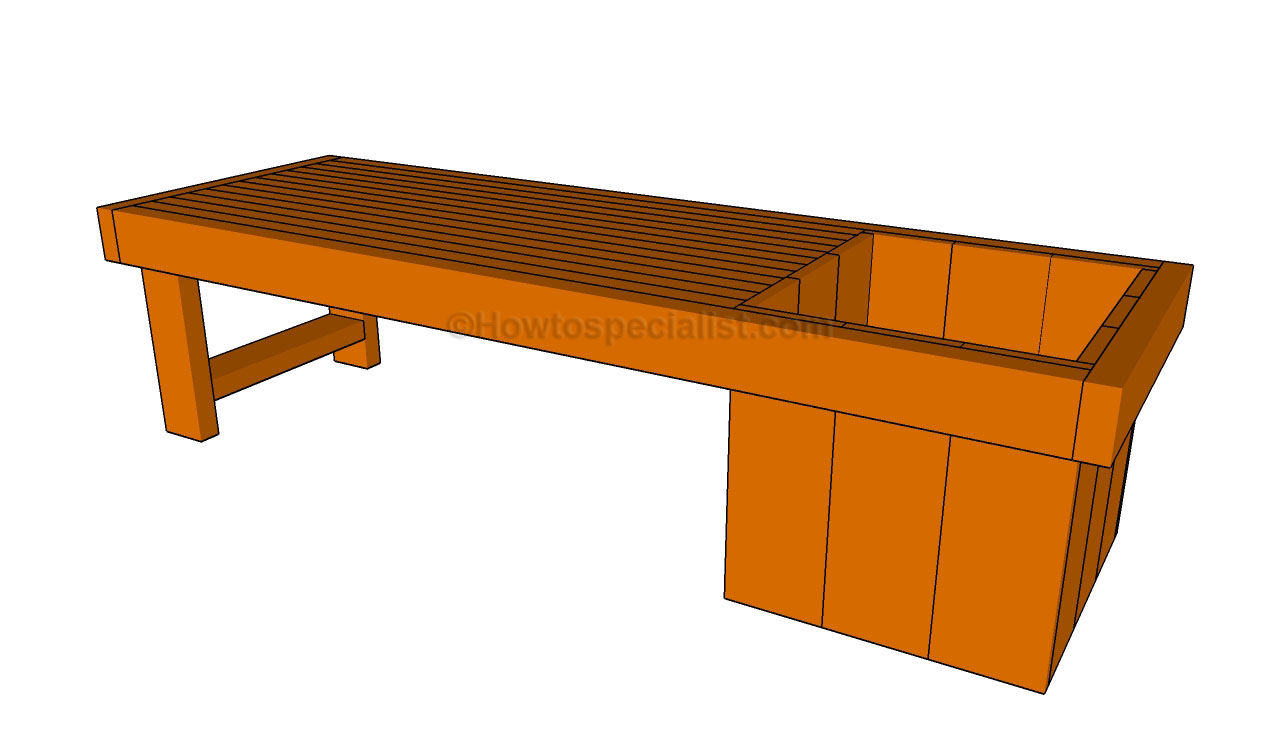
Building a planter bench out of wood is a fun project, as it is the perfect opportunity to create something unique with your own hands. Make sure you adjust the size and design of the bench with planter to your needs, but you can use the techniques described in this project to get the job done in a professional manner.
How to build a planter bench
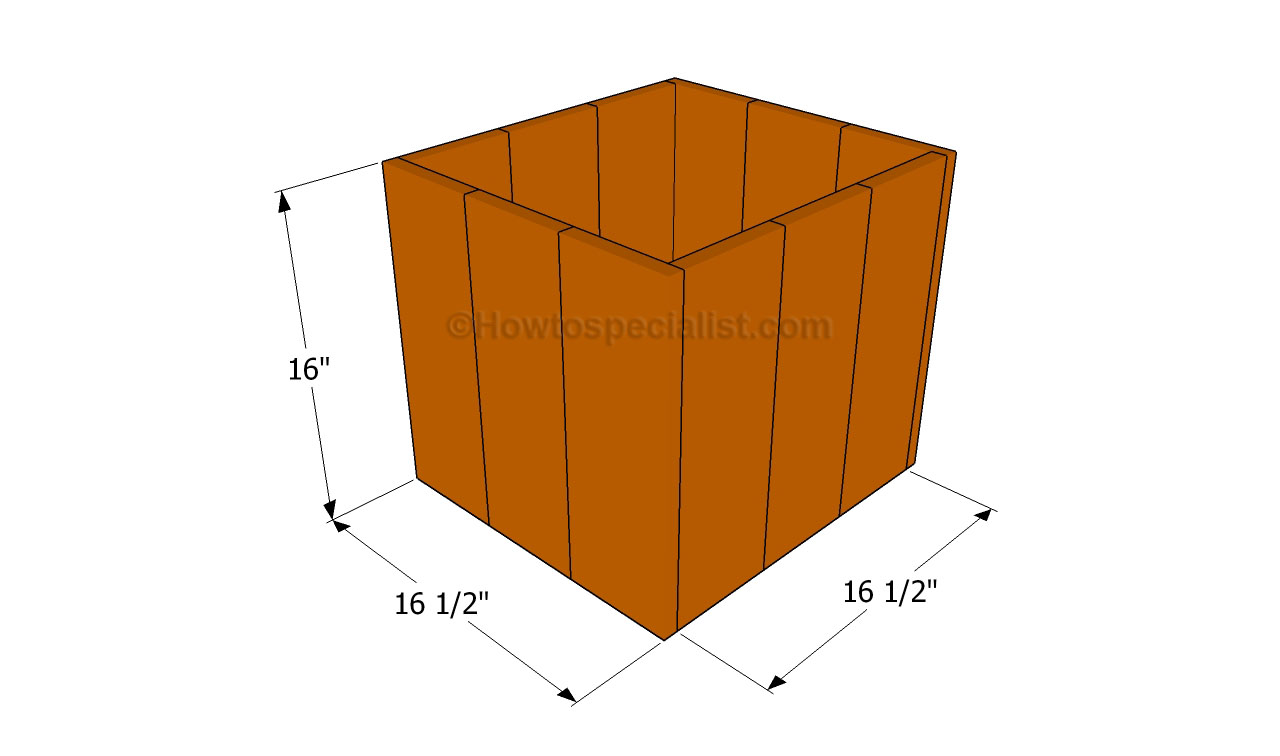
The first step of the project is to build the planter. As you can see in the image, you need to build the floor of the planter, by using 2×2 lumber and 1×6 wooden slats. Drill pilot holes trough the slats and lock them to the frame with 1 1/4″ galvanized screws.
Continue the project by attaching the side walls of the planters. As you can notice in the plans, you need to cut the boards at 16″ and attach them to the floor frame. Drill pilot holes trough the slats and secure them to the frame with 1 1/4″ galvanized screws. Make sure you don’t leave any gaps between the slats and add waterproof glue, in order to create a strong bond. Lock the adjacent walls together with 1 1/4″ finishing nails.
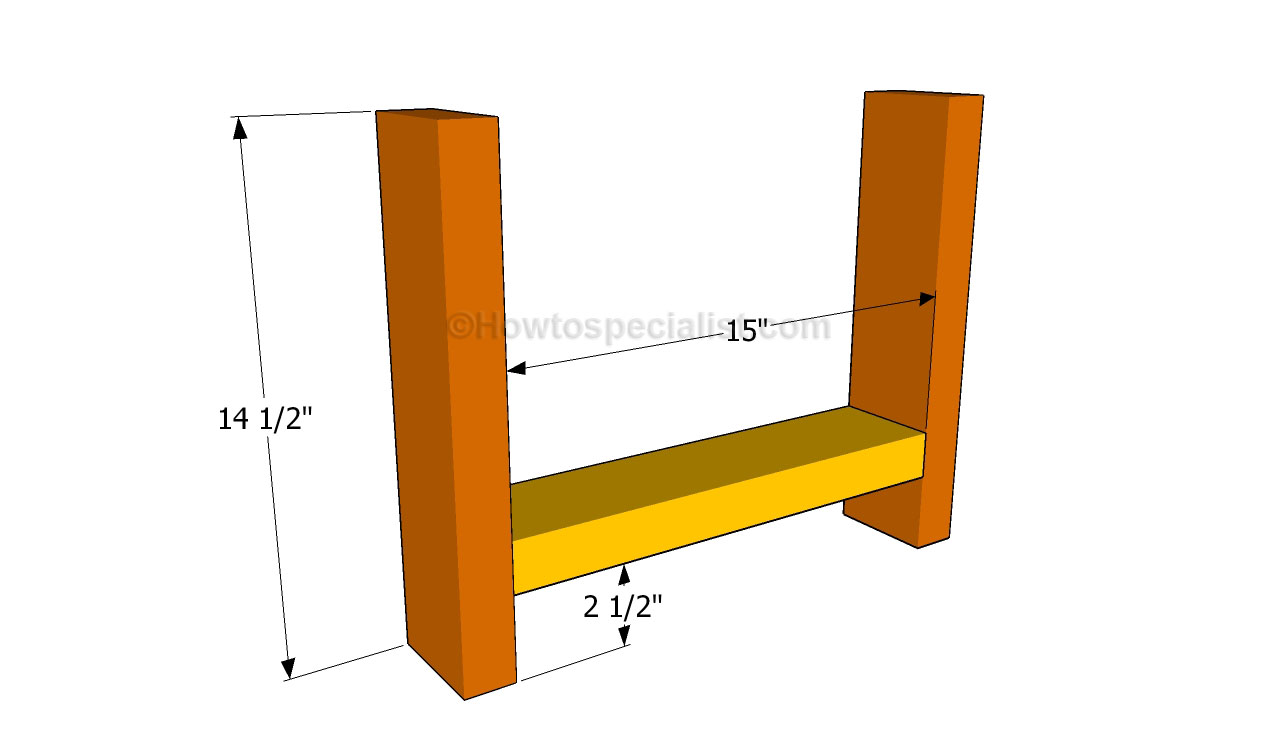
Build sturdy legs for the bench seat, if you want to get a professional result. Use 2×4 lumber and 3 1/2″ screws and assemble them together, as in the image. Drill pilot holes trough the legs before inserting the screws into the support, to prevent the wood from splitting.
The next step of the woodworking project is to build the frame of the planter bench and to lock the components together. Build the frame using 2×4 lumber and check if the corners are right angled, before continuing the project. In addition, we recommend you to check if the frame is horizontal, before inserting screws into the legs and into the planter. Check again if the corners are square.
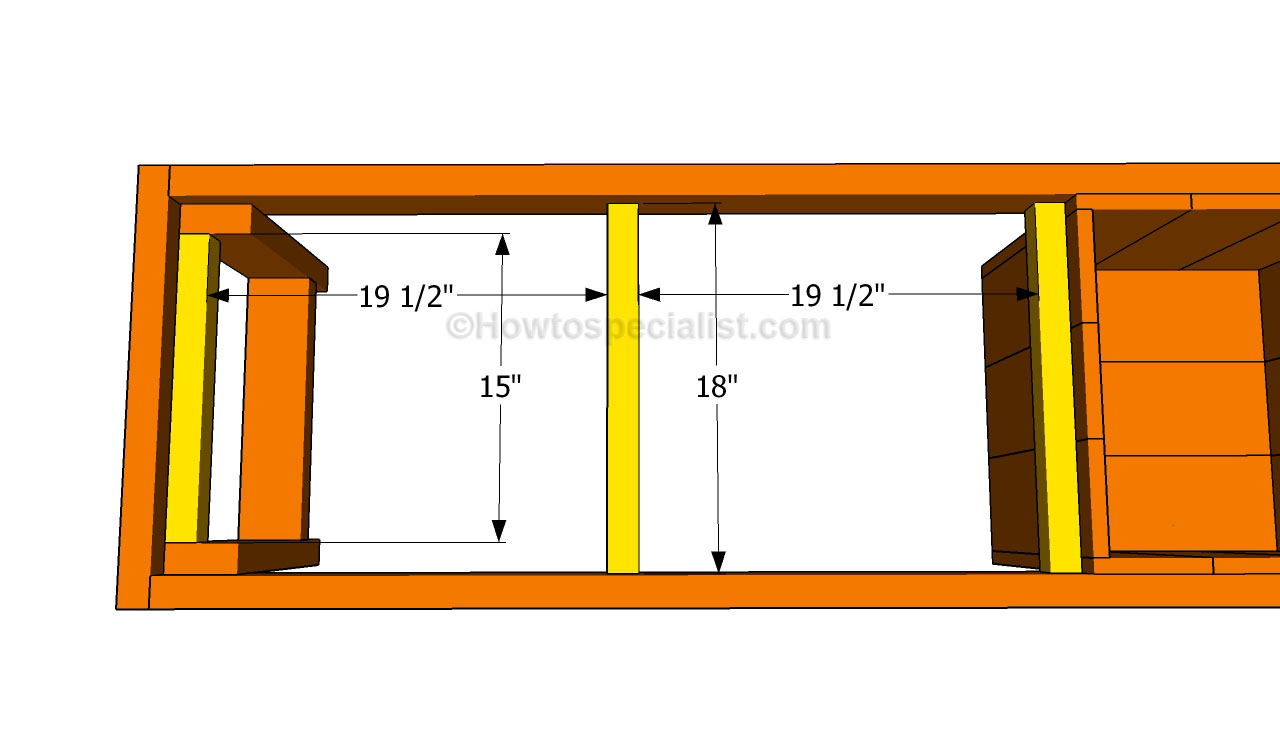
We recommend you to fit 2×2 supports between the side components of the frame, in order to support your weight. Place the cleats equally spaced, as in the image, and lock them to the frame properly. It is essential to attach these components, otherwise the bench won’t be able to support your weight.
Attach 2×2 pieces of wood on top of the cleats and lock them into place with 2 1/2″ galvanized screws. Drill pilot holes trough the components and countersink the heads of the screws, before inserting the screws. Make sure you don’t leave any gaps between the slats and you add waterproof wood glue, as to enhance the rigidity of the frame.
Last but not least, we recommend you to take care of the finishing touches. Fill the holes with wood filler and let it to dry out for several hours. Afterwards, smooth the wooden surface with fine-grit sandpaper and vacuum the residues.
Thank you for reading our project about how to build a planter bench and we recommend you to check out the rest of the projects. Don’t forget to LIKE and SHARE our projects with your friends, by using the social media widgets.


