This diy step by step article is about free garden bench plans. We show you how to build a simple bench by yourself in just one weekend, while keeping the costs under control. Placing a bench in your backyard is great for your leisure breaks. In addition, if you choose an area under a large tree, you will enjoy the summer afternoons a lot more than before. Adjust the size of the bench to your needs.
This is a basic woodworking project, as you have to cut several components from 2×4 and 2×6 slats, and lock them together with screws, after aligning and plumbing them properly. Moreover, building an outdoor bench is a cheap project, as it should cost somewhere between 50 – 150 dollars (according to the used materials ). It is a lot cheaper to use pressure-treated lumber, but a cedar bench would have a distinguished look.
Use a router and a 1/4” bit to round the exposed edges of the 2×4 slats, to give your garden bench a nicer look. Align the components at both ends, before inserting the wood screws. In addition, check the corners for squareness, after every step. If you want to make the wooden bench more rigid, you could add a 2×4 stretcher between the sides and lock it into place with 3” screws.
Made from this plan
Building a garden bench

Building a garden bench
Materials
- A – 2 pieces of 2×6 lumber – 17” long, 2 pieces of 2×6 lumber – 37″ long LEGS
- B – 4 pieces of 1×4 lumber – 18″ long, 4 pieces of 1×4 lumber – 21″ long BRACES
- C – 6 pieces of 2×4 lumber – 57″ long SLATS
Tools
- Safety gloves, glasses
- Circular saw, chalk line, tape measure
- Hammer, spirit level, carpentry pencil
- Drill machinery and drill bits
Tips
- Pre-drill holes in the wooden components, before inserting the screws
- Smooth the edges of the wooden components with sandpaper
Time
- One Day
Related
Simple Garden bench plans
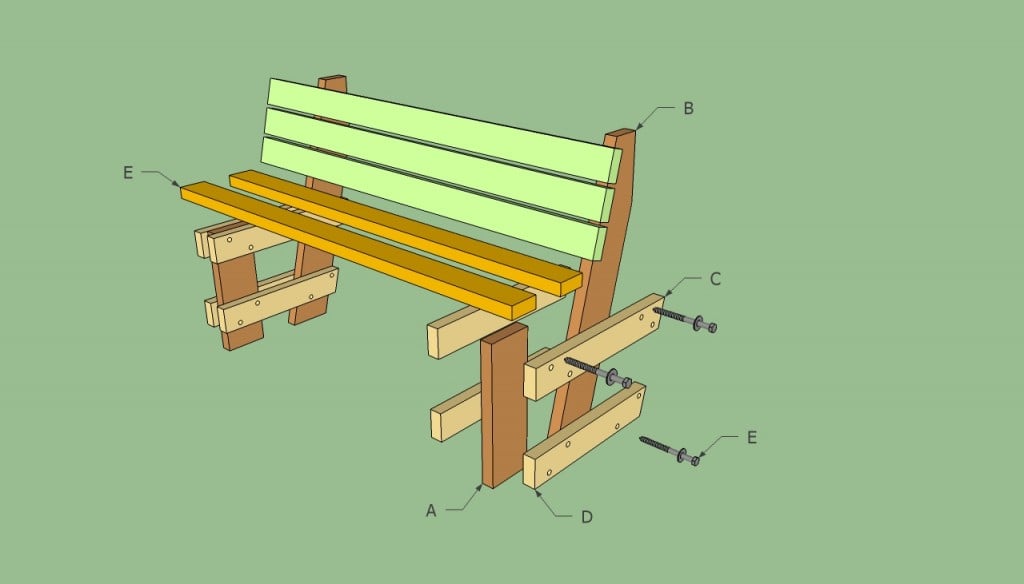
Free garden bench plans
Building a nice park bench is a straight forward process, if you use the right plans for your needs and budget. There are many outdoor bench designs to choose from, but in this article we show you how to build a simple bench, at a low cost.
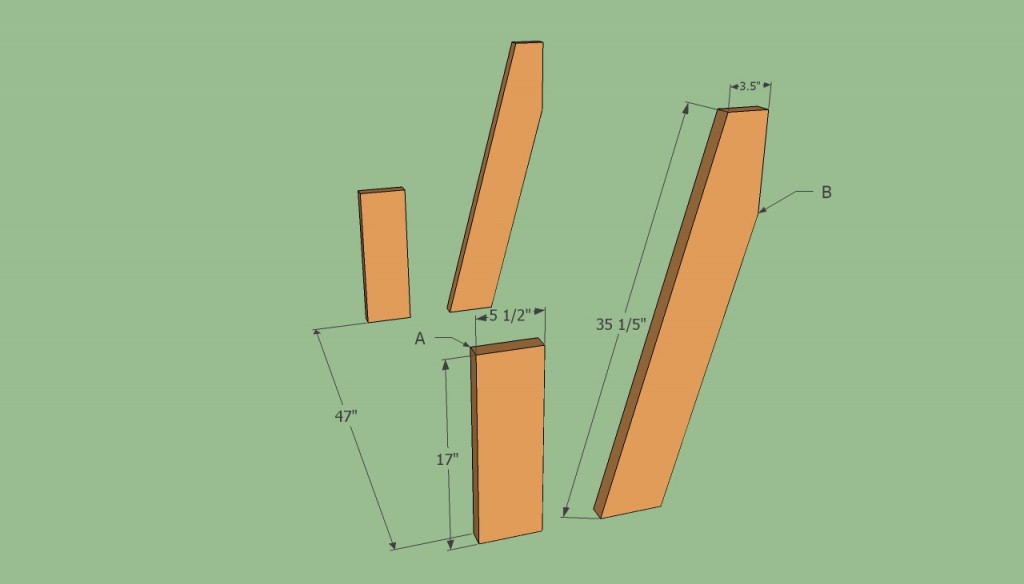
Garden bench legs
First, you need to build the legs of the garden bench. Therefore, use 2×6 wooden boards to build the front leg and the back support, according to our free plans. Cut both ends of the back legs at 75 degrees. If you want to customize your bench, you could adjust the angle of the back support to fit your needs (75º cut).
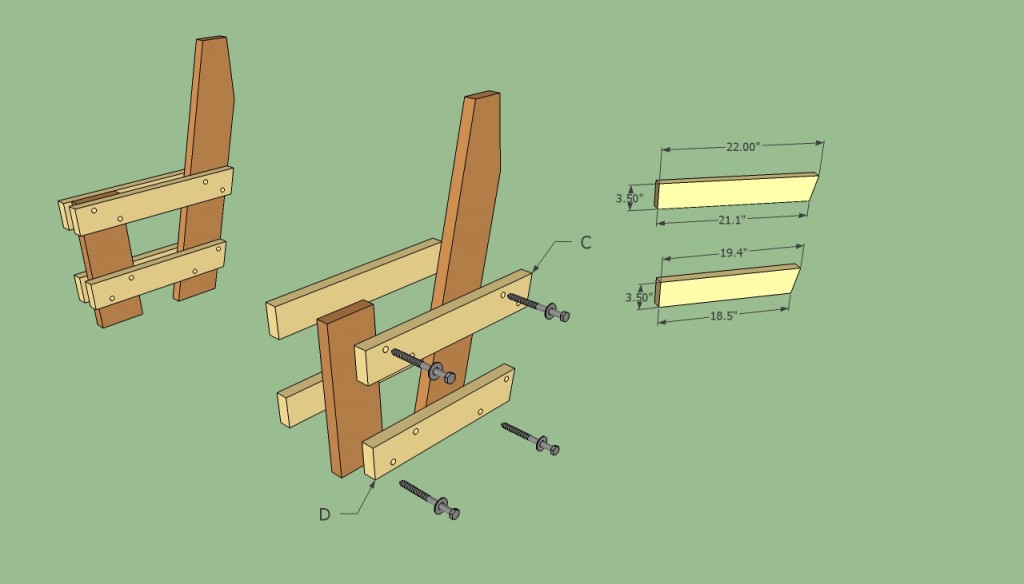
Building the garden bench
Next, build the cross braces, to lock the wooden legs together. In order to obtain a rigid and durable structure, we recommend you to cut the braces from 2x4s or 1x4s. Make sure you cut one end of the braces at the same angle with the pitch of the back supports.
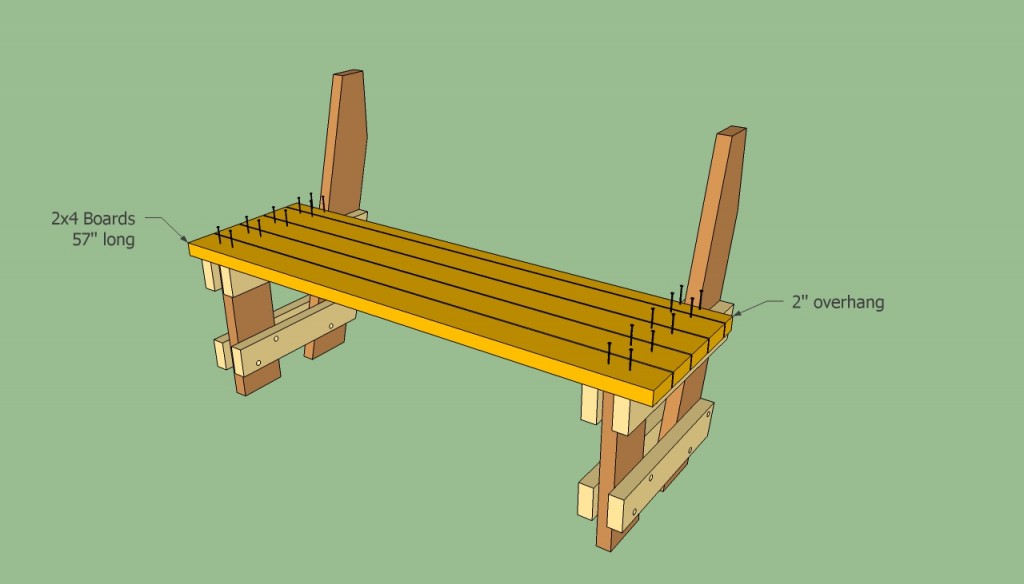
Installing the slats
Use 2×4 slats to cover the garden bench, as in the image. Cut the wooden boards at 57” and install them into place, as to overhang 2” on each side. Before locking them into position, we recommend you to sand their edges with a sand block and to cover them with several coats of wood stain.
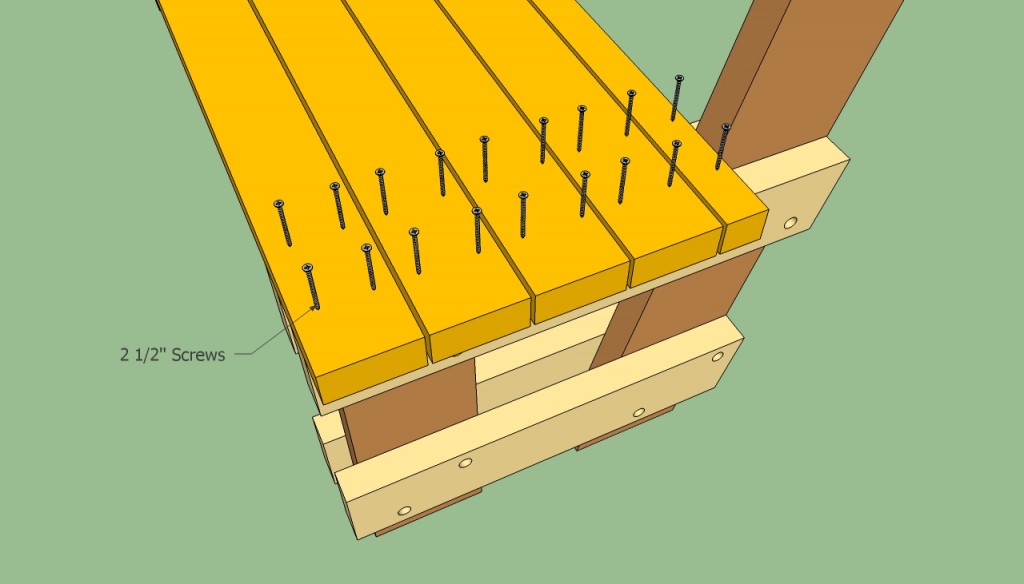
Installing the wooden slats
You should notice in the image how to secure the 2×4 slats to the frame of the bench. Therefore, you have to drive in 4 screws in both ends of the slats: 2 in each brace. Draw two parallel lines before drilling the pilot holes, in order to obtain a neat look and consistent results.
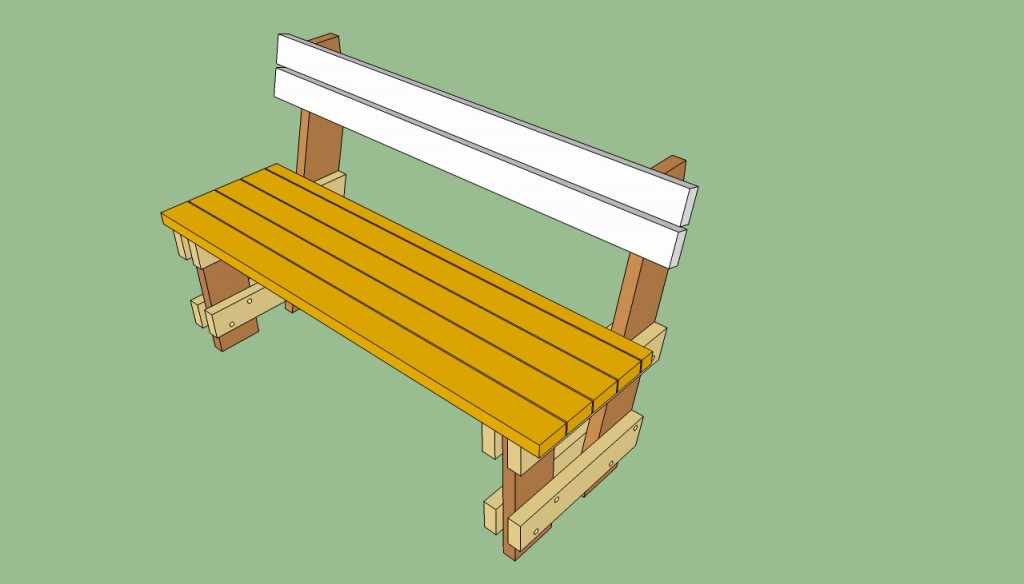
Installing slats on the back support
Next, install the 2×4 slats on the back support of the bench. The technique is straight forward. First of all, you have to measure the size of the back support, to determine the gap between the slats.
In our case, you should leave about 1/4” between the wooden boards, if you want to place them equally spaced. Nevertheless, you can adjust the gaps between the boards, to satisfy your needs and tastes.
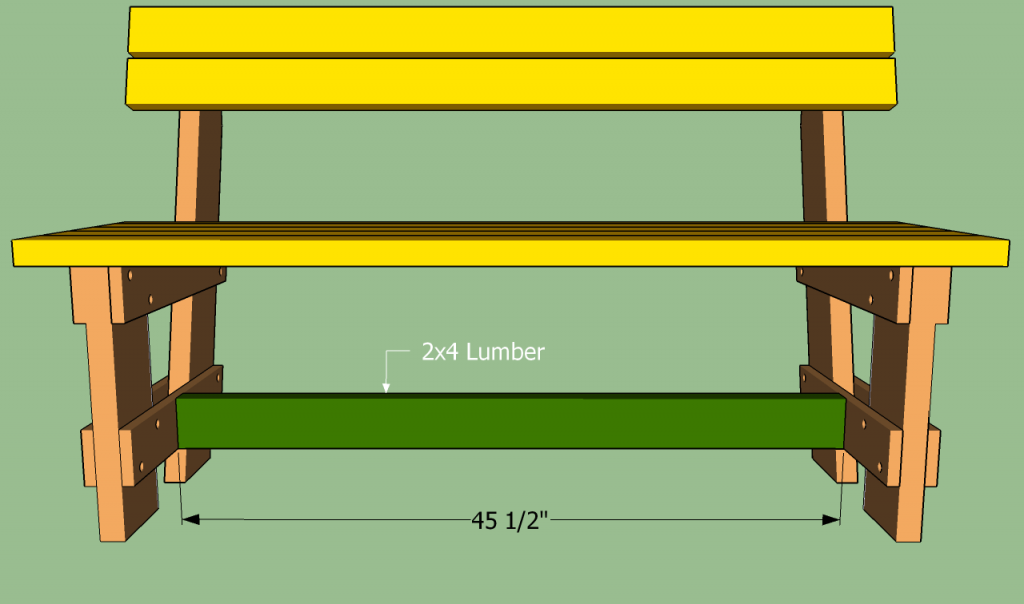
Fitting the stretcher
Enhancing the rigidity of the garden bench is easy, but essential for your woodworking project. As you can easily notice in the image, you need to fit a 2×4 stretcher between the bottom braces of the bench.

Garden bench plans
After you have built and secured the components together, you should sand the surface of the bench with medium grit sandpaper and apply several coats of varnish. If you want to protect it from water damage, you have to freshen up these coats, every few years.
Thank you for reading our article about free garden bench plans and we recommend you to check out the rest of our projects. Don’t forget to SHARE and LIKE our projects with your friends, by using the social media widgets, if you want to help us keep adding free woodworking plans.

4 comments
It would be nice if you would update this.
Being an amateur I followed the material list and bought 1×4’s only to read later it should be 2×4’s.
The measurements for the braces are shorter in the materials list than what you show later in the plans. Instead of 75 degree angles I figured out it’s same as a 15 degree angle. It would also be nice if you would have included the bolts in the materials list as well. Other than that it is a simple plan for a nice bench which I was looking for. Thanks!! :)
The 1x4s are for the braces. There is no need to buy 2x4s for the braces if you already have the 1x4s. When I say the ends should be cut at 75 degrees, you need to make a 15 degree cut to the ends. Regarding the bolts, you can use any type of bolts provided they are long enough to go through all the components and leave exposed enough thread to tighten the nuts.
try out the garden bench as your plans. good and beautiful, we had a nice bbq outside the house sitting on the new bench. thank you for your plans, it work.
That’s awesome! I would love to see how it came out. Please send a few pics at: http://howtospecialist.com/give-back/