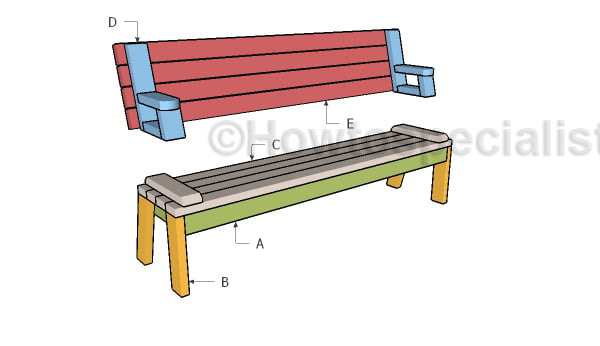
This step by step woodworking project is about folding picnic table plans. This is a super simple bench I have designed so you can get the job done in just one weekend, using just 2x4s and screws. This garden bench is extremely sturdy and features a nice appearance so you can use it in any decor. You can adjust the size of the bench to suit your needs. See my other DIY projects HERE.
We recommend you to invest in the best materials you could afford. Therefore, you should buy weather-resistant lumber, such as pine or cedar. Always take accurate measurements before adjusting the size of the components at the proper size. Drill pilot holes trough the components before inserting the wood screws, to prevent the wood from splitting. See all my Premium Plans in the Shop.
Made from this plan
Folding Picnic Table Plans
Building a folding picnic table
Materials
- A – 2 piece of 2×4 lumber – 69″ long, 4 pieces – 11 3/4″ long SEAT FRAME
- B – 2 pieces of 2×4 lumber – 14 1/2″ long, 2 pieces – 16″ long LEGS
- C – 4 pieces of 2×4 lumber – 72″ long, 2 pieces – 14 3/4″ long SEAT
- D – 1 piece of 2×4 lumber – 5 3/8″ long, 1 piece – 7 3/8″ long, 1 piece – 15 3/8″ long, 1 piece – 10″ long 2xARMRESTS
- E – 4 pieces of 2×4 lumber – 72″ long BACKREST
- 20 pieces of 2×4 lumber – 8′ (for 2 benches)
- 2 1/2″ pocket screws, 2 1/2″ screws,
- paint, glue, putty
- hinges
Tools
- Safety gloves, glasses
- Miter saw, jigsaw
- Chalk line, tape measure, spirit level, carpentry pencil
- Drill machinery and drill bits
Time
- One Day
Building a picnic table bench
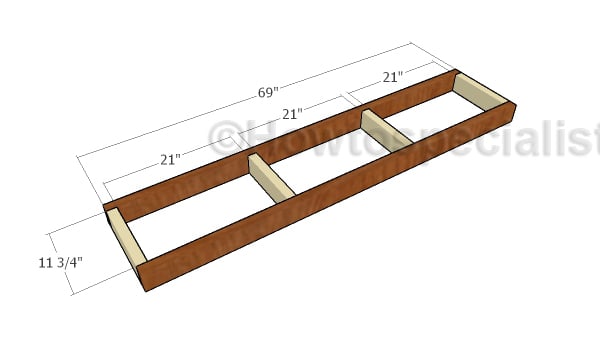
Seat frame
The first step of the project is to build the seat frame for the folding picnic table. Cut the components to size and then assemble the frame with 2 1/2″ pocket screws. Drill pocket holes at both ends of the 11 3/4″ components. Make sure the corners are square and insert 2 1/2″ screws to lock them together tightly. Add glue to the joints and leave no gaps between the components.
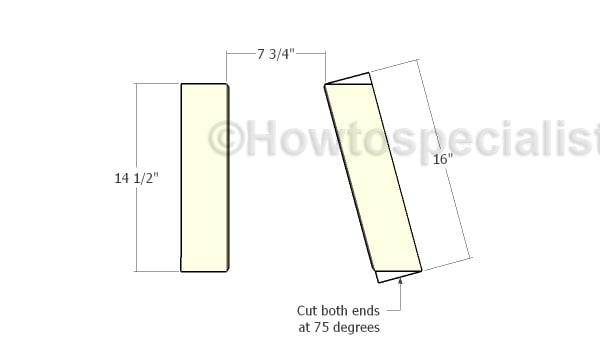
Building the legs
Build the legs for the bench from 2×4 lumber. Cut both ends of the back legs at 75 degrees and smooth the cut edges with sandpaper.
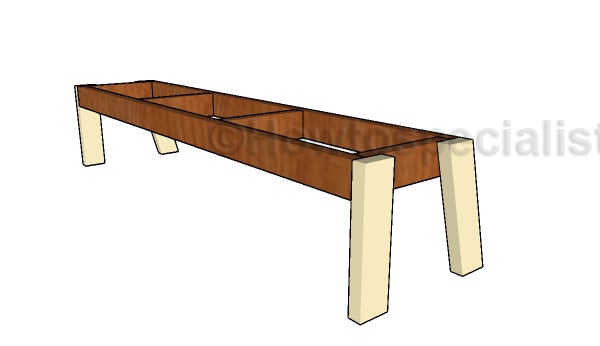
Attaching the seat slats
Attach the legs to the seat frame. Align the edges with attention, drill pilot holes through the legs and insert 2 1/2″ screws into the seat. Add waterproof glue to the joints for more bond between the components.
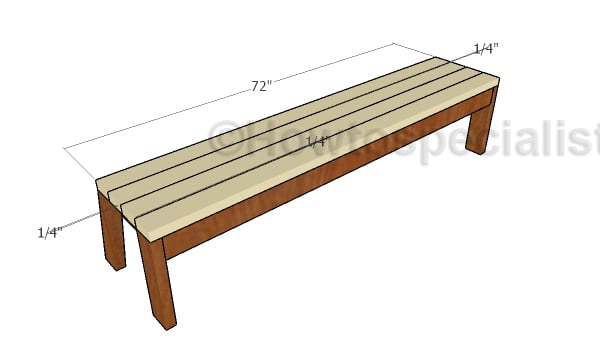
Seat slats
Attach the 2×4 slats to the seat of the bench. Align the edges flush, drill pilot holes and insert 2 1/2″ screws to secure them into place tightly.

Backrest seat support
Build these 2×4 supports for the seat, so you can install the backrest into place.

Fitting the backrest seat support
Fit the supports to the seat of the folding picnic table, as shown in the diagram. Drill pilot holes and secure the supports into place with 2 1/2″ screws.
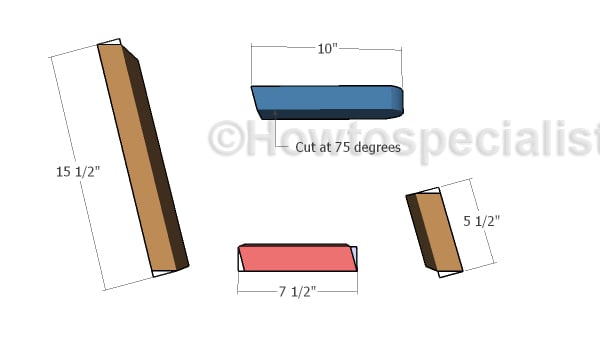
Armrests components
Build the armrests from 2×4 lumber. Make all the angle cuts at 75 degrees (make 15 degree cuts using a miter saw).
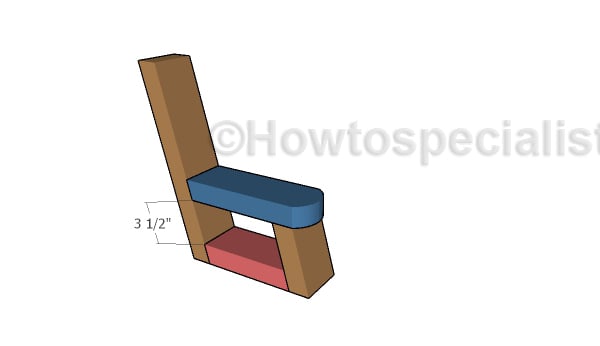
Building the armrests
Assembling the armrests together using 2 1/2″ screws and glue.
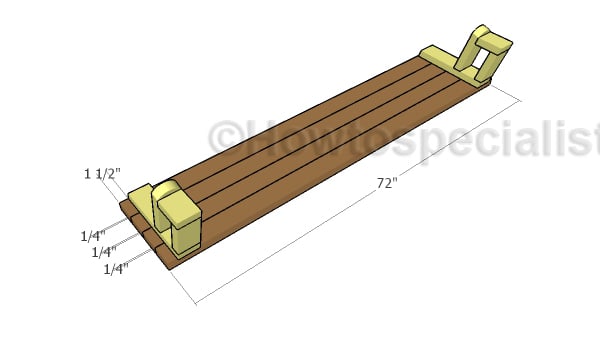
Assembling the backrest
Lay 2×4 slats on a level surface and then lay the armrests into place. Drill pilot holes through the armrest and insert 2 1/2″ screws into the back slats.
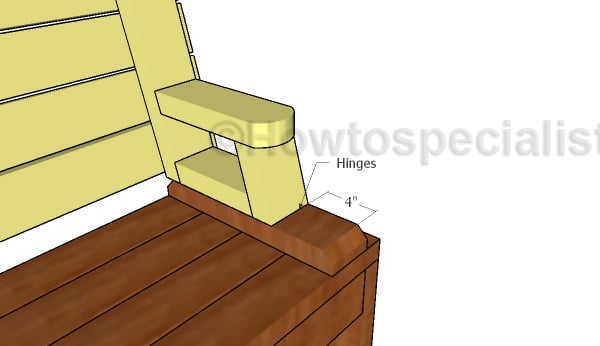
Attaching the backrest
Fit the backrests to the seats, as shown in the diagram. Use hinges to secure the backrest to the seat, so you can fold it up and down. In this manner, the picnic table bench will be easily converted into a table. You can join two benches together so you can make a large picnic table.
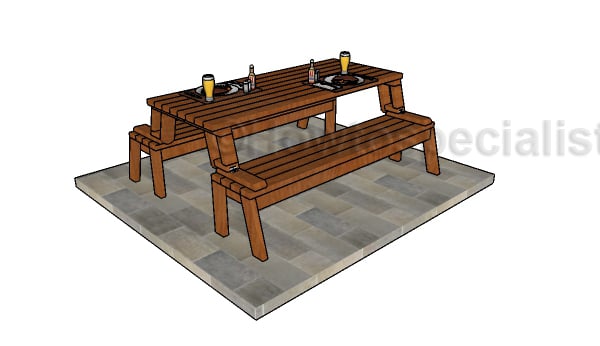
DIY Folding picnic table plans
Fill the holes with wood putty and let it dry out for a few days. Smooth the surface with sandpaper and then apply a few coats of paint or of stain to enhance the look of the project.
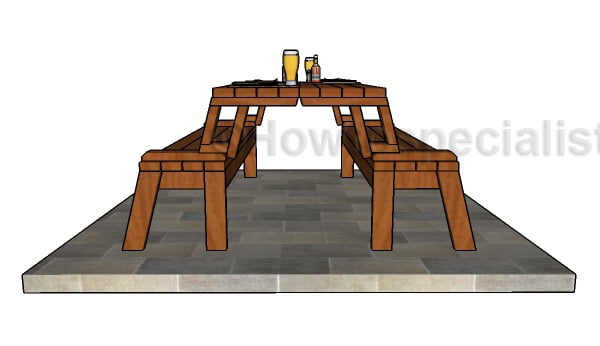
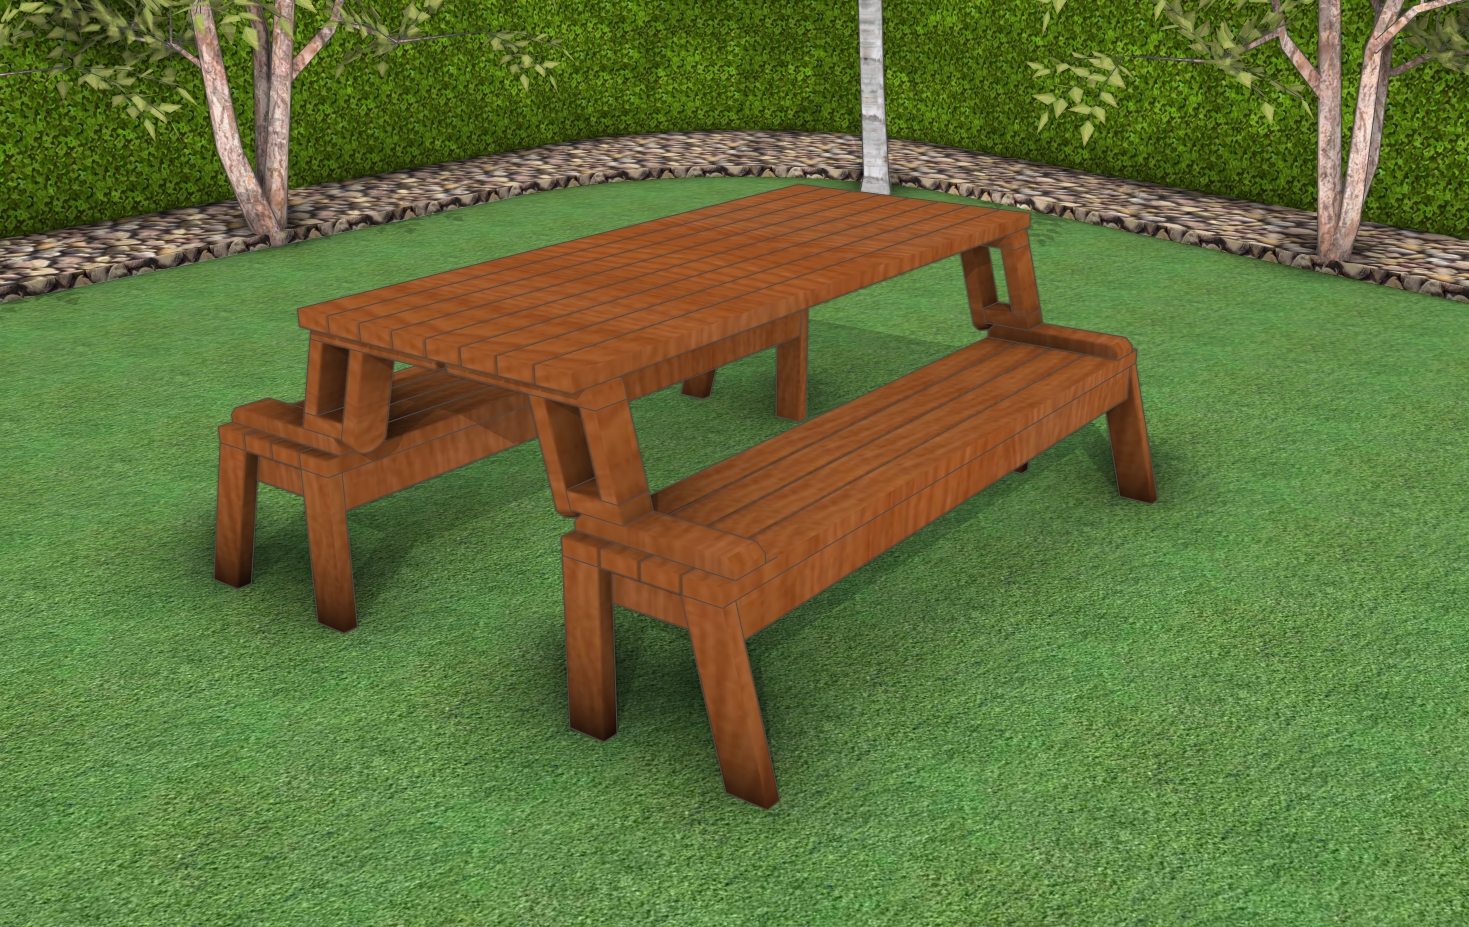
Folding picnic table plans
This is a neat design that is ideal if you have a small space but you want both garden benches and a roomy picnic table
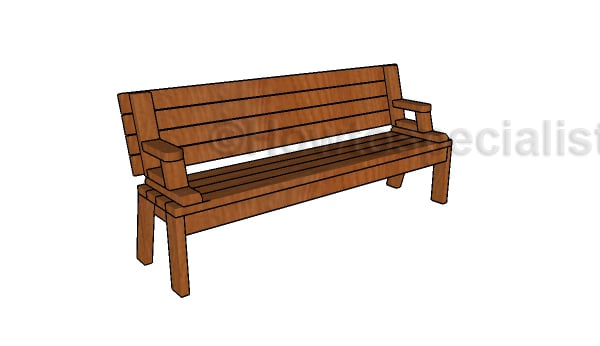
Picnic table bench plans
This is a nice 8 ft long bench. You can adjust the size of the project easily so it suits your needs and tastes. If you like my project, don’t forget to SHARE it on Facebook and Pinterest.
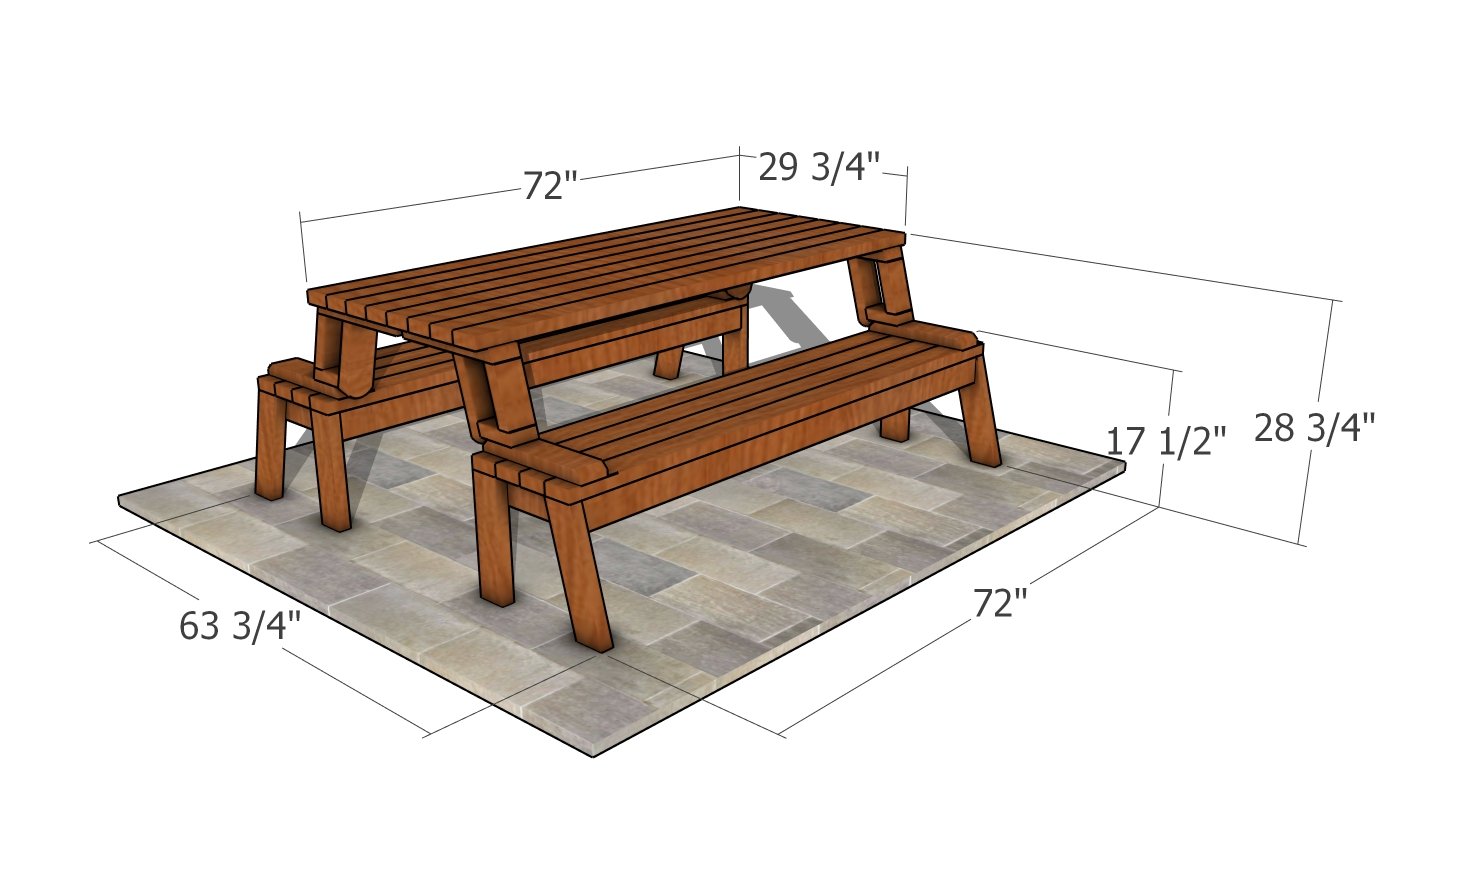
Folding picnic table plans – dimensions
Folding picnic table plans
Thank you for reading our project about folding picnic table plans and I recommend you to check out the rest of the projects. Don’t forget to LIKE and SHARE our projects with your friends, by using the social media widgets. SUBSCRIBE to be the first that gets our latest projects.
6 comments
I just built this project and it came out perfect. The plans are nicely written and illustrated and very easy to follow. How ever (unless I am missing something somewhere), the material list should read 20 2x4x8 not 16. You need 4 for each seat , 4 for each backrest for a total of 16 cut at 72 inches. Then you need an additional 4 cut at 69 inches for the seat frame giving you a total of 20 2x4x8′.
Thanks for the feedback. I will update the cut list. I would love to see your project. You can send pics here: http://howtospecialist.com/give-back/
Would you recommend making it out of trex?
No.
If I wanted to make it 6foot wide are there special accomodations I should think about or take into consideration?
Hey, this looks great, just curious about what the total width would be with two of the benches folded up to make the table, e.g. like in the second last picture, 8 feet long but how wide?