This step by step project is about double adirondack chair with table plans. The best therapy against stress is spending time in nature. Therefore, I have designed this beautiful adirondack bench, so you have just another reason to read a good book or do some bird watching in nature. If you are a woodworking beginner, I recommend you not to be intimidated, as anyone can get the job done with a few basic tools.
There are many designs and plans you could choose from, so you should take a look on more projects before starting the actual project. Nevertheless, if you are looking for a simple but sturdy design, this project might be the solution to your needs. Moreover, you could build all the components from 2×4 lumber, as to save both time and money. Make sure you check all the dimensions before making the cuts, otherwise the components might not fit together easily. PDF downloadable plans with premium features in the Store.
Made from this plan
Double Adirondack Chair with Table Plans
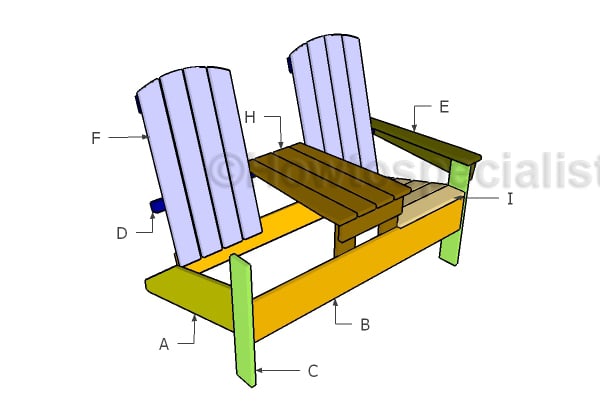
Building double adirondack chairs
Materials
- A – 2 pieces of 1×8 lumber – 33 1/4” long LEGS
- B – 1 piece of 1×8 lumber – 46 1/2” long, 1 piece of 1×6 lumber – 45″ long, 2 pieces of 1×4 lumber – 19 3/4″ long FRAME
- C – 2 pieces of 1×4 lumber – 20 3/4″ long LEGS
- D – 1 piece of 2×2 lumber – 48″ long SUPPORT
- E – 2 pieces of 1×4 lumber – 24 1/2″ long, 2 pieces – 23 1/4″ long ARMRESTS
- F – 8 pieces of 1×4 lumber – 29 1/4″ long, 2 pieces – 16″ long BACKREST
- H – 3 pieces of 1×4 lumber – 13″ long, 4 pieces – 24 1/2″ long TABLE
- 2 pieces of 1×8 lumber – 6′
- 1 piece of 1×6 lumber – 6′
- 7 pieces of 1×4 lumber – 8′
- 1 piece of 2×2 lumber – 6′
- 1 1/4″ screws, 1 5/8″ screws, 2 1/2″ screws
- wood filler , wood glue, stain/paint
Tools
- Safety gloves, glasses
- Miter saw, jigsaw
- Chalk line, tape measure, spirit level, carpentry pencil
- Drill machinery and drill bits
Tips
- Pre-drill holes in the wooden components, before driving in the screws
- Use a good miter saw to make the angle cuts
Time
- 1 day
Related
How to build a double adirondack chair bench
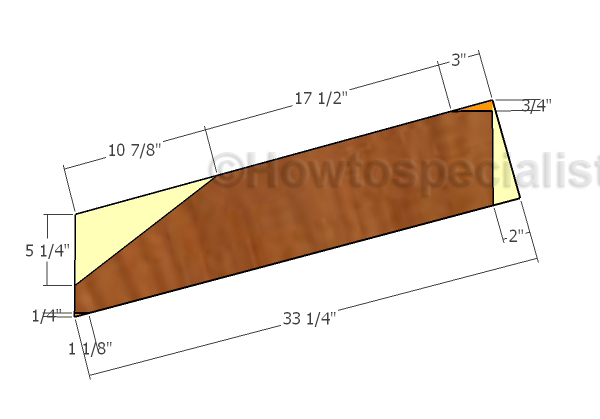
Building the legs
The first step of the project is to build the legs for the adirondack chairs. Mark the cut lines on the 1×8 slats and then get the job done with a saw. Smooth the edges before continuing the woodworking project.
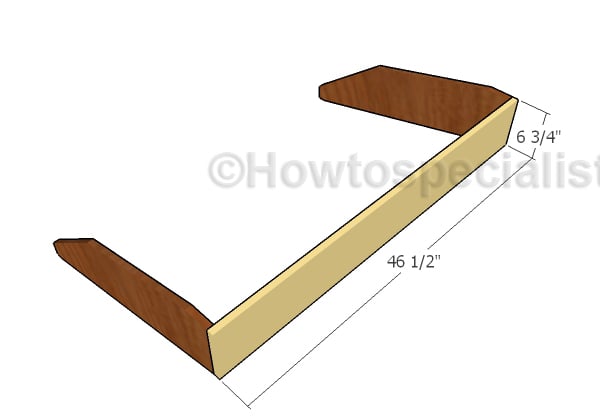
Seat frame
Cut a 1×8 slat to a 6 3/4″ width, using table saw or a circular saw with a guide rail. Align the edges flush, making sure the corners are perfectly square. Drill pilot holes through the front slat and insert 1 5/8″ screws.
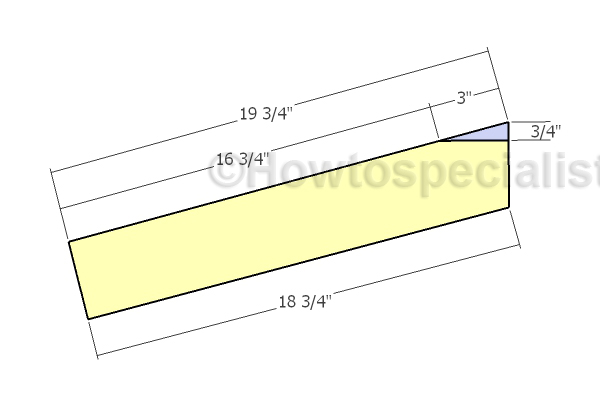
Seat middle supports
Continue the outdoor woodworking project by cutting the middle supports for the seats. Mark the cut lines on the slats and then get the job done with a saw. Smooth the edges smooth.
Assembling the frame for the seat
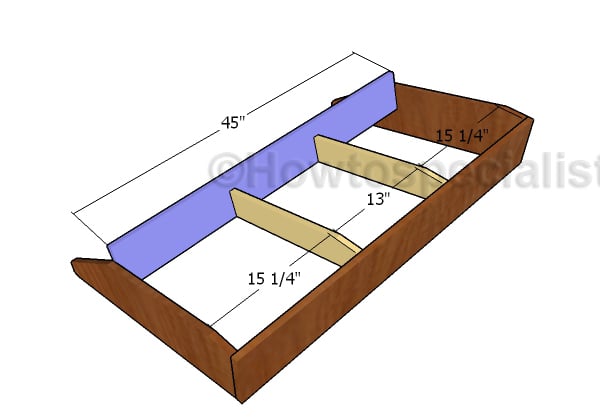
Fit the supports to the seat frame, as shown in the diagram. Align the edges flush, making sure the corners are square. Drill pilot holes and insert 1 5/8″ screws to lock the components together tightly. As you can easily notice in the diagram, you need to attach the 1×6 support to the back of the frame.
Alternatively, you can drill pocket holes and insert the screws, so you hide the head of the screws. Add glue to the joints so you enhance the bond.
Attaching the legs
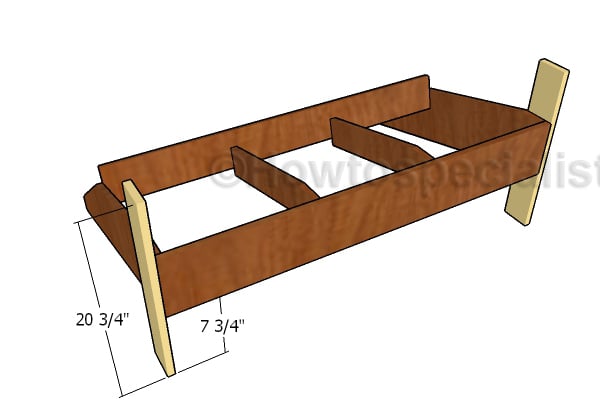
Attach the 1×4 legs to the sides of the frame. Use a spirit level to plumb the legs and then clamp them into place. Drill pilot holes through the seat frame and insert 1 1/4″ screws.
Armrest components
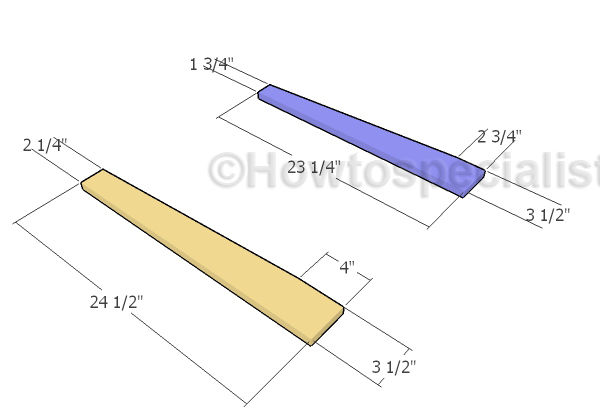
The next step of the woodworking project is to build the armrests for the adirondack double bench. Mark the cut lines on the slats and then get the job done with a saw. Smooth the edges with sandpaper or round them over with a router.
Attaching the armrest components
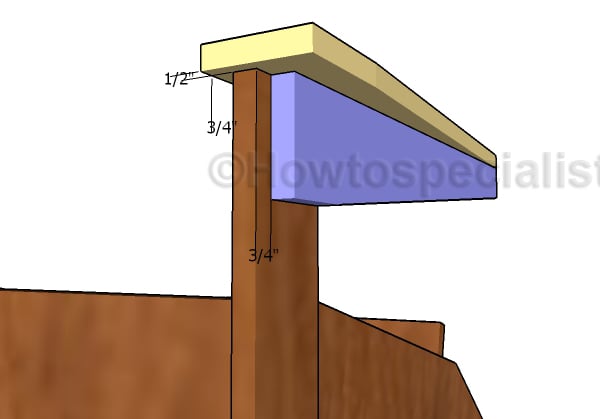
Fit the components of the armrests to the side legs. Clamp everything together tightly, drill pilot holes and insert 1 1/4″ screws.
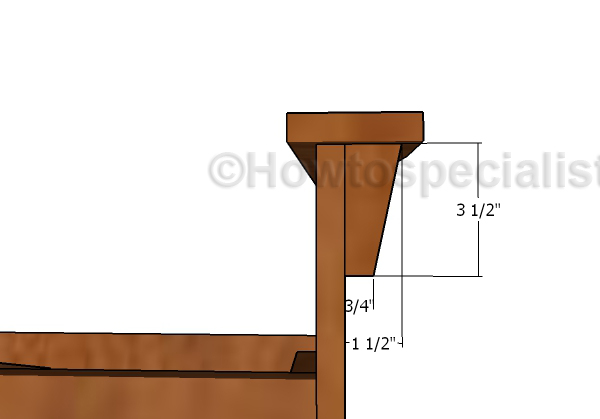
Armrest trims
Cut a nice trims from a scrap piece of 1×4 lumber and attach it to the armrests, as shown in the plans. Use glue and brad nails to lock it into place tightly.
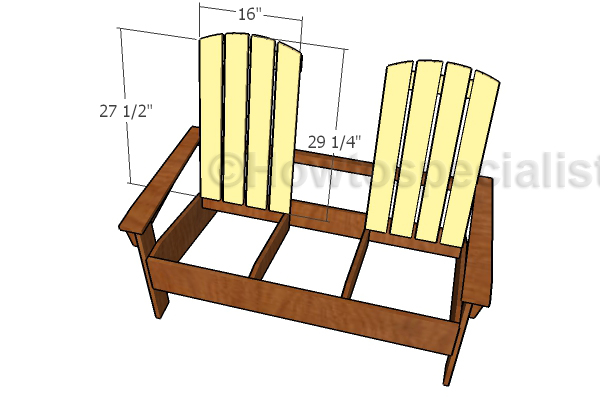
Attaching the backrest slats
Attach the 1×4 slats to back of the bench. Place a piece of 1/2″ plywood between the slats to create even gaps between them. Drill pilot holes and insert 1 1/4″ screws, to lock them into place. Countersink the head of the screws for a professional result.
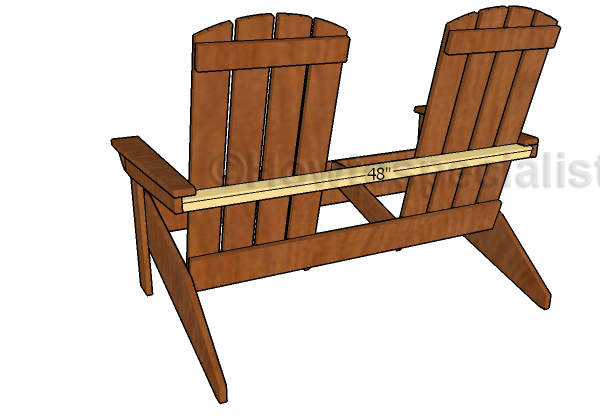
Fitting the backrest support
Fit 1×4 slats to the backrest, so you can lock them into place tightly. Drill pilot holes and insert 1 1/4″ screws for a professional result. In addition, attach the 2×2 middle support to the back of the double chair bench.
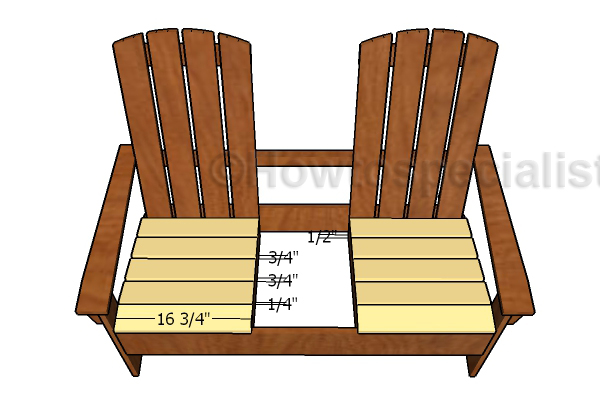
Fitting the seat slats
Use 1×4 lumber for the seat slats. Cut the components at the right dimensions and then place them to the supports. Place a piece of 3/4″ plywood between the slats for creating even gaps. Drill pilot holes and insert 1 5/8″ screws to lock them into place tightly.
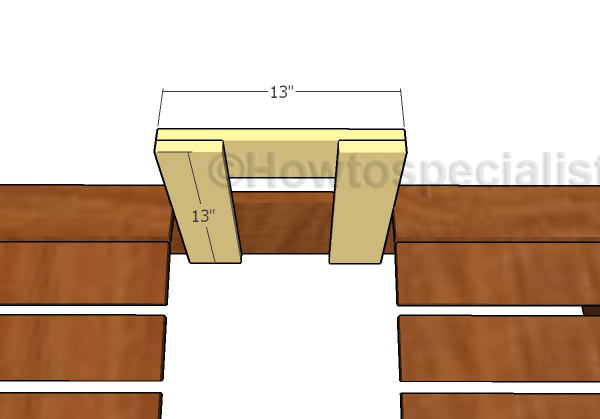
Fitting the table supports
The next step is to build the small table between the adirondack chairs. Cut the components from 1×4 lumber at 13″ and secure them to the frame with 1 1/4″ screws.
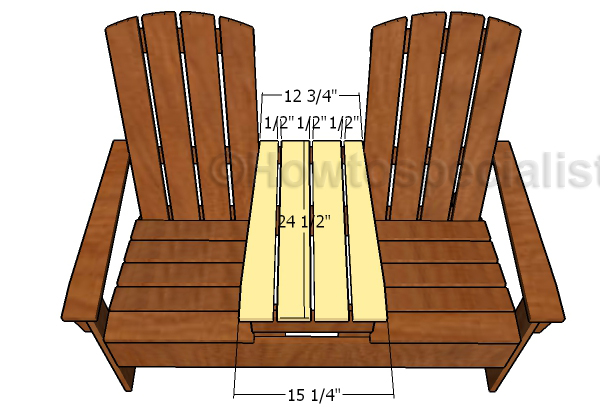
Fitting the tabletop slats
Use 1×4 lumber for the tabletop. Place the slats equally spaced and then lock them into place with 1 5/8″ screws.
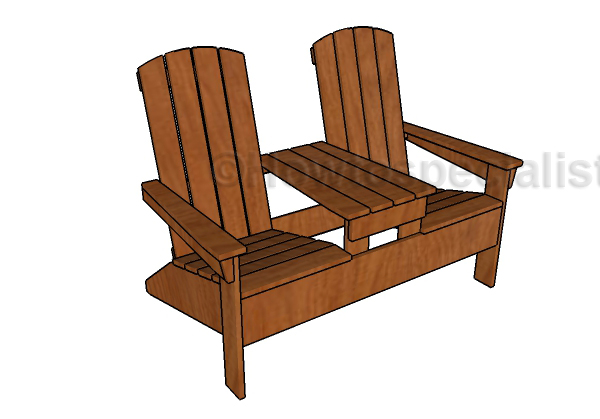
Double adirondack chair bench plans
Last but not least, you need to take care of the finishing touches. Therefore, you need to smooth or even roundover the edges. Fill the holes with wood putty and then use 120-220 grit sandpaper to smooth the surface. Apply a few coats of paint or stain to enhance the look of the double chair bench.
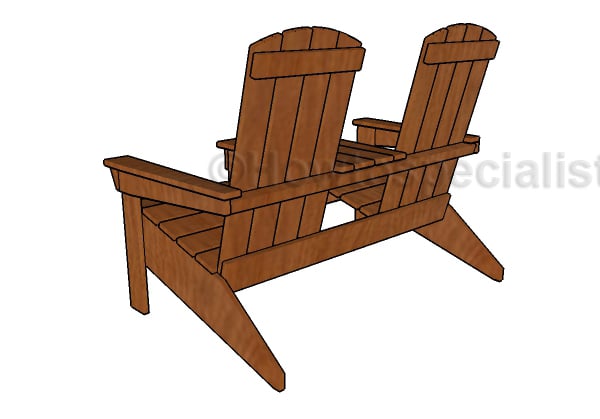
How to build a double chair bench
This project was about building a wood double adirondack chair bench. The unique feature about this project is that the bench has a small table attached to the middle. In this manner, you can sip your favorite drink while reading a good book.
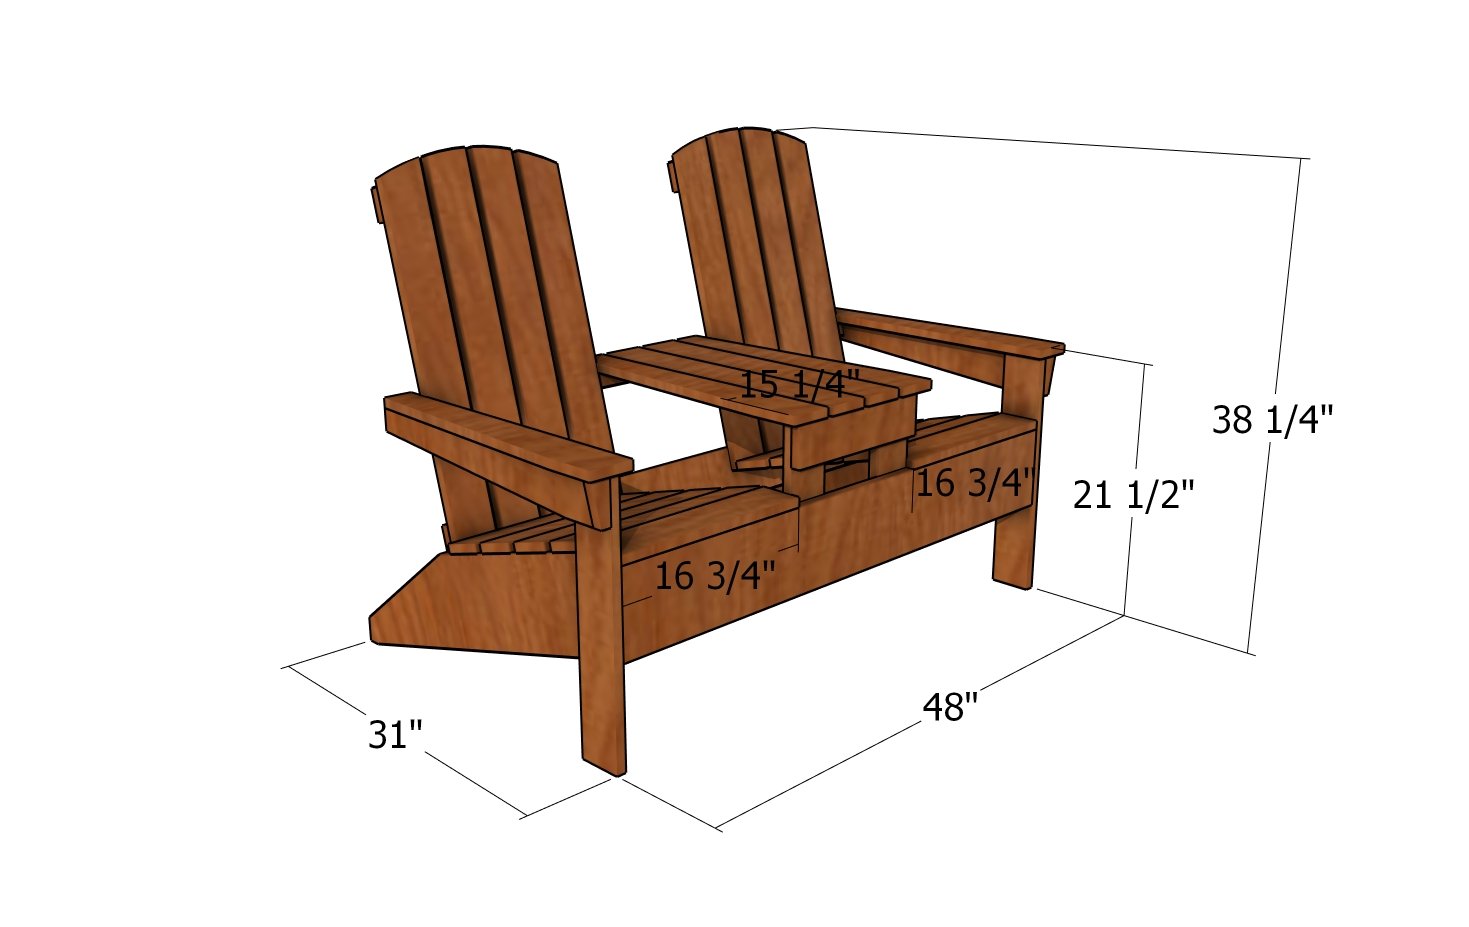
Double adirondack chair bench plans – dimensions
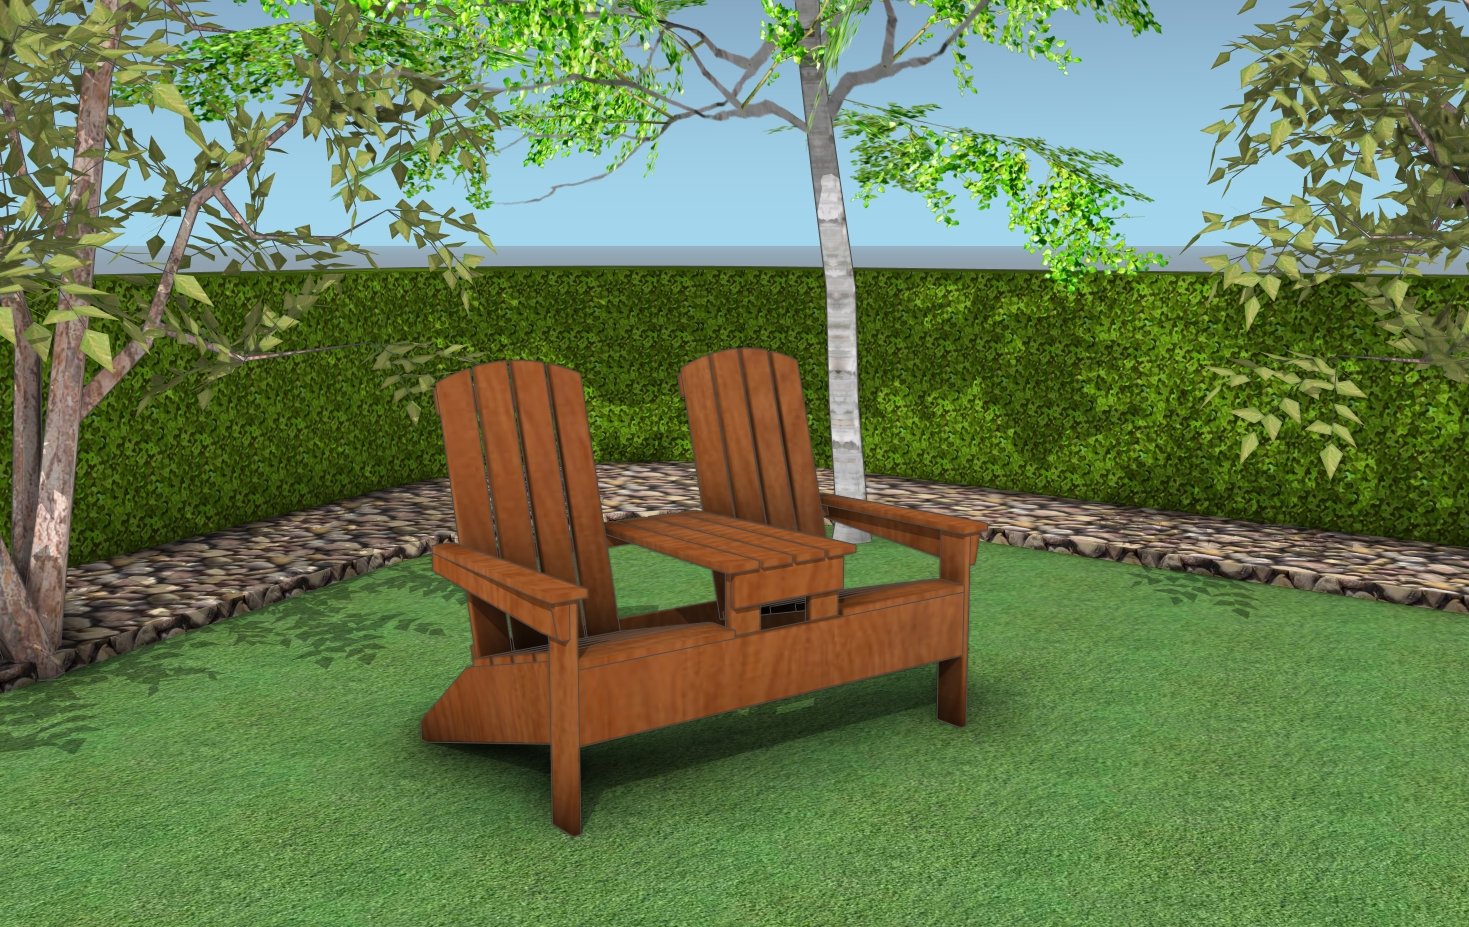
How to build a double adirondack chair
Thank you for reading our project about double adirondack chair bench with table plans and we recommend you to check out the rest of the articles. Don’t forget to share our projects with your friends, by using the social media widgets.

7 comments
Why use 1 inch thick instead of 2 inch thick for the frame?
I think it looks nicer, it’s lighter and it costs less. But you can use 2 inch thick lumber, if you want.
Is it just me or does it not tell you how high to mount the 45″ backrest? You can see it suits up last rhe legs bit doesn’t say how much. Also, is it a 1/4 board? Don’t see it on the cut list
It should be fitted at the same level with the middle seat frame supports. The backrest slats are made from regular 1x4s.
You skip the letter G and don’t mention the legs in the cut list.
Sorry not the legs, the seat
In the step “Assembling the frame for the seat,” the blue back frame piece looks to be flush with the bottom of the inner yellow supports. In the steps “Attaching the legs” and “Fitting the back supports,” the inner yellow supports look lower than the blue back frame piece. Which one is correct? if it is the steps where it is elevated, what is the measurement for that?