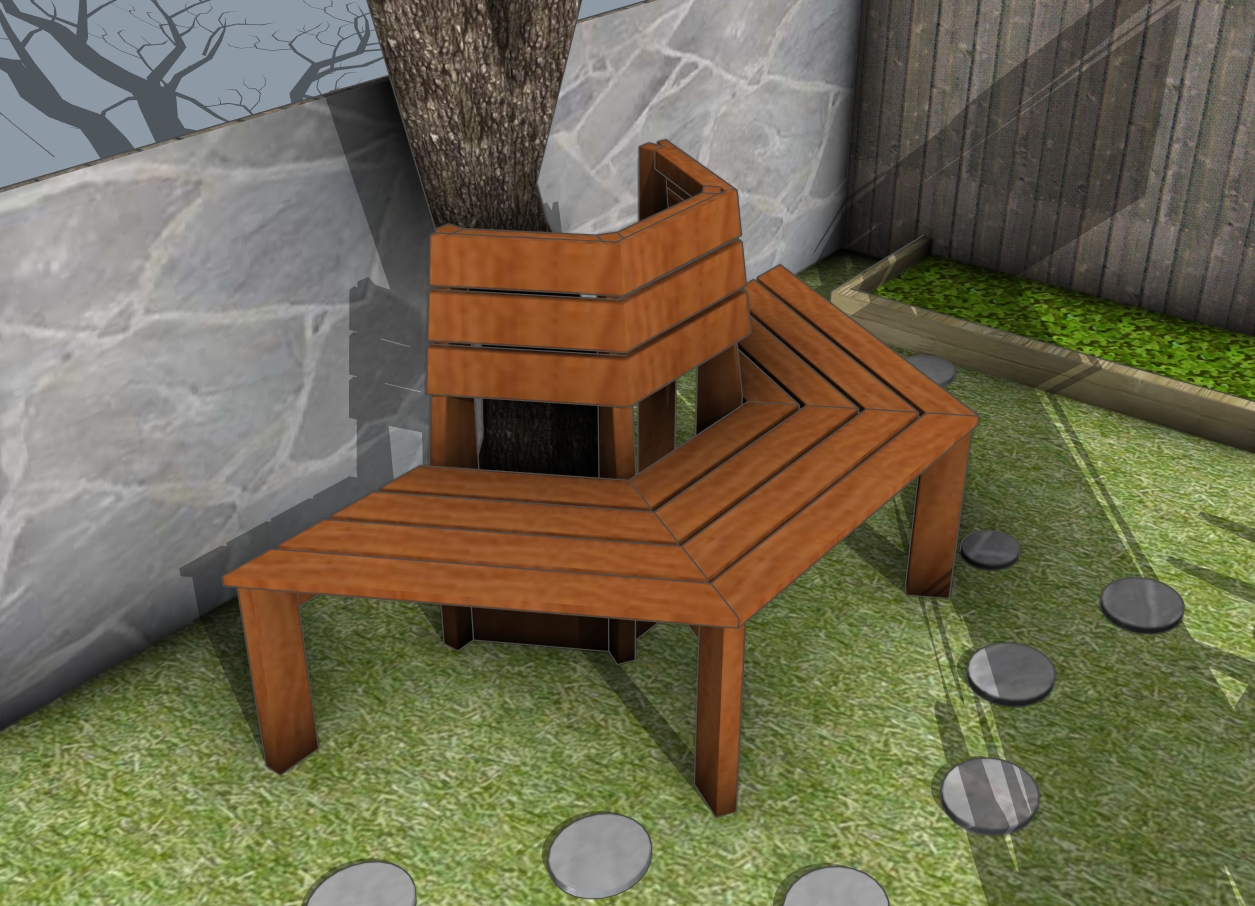
I am beyond excited to share my latest project with you – around tree bench plans! This beautiful and functional bench wraps perfectly around your favorite tree, creating a cozy and charming spot to relax and enjoy your outdoor space. With my easy-to-follow plans, you’ll be able to build this stunning bench in no time and add a unique feature to your backyard!
For our around tree bench project, you’re looking at spending a couple of weekends to get this beauty built. As for the cost, expect to invest around $150-$250 for all the lumber and hardware, depending on your local prices and the type of wood you choose. With our detailed plans, you’ll have everything you need to create this charming and functional bench without breaking the bank! See my other DIY projects HERE.
We recommend you to invest in the best materials you could afford. Therefore, you should buy weather-resistant lumber, such as pine or cedar. Always take accurate measurements before adjusting the size of the components at the proper size. Drill pilot holes trough the components before inserting the wood screws, to prevent the wood from splitting. My plans come with a full cut / shopping list and they are PDF Download and Print friendly. See all my Premium Plans HERE.
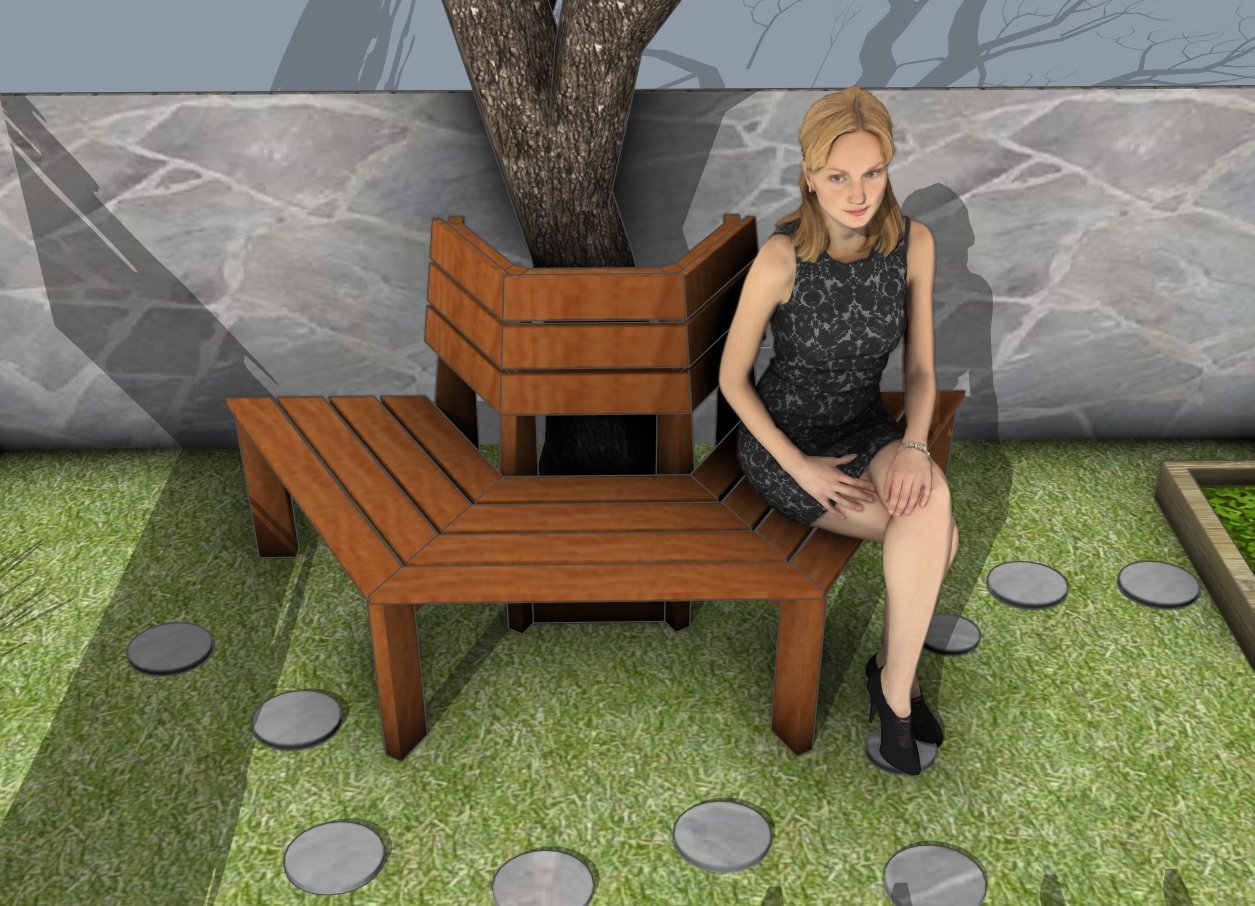
Made from this plan
Pin for Later!
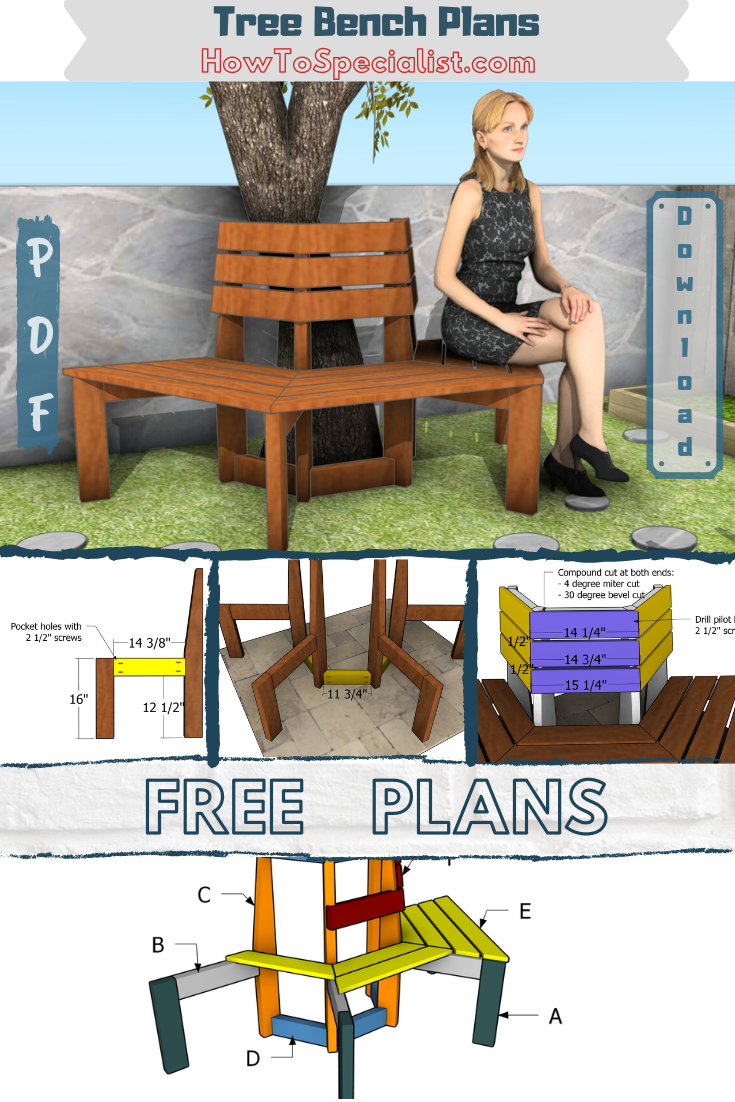
Around Tree Bench Plans – Free Plans
Building-a-tree-bench
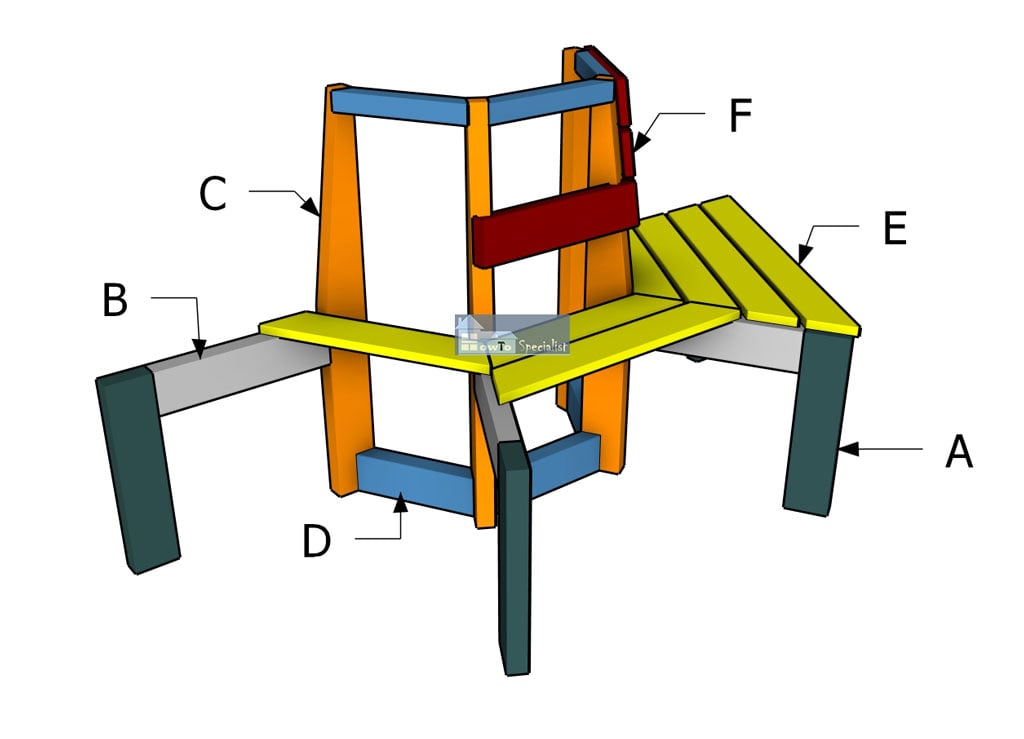
Materials
A – FRONT LEGS – 2×4 lumber 16″ – 3 pieces
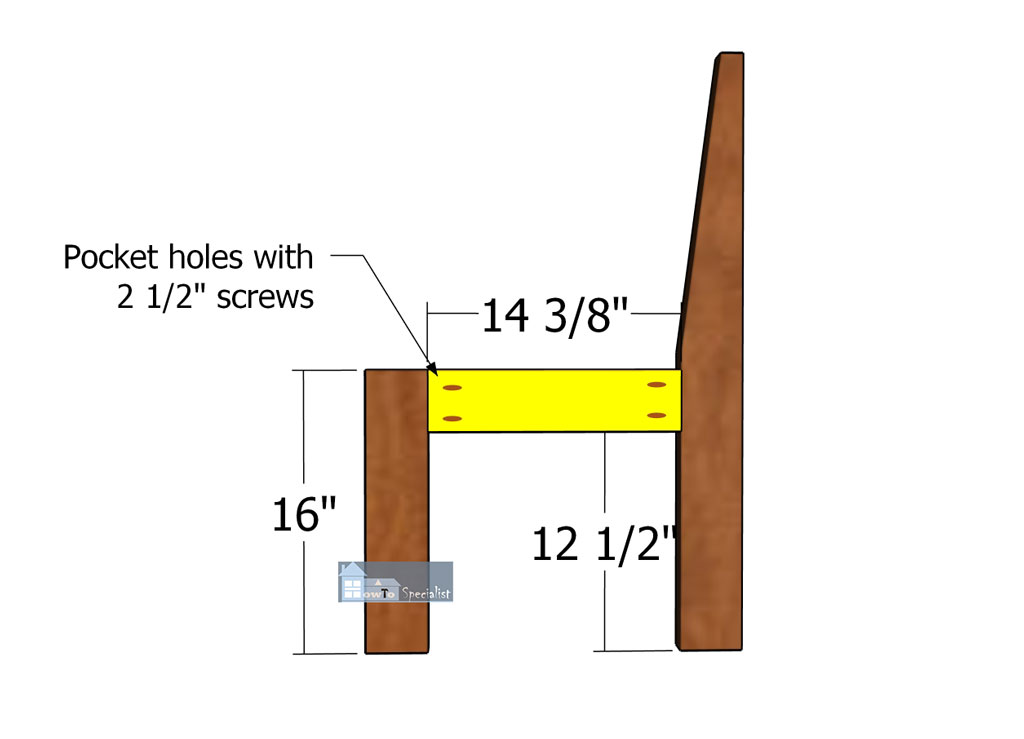
B – FRAME – 2×4 lumber 14 3/8″ – 3 pieces
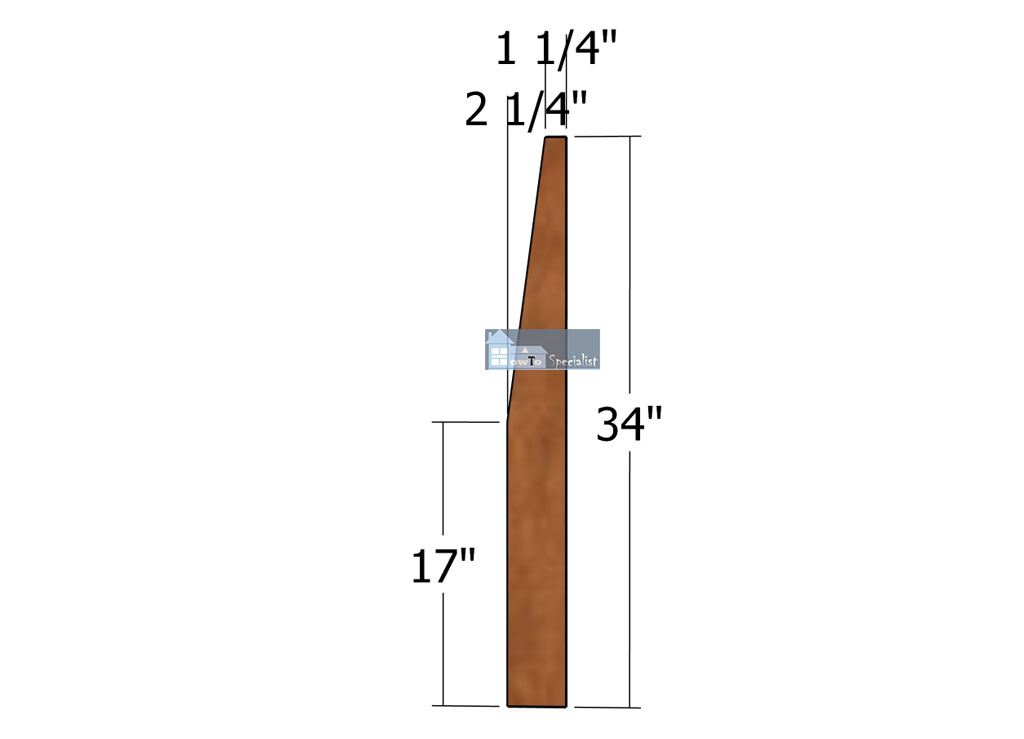
C – BACK LEGS – 2×4 lumber 34″ – 3 pieces
D – SUPPORTS – 2×4 lumber 10 7/8″ – 2 pieces
D – SUPPORTS – 2×4 lumber 11 3/4″ – 1 piece
D – SUPPORTS – 1×2 lumber 10 7/8″ – 2 pieces
D – SUPPORTS – 1×2 lumber 11 3/4″ – 1 piece
E – SEAT SLATS – 1×4 lumber 33 1/4″ – 3 pieces
E – SEAT SLATS – 1×4 lumber 28 5/8″ – 3 pieces
E – SEAT SLATS – 1×4 lumber 24″ – 3 pieces
E – SEAT SLATS – 1×4 lumber 19 3/8″ – 3 pieces
F – BACKREST – 1×4 lumber 14 1/2″ – 3 pieces
F – BACKREST – 1×4 lumber 14″ – 3 pieces
F – BACKREST – 1×4 lumber 13 1/2″ – 3 pieces
- 1×2 lumber – 4 ft – 1 piece
- 1×4 lumber – 10 ft – 4 pieces
- 2×4 lumber – 8 ft – 3 pieces
- 2 1/2″ screws – 100 pieces
- 1 1/4″ screws – 100 pieces
- Stain – 1 can
Tools
- Compound miter saw
- Circular saw
- Drill machinery, drill bits
- Safety gloves, glasses
- Chalk line, tape measure, spirit level, carpentry pencil
Time
- One week
Tree Bench with Backrest Plans – Building the frame
Cutting-the-back-legs
The first step of the project is to build the back legs for the tree bench. As you can see in the diagram, you need to make a cut to the top part of the 2×4 boards. Mark the cut lines and then get the job done with a circular saw. Smooth the edges with sandpaper.
Assembling-the-frames
Next, we need to assemble the three frames for the tree bench. Use 2x4s for the rest of the components, as well. Make pocket holes at both ends of the 14 3/8″ components. Lay everything on a level surface and align the parts making sure the edges are flush and corners square. Insert 2 1/2″ screws to assemble the frames.
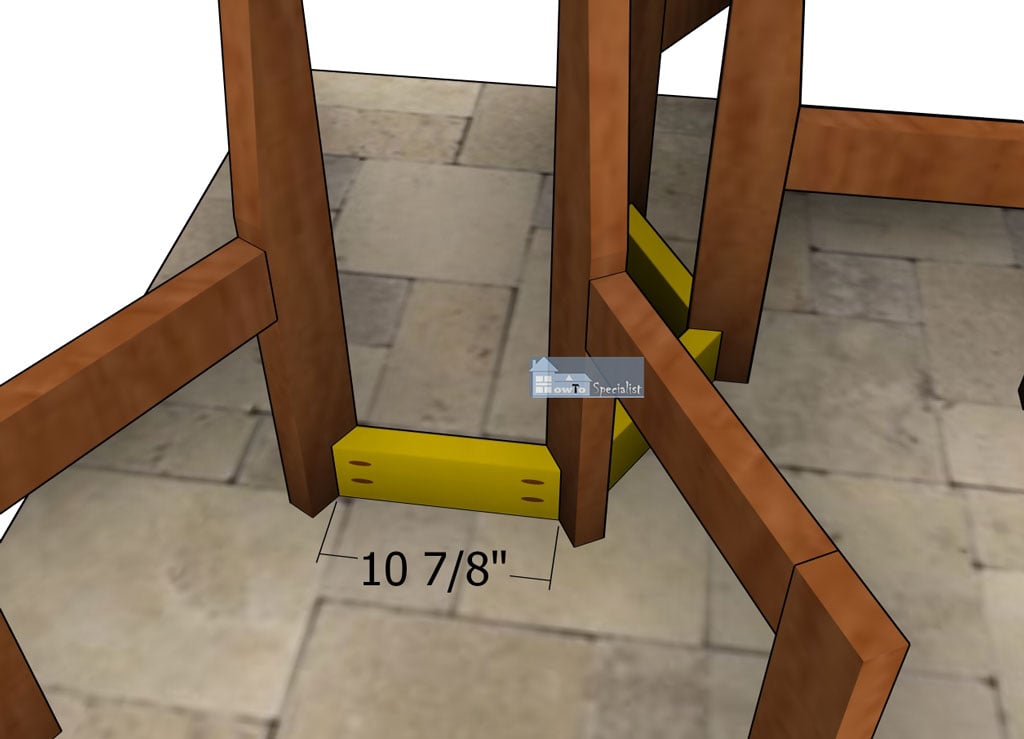
Side-base-supports
Continue the project by assembling the tree bench. Use 2×4 for the base supports. Make 30 degree cuts to both sides, and drill pocket holes at both ends. Align the edges to the back of the vertical frames and insert 2 1/2″ screws to lock them into place. We need these supports to enhance the rigidity of the bench and to help with alignment.
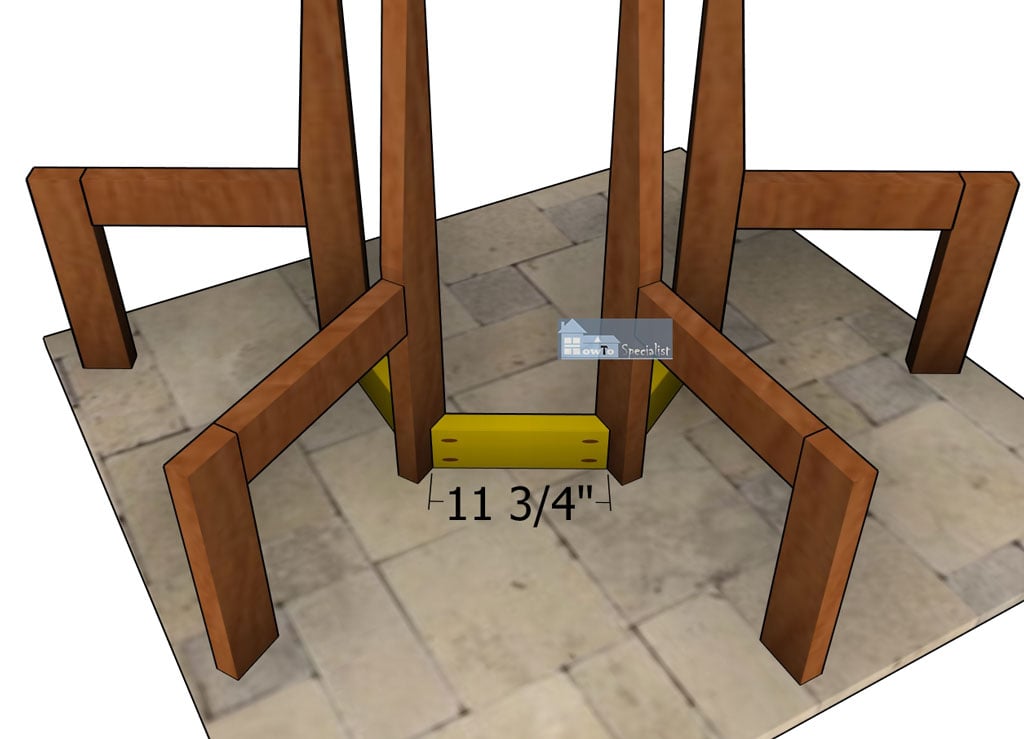
Middle-base-support
Repeat the process for the middle base support.
Tree Bench Plans – Seat and Backrest
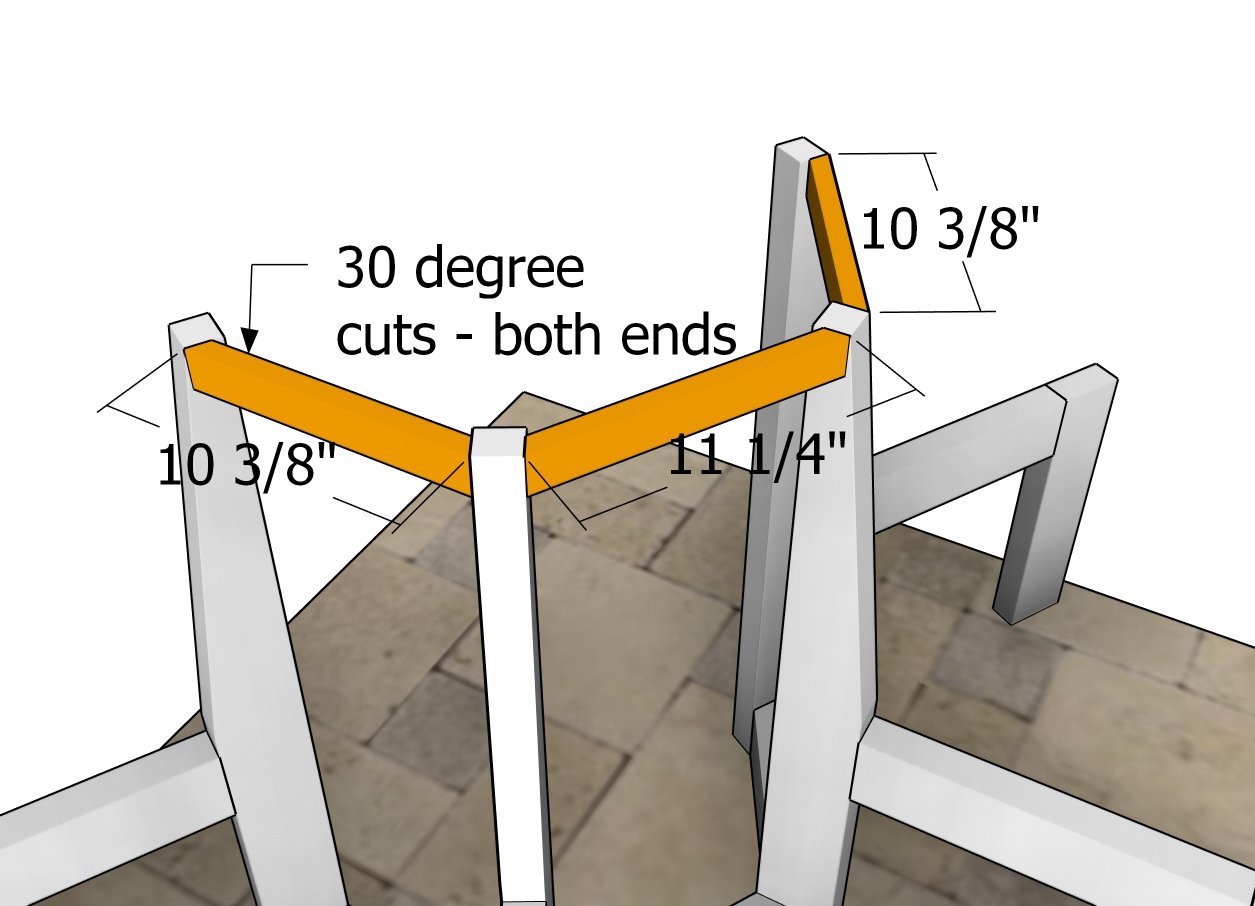
Top supports
Use 1×2 boards for the top supports. Make 30 degree cuts to both ends of the supports and secure them into place with pocket holes and 1 1/4″ screws. Drill the pocket holes on the front face.
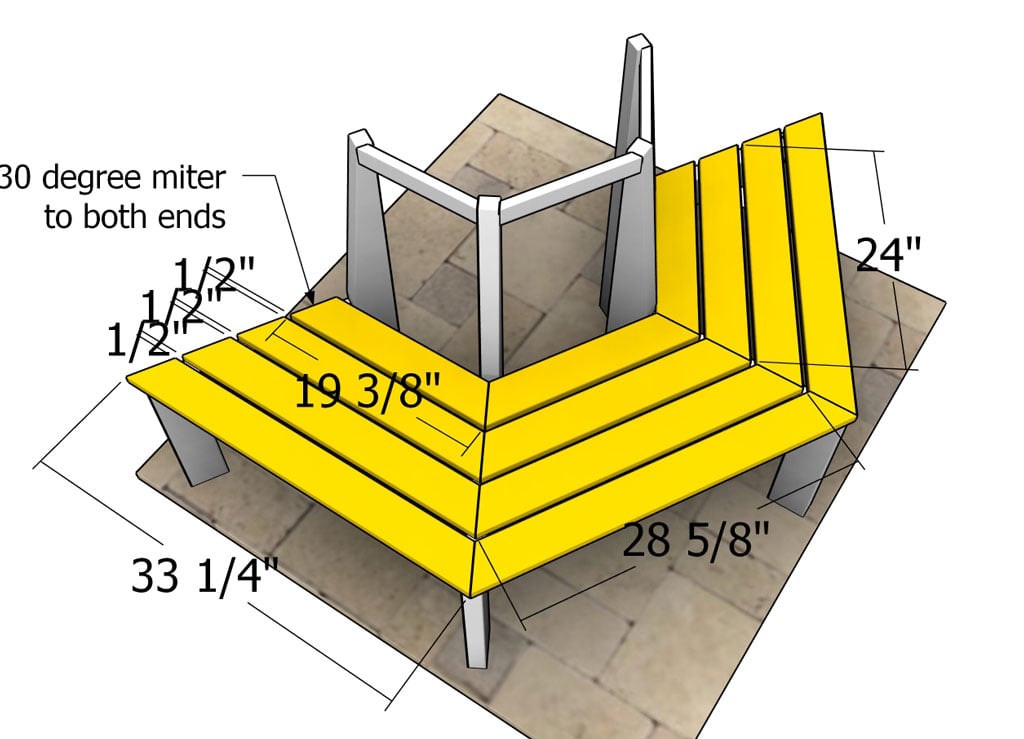
Seat-slats
Once you have the frame assembled, we need to proceed to installing the 1×4 seat slats. Make 30 degree angle cuts to slats and then fit the into place. Drill pilot holes and insert 2 1/2″ screws to lock the slats to the seat frame. Place 1/2″ spacers between the boards to create even gaps.
Start installing the slats from the sides. Align the exterior side of the boards to the seat frame. Notice the middle joints between the slats fall on the middle axis of the seat frames, while the outside side edges of the boards are perfectly aligned to the seat frame.
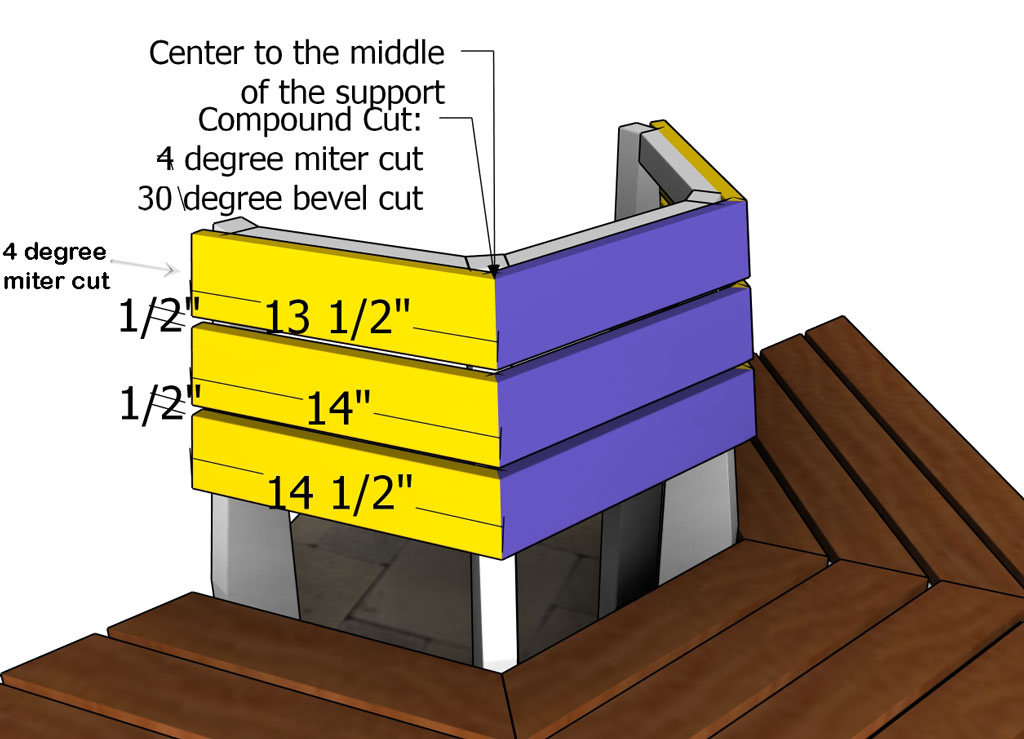
Side-backrest-slats
Now, to the trickiest part of this tree bench plans. We will be using 1x4s, as well. Since the backrest has an incline, we need to make 4 degree miter cuts to both sides of the boards. However, on the side that joins the middle panel boards, we also need to make a 30 degree bevel cut. Therefore, for this project you have to use a compound miter saw. That will make the process easy, quick and accurate.
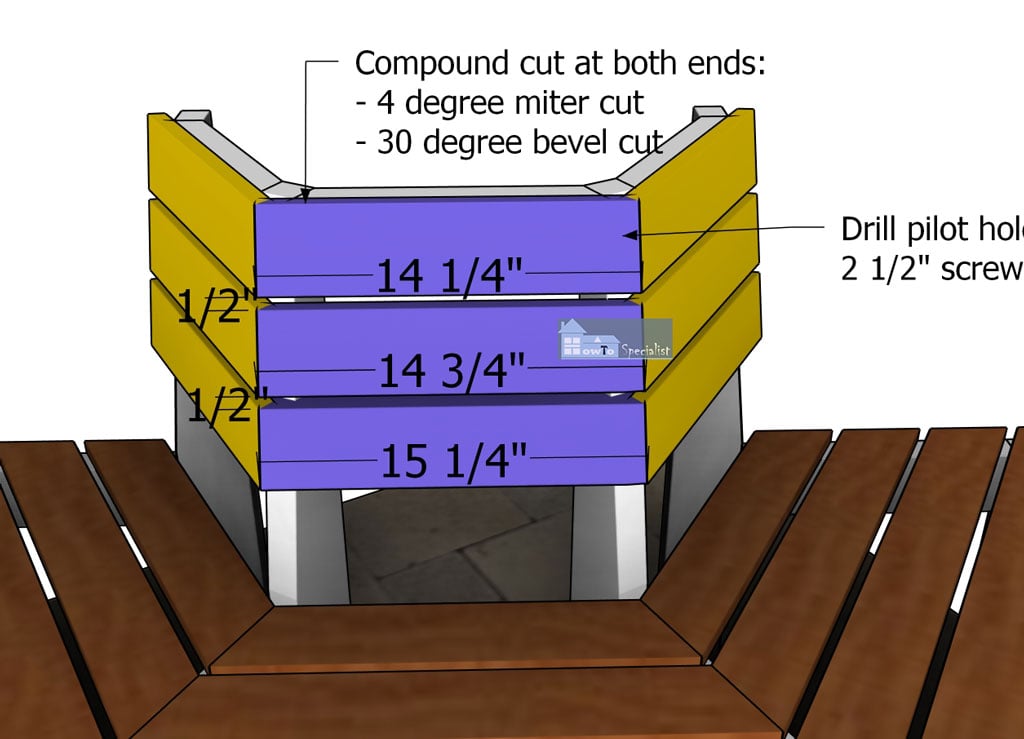
Middle-backrest-boards
Next, we have to cut and install the boards to the middle backrest panel. Make compound cuts to both ends of the boards. Set the saw to make a 4 degree miter cut and a 30 degree bevel cut.
Finishing touches
DIY-Tree-Bench-Plans
For the finishing touches on your around tree bench, give it a good sanding to ensure a smooth surface. Then, apply a high-quality outdoor stain or paint to protect the wood and match your outdoor decor. Finally, add some comfy cushions and a few potted plants around the bench to create a cozy and inviting space.
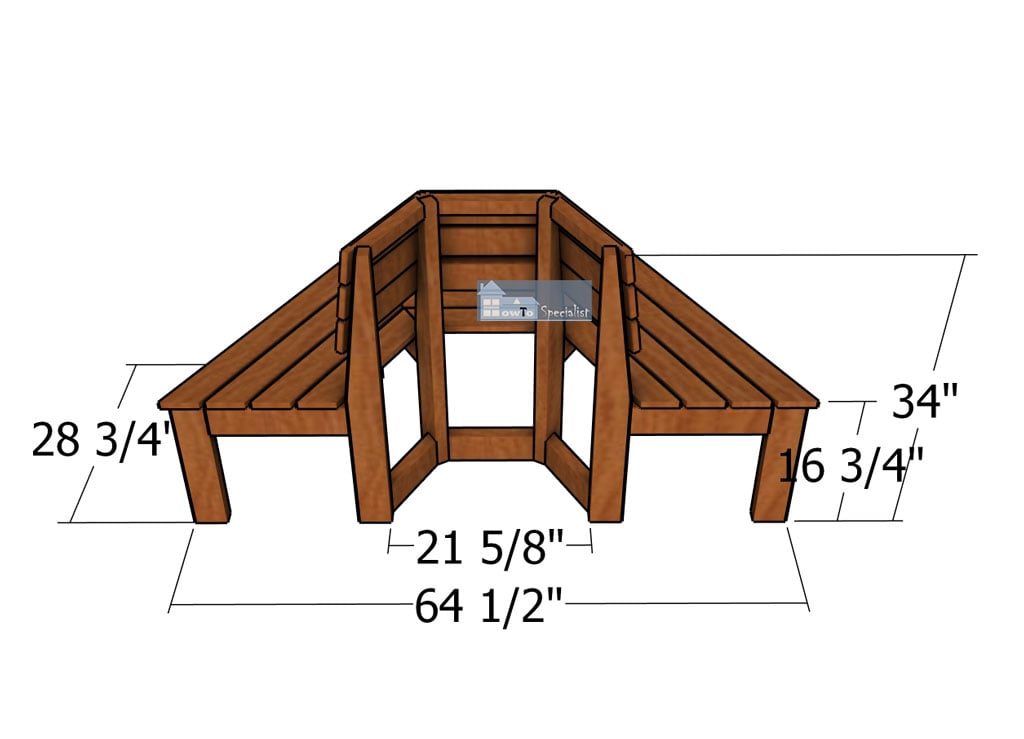
Dimensions-for-tree-bench
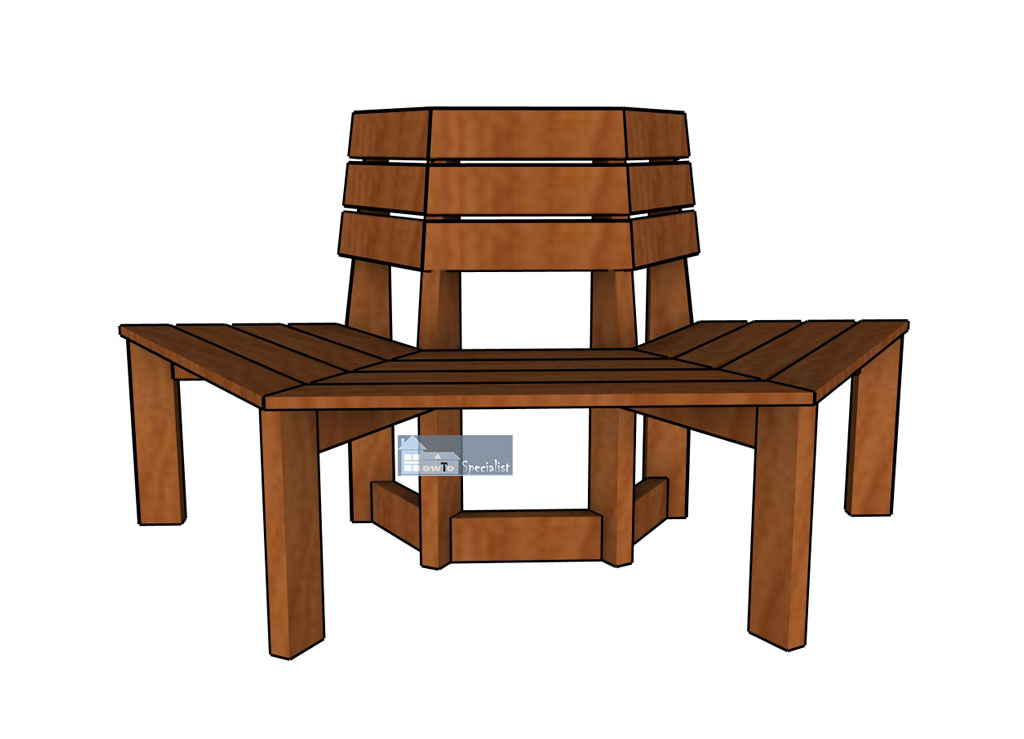
How to build a tree bench
Tree bench plans
Building this around tree bench has so many great benefits! First, it creates a unique and cozy seating area that enhances the beauty of your outdoor space. Plus, it’s a practical way to utilize the space around a tree, offering shade and a lovely spot to relax.
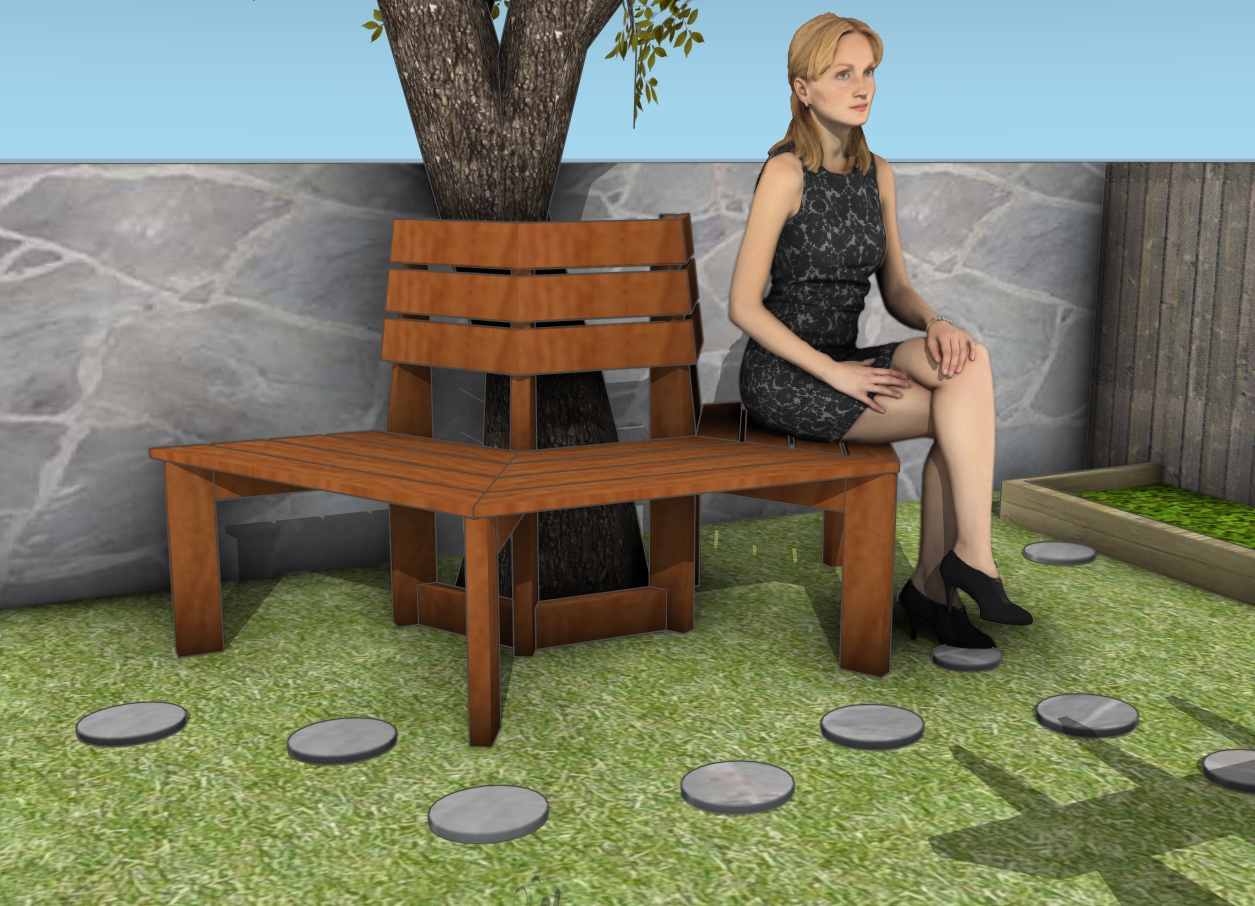
Around tree bench plans diy
I hope you’re as excited about your new around tree bench as I am. It’s the perfect blend of style and function, adding a charming focal point to your yard. I can’t wait to see how you make it your own – don’t forget to share your finished projects with me!

Thanks for checking out my around tree bench plans! Be sure to explore my other projects for more fantastic ideas. Don’t forget to hit the LIKE button and SHARE with your friends using the social media links below.