This step by step woodworking project is about aldo leopold bench plans. This bench is super simple to build, but surprisingly sturdy. If you like the design, make sure you follow the instructions so you get the job done by yourself. My plans come with step by step instructions and you can easily adjust all the dimensions to suit your needs. See my other DIY projects HERE.
We recommend you to invest in the best materials you could afford. Therefore, you should buy weather-resistant lumber, such as pine or cedar. Always take accurate measurements before adjusting the size of the components at the proper size. Drill pilot holes trough the components before inserting the wood screws, to prevent the wood from splitting. See all my Premium Plans in the Shop.
Made from this plan
Aldo Leopold Bench Plans
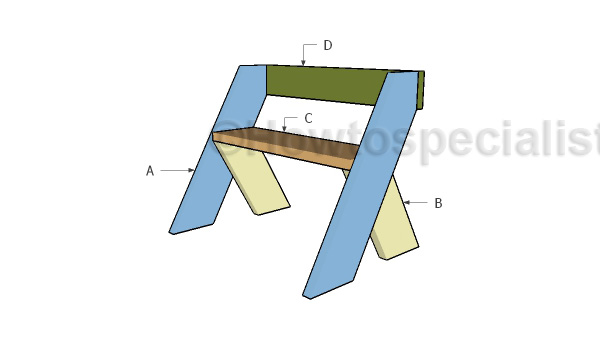
Building a leopold bench
Materials
- A – 1 piece of 2×8 lumber – 37 1/4″ long LEGS
- B – 1 pieces of 2×8 lumber – 22 1/4″ long LEGS
- C – 1 piece of 2×10 lumber – 33″ long SEAT
- D – 1 piece of 2×6 lumber – 36″ long BACKREST
- 1 piece of 2×8 lumber – 10′
- 1 piece of 2×6 lumber – 4′
- 1 piece of 2×10 lumber – 4′
- 2 1/2″ screws
- stain, glue, putty
Tools
- Safety gloves, glasses
- Miter saw, jigsaw
- Chalk line, tape measure, spirit level, carpentry pencil
- Drill machinery and drill bits
Time
- One Day
Building a Leopold wood bench
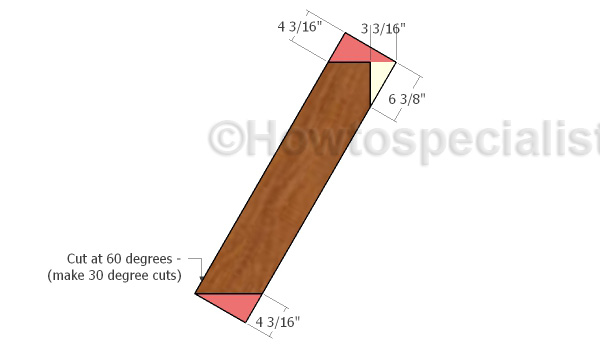
Building the legs
First, you need to build the front legs for the aldo leopold bench. Mark the cut lines on the beams and get the job done with a circular saw. Smooth the cut edges with sandpaper for a professional result.
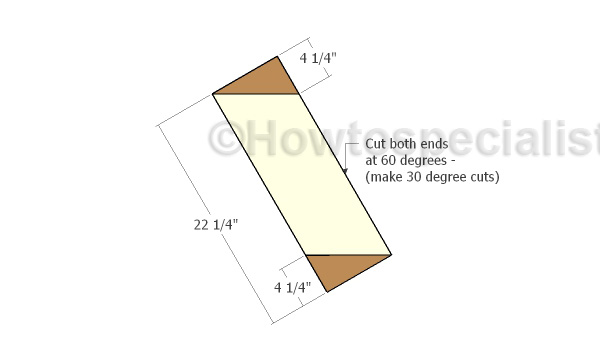
Building the back legs
Build the back legs from 2×8 lumber, as well. Cut both ends of the beams at 60 degrees, by making 30 degree cuts with a miter saw. You can use any saw, as well, making sure you go with the blade along the cut lines.
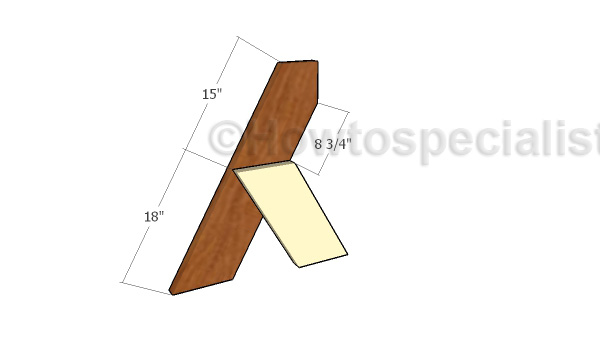
Assembling the legs
Assemble the sides for the leopold bench. Align the edges with attention, add glue to the joints and drill pilot holes. In addition, insert 2 1/2″ screws to lock the legs together tightly.
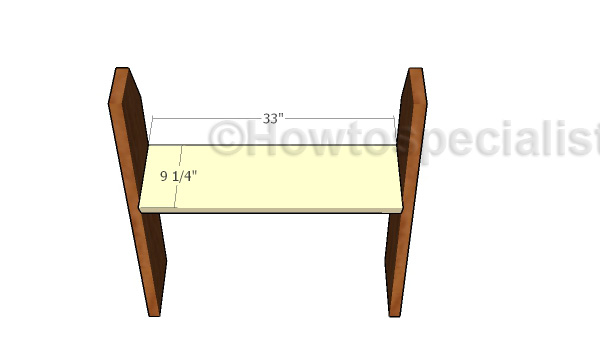
Fitting the seat slat
Build the seat of the bench from 2×10 lumber. You can easily adjust the width of the bench to suit your needs. Drill pilot holes and inset 2 1/2″ screws into the side legs.
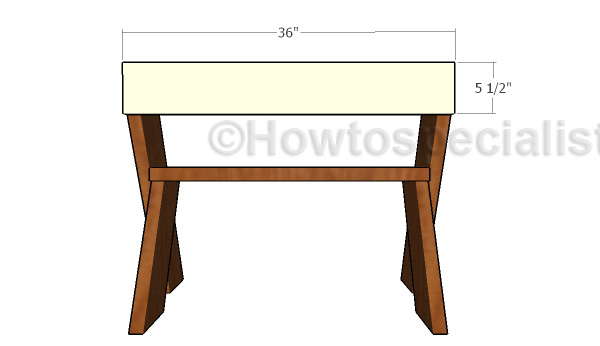
Attaching the backrest beam
Build the backrest from 2×6 lumber. Align the edges flush, making sure the corners are right angled. Drill pilot holes through the backrest and insert 2 1/2″ screws into the legs.
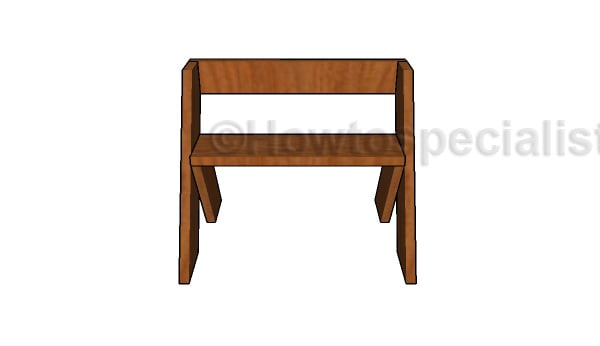
Build a leopold bench
Make sure you fill the holes and the dents with wood putty. Let it dry out for several hours and then smooth the surface with 120-220 grit sandpaper. Apply a few coats of stain or paint over the components to enhance the look of the bench.
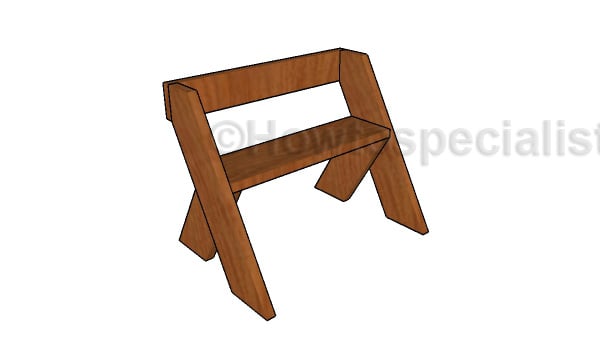
Leopold bench plans
The Aldo leopold bench is a classic design that is immortal. If you want to add unique appeal to your backyard or to your porch, make sure you make one of these. If you like my project, don’t forget to SHARE it on Facebook and Pinterest.
Thank you for reading our project about Aldo leopold bench plans and I recommend you to check out the rest of the projects. Don’t forget to LIKE and SHARE our projects with your friends, by using the social media widgets. SUBSCRIBE to be the first that gets our latest projects.

3 comments
Don’t understand this cut at 60° both ends. What’s the 30’s have to do with it?
You set the miter saw to 30 degrees and make a cut. The component will now have a 60 degree end. I hope it is more clear now.
How wide long can you make the seat with 2″timber?
Can you place a supporting leg in the centre to extend the length without breaking the seat?