This step by step woodworking project is about wooden adirondack chair made from 2x4s plans. I have designed this super 4′ wide adirondack bench so you can build it in one weekend with common tools. It is so straight forward that you can ask the kids to watch or assist you. If you have a higher budget, invest in weather resistant lumber. See my other DIY projects HERE.
We recommend you to invest in the best materials you could afford. Therefore, you should buy weather-resistant lumber, such as pine or cedar. Always take accurate measurements before adjusting the size of the components at the proper size. Drill pilot holes trough the components before inserting the wood screws, to prevent the wood from splitting. See all my Premium Plans HERE.
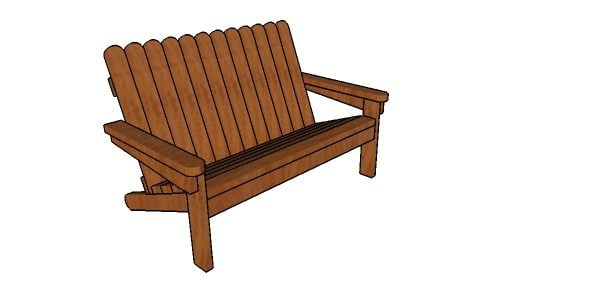
Made from this plan
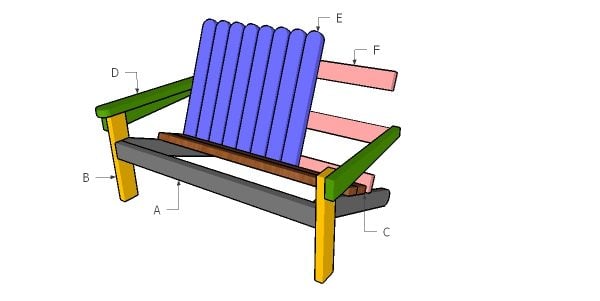
Adirondack Bench made from 2x4s Plans
Building a 2×4 adirondack bench
Materials
- A – 2 pieces of 2×4 lumber – 32″ long, 1 piece – 48″ long FRAME
- B – 2 pieces of 2×4 lumber – 19 1/2″ long LEGS
- C – 5 pieces of 2×4 lumber – 48″ long SEAT
- D – 2 pieces of 2×4 lumber – 25 3/4″ long, 2 pieces – 28 1/4″ long ARMRESTS
- E – 12 pieces – 29″ long BACKREST
- F – 2 pieces of 2×4 lumber – 48″ long, 1 piece – 51″ long BACKREST
- 10 pieces of 2×4 lumber – 8′
- 200 pieces 2 1/2″ screws
- 5o pieces 3 1/2″ screws
- stain, wood filler , wood glue
Tools
- Safety gloves, glasses
- Miter saw, jigsaw
- Chalk line, tape measure, spirit level, carpentry pencil
- Drill machinery and drill bits
Time
- One Weekend
Adirondack Bench – Video
How to build an adirondack bench from 2x4s

Building the back legs
The first step of the project is to build the back legs for the adirondack bench. As you can easily notice in the diagram, you need to round one end and to make an angle cut to the opposite. Use a miter saw to make the proper cut to the component. Smooth the edges with sandpaper.
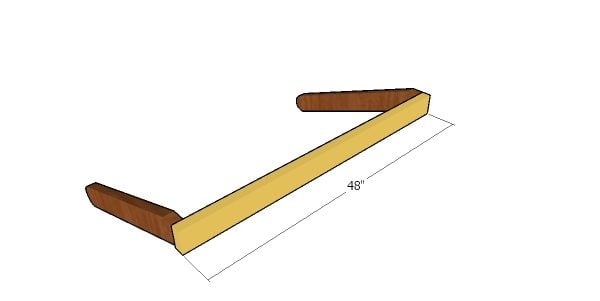
Assembling the frame of the chair
Next, assemble the bench frame by fitting the front apron. Align the component at both ends, drill pilot holes and insert 2 1/2″ screws. Leave no gaps between the components.
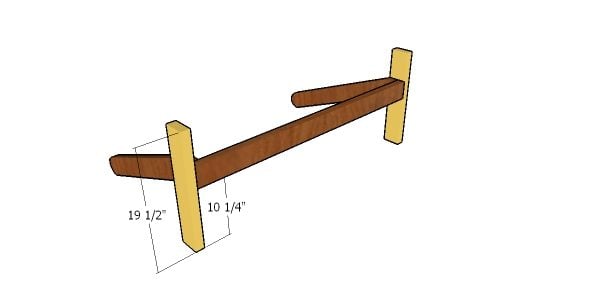
Attaching the front legs
Attach the front legs to the bench seat frame, as shown in the diagram. Drill pilot holes and insert 2 1/2″ screws to secure the legs into place tightly.
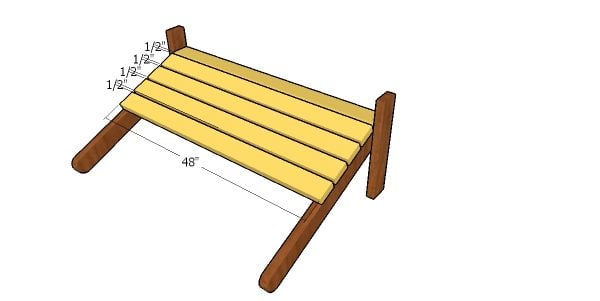
Fitting the seat slats
Fit the sat slats to the frame of the adirondack bench. Place a piece of 1/2″ plywood between the slats to create even gaps. Drill pilot holes and insert 2 1/2″ screws to secure the slats to the frame.
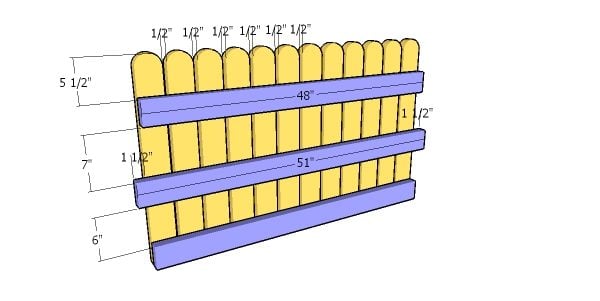
Assembling the backrest
Next, assemble the backrest for the simple lawn bench. Lay the backrest slats on a level surface and place them equally spaced. Attach the supports to the backrest, as shown in the diagram. Drill pilot holes and insert 2 1/2″ screws to lock the supports into place tightly.
Fitting the backrest
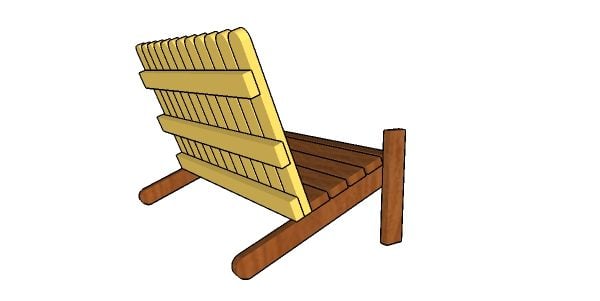
Fit the backrest to the frame of the bench. Align the edges with attention. Drill pilot holes through the bottom support and insert screws into the back legs of the chair.
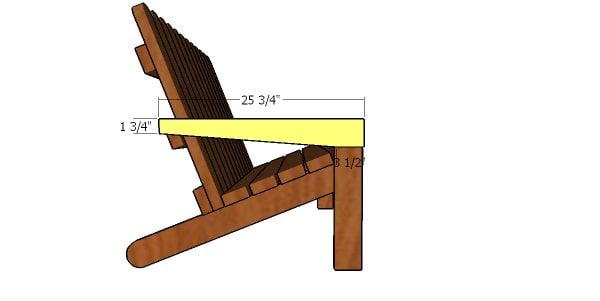
Fitting the armrest supports
Fit the armrest supports to the adirondack bench, as shown in the plans. Drill pilot holes through the supports and insert 2 1/2″ screws into the legs.
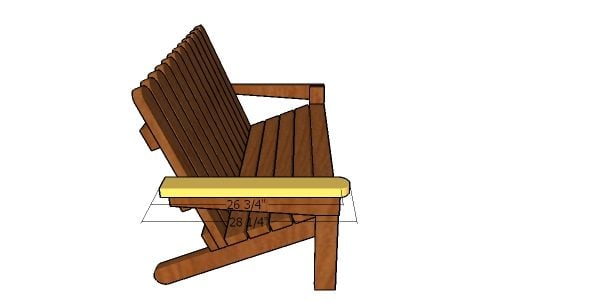
Fitting the armrests
Use 2×4 lumber for the armrests, as well. Fit the armrests to the supports, drill pilot holes and insert 2 1/2″ screws to lock them into place tightly.
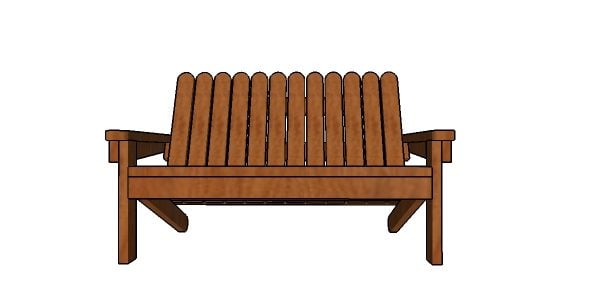
Adirondack Bench made from 2x4s Plans
Fill the holes with wood putty and smooth the surface with 120-220 grit sandpaper. Apply a few coats of paint or stain over the components. If you really want to have a long lasting chair, apply a few coats of poly or use cedar from the very beginning.
How to build an adirondack bench
If you like my project, don’t forget to SHARE it on Facebook and Pinterest.
Thank you for reading our project about Adirondack bench made from 2x4s plans and I recommend you to check out the rest of the projects. Don’t forget to LIKE and SHARE our projects with your friends, by using the social media widgets. SUBSCRIBE to be the first that gets our latest projects.
6 comments
Question on the barn shed ? Nothing is mentioned about the overhang of the roof Sheeting on the sides. from the rafters. Are drip edges used here and on the over hang of the front and back over hang? It would seem something is needed to protect the sheeting edge and siding.
I find it funny you leave a comment about the barn shed plans on the adirondack bench project. I will help you but I need to know what plans you are referring to first.
Love plans for Adirondack bench 🙋🏻♂️👍🏻
The plans shows 6 pieces at 29″ each for the vertical backrest slats, yet the diagram shows 12 pieces?
Thanks. List updated
Replacing the seat, back, arms with ski’s
any advice – going to use the same dimensions – should weight capacity be any concerns or sturdiness with using different materials?