This step by step article is about installing door casing. Installing door casing is a fun and easy diy project, provided you have the right tools and materials. Before you begin the actual installation of the door trim, you should measure attentively the perimeter of the door. Nevertheless, when buying door casing, you should pay attention to the following aspect: you should purchase two long trims for the side jambs and a shorter one for the head door.
In addition, we recommend you to buy prepainted door casing, as it will give a professional edge to your door. We don’t say it’s impossible to paint door casing by yourself, but from our experience we assert it’s hard to obtain the same finish as compared to pre-painted trim. Moreover, when buying door casing, you have to check if the trim is wide enough to hide the space between the jamb and the wood studs.
In order to secure door casing, you have to use finishing nails, as they are almost unnoticeable to the human eye and can be caulked easily. Therefore, when buying the nails from your local diy store, make sure you get the ones with small heads and very thin.
If around the door jam there are installed baseboards, you should remove them temporarily, as to be able to install the door casing from the floor up to the door head. After you have installed the door casing, you can secure the baseboards in the remaining spot.
Made from this plan
In order to install door casing, you need the following:
Materials
- Door casing
- Finishing nails
Tools
- Safety gloves, glasses
- Miter saw, level, carpentry pencil
- Hammer
Tips
- Use a miter saw, to make accurate corner joints
Time
- 30 minutes
My best tips on installing door casing:
Installing door casing is a great way to give your doorways a finished, polished look while covering gaps between the door frame and the wall. It’s a straightforward project that can dramatically enhance a room’s appearance. Here are my best tips for installing door casing like a pro.
1. Gather Your Tools and Materials
Before you start, make sure you have all the tools and materials you need:
- Pre-cut door casing (or trim)
- Measuring tape
- Miter saw
- Nail gun or hammer and finishing nails
- Wood glue
- Caulk and caulking gun
- Wood filler
- Sandpaper
- Level
- Pencil
2. Measure and Cut the Casing
Start by measuring the door frame and the space where the casing will be installed:
- Measure the height of the sides and the width across the top of the door.
- Use a miter saw to cut the casing pieces at 45-degree angles where the top piece meets the side pieces for a clean, professional finish. The bottom of the side casing can be cut at a straight 90-degree angle.
Tip: Measure twice and cut once! Double-check your measurements before making any cuts to avoid wasting material.
3. Dry Fit the Casing
Before attaching anything, do a dry fit of the casing around the door:
- Place the casing pieces around the door frame and ensure they fit properly. The mitered corners should meet neatly without gaps.
- Use a level to check that the casing is plumb (vertically straight) and the top piece is perfectly level.
If necessary, make slight adjustments to your cuts or trim the ends to ensure everything fits snugly.
4. Apply Wood Glue to the Joints
To create a strong bond and help keep the casing secure, apply a small amount of wood glue to the mitered joints where the side pieces meet the top piece:
- Press the mitered corners together, making sure they align perfectly.
- Wipe away any excess glue immediately to prevent it from drying on the visible surface.
5. Attach the Casing with Finishing Nails
Once the casing is in place and the joints are glued, secure the casing to the wall using finishing nails or a nail gun:
- Drive nails into the door frame, spacing them about 12-16 inches apart along the length of the casing.
- Make sure the nails go through the casing and into the door frame to ensure a strong attachment.
If you’re using a hammer and nails, be careful to drive the nails gently to avoid damaging the wood. Use a nail set to sink the heads slightly below the surface for a smooth finish.
6. Check for Gaps and Adjust
After the casing is nailed in place, check for any gaps between the casing and the wall or frame:
- Use shims behind the casing if needed to fill any uneven areas and create a flush fit.
- Check again with a level to ensure the casing remains plumb and aligned.
7. Fill Nail Holes and Gaps
For a professional finish, use wood filler to fill any visible nail holes:
- Apply the filler over the holes and use a putty knife to smooth it out, making sure the filler is flush with the surface.
- Once the filler dries, lightly sand the areas for a seamless finish.
Additionally, apply caulk along the edges where the casing meets the wall to fill any small gaps or imperfections.
8. Caulk the Seams
Apply a thin bead of caulk along the joints and seams where the casing meets the wall and frame:
- Use a caulking gun to apply a smooth, continuous line of caulk.
- Smooth it out with a damp finger or caulk tool to create a clean, polished look.
Caulking seals the gaps and gives the casing a more finished, professional appearance.
9. Prime and Paint or Stain
Once the casing is installed and all the gaps are filled, you’re ready to paint or stain:
- If you’re painting, apply a coat of primer before your final paint color.
- For staining, make sure the wood is sanded smooth before applying your chosen finish.
Let everything dry completely before reattaching any door hardware or touching the casing.
Bonus Tip: Use Pre-Cut Casing Kits For a faster installation, consider using pre-cut door casing kits. These kits come with the mitered cuts already done, making the installation process even easier—especially for beginners.
Installing door casing

Materials and tools for door casing
Installing door casing is not difficult nor time consuming, if you use the right materials and tools. Consequently, beside the actual door casing, you also need a spirit level, a hammer, a miter saw and 20-30 finishing nails.
The door casing should match the design and the color of the interior door, consequently you should choose the one which fit your needs and tastes.

Measuring head casing
The first step of installing door casing, is to mark the cutting lines on the head trim. Consequently, you should use a spirit level over the top casing as to make sure it is aligned. In addition, you should place the casing at about 1/2” from the bottom of the door header.
Make one mark on one side of the casing, just over the corner joint of the door jamb.

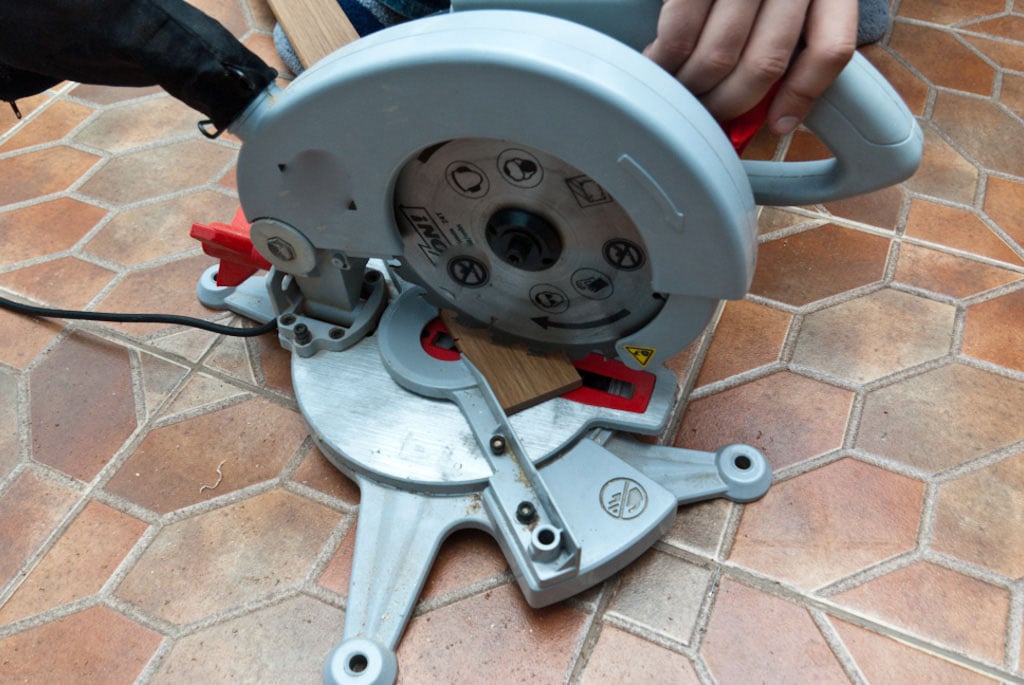
Cutting door trim with miter saw
Next, you have to use a miter saw to cut the door casing at 45º. Make sure the blade of the miter saw is exactly over the mark, otherwise you will get a wrong cut. We recommend you to make the cut progressively, otherwise you will have to sand the edge.
While you use the miter saw, you have to use safety glasses, as to avoid any possible injuries. In addition, make sure the miter saw is locked into position, otherwise it might move during the process.

Marking cut line on door trim
After you have made the 45º cut, you should make the mark on the opposite side. Although it is possible to make both cuts from the very beginning, we recommend you to proceed like this, as it is much safe (by making both cuts at once, you can make a mistake much easier).
Make sure you use the spirit level over the top casting, otherwise your joints won’t be perfect.

Installing head door casing
After you have made the cuts, by using the miter saw, you should secure the casting by driving in several finishing nails. Make sure you use a hammer and a couple of finishing nails, to secure the top casting into position. We recommend you not to tap the nails definitively, but to let 1/4 of them out. In this way, in case the side castings won’t fit, you can remove it without any issues.
When driving in the nails, make sure you don’t damage the jamb.

Marking side door casing
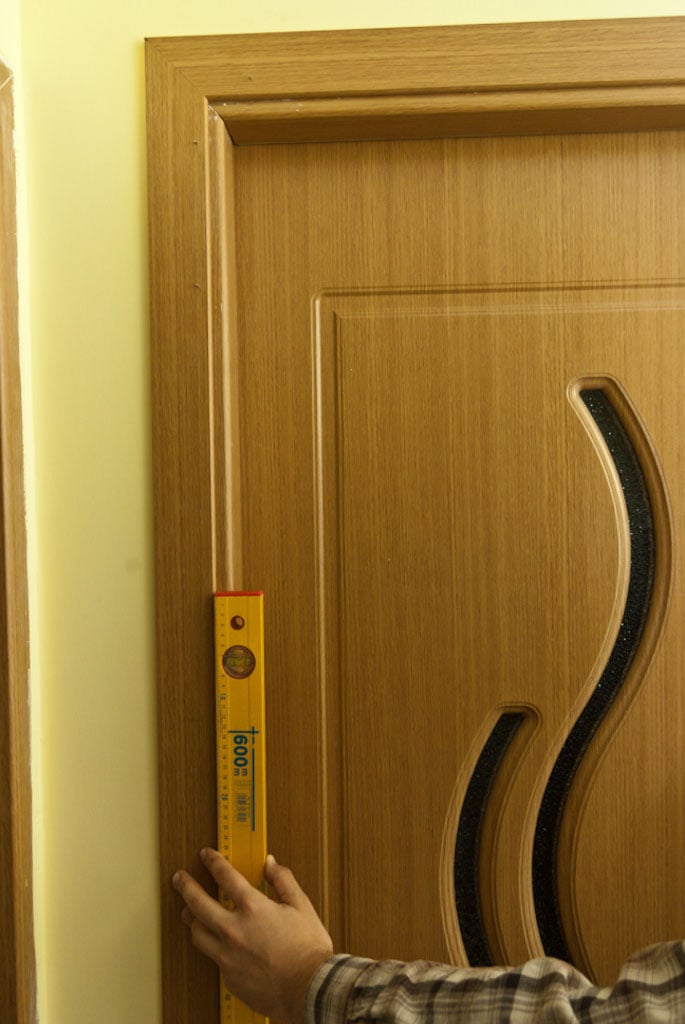
Next, you have to install the side castings. Consequently, use a spirit level as to make sure it is plumb, and make a mark as to cut it at 45º. In order to get a nice appearance, do not leave any gap between the side casing and the floor. If the casing doesn’t touch the floor, it is very hard to conceal this gap.
It is important to leave the same space around the door jamb on all sides, otherwise you won’t be able to make the corner joints properly.

Making sure door casing is plumb
After you have made the 45º cut, it is time to fit it into position, as to check if it aligns properly. In addition, you also have to use a spirit level, as to make sure the casting is plumb. As you can notice in this image, the casting doesn’t have all sides even, that is why you should pay attention while you make the cuts.
Work with patience as to avoid any mistake during the process. If you set the miter saw at 45º and you take accurate measurements you will get the job done in a professional manner.

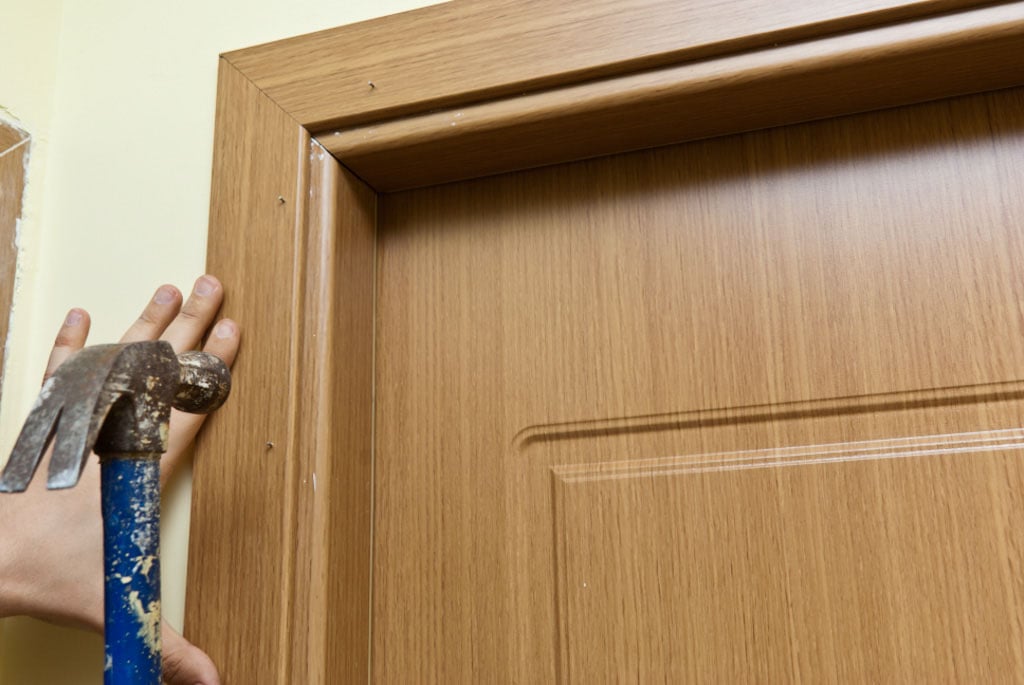
Fastening door casing with finishing nails
In order to fasten the side door casting, you should drive in finishing nails every 10-15”. While you insert the nails, you should use the spirit level, as to make sure the casting is plumb. In order to secure the trim properly, you can insert nails both in the door jamb and in the wood studs.

Door casing diy
In this image, you can see how the door casing looks, after you have installed 2/3 of the of the door casing. As you can see, installing door casing changes dramatically the look of your doors and adds personality to your home.
On the market, there are so many options that you can find door casting that will match your needs and tastes. From our experience, if the door is installed properly, it is better to install casting directly on the door jamb, rather than cut them and connect them together.

Installing door casing
Next, you have to continue installing door casing on the other side of the door, by using the same techniques as described above. You should drive finishing nails every 10-15” around the door casing, otherwise there might remain gaps between the door casting and the jamb.
After you have inserted the finishing nails you might consider them too noticeable. In this situation, you can caulk them by using a good paintable caulk. After the caulk has dried out, you can paint the small dots with a similar color as the door casing.
By following these steps, you’ll be able to install door casing that looks professional and enhances the overall appearance of your home. With a bit of patience and attention to detail, you can achieve a flawless finish that adds value to any room.
Thank you for reading our article on installing door casing, and we recommend you to check out the rest of our projects. Please share our projects with your friends, by using the social media widgets.
