This article is about how to install a tile to tile transition. Installing a transition between two ceramic tile surfaces improves dramatically the look of your flooring and helps you to lock them into place professionally. In this diy step-by-step guide, we show you our way to install an aluminum transition strip for tiles, as to help you save some money or get the satisfaction of a proper job done by yourself. Either way, we recommend you to read carefully our article, pay attention to the following aspects and buy the transition which fits both your needs and tastes. Installing a tile to tile transition is not difficult, either we speak of a concrete or a wooden sub-floor, provided you work with attention and use the right material and tools.
Tile to tile transitions come in a large variety of shapes and locking systems, as there are transition strips which should be fitted along with the ceramic tile flooring or transitions which are locked on a metal track. There are both very efficient, therefore your choice should be made according to your specific needs and tastes (the strips are made usually from aluminum, while the regular transitions can be made of wood or composite materials).
Before buying the tile to tile transition, you should measure the needed length, so use a tape measure to calculate the necessary. If you install the tile to tile transition between the doorway, you need a short piece (up to 3′ / 1 m). If you have to install a tile to tile transition on a large area, you should buy the transitions as to have the fewest cuts and joints (also add 10-15% for cutting waste).
Made from this plan
In order to install tile to tile transition, you need the following:
Materials
- Thinset mortar / premixed mastic
- Transition from tile to tile
Tools
- Safety gloves, Eye protection
- Drill machinery with mixing palette
- Bucket, Rubber hammer
- Saw
Tips
- Read carefully the manufacturer’s instructions, before installing the transition into place
Time
- Half an hour
How to install tile to tile transition

Fitting tile under door jambs
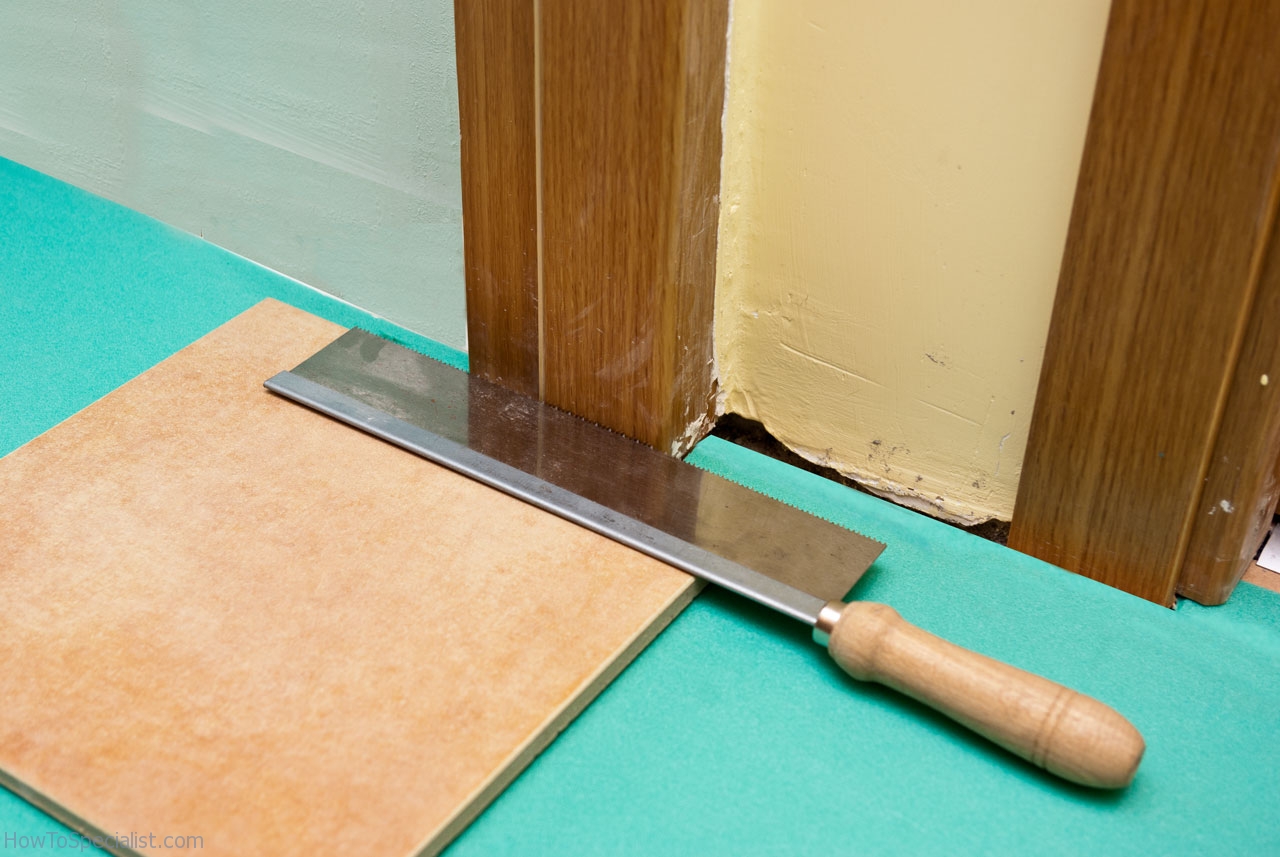
First of all, you might want to fit the transition strip and the tiles under the doorway. In this case you have to decide from the very beginning, before laying the tiles in the room, otherwise it would be impossible to cut the jambs in a professional manner.

Installing transition from tile to tile
Next, you should use a tape measure to determine the needed length of the transition. In addition, use a vacuum cleaner to remove all the residues and dust between the two tile surfaces and measure the distance between the doorway.

Aluminum transition
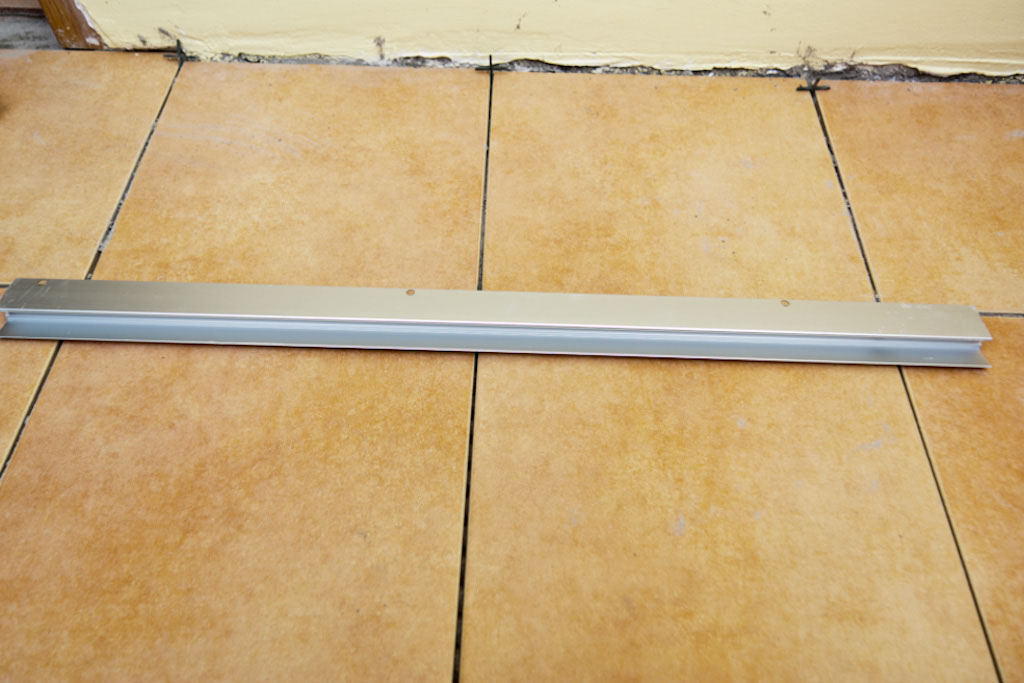
In this image, you should notice the aluminum transition we are going to install from tile to tile. It is a modern aluminum transitions strip, which has to two main components.
On one side of the junction, the tiles should go inside the transition, while on the other side the transition covers the edges of the ceramic tiles. Therefore, in our case, the U-shaped side of the transition will be installed towards the surface on which we are going to install the remaining ceramic tiles.

Cutting transition from tile to tile
After you have measured the needed dimension, you have to mark the cut line on the transition, using a pencil. Next, you should cut the transition with a miter box and a saw, as to get an accurate cut. Vacuum the residues and smooth the cut edges with a sand-block.

Installing temporarily tile to tile transition
After you have cut the tile to tile transition, you have to install it temporarily inside the doorway, as to check if it fits properly. In addition, measure the dimensions at which you have to cut the missing tiles.
In the image, you should also notice a few holes in the base of the transition. The holes are made to lock the transition into position, by fastening a few screw. While in some cases this is highly recommended, in other you don’t have to insert the screws, as the tiles might not fit inside the transition because of the screw heads.
Tile to tile transition

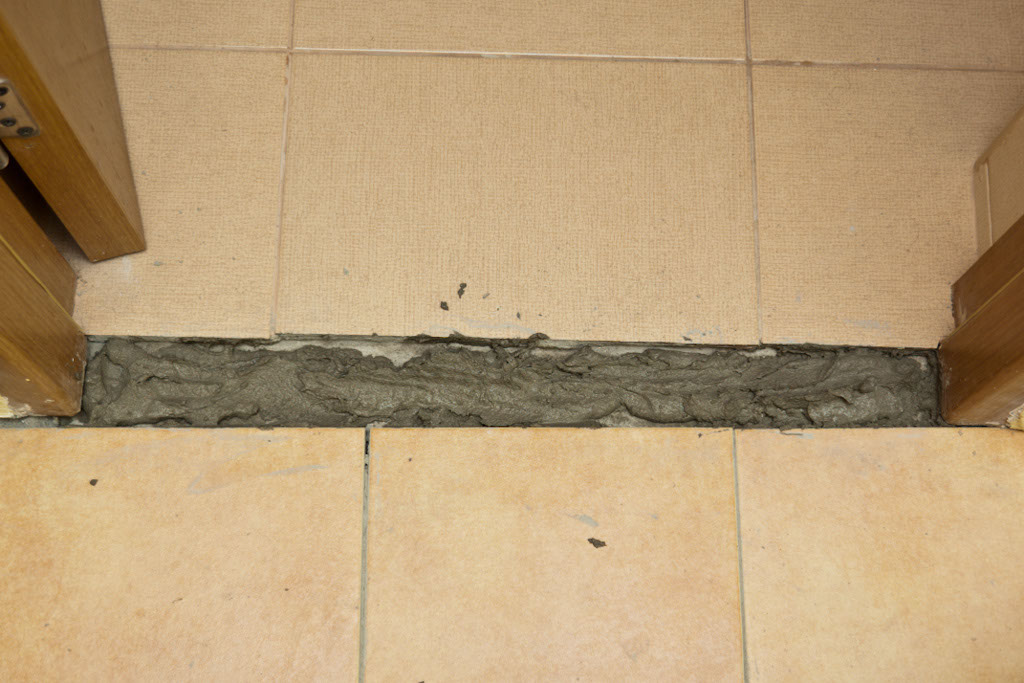
Spreading adhesive to install transition
Mix thinset adhesive and spread it on the floor, before installing the tile to tile transition. In order to spread an uniform layer of ceramic tile adhesive, you have to work with a lot of patience and use a notched float.
Remember that the tile adhesive will dry out very quickly, so you have to spread it on the floor after you have cut the missing ceramic tiles. In order to learn how to cut ceramic tiles, you could read our article regarding this issue.

Installing tile in transition
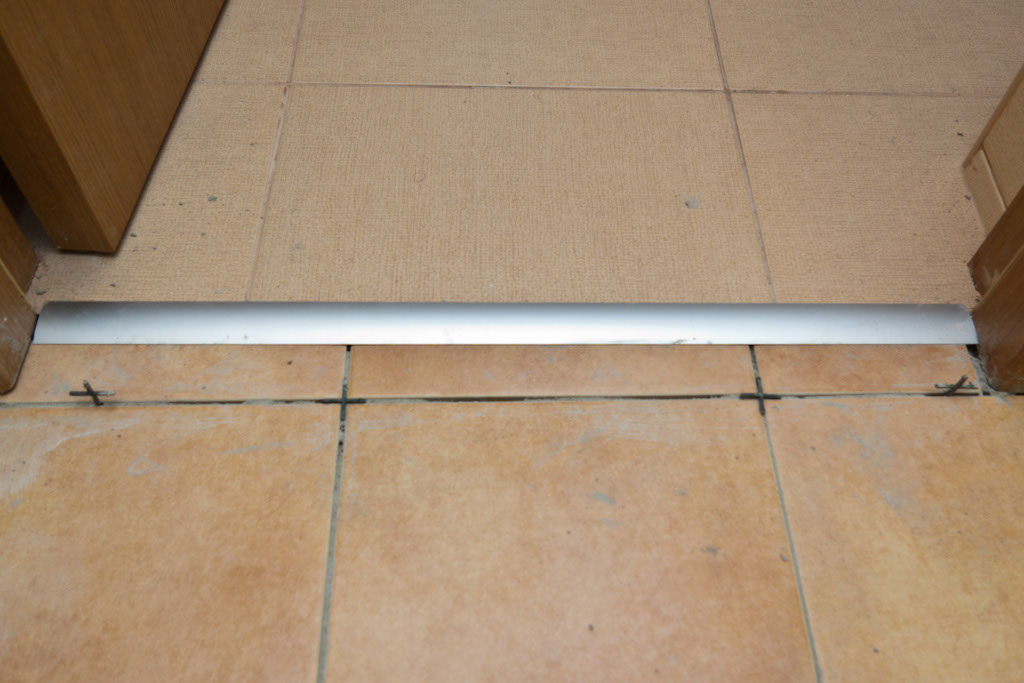
After you have spread the tile adhesive on the floor, you have to install the missing ceramic tiles in the tile to tile transition. Work with great care, as you might push thin set adhesive in the transition and the tiles might not fit in it because of that.

Transition from tile to tile
After laying the tiles inside the transition, you have to check for one last time if the floor is level and if the transition is aligned properly. Remember that after the adhesive has dried out, you won’t be able to adjust them by any mean.
Best tips for installing tile transitions:
Installing a tile-to-tile transition is essential for creating a smooth, seamless flow between different tiled areas, especially where two different types of tile or tile patterns meet. Here are my best tips to help you get a professional-looking tile transition:
1. Choose the Right Transition Strip: Start by selecting a transition strip that matches the height and style of your tiles. Options include metal, wood, or vinyl strips that come in various finishes like aluminum, brass, or even color-matching options. T-shaped transition strips work well for areas with equal tile heights, while **ramp transitions** are ideal when one tile is slightly higher than the other.
2. Check Tile Heights: Before you install the transition, ensure both tile surfaces are level or understand if there is a slight difference in height. If there’s a difference, make sure to choose a **ramped transition strip** to create a smooth incline between the two surfaces and prevent tripping hazards.
3. Leave a Gap for Expansion: Always leave a small gap (about 1/8 inch) between the tiles where the transition will be installed. This space allows for natural expansion and contraction of the tiles and provides room for the transition strip to fit snugly.
4. Dry Fit Before Installing: Before securing the transition strip, dry fit it in place to ensure it fits correctly and the gap between the tiles is even. Adjust the position of the strip or trim it as needed to achieve a perfect fit.
5. Secure with Thinset or Adhesive: If you’re using a transition strip that sits directly on the floor (like a metal or wood strip), apply thinset mortar or adhesive to the back of the strip and press it into the gap between the tiles. For transition strips that have a mounting track, install the track first using screws or adhesive, then snap the transition strip into place.
6. Use Screws for Track-Mounted Strips: For transition strips with a track system, make sure to use screws to secure the track to the subfloor or concrete. Then, once the track is secure, snap the transition strip into place, ensuring it’s firmly locked in and level with the surrounding tiles.
7. Match Grout or Caulk: To ensure a clean look, match the grout or caulk around the transition strip to the grout color of your tiles. If you’re working with a metal strip, using matching caulk can create a neat finish and also allows for more flexibility, reducing the risk of cracking.
8. Consider a Schluter Profile: If you’re looking for a sleek, modern transition between tiles, Schluter profiles are a great option. They offer a variety of styles, including trim edges for tile-to-tile transitions, providing both protection and a polished finish.
9. Check for Level and Stability: Once the transition strip is installed, check that it’s level with the tiles on either side. Step back and test it for stability—make sure it’s secure and won’t shift over time or with foot traffic.
By following these tips, you’ll achieve a smooth, durable transition between your tiles that enhances both the appearance and function of your tiled spaces!
Thank you for reading our article on how to install tile to tile transition and we recommend you to check out the rest of our projects. Don’t forget to SHARE our articles with your friends, by using the social media widgets. LIKE us to be the first that gets our latest projects and to help us create more free tutorials.
