This article is about how to install tile around door jamb. Cutting tile around door jamb is easy if you take the right measurement and you use the right tools. When installing tile flooring, in most of the cases you will face the issue of installing ceramic tiles around door jamb, as to get a nice appearance. In this article, we will show you step by step how to measure properly, how to cut the tile and install it around doorway in a professional manner.
If you really want to get the job done in a professional manner, we strongly recommend you to cut the door jamb and to fit the tiles under. In this manner, you will get a continuous tile surface and the end result will be stunning. Nevertheless, if you don’t want to cut the door jamb or it is not possible, you can still get the job done and install the tiles in a professional manner.
From our experience, we strongly recommend you to use a good wet saw when cutting out the tile, as to fit into place. In most of the case you need to make notches in the tiles, which is not possible to do with a regular score-and-snap cutter. If you don’t have a wet saw, you can rent a small one for the nearest diy store. Even if this will increase the total costs of the project, the investment will really pay off on the long run. See more step by step tile projects HERE.
Made from this plan
In order to install tile around door jamb, you need the following:
Materials
- Thinset mortar / premixed mastic
- Ceramic tile
Tools
- Safety gloves, eye protection
- Drill machinery with mixing palette
- Bucket, Rubber hammer
- Wet saw
Tips
- It is better to cut the door jamb, as to fit the tile under it
Time
- 30 minutes
How to cut tile around door jamb

tile-under-door-jamb
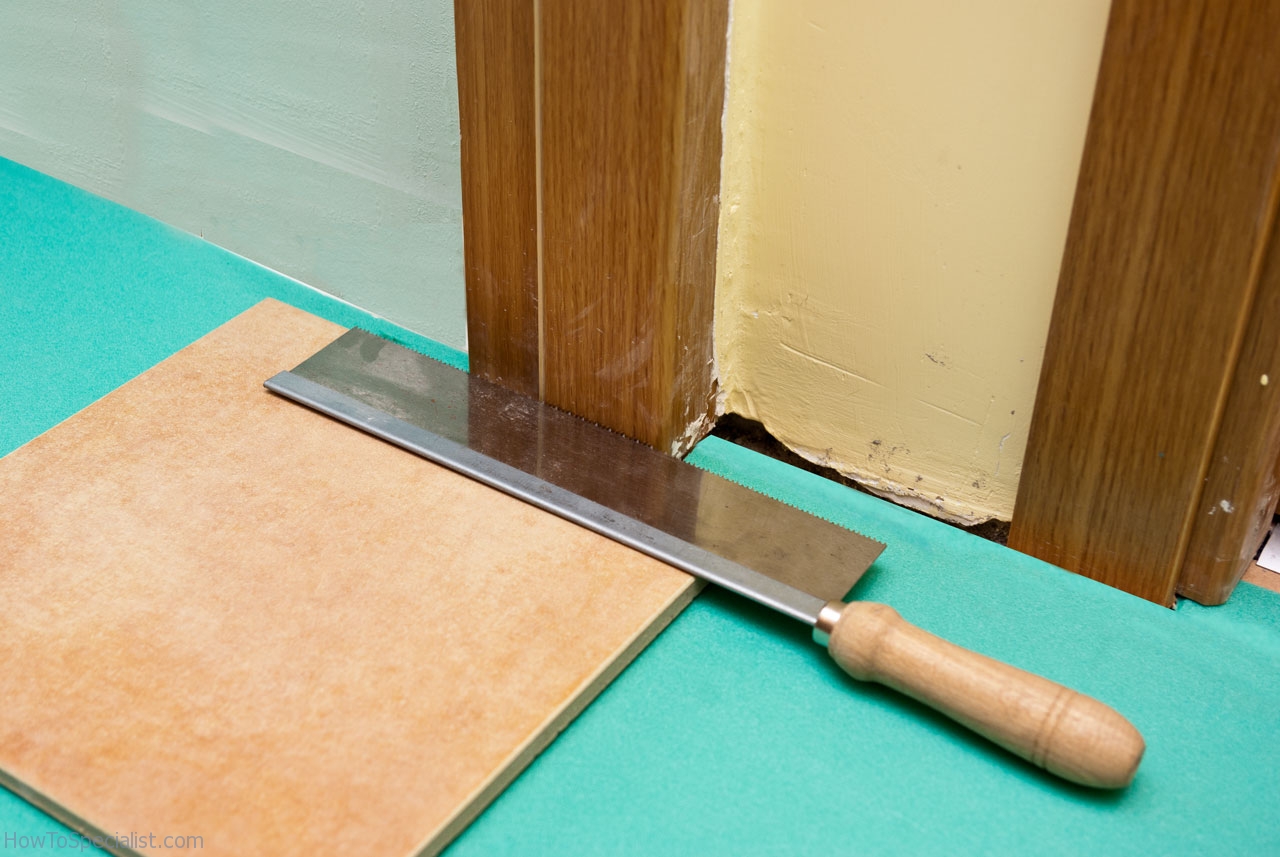
Generally speaking, there are two main techniques related to installing tile around door jambs. On one hand, you can mark the tile and cut it out as to fit around the wooden jambs. On the other hand, you can choose to cut the door jamb, as to lay the tile under it.
If you prefer the second technique, you have to use a pull saw. Place a large piece of underlay (it should have the same thickness as the layer of thin-set) on the sub-floor and the tile on top of it. Next, use a pull saw to cut the door jambs, by holding it perfectly level.

Marking tile around door jamb
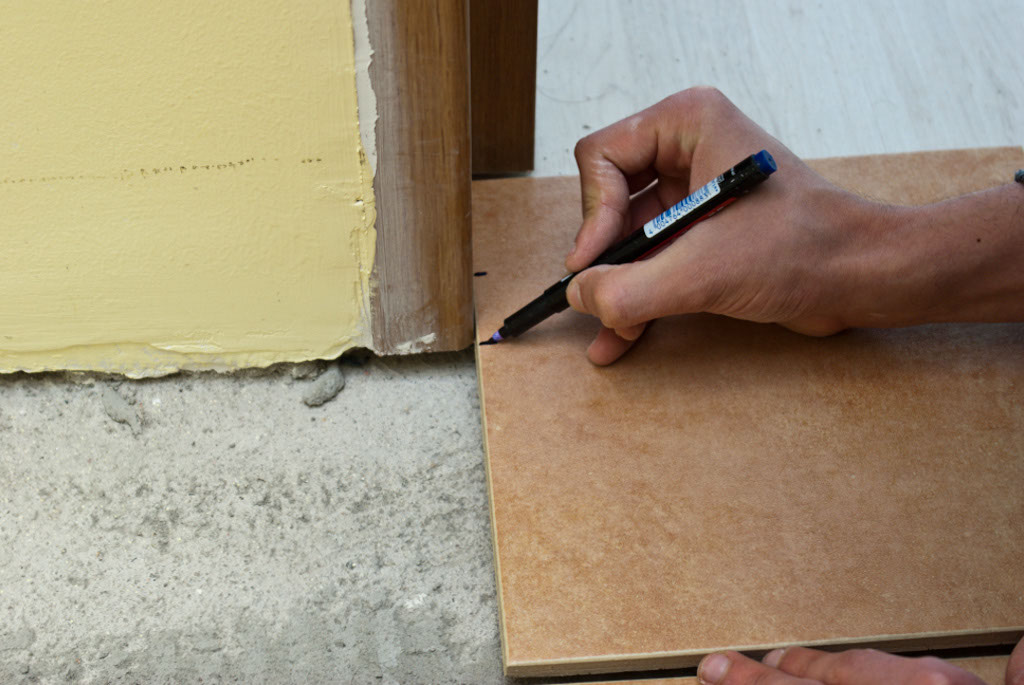
If you prefer the second technique, you have to draw marks on the tile, as to fit around the door jamb. Consequently, you have to lay the tile on position and draw the cut lines, by using a pencil. Make sure you take accurate measurements, otherwise you will have to repeat the process until you make the marks properly.

Making marks on tile
Next, we have to draw another mark on the tile, as to fit inside the transition. Align the tile properly before drawing the marks, otherwise it won’t fit into location. Once you take the accurate measurements and mark the cut lines, almost 50% of the project is done. Installing the tile into place is relatively easy, as compared to the preliminary stages.
Make sure you take the right measurements, otherwise you will have to cut another tile. Remember that when marking the tile, you have to leave space for the grout between the tiles.

Measuring tile around door
Last but not least, we have to make the final mark on the tile, as to fit alongside the wall. It might look a complex operation, but it is straightforward and very easy if you work with great care.
Make sure you make accurate marks, otherwise you will have to redo the whole process.

Marking cut lines on tile
After you have drawn all the marks on the ceramic tile, you have to use a level or an l-square to draw the cut lines. Consequently, make sure the line is drawn properly, otherwise the tile won’t fit in the location.

Cut lines on tile
After you have drawn the cut lines, it is better to hatch the area which will be cut out from the tile. Remember that this operation is not necessary, but it should help you visualize better the area you have to cut out from the tile.

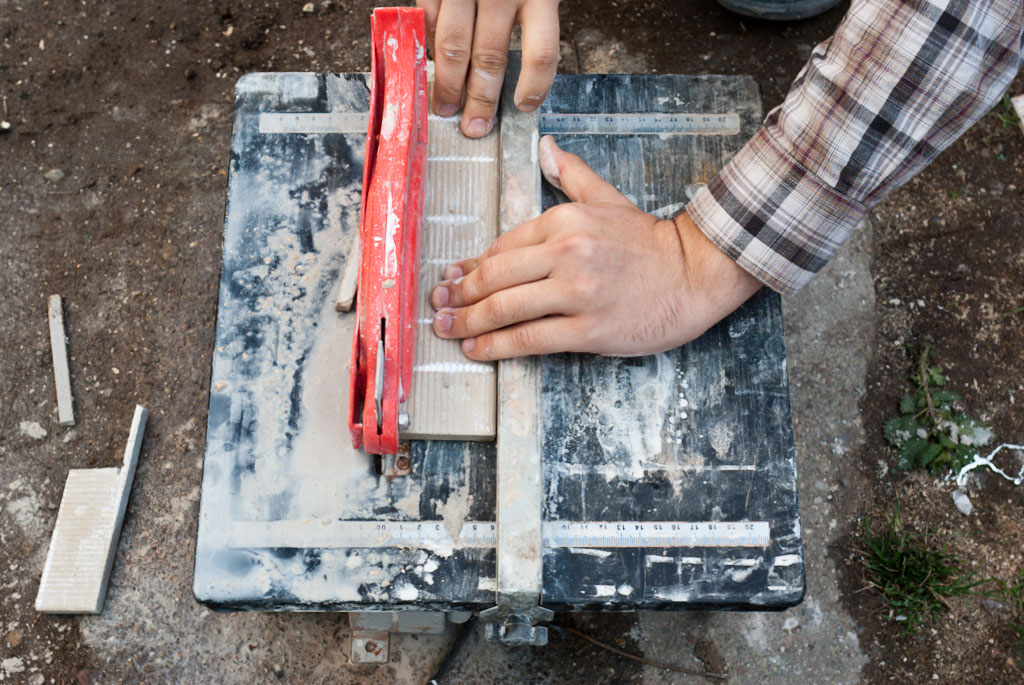
Cutting tile with a wet saw
In order to make a complex cut, you have have to use a wet saw. Although these wet saws come at a high price, they make the most accurate cuts, so you could at least rent one for a day. Place the tile on the support and adjust the guidance fence, making sure the blade goes exactly over the cut line. Don’t force the tile, otherwise you might break it or get poor cut edges.
How to install tile around door jamb

Cut tile for door jamb
In this image you can see the cut tile, that we will install around the door jamb. Before fitting it into location, we recommend you to wash it thoroughly, as afterwards it will be hard to have access to it.
Before installing the tile around the door jamb, you should check it attentively, as to make sure it is not scratched or damaged.

Installing tile around door jamb
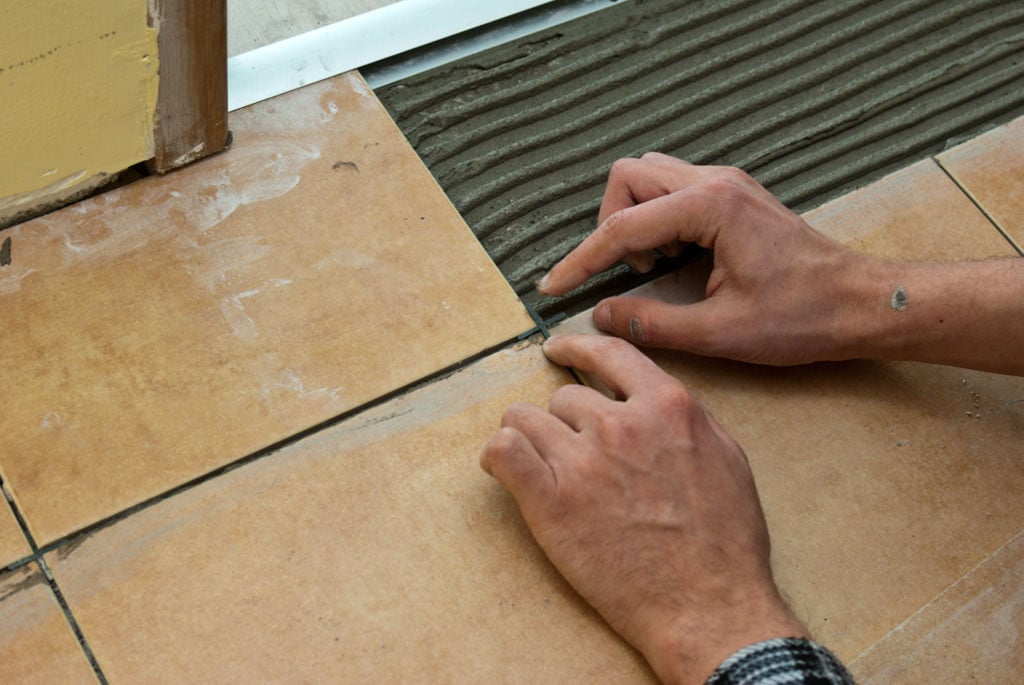
Before installing the tile around the door jamb, you should mix tile adhesive and to spread it on the area, by using a notched float. Make sure you spread the thinset evenly on the whole surface, otherwise you will have to adjust the tile to be level with the rest of the floor.

Installing tile spacers
Last but not least, you have to install tile spacer, as to make sure you do the job in a professional manner. In addition, you will have to tap gently the tile with a mallet, as to make it level with the rest of the floor. Use a spirit level to ensure it is horizontal and aligned with the rest of the floor.
Best tips to install tiles around door jambs
Installing tile around a door jamb requires precision to ensure a clean, professional look. Here are my best tips to help you get it right:
1. Undercut the Door Jamb: To get a seamless fit, use a handsaw or a jamb saw to undercut the door jamb. The idea is to cut the jamb just high enough so the tile can slip underneath it. This gives you a more polished finish compared to cutting the tile to fit around the jamb.
2. Measure and Mark the Tile: Measure the space carefully and mark the tile where it needs to be cut. Make sure to account for any necessary gaps for grout. Use a pencil or marker to draw your cut line for accuracy.
3. Cut the Tile Carefully: For straight cuts, use a manual tile cutter or wet saw. If you need to make a notch or L-shaped cut to fit around part of the jamb, a wet saw works best. For more intricate cuts, tile nippers can help to carefully chip away at small sections.
4. Dry Fit the Tile: Before applying adhesive, dry-fit the tile in place to make sure it fits snugly under the door jamb. This helps ensure the cut is accurate, and you won’t have any surprises when you’re ready to set the tile.
5. Apply Thinset and Set the Tile: Once you’re happy with the fit, apply thinset adhesive to the floor, making sure to spread it evenly. Set the tile in place, gently pushing it under the door jamb for a snug fit. Use spacers to maintain even grout lines between tiles.
6. Use a Rubber Mallet: If needed, use a rubber mallet to lightly tap the tile into place, ensuring it sits level with surrounding tiles and fits snugly under the jamb without forcing it.
7. Grout and Finish: After the tiles have set, grout the joints, making sure to wipe away any excess grout before it dries. Be careful not to overfill the gap between the tile and the jamb. If necessary, use caulk around the door jamb for a clean, flexible finish.
By following these steps, you’ll achieve a tight, professional finish when tiling around a door jamb, leaving no gaps or awkward cuts.
Thank you for reading our article on installing tile around door jamb and we recommend you to check out the rest of our projects. Don’t forget to share our projects with your friends, by using the social media widgets.
