This article is about how to install interior door. Consequently, in this article we show you how to choose the right door to fit your needs and tastes, how to make sure it is level and how to install it using polyurethane foam. As a homeowner you will face a lot of situations when after a remodeling, you have to install a brand new door, as to freshen up the dull appearance of a room. That is why, you could install the door by yourself, as a diy project, to both save a few bucks and to enjoy the result of your own work. Installing an interior door is not a difficult nor a time-consuming project, but you have to learn few basic techniques, as to get the job done in a professional manner.
[dropcap]1.[/dropcap] First of wall, you have to use a tape measurement, in order to know the size of the door you will install. Consequently, make sure the angles of door entrance are right cornered, and that the space between the door frame is even. In addition, it is as important to measure the distance between the door sill up to the top jamb. With these dimensions in mind, it would be easier to find the right door for your tastes and needs. There are a lot of alternatives on the market, from ready to finish up to finished doors, with or without glass or painted in a large variety of colors.
[dropcap]2.[/dropcap] On the other hand, your new door may come in several varieties: you can order a pre-hung or a slab door. The first option is the best, from our point of view, as it spares you from a great amount of work; in addition, it is pretty difficult to assemble the door jamb and to install the door hinges, especially if you haven’t done it before. Consequently, buy a pre-hung door although it comes at a higher price, as o get rid of a lot of headaches.
[dropcap]3.[/dropcap] There are several ways to fix a door, according to the material of your walls: if you house is made of timber, the most efficient way is ti fix the door using nails, on the other hand, if you live in a house made of bricks or concrete blocks, it would be easier to use polyurethane foam.
[dropcap]4.[/dropcap] If you have to replace an old door, it is a good idea to remove it before installing the new door. Consequently, you should start with removing the door castings and then the door hinges. Nevertheless, you should remember that the door is quite heavy, so it would be wise tho call a friend to assist you while removing the old door and installing the new one. Last but not least, you should remove the door frame and the door sill (if it was part of the old door, otherwise you should replace if it’s in bad condition).
Made from this plan
In order to install an interior door, you need the following:
Materials
- Pre-hung door
- Polyurethane foam / 3” nails
- Spacers
Tools
- Safety gloves, safety glasses
- Measuring tape, framing square
- Pencil, T-square
- Ceramic tile cutter
Tips
- Make sure the door is level, before fixing it
Time
- Two hours, two persons
My best tips on installing a door using foam:
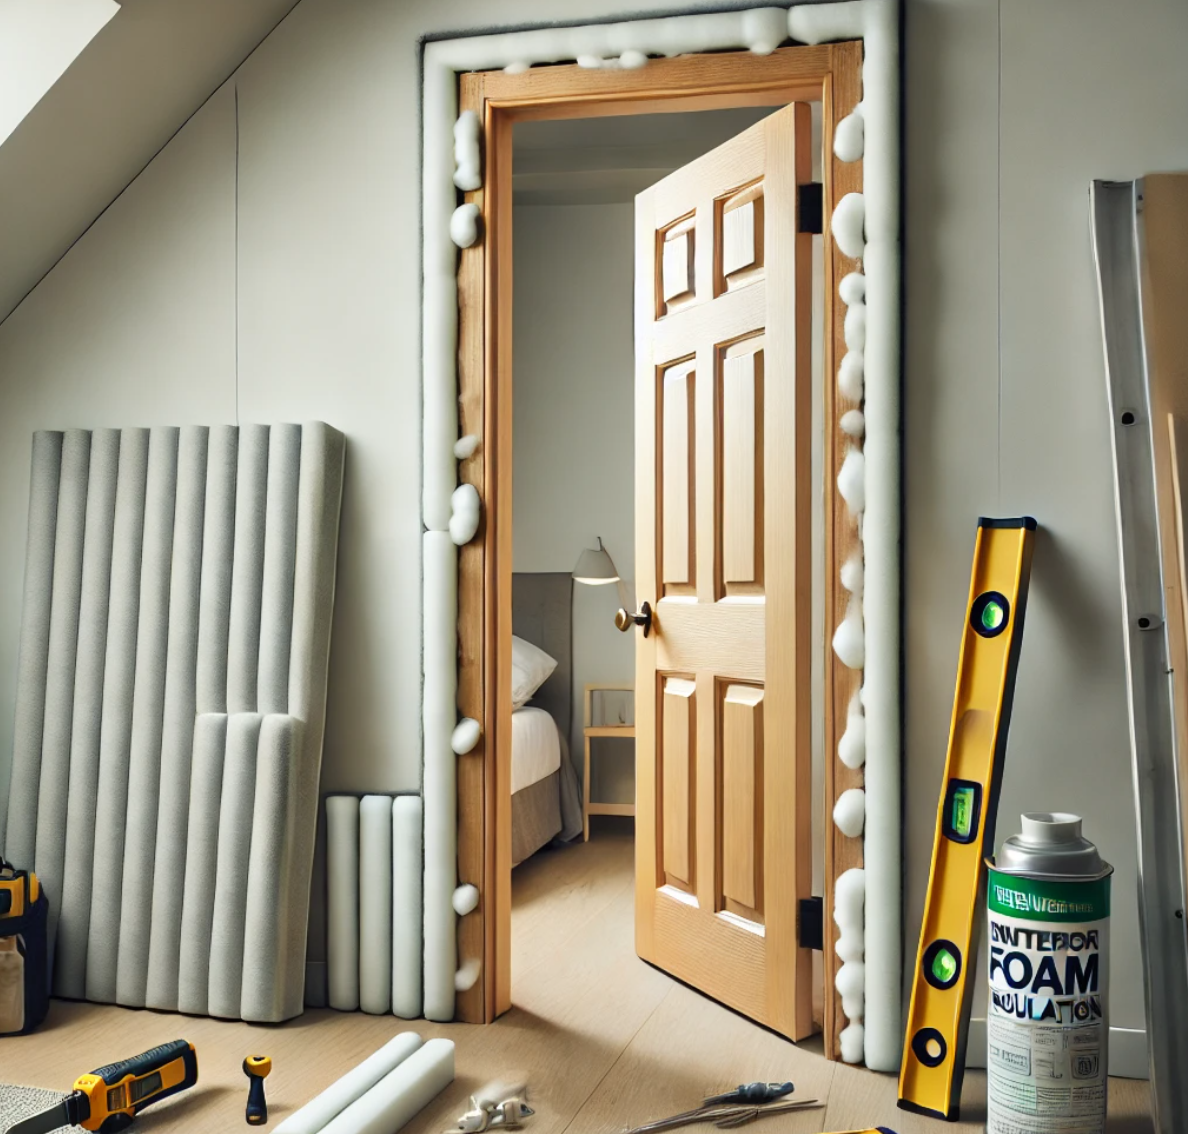
Installing an interior door can seem like a straightforward task, but ensuring a snug, draft-free fit takes some skill. Using foam insulation during installation helps seal gaps and improves both energy efficiency and soundproofing. Follow these steps to install an interior door using foam insulation for the best results.
1. Gather the Right Tools and Materials
Before you get started, make sure you have all the tools and materials needed for the job:
- Pre-hung door
- Shims
- Level
- Tape measure
- Hammer and nails or screws
- Foam insulation (low-expansion foam specifically for doors and windows)
- Utility knife
- Trim nails and nail set
- Caulk
- Wood trim/molding (optional)
2. Check the Door Frame Opening
Measure the door frame to ensure your new pre-hung door will fit properly. The rough opening should be slightly larger than the door to allow room for adjustment. Check that the opening is square and level—use shims to correct any unevenness before proceeding with the installation.
3. Dry Fit the Door
Before securing anything, do a dry fit of the door to check for alignment. Place the door frame into the opening and make sure the door opens and closes smoothly. Use a level to check the plumb of the door frame on both sides, and make sure the gap between the door and the frame is even all around.
4. Use Shims to Level and Adjust the Door
Place shims behind the door frame on the hinge side, starting at the top and working your way down. Insert shims on the opposite side as well, making adjustments as needed to keep the frame plumb and level. The shims should hold the door firmly in place but shouldn’t distort the frame. You can temporarily tack the door in place with nails or screws.
5. Secure the Door Frame
Once you’re satisfied with the door’s position, fully secure the frame by driving nails or screws through the frame and shims. Make sure you place nails or screws at the hinge locations and at the strike plate for a sturdy installation. Be careful not to over-tighten, as this could warp the frame.

6. Apply Low-Expansion Foam
To fill any gaps between the door frame and the rough opening, use low-expansion foam insulation. This type of foam is designed specifically for doors and windows, so it won’t expand too much and warp the frame. Apply the foam sparingly, filling the gaps between the shims around the door frame.
Tip: Be sure to read the instructions on the foam can, as it will continue to expand slightly after being applied. You don’t need to overfill the gaps—just apply enough to fill the space evenly.
7. Trim the Excess Foam
Once the foam has fully cured (usually a few hours, depending on the product), use a utility knife to trim away any excess foam that may have expanded past the surface of the wall. Be careful not to damage the wall or door frame.
8. Install the Door Trim
After the foam has been trimmed and the door is securely in place, install door trim or molding around the door frame to cover the gap between the door frame and the wall. Use trim nails and a nail set to secure the molding in place, making sure to use caulk to seal any gaps between the trim and the wall.
9. Check the Door Swing and Fit
Once the trim is installed, check that the door opens and closes smoothly. Adjust any hardware, such as the hinges or strike plate, as necessary to ensure a proper fit. The door should open easily without rubbing against the frame or sticking.
Bonus Tip: Seal Around the Trim For a clean, finished look, apply a bead of caulk along the edges of the door trim where it meets the wall. This helps seal out drafts and gives the installation a professional touch.
Preparing to install the new door

Measuring the width of the door opening
First of all, you have to make sure the door opening is clean of residues and it is prepared to install the new door. If you want to replace an existing door, then you have to remove it together with the door frame and jamb. This job is pretty difficult for an unexperienced diy-er, so you could either hire a qualified professional or ask a skilled fried to assist you.
After you have removed the old door, you have to use a tape measurement to determine the width of the door opening and the distance between the bottom sill and the header. In this way, you will be able to buy a new door which will fit your door opening.
Installing the pre-hung door

Making sure the door jamb is level
If you have bought a pre-hung door, then in most of the cases the hinges are already installed. Nevertheless, if they aren’t, you should use 2” wood screws and an electric screwdriver to fix the door hinges to the jambs.
Next, you should position the frame and the door inside the opening, of course with the help of a fried, as they are quite heavy. Next, move them until you find the perfect fit. Make sure you have left a clearance space between the door and the floor, otherwise your door wont open – you could make sure the space will not decrease during the process by using 2 spacers (1/2 – 1”).
Afterwards, use a spirit level, to check if the door is aligned properly. Use the level on the side jambs, on the head jamb and on the door itself. If the frame is not aligned properly, you have to install door shims to correct the alignment.

Fixing a piece of timber between door jambs
Install the door shims in the place where the door is not leveled. In order to obtain a perfect result, you should use shims of different dimensions until you notice the frame is aligned properly.
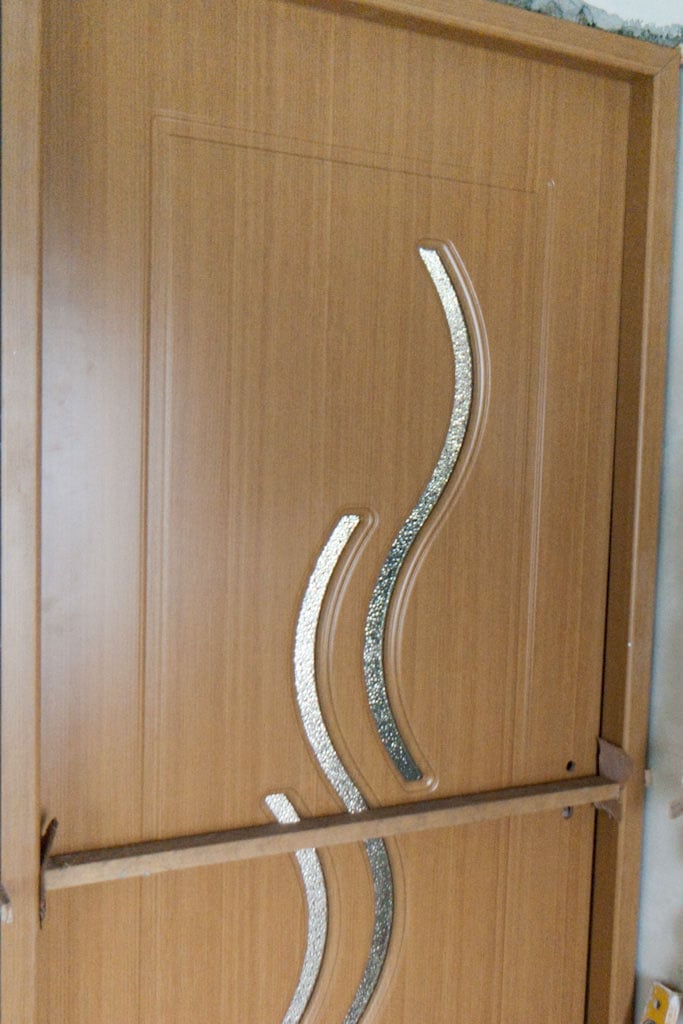
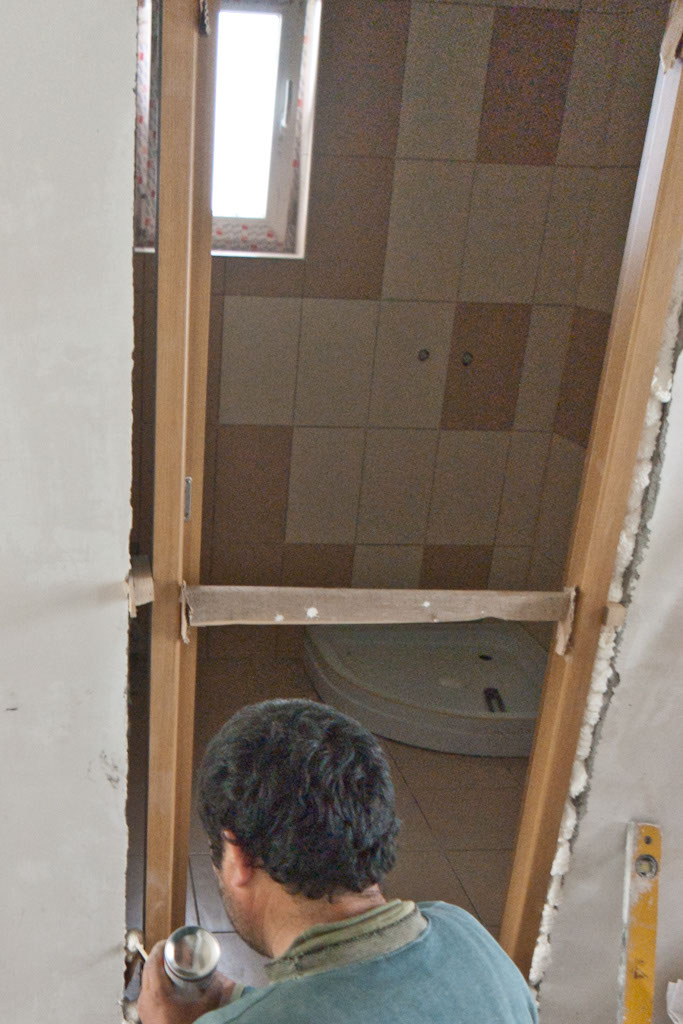
Next, you should use a piece of timber to make sure the polyurethane foam will not push the frame off its position. Consequently measure the distance between the door jambs and cut a piece of timber at that length minus 1/2”. As to protect the door frame from scratches, you should install two pieces of cardboard at both ends of the piece of timber.

Fixing the door jambs with foam
After you have locked the door frame into position, you should make one last check. Just close the door to see if the space between the door and the jamb is even from top to the bottom. If the gap is uneven, then you haven’t installed the shims properly, consequently you have to redo the whole process until you notice the alignment is right.
Next, it is time to install the door permanently, using polyurethane foam. Consequently, use the polyurethane foam to fill the space between the walls and the door jambs. Do not use too much foam, as it expands and it could damage the alignment of your door, but if you have followed our previous guidelines it should turn out good.

Fixing door into opening
Continue applying the polyurethane foam around the door jambs, making sure you do not move the door from its place, otherwise your hard work would be for nothing. Fill the space between the concrete wall and the door jamb with foam, as to obtain a even layer around the whole perimeter.
Remember that before applying polyurethane foam you have to make sure the door is level and it opens properly. In addition, it has to be aligned with the walls of the room, as to be able to install door trims. This aspect is essential, otherwise you would end up with an unpractical door. Last but not least, the door should be fixed firmly in the door opening, using the shims. If the door is not locked into position, it could slide or even injure someone.

Installing door
After you have finished applying the polyurethane foam around the whole perimeter of the frame, you should close the door, as to make sure the center of gravity is aligned with the door frame. In this way, the door will stay on its position and you won’t face any issue with it, after the foam dries out.
Usually, you have to wait at least one day until the door could be opened and the shims and the two pieces of timber removed. Consequently, do not try to use the door until the polyurethane foam dries out completely. Even if the exterior of the foam looks dried out, we ensure you that it has not dried out completely. Therefore, wait just one day until you can use the door at your will.
By following these steps, you can install an interior door with foam insulation that’s properly aligned, sealed, and efficient. The foam will help reduce drafts, sound transfer, and energy loss, giving you a secure and professional-looking result.
Thank you for reading our article about how to install an interior door, and we recommend you to check out the rest or our projects regarding door and windows.

2 comments
Securing a door with only spray foam seems like the worst idea ever and likely not something any professional would ever recommend. I’m all for shortcuts but this just seems mis-informed.
They were installed in a brick house and I can report that 5 years later they are doing really well.