This article is about how to install rubber baseboard molding. Generally speaking, installing rubber baseboard has a dual purpose: on one hand it gives a nice appearance to the walls (it hides the imperfections or the crooked walls) and it protects the base of the walls and the edges against all sorts of impacts or hits.
In most of the cases the wall baseboard moldings are attached directly to walls and not to the floor, as they are very flexible and designed to conceal the curved walls. If you want to install rubber baseboard you have two options: either use a good glue and stick them to the walls of the room, or use nails/screws to fasten them to the walls. We recommend you to choose the first option on drywall and the second one for masonry walls. After you have learned how to install laminate flooring, it is time to show you how to install rubber baseboard.
If you want to install the rubber baseboard on drywall, you have to use a stud finder to identify the spots where you have to drive in the screws. Work with great care as to get the job done in a professional manner, making sure you don’t leave gaps between the baseboard and the walls or between the rubber molding and the floor. If have to attach the rubber baseboard to masonry walls, you have to drill pilot holes, install dowels and then drive in the crews every 15”. We recommend you to use a good drill machinery with hammering function, to make proper holes in the brick walls.
Last but not least, you can also glue the vinyl baseboard to the walls, if you don’t want to drive in screws. Add glue on the back of the rubber molding and then press it against the wall until it secures properly. Make sure you install the rubber baseboard properly, paying attention to its alignment. Don’t forget to check out the rest of our laminate flooring projects, if you want to see more step by step tutorials.
Made from this plan
In order to install rubber baseboard, you need the following:
Materials
- Rubber baseboard
- Plastic accessories for the joints
- 2” screws and plastic anchors
Tools
- Safety gloves, glasses
- Measuring tape, carpentry pencil, l-square
- Stud finder
- Miter saw / miter box
- Drill machinery and drill bits
- Vacuum cleaner
Tips
- Use a vacuum to remove the residues after drilling the holes in the wall
Related
- Episode 1: Preparing the Surface
- Episode 2: Installing the underlay
- Episode 3: Installing laminate flooring
- Episode 4: Installing the baseboard
- Episode 5: Fixing Laminate Flooring Gaps
- Episode 6: Fixing Laminate Flooring Scratches
- Episode 7: Replacing Laminate Flooring
How to install rubber baseboard

Tools for installing plastic baseboard
In order to install the rubber baseboard you will be needing a miter box and a back saw, for performing precision cuts. In addition, in this project we show you how to install rubber or plastic base molding on concrete walls, consequently you also need to buy 2” screws, plastic anchors and the need accessories for your room.
First, you have to measure the length of the walls of your room, as to calculate the needed length of the baseboard. Don forget to add 5-10% for cutting waste. We remind you that rubber baseboard comes in many varieties of shapes and colors, so it is better to pay attention to this aspect before placing the final order. Usually, the rubber baseboard comes in rolls or in bars, so you have to study this aspect as well.

Installing plastic baseboard molding
Next, you have to start the project with one corner of your room, making sure you install the full baseboard in the most visible areas of your room. In most of the cases, these tiny details make a project to be successful, so open your eyes and pay attention while working.
If you have chosen a model which requires joint accessories, then you have to install them at the end of the baseboard while you take the measurements. This particular model of rubber baseboard has two main components: the baseboard on which you can conceal the wires and its cover. In addition, one advantage of installing rubber baseboard is its flexibility, which helps you to mold along the curves of a regular wall.
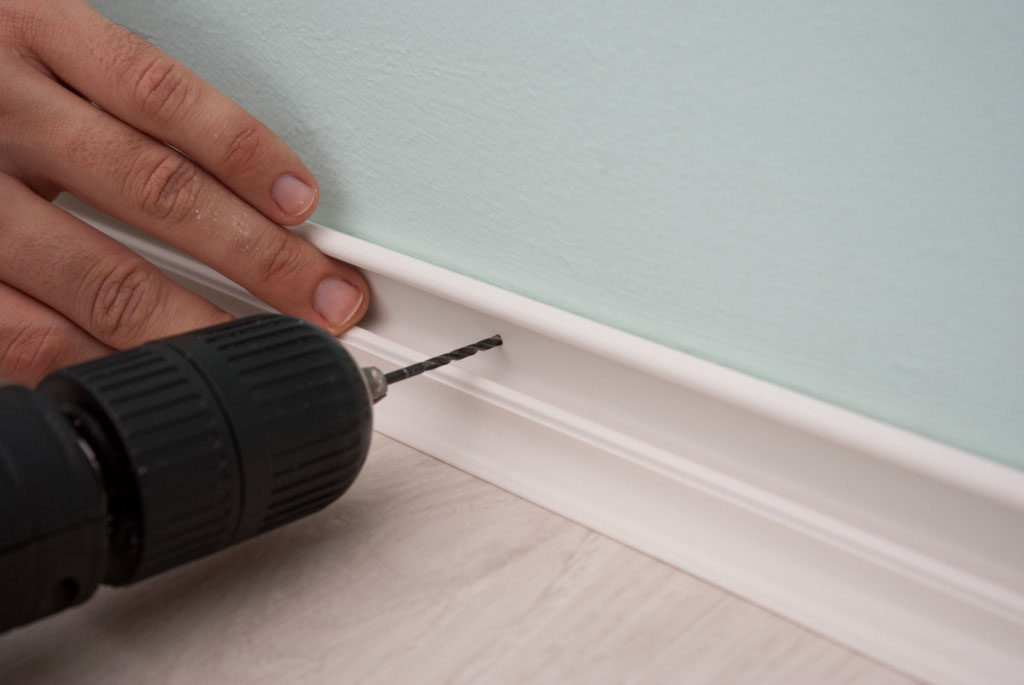
Drilling through plastic molding
Afterwards, you have to use a drill machinery with torque control and a small drill bit. With one hand you have to lock the baseboard into position, making sure it doesn’t move and there is no gap between it and the floor, while with the other hand you should drill holes through the plastic molding, every 10”.

Drilling in wall
Next, you have to enlarge the holes by using a larger drill bit (the size which fits the plastic anchors). Remember that if you drill in a concrete or masonry wall, you have to use drill bits designed for this task. In addition, it is better to use a drill machinery with hammering function and torque control, as to get proper holes.

Cleaning the residues after drilling
Next, you have to use a vacuum cleaner to remove the residues created during the drilling process. This aspect is essential for your project, otherwise you cannot align properly the rubber baseboard.
Installing rubber baseboard is not complex, provided you use the right tools, materials and techniques. The critical step of this project is to align the baseboard trim properly before drilling the pilot holes.
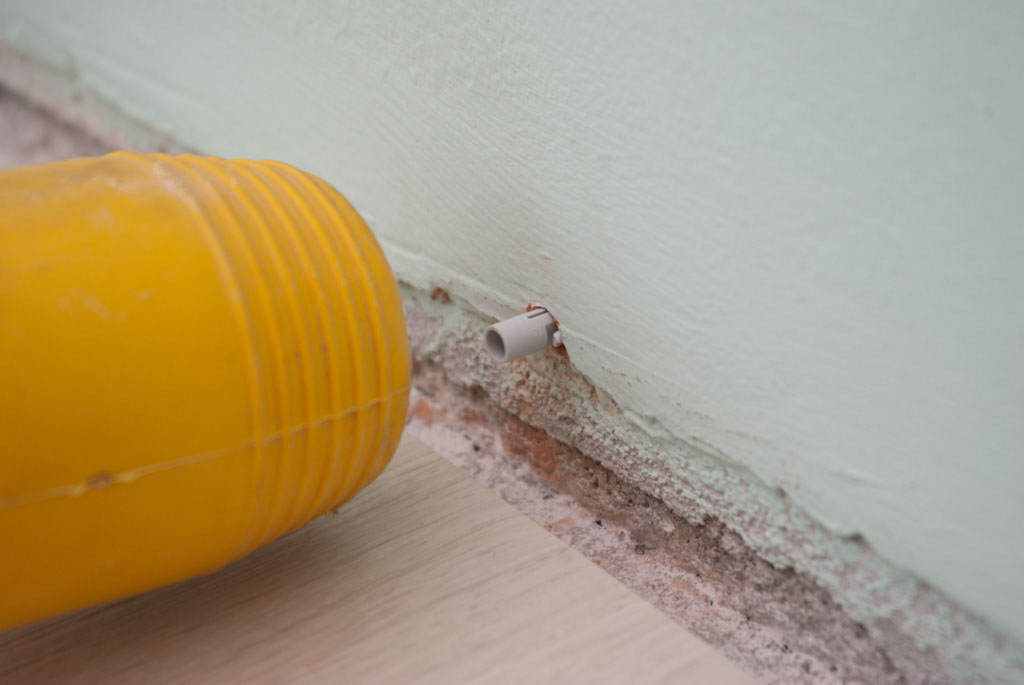
Inserting plastic anchors in wall
Next, you have to insert the plastic anchors in the holes, as to fasten the rubber baseboard with screws. Remember that this is the way we have done this project, which doesn’t mean automatically that you should proceed in the same manner.
It all depends on the structure of your walls and on the type of baseboard trim you have used. Nevertheless, you have to use a mallet (rubber hammer) to insert properly the anchors in the pilot holes. Make sure their heads are aligned with the wall surface.
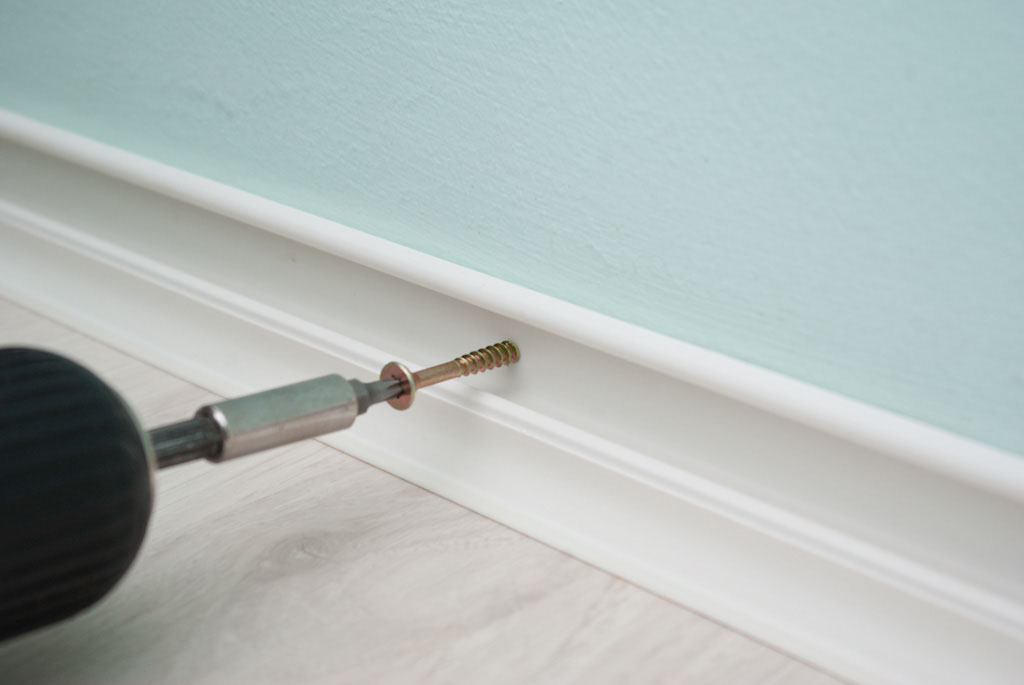
Fastening baseboard trim with screws
After you have installed the plastic anchors in the walls, you have to fasten the rubber baseboard molding, with several screws. Consequently, you should use an electric screwdriver, as to get the job done.
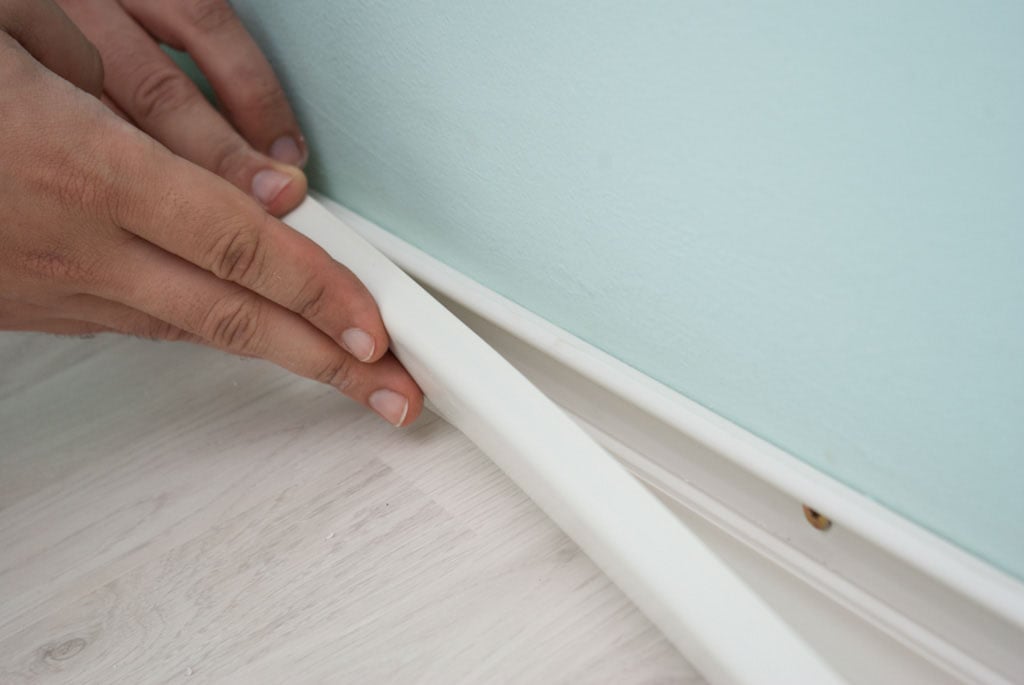
Installing base trim
After you have inserted the screws along the plastic baseboard, you have to install its cover. If you have to install any wires, you could postpone this operation until you finish the whole project.
Installing rubber baseboard around corners

Marking the cut line on baseboard trim
Installing rubber baseboard around corners is a little more complex than the previous steps, so you have to focus to get it done as a professional. The first thing you have to do is to mark the cut line, by using a carpentry pencil. This is a straight-forward operation, so there is no need to emphasize on it.

Cutting baseboard moulding
Then, you have to cut the rubber baseboard by using a miter box and a back saw. You could also use a miter saw, but you have to make sure it has an appropriate blade for cutting plastic and rubber, otherwise you won’t get a precision cut.
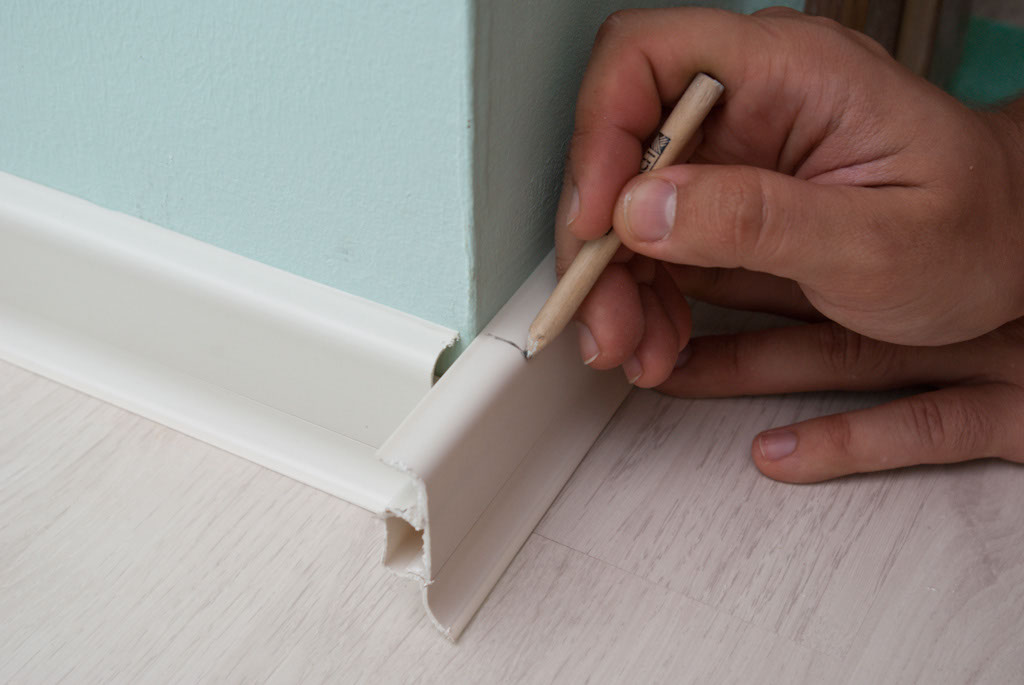
Installing exterior corner molding
Next, you have to take the measurement on the other side of the corner. Just use a carpentry pencil and mark the cut line as to be highly visible, when cutting it with the miter box.

Installing plastic wiremold
Next you have to install the moldings into position by connecting them with a corner accessory. In addition, we have to highlight the fact that you have to install the rubber baseboard in the same way you have proceeded in the previous steps.
Consequently, you have to drill holes every 10”, install plastic dowels and then several screws, making sure the baseboard is secured properly.

How to install plastic baseboard
In this image you should be able to see the way we have installed the rubber baseboard along the walls of a bedroom. In addition, if you look attentively, you can notice the way we have done the interior corner of the room.
Roughly speaking, the procedure is the same, the only thing which has changed is the corner accessory. Make sure you work with patience and you leave no space left between the baseboard and the flooring.
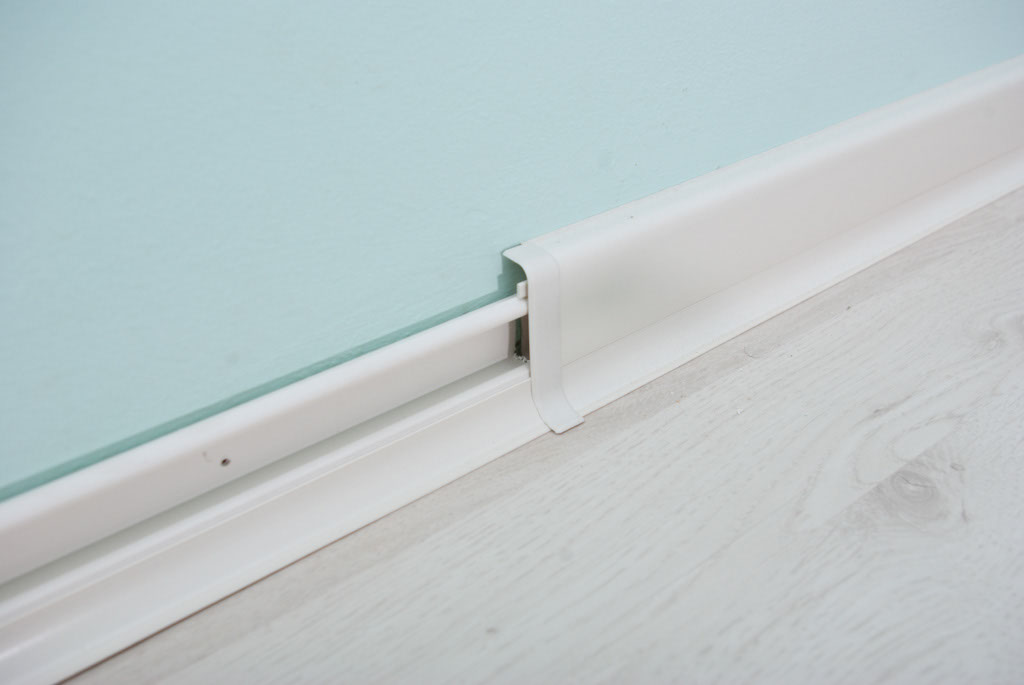
Connecting baseboard molding
If the baseboard is smaller than the length of the walls, you have to connect them by using a special accessory. Consequently, you have to cut another piece of baseboard to fit in the location and join them by using the plastic connector.
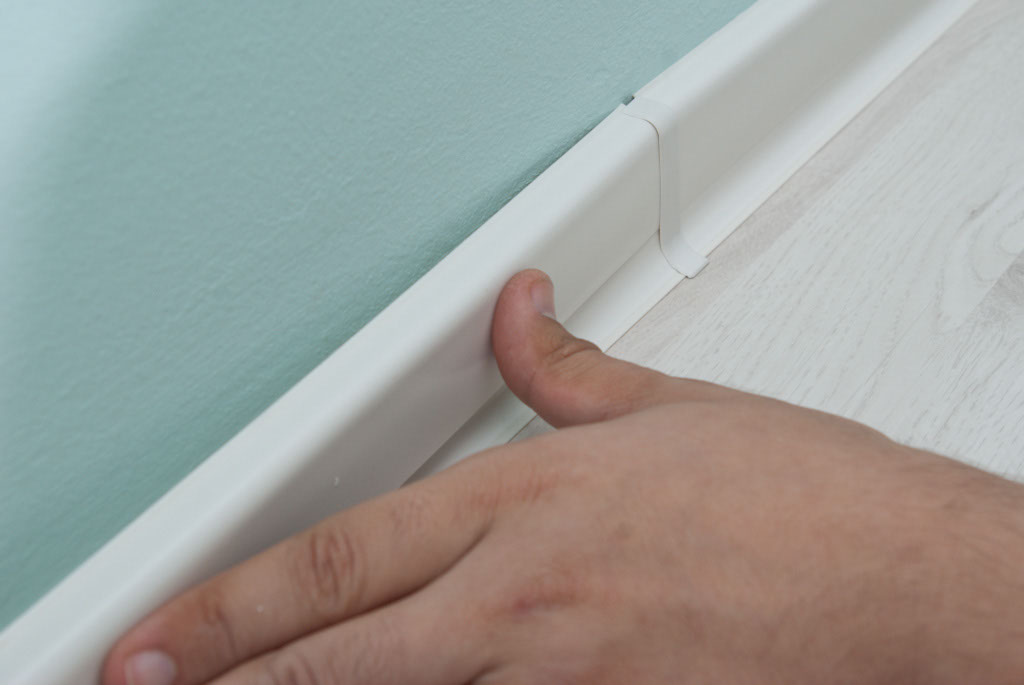
Baseboard molding joint
After you have installed the main part of the wiremold, you have to install its cover. This operation might prove to be a little tricky, but anyone can do it with any problems. You have to be attentive while installing the baseboard, as to make sure the joint between the two pieces is properly attached and it has a look neat.
Nevertheless, if you want to install the baseboard using miter joints, you should read the other article on how to install baseboard trim.

Plastic baseboard trim
You should continue installing the rubber baseboard alongside the walls of your room until you complete the project, by using the technique described previously. Make sure you follow the whole Laminate Flooring Series.
Thank you for reading our article on how to install rubber baseboard and we recommend you to check out the rest of our projects. Please share our articles with your friends by using the social media widgets.

2 comments
OK great but where do I buy this?
Home improvement stores.