This article is about how to cut laminate flooring. Therefore, we strive to show you the best ways to cut laminate flooring planks, as to install it in a professional manner. When redecorating your house, the first thought that comes to your mind is to hire a certified professional to get the job done in the shortest amount of time. Nevertheless, you could save some money and get the satisfaction of doing a project by yourself, if you take the plunge and learn the basic techniques of laminate flooring installation. Therefore, in this step-by-step guide we try to explain you the best ways of cutting laminate flooring by using regular tools (such as a circular saw or a jig saw).
The best way to cut laminate flooring is to buy a laminate flooring saw, as it is designed to perform this task. This tool comes at a high price, as it is a professional saw for cutting and installing laminate flooring on large surfaces. If you cannot afford or you have to install laminate flooring on a relatively small area (up to 100 feet / 30 m2 ), you could try to use other alternatives (cutting the planks with a jigsaw or a circular saw).
For small areas, you could cut laminate flooring with a circular saw or a jig saw. In order to do that, you should use a smart setup, as to cut the planks straight and to avoid chipping their edges. Therefore, you have to use another laminate flooring board or a straight edge to guide the jigsaw or circular saw. Nevertheless, remember that it is essential to lock the laminate flooring planks into position while you use the saw, otherwise you risk damaging them or injuring yourself.
It is essential to take accurate measurements before cutting the laminate flooring, otherwise the boards won’t fit into position even if you make proper cuts. Consequently, we recommend you to take your time when drawing the cut lines on the laminate planks, as to get it right from the very first time.
We recommend you to use a blade with downward-oriented teeth (if you use a jigsaw), if you place the laminate board with the face up, while you make the cuts, otherwise you will chip the edges and the finish. Nevertheless, if you want to use a regular blade, you can still get the job done as a professional by placing the board with the face down. Don’t forget to check out the rest of our laminate flooring projects, if you want to see more step by step tutorials.
Made from this plan
In order to cut laminate flooring, you need the following:
Materials
- Laminate boards
- Spacers
Tools
- Eye protection
- Jig saw / Circular saw
- Level, Carpentry pencil, L-square
- C-clamps
Tips
- Use a smart setup when cutting the laminate boards
- Use a blade with downward-oriented teeth, if you place the laminate boards with the face up
Time
- 5 minutes for every cut
How to cut laminate flooring
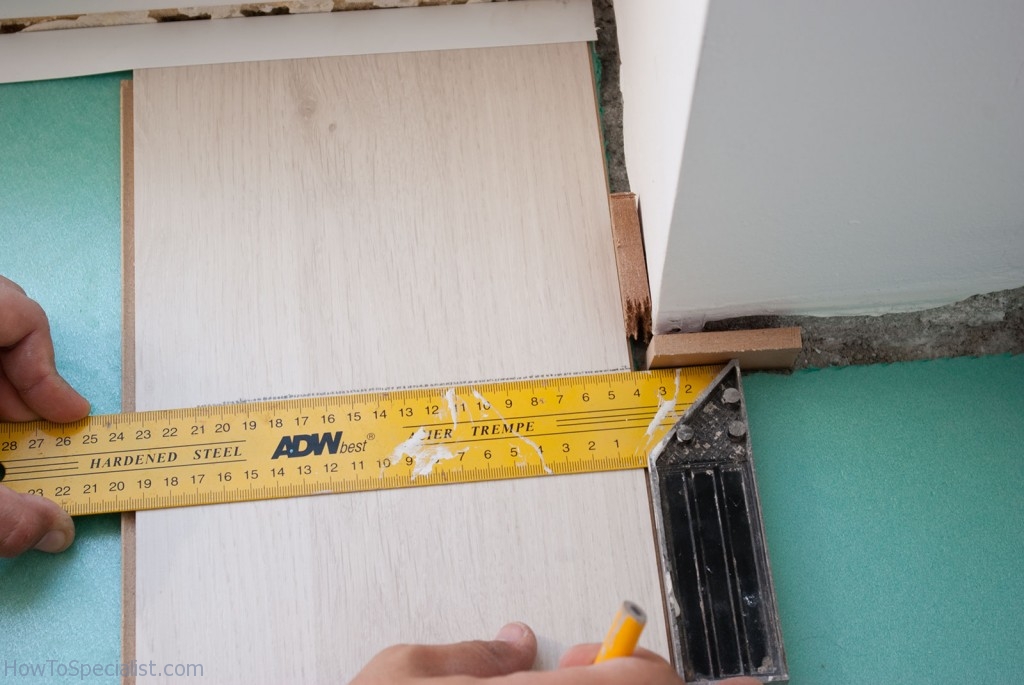
Measuring laminate flooring
Step 1: Take accurate measurements. First of all, you have to draw the cut lines on the laminate boards, by using an L-square and a carpentry pencil. Don’t forget to place spacers along the walls in every direction (1/3” – the laminate might expand in time) and draw the cut lines with great attention.
Step 2: If you have to make a complex cut, around a corner or other item, you could use a paper template. Therefore, take a sheet of cardboard or paper and cut it with a pair of scissors, as to fit into position. Next, use a pencil to draw the cut lines on the laminate boards, based on the paper template.

Cutting laminate flooring
Step 3: Use a straight edge or another laminate flooring plank to guide the jigsaw or the circular saw. Place your board with the top-face up (only if you use a blade with downward-oriented teeth) and lock the straight edge with two C-clamps. In addition, make sure the blade of the jigsaw goes exactly over the cut line, at both ends, before making the cut.
If you use a regular blade (with upward oriented teeth), you should draw the cut lines on the back of the laminate boards.
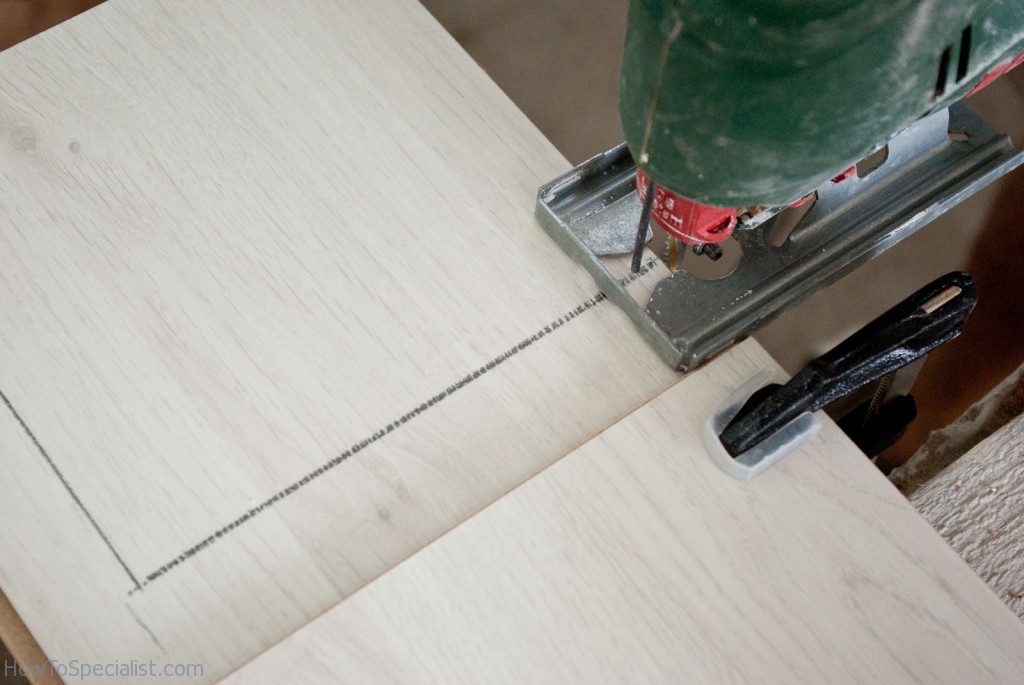
How to cut laminate flooring
Step 4: Cut the laminate flooring board with a jigsaw or a circular saw. Generally speaking, if you don’t use a straight edge (or another laminate plank with a straight edge) to guide the jigsaw, it will wander and you won’t get a straight cut.
Step 5: Make sure you wear eye protection while cutting the laminate boards. In addition, you have to lock the whole setup on several sawhorses, or ask somebody else to hold it firmly into position, while making the cuts.
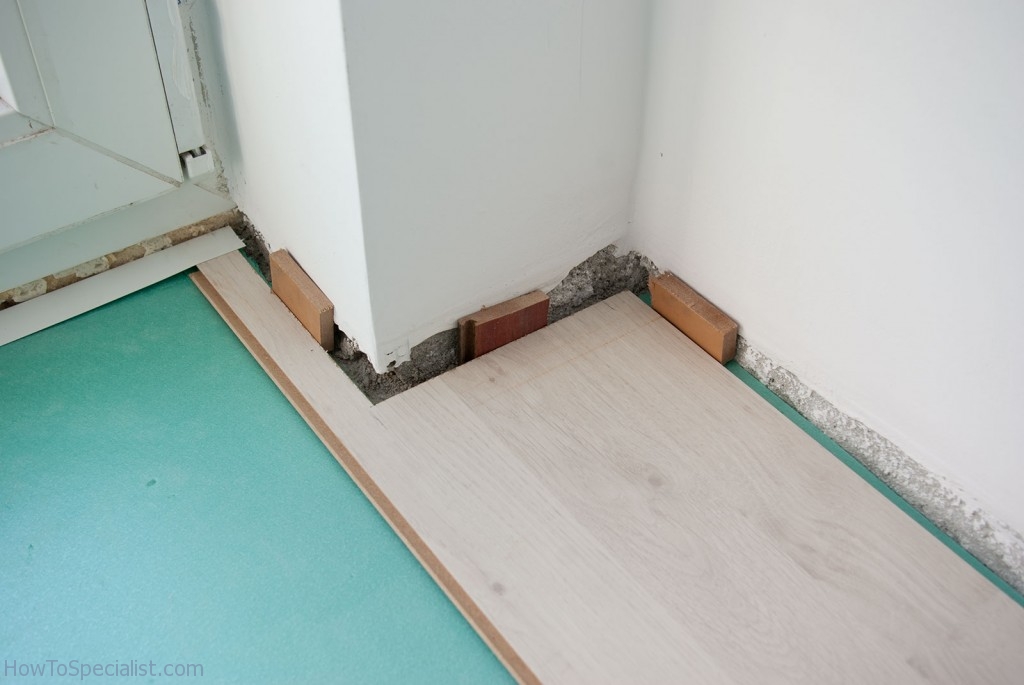
Laying laminate flooring
Step 6: After you have cut the laminate flooring board, you have to lay it on the sub-floor, to see if it fits into position. If you took accurate measurements and used our tips to cut the planks, you shouldn’t have any issue while laying it into position.
Step 7: Remember that you have to place spacers around the walls, otherwise the laminate might expand in time and create issues. Make sure you clean the groove properly, using a vacuum.
Cutting laminate flooring
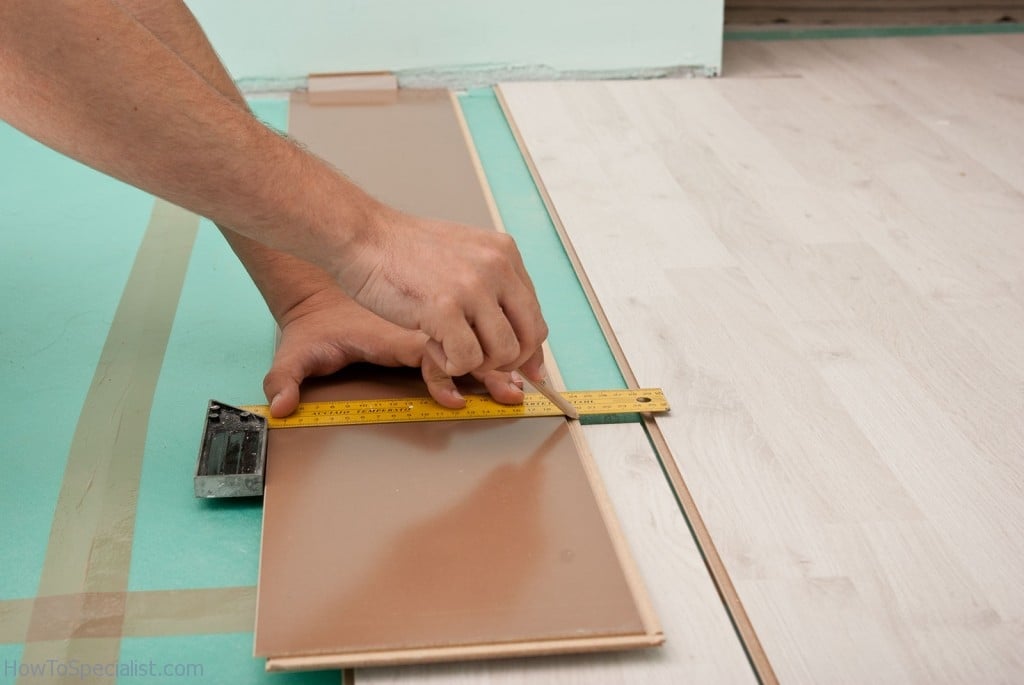
Marking cut line on laminate planks
Step 1: In order to cut the last laminate board in a row, first you have to lay it with the tongue towards the wall (don’t forget to place a spacer along the wall to leave room for expansion). In addition, if you will use a circular saw or a jigsaw with upward oriented teeth you should place it with the face down. Next, use an L-square and a carpentry pencil to mark the cut line on the laminate board.
Step 2: Work with great care and take accurate measurements, otherwise the boards won’t fit into location.
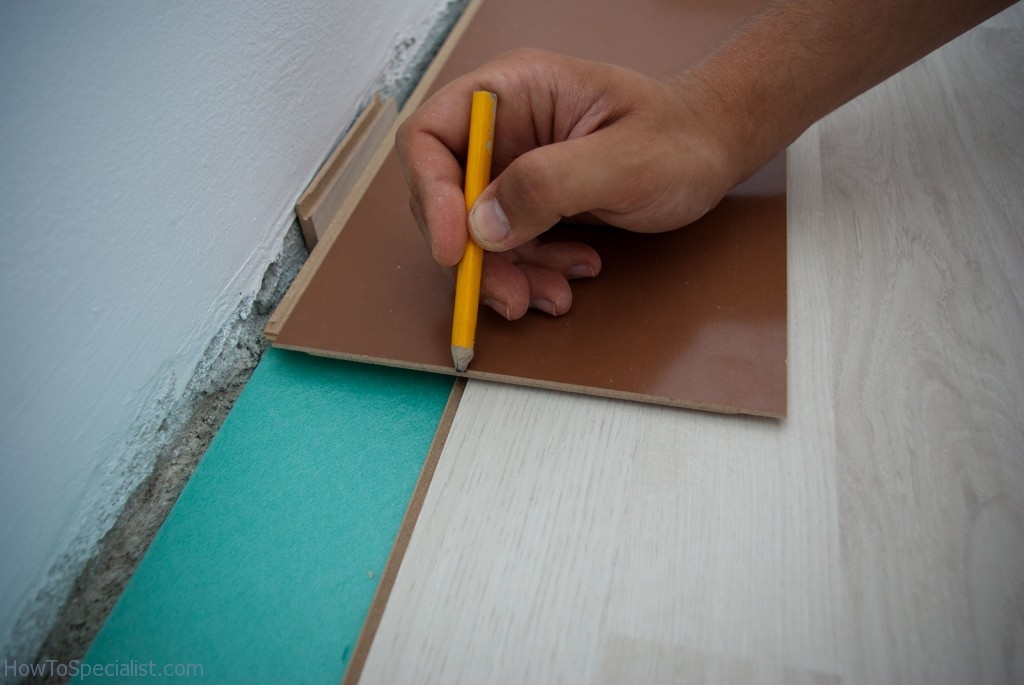
Making marks on laminate boards
Step 3: In most of the cases, you have to cut the last row of laminate planks, as to fit easily along the wall. Therefore, you have to place the boards with their tongues pointing towards the wall and to place spacers at both ends, to leave enough room for expansion.
Step 4: Use a pencil to mark the cut line at both ends of the laminate boards. Pay attention to this step, otherwise you would have to redo the previous procedure until you get it right.
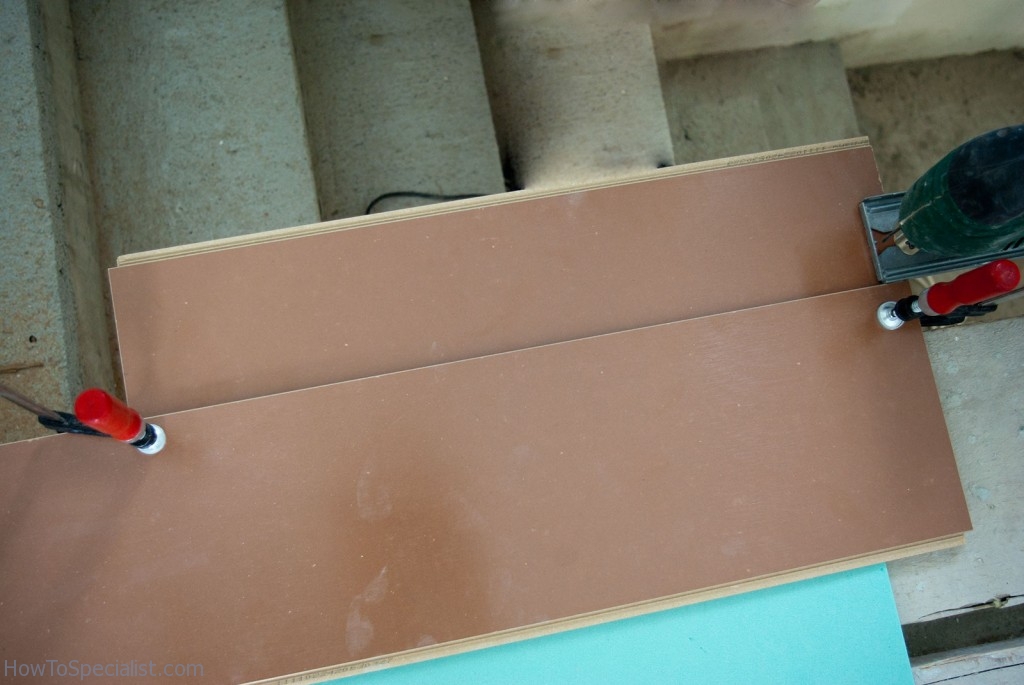
Best way to cut laminate flooring
Step 5: Use a straight edge or another laminate board to guide the jigsaw. Make sure the blade of the jigsaw will go exactly over the cut line and clamp the two components together.
Step 6: Cut the laminate flooring lengthwise, by using a jigsaw or a circular saw. Do not force the power tool and make sure you wear eye protection during the whole procedure.
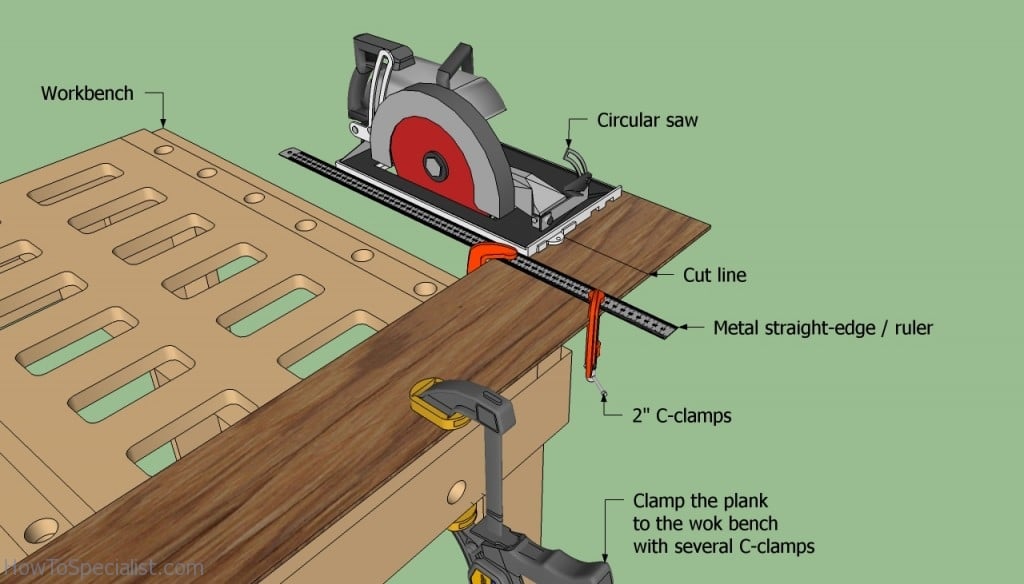
Cutting laminate flooring
If you want to use a circular saw, you should use the same setup described above. Place the laminate plank to a workbench and clamp it in several places. Take the measurement and draw the cut line. Position the circular saw, making sure the blade goes exactly over the line.
Install the straight edges and secure it into place with several C-clamps. If the whole setup is locked tightly, you should proceed to cutting the planks.
Cutting laminate flooring around pipes
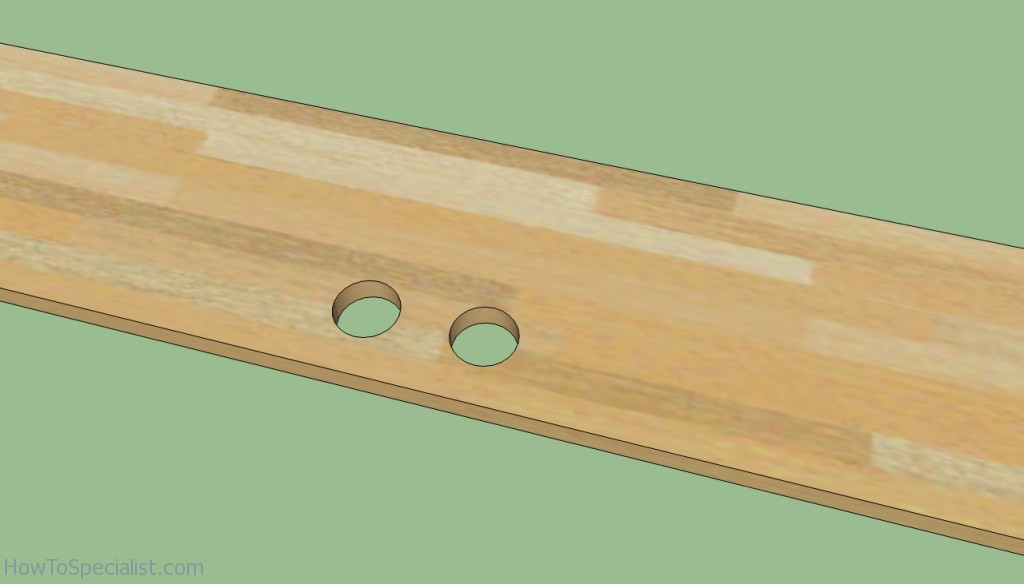
Laminate around pipes
Step 1: Cutting around pipes might look as a difficult task, but in reality it is easy if you use the right techniques. First lay the board around the pipes and measure both their diameter and the distance from the pipes to the wall. Then, draw the circles on the planks (making sure you make them 1/4” bigger to leave room for expansion).
Step 2: Cut the holes in the planks by using a hole saw (attach the hole saw to a drill machinery, lock the board into position and make the round cuts).
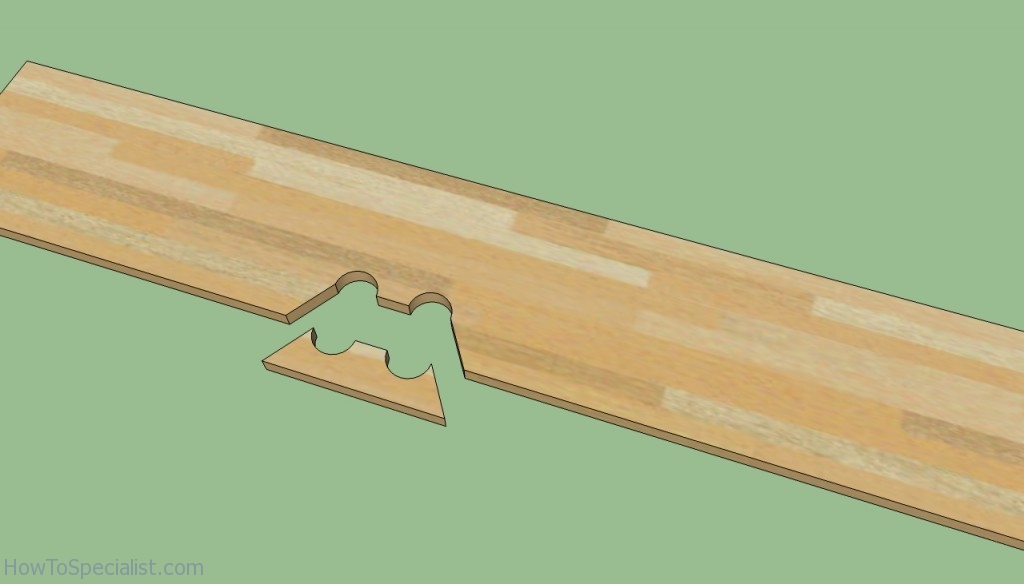
Cutting laminate flooring around pipes
Step 3: Use a jig saw to make two V-shaped cut in the planks. Lay the laminate board into position, around the pipes, and fit the small piece into place. We recommend you to add glue to the edges of the small piece and secure it to the plank.
Best tips to cut laminate flooring:
Cutting laminate flooring can seem tricky at first, but with the right approach and tools, your cuts will be smooth and precise. Here are my absolute best tips for your blog readers:
1. Use the Right Saw: For straight cuts, a miter saw or circular saw with a fine-tooth blade (at least 80 teeth) works best. For intricate cuts around obstacles like vents or doorways, a jigsaw is ideal. A manual laminate cutter is another great, dust-free option for smaller cuts.
2. Cut with the Finished Side Down: When using power saws, always cut with the finished side of the plank facing down to reduce chipping on the visible surface. For hand tools, cut with the finished side up for cleaner results.
3. Mark and Tape Your Cut Line: Measure carefully, and mark your cut line clearly using a pencil or masking tape. Tape over the cut line helps reduce splintering, giving you a cleaner edge when you cut.
4. Go Slow and Steady: Don’t rush the cut! Take your time to feed the laminate through the saw slowly and steadily. A smooth pace helps minimize splintering and ensures more precise cuts.
5. Support Your Boards: Make sure to fully support both sides of the laminate plank while cutting, especially when working with shorter pieces. This prevents the board from bending or cracking as you cut.
6. Undercut Door Jambs: Instead of cutting laminate to fit around door jambs, use a jamb saw to undercut the jamb slightly. This way, the laminate can slide underneath for a professional-looking, seamless finish.
7. Cut Outside to Reduce Dust: Cutting laminate creates a lot of dust, especially with power tools. If possible, do your cutting outside or in a well-ventilated space. Don’t forget your dust mask and safety goggles for protection.
8. Test Fit Before Cutting: Before making any cuts, dry-fit your planks to double-check measurements and ensure everything lines up perfectly. It’s better to measure twice than make a mistake and waste material.
9. Smooth Edges for a Perfect Fit: After cutting, use a fine-grit sandpaper or utility knife to smooth out rough edges, ensuring your pieces fit tightly together without gaps.
Thank you for reading our article on how to cut laminate flooring and we recommend you to check out the rest of our projects. Don’t forget to share our articles with your friends, by using the social media widgets.


