If you’ve ever noticed black mildew creeping along the edges of your bathtub or shower, or felt water seeping into places it shouldn’t, chances are your caulk has worn out its welcome. That soft, white line that once kept water neatly tucked away can eventually dry out, peel off, crack, or grow moldy. And once it fails, water finds its way behind your tiles or walls, setting you up for all kinds of headaches—mildew smells, spongy drywall, even rot. But don’t panic.
Re-caulking may sound intimidating if you’ve never done it before, but trust me—it’s one of the easiest home improvement projects you can knock out in an afternoon, with almost no experience required. In this beginner’s guide, we’re going to walk through the why, when, and how of re-caulking your tub or shower the right way—no fancy tools, no guesswork, just practical steps and a bit of elbow grease. Whether you’re tackling this as part of a full bathroom remodel or simply tired of staring at those grimy seams every morning, you’ll be amazed at how much fresher, cleaner, and more finished your space looks once the job’s done right.
Why Re-Caulking Matters More Than You Think
Caulk may not get much attention, but it’s one of the most important moisture barriers in your bathroom. Its main job is to seal joints and prevent water from sneaking into the cracks between your tub, shower, tiles, and walls. When it’s in good shape, you barely notice it—but when it fails, you definitely will. Over time, even high-quality caulk breaks down due to constant exposure to moisture, changes in temperature, and cleaning products.
Steam expands the material, cool air contracts it, and hard scrubbing (or worse, mold-killing chemicals) slowly eat away at the surface. Eventually, it loses its elasticity, starts pulling away from surfaces, or becomes a breeding ground for mold and mildew. And when that happens, water starts going places it really shouldn’t—behind the tiles, into drywall, or down into flooring. That’s where serious damage can begin.

Signs It’s Time to Re-Caulk
You don’t need a degree in construction to know when your caulk is past its prime—your bathroom will usually start sending signals loud and clear. One of the first things you might notice are small cracks forming along the seal. They may start out hairline-thin, barely visible unless you’re looking closely, but over time, those cracks grow into open gaps that let water through. You might also spot sections where the caulk is starting to lift or peel away from the surface. It can curl up at the edges or pull back from the tub, tile, or wall, breaking that watertight barrier you depend on every time you shower.
Another common sign is discoloration. If your once-white caulk is now a dingy brown, orange, or even black, it’s likely harboring mold or mildew underneath the surface. Mold thrives in warm, damp environments, and old caulk can act like a sponge—so once you see that kind of staining, a deep clean won’t cut it. The only real fix is removal and replacement. You might also notice staining or moisture damage along the wall near the caulk line. These are warning signs that water is seeping behind the scenes, and if left untreated, it could lead to swelling drywall, loose tiles, or worse—hidden rot.
One of the more serious red flags is a soft or spongy feeling in the wall or tile surrounding the tub or shower. If it gives when you press on it, there’s a good chance moisture has made its way behind the surface. In that case, re-caulking alone might not be enough—you may need to investigate further to make sure there isn’t underlying damage to the substrate or framing.
The bottom line? If something looks or feels off, it probably is. Caulk failure usually starts small, but it never gets better on its own. The good news is, catching it early makes for a quick fix. Wait too long, and that easy afternoon project can spiral into something much costlier. So trust your instincts, take a close look at those seams, and don’t wait—because when it comes to keeping your bathroom watertight, fresh caulk is your best friend.
Tools & Materials You’ll Need
Don’t overthink it—this is one of those projects where you don’t need a workshop full of tools to get pro-level results. A few basic supplies and a little patience go a long way here. Start with something to remove the old caulk—a sharp utility knife works just fine, but a dedicated caulk removal tool can make the job easier and cleaner, especially in tight corners or around curves. You’ll also want some painter’s tape, especially if you’re after nice clean lines. It’s technically optional, but for beginners or anyone who wants a tidy finish, it’s a game-changer.
Once the old caulk is out, you’ll need to prep the surface. Grab some rubbing alcohol or white vinegar to wipe everything down and kill off any lingering mildew. Clean rags or paper towels will help you dry and polish the surface before applying the new caulk. Next, get yourself a caulk gun. A simple manual one is more than enough—no need to go battery-powered unless you’re doing a dozen bathrooms in a row. The key piece of the puzzle is the caulk itself. Don’t cheap out here or grab the wrong formula off the shelf. What you want is 100% silicone caulk, specifically labeled for bathrooms or wet areas. Look for words like “mildew-resistant,” “waterproof,” and “for kitchen and bath.”
And yes—wear gloves. Silicone is sticky, stretchy, and surprisingly unforgiving if you get it on your hands or clothes. Latex gloves will save you from cleanup headaches later. One last tip: avoid painter’s caulk or anything acrylic or latex-based. They may say “interior use” or even “easy to clean,” but they simply won’t hold up in a wet, steamy bathroom. Silicone stays flexible and watertight, which is exactly what you need to keep mold out and moisture where it belongs.
Step-by-Step: How to Re-Caulk Like a Pro
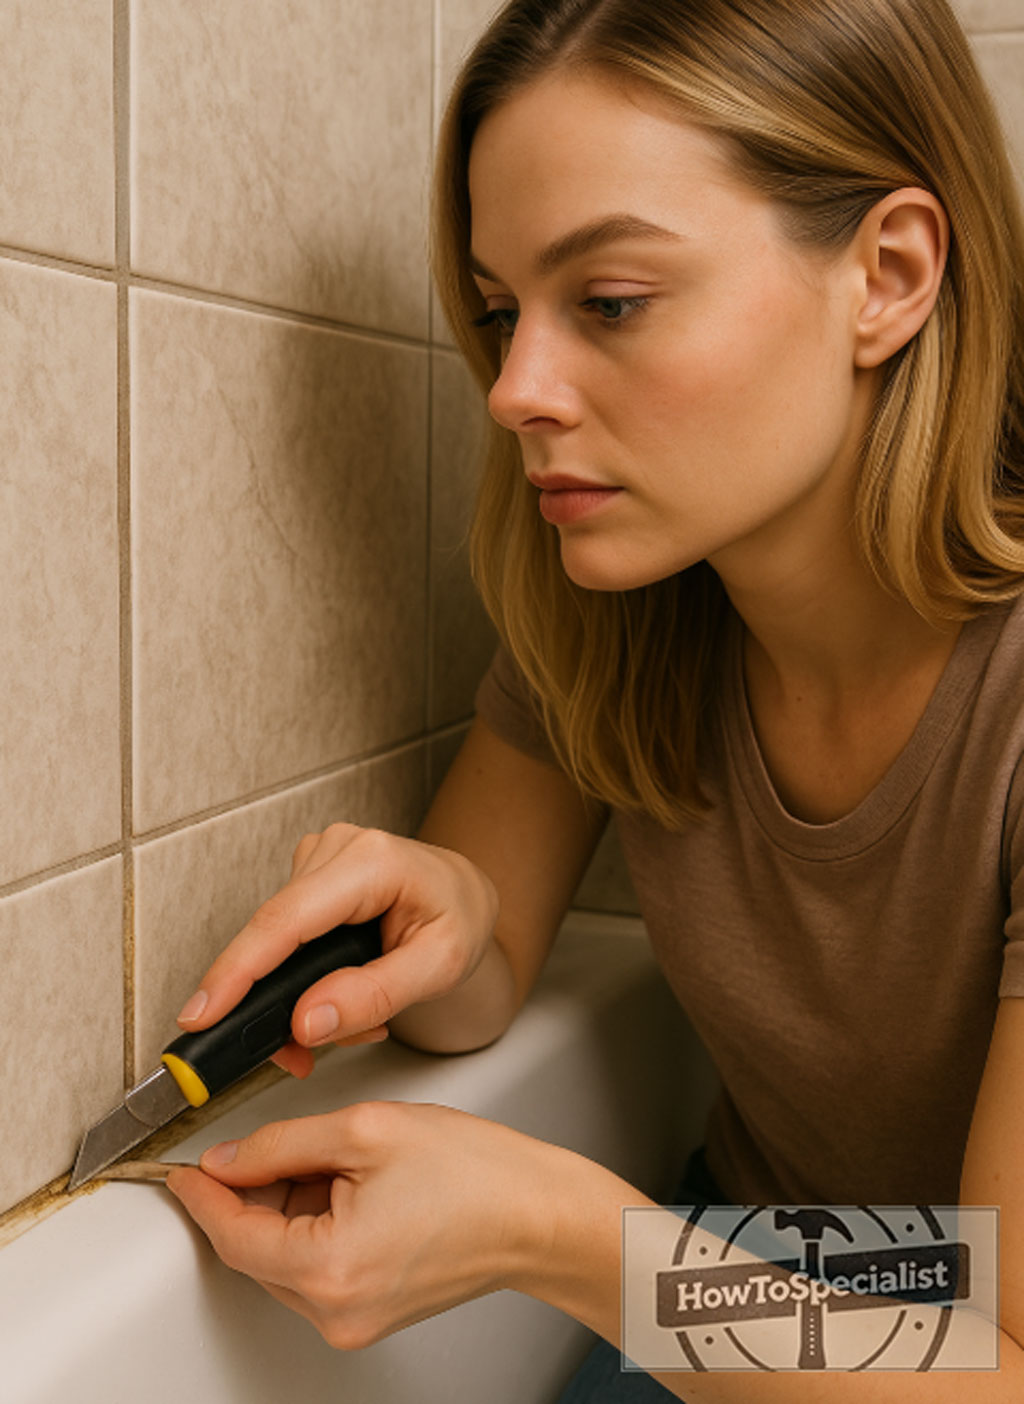
Start by removing the old caulk. This is where your project really begins, and it’s the most important step to get right. You can use a dedicated caulk removal tool or a sharp utility knife to carefully slice along the top and bottom edges of the old line. Once you get an edge started, gently peel it away. Some pieces will come off cleanly in long strips, while others might crumble and resist a bit. That’s totally normal. Just go slow and steady, and try not to gouge the tub or scratch the tile. Don’t worry if you need a second pass to get stubborn residue—leftover caulk will prevent the new bead from adhering properly, so it’s absolutely worth spending an extra 10 or 15 minutes making sure it’s all gone.
Once the seam is clean of caulk, it’s time to disinfect and prep the surface. This step is crucial and often overlooked. Use rubbing alcohol or white vinegar on a clean cloth to wipe down the area where the caulk was. This not only removes any lingering grime or soap scum, but also kills off hidden mold spores. Give everything a good scrub, especially if you noticed any mildew before. Then, let it dry—completely. Any moisture left behind can compromise your new seal and shorten its lifespan. If you’re in a humid space or working fast, you can even hit it with a blow dryer on low to be sure it’s bone dry before moving on.
If you’re aiming for clean, professional-looking lines, painter’s tape is your best friend. Apply strips just above and below the seam where you’ll be laying the new caulk. It creates a nice visual guide and gives you crisp edges once you’re done. It’s optional, but if it’s your first time or if you want that polished finish, it’s totally worth the extra minute or two it takes.
Now comes the fun part—applying the new caulk. Cut the tip of your silicone tube at a 45-degree angle, just enough to create a bead about 1/8 inch thick. That’s the sweet spot for most tubs and showers. Load it into your caulk gun and start at one end of the joint, applying steady pressure as you move in a smooth, even motion. Try to go in one continuous line instead of stopping and starting. Too much caulk will make smoothing harder, so focus on a consistent, clean bead rather than laying it on thick.
Once the line is down, don’t wait too long to smooth it out. This is where everything comes together. Use your gloved finger or a caulking tool to gently press and shape the bead into the seam. You can dip your finger in water, or in a mix of water and a little dish soap, to help it glide cleanly without sticking. The goal here is a seamless, concave finish that not only seals the gap completely but also looks great.
If you used painter’s tape, remove it immediately after smoothing the caulk—before the caulk starts to skin over. This will prevent tearing or pulling and help preserve those sharp lines. Then let the caulk cure. This part is non-negotiable: most silicone caulks require at least 24 hours to fully cure, sometimes longer depending on humidity and temperature. Don’t rush this step. If you jump in too soon and get it wet, you’ll end up undoing all that hard work.
Give it the time it needs, and once it’s cured, you’ll have a clean, waterproof seal that looks great and protects your bathroom like a champ. This is one of those satisfying DIY wins that instantly refreshes your space and reminds you—you’ve totally got this.

Common Mistakes to Avoid
Even though caulking is a straightforward project, there are a few rookie mistakes that can quietly undo all your hard work if you’re not paying attention. One of the biggest culprits is rushing through the prep. It might be tempting to skip ahead and lay down the new bead, especially if the surface looks clean enough—but appearances can be deceiving. If there’s any lingering moisture, dust, soap residue, or leftover bits of old caulk, the new silicone won’t adhere properly. That’s how gaps form, and gaps mean water leaks. So slow down and make sure your prep work is rock solid—clean, dry, and free from anything that could interfere with a tight seal.
Another common pitfall is using the wrong kind of caulk. It’s easy to assume all caulks are the same, especially when they’re sitting next to each other on the shelf. But for tubs and showers, latex or acrylic caulk is a poor substitute for 100% silicone. Latex may go on smoothly, and it might be easier to clean up, but it simply doesn’t have the staying power in a wet environment. It dries out, cracks, and starts peeling way faster than silicone, especially in steamy bathrooms where temperatures and humidity constantly fluctuate. Silicone, on the other hand, remains flexible, watertight, and mildew-resistant for years.
Lastly, one of the most avoidable mistakes is impatience. Once that new bead is laid and smoothed out, you’ve got to let it cure—fully. That usually means giving it 24 hours (or whatever the product label recommends) without getting it wet. No showers, no steam, no splashes. It might be inconvenient, especially in a one-bathroom household, but skipping that dry time can ruin your seal and force you to start over. Letting it cure properly locks in all your effort and ensures the bond is tight and long-lasting.
So take your time, trust the process, and follow each step carefully. A clean, well-prepped surface, the right materials, and a little patience are all it takes to get professional results that will last for years.
The Finishing Touch
Once your caulk is fully cured, step back and take a look—you’ve just given your bathroom a mini-makeover that packs a serious punch. That once-tired seam is now crisp, clean, and watertight, acting as a shield against mold, mildew, and hidden moisture damage. Not only will your tub or shower look dramatically better, but you’ve also reinforced the structural integrity of the space in a way that most people overlook until it’s too late.
Whether you’re freshening up a dated bathroom or simply staying ahead on your home maintenance, re-caulking is one of those rare DIY projects that’s easy, inexpensive, and immediately rewarding. It’s the kind of task that builds confidence—you don’t need a contractor, a weekend of free time, or a pile of expensive tools. Just a little patience, the right materials, and a willingness to get your hands a bit messy.
So grab your tools, roll up your sleeves, and get to it. You’re not just sealing gaps—you’re learning a skill, improving your home, and showing yourself what you’re capable of. You’ve got this—and your bathroom will absolutely thank you for it every time you step into a shower that feels clean, dry, and finished right.