This article is about how to screed a floor. There are certain cases in which either the concrete floor is not level or you want to cover some wires and cable, and the best solution is to pour a thick layer of cement screed. Pouring screed is also a must when using an under-heating system, so pay attention to our diy step by step guide, to understand the basic techniques. The screed coat should be around 2” / 5 cm thick, but you can adjust it to your needs (it should always be thicker than 1” – 2.5 cm). If you find it too expensive to use self-leveling screed, then you will have to make a semi-dry mix of 1 parts cement with 3 part sharp sand (grade A).
If you choose to do this job by yourself, we recommend you to ask a friend to help you, as you also need to mix the cement screed before leveling the floor. Consequently, even if you rent or buy a power mixer, you need another person to prepare and transport the cement screed, while you level it with a straight edge and a margin trowel.
If the concrete floor is relatively level, then you can use an easier method to pour the screed in a professional manner. Consequently, you have to lay 2×2 wooden screeds every 3′ (1 m), making sure they are perfectly level one with other. Then pour the cement screed and level the floor with a straight edge along the wooden screeds. Last but not least, remove the wooden screeds and pour cement in the holes. Level the floor by using the aluminum straight edge.
Pouring flooring screed is not the easiest diy project, therefore you have to weight the advantages and disadvantages of doing it by yourself. A qualified builder will charge you about 500 dollars for the job, according to the surface of the room. Nevertheless, you can reduce the cost but in the same time to avoid the hard work by ordering the screed from your local cement mixing company. It will be pricier than mixing it by yourself, but they will deliver it to your home and use a pomp to pour it on the floor. In addition, they will strengthen the screed by adding several additives and other compounds.
If you want to install vinyl flooring, then the surface must be perfect. Therefore, you could try another approach: fill the visible imperfections (cracks, holes) by using a mix of 3 parts sand and 1 part cement and let the concrete to dry out for at least a day. Next, you should mix self-leveling screed with water (read carefully the instructions on the bag) and pour it on the floor, starting with the farthest corner. In order to spread it across the surface, you have to use a trowel and then the screed will find the perfect level by itself. After it dries out, if you aren’t satisfied with the results , you can pour another thin layer of self-leveling compound.
Made from this plan
Materials
- Sand, cement
- Water
- self leveling screed (optional)
Tools
- Safety gloves, glasses
- Measuring tape, carpentry pencil, l-square, spirit level and water level
- Straight edge – to level the surface
- Margin trowel – to spread the cement screed
- Concrete mixer – to mix the cement screed
- Construction buckets or wheelbarrow to transport the cement screed
Tips
- Make sure you draw level mark lines on the walls, before screeding the floor
Time
- 4 hours, 100 sq ft (10 m2), two persons
My best tips on how to cement render a floor:
Cement rendering a floor can give it a smooth, durable surface that’s perfect for indoor or outdoor use. Whether you’re preparing for a tile installation or looking to create a finished surface, cement rendering is an excellent way to level and strengthen a floor. Here are my best tips for cement rendering a floor.
1. Gather the Right Tools and Materials
Before you begin, make sure you have all the tools and materials needed for the job:
- Cement render mix (either pre-mixed or your own blend)
- Trowel
- Float
- Bucket
- Mixing paddle or cement mixer
- Spirit level
- Screed board
- Measuring tape
- Brush or broom
- Water spray bottle
2. Prepare the Floor Surface
To ensure the cement render adheres well, the floor surface needs to be clean and free of debris:
- Sweep or vacuum the floor to remove dirt, dust, and any loose particles.
- If the floor has cracks or uneven areas, use a patching compound to fill them in before starting the render.
- Dampen the floor slightly with a water spray bottle to prevent the surface from absorbing too much moisture from the render. This step is crucial to avoid cracking.
3. Mix the Cement Render
You can either use a pre-mixed cement render or mix your own using:
- 1 part cement
- 1 part lime (optional, for increased workability)
- 6 parts sand
Add water gradually to the dry mixture and mix it thoroughly until you reach a thick, workable consistency. If you’re working on a large floor, consider using a cement mixer to ensure a consistent blend.
4. Set Level Guides
To achieve a perfectly level floor, you’ll need to create level guides for the render:
- Use a spirit level and set up level markers around the perimeter of the floor.
- You can use screed rails or lay thin strips of wood or metal as guides to ensure the render is spread evenly across the entire surface.
These level guides help you maintain an even thickness of the cement render.
5. Apply the First Layer of Render
Start by applying the first layer of cement render across the floor:
- Use a trowel to scoop the render and spread it evenly across the floor, beginning at the far corner and working your way out.
- Use a screed board to level the surface as you go. Place the screed board on your level guides and drag it across the surface in a smooth, even motion to ensure the render is spread uniformly.
- Aim for a thickness of 10-15 mm for the first layer, depending on the surface’s condition.
6. Let the First Layer Set
Allow the first layer of render to set for a few hours. The surface should be firm but not fully dry before applying the second layer. You don’t want the render to dry too quickly, as this can lead to cracks. If needed, mist the surface with water during this time to keep it slightly damp.
7. Apply the Second Layer
Once the first layer has set, apply the second layer of cement render:
- This layer should be thinner, about 5-10 mm, and it’s used to smooth and level the surface even further.
- Use your trowel to apply the render, and follow with a float to smooth out any ridges or imperfections. Work in small sections and make sure to blend the layers together seamlessly.
8. Use a Float to Smooth the Surface
After applying the second layer, use a steel float to smooth the render and ensure a flat surface. Move the float in circular or sweeping motions to remove any bumps and create a uniform finish. Be sure to check for levelness as you go, using your screed board and spirit level to guide you.
For a slightly textured finish, you can use a sponge float or brush to create a subtle texture while the render is still damp.
9. Allow the Render to Cure
Curing is one of the most important steps in cement rendering a floor. Proper curing ensures the render gains strength and doesn’t crack:
- Keep the floor moist by misting it with water or covering it with plastic sheeting to retain moisture. This slows down the curing process and helps prevent cracking.
- Allow the render to cure for at least 7 days, but ideally up to 28 days for maximum strength, especially if the floor will bear heavy loads.
10. Check for Imperfections
Once the render has cured, inspect the floor for any imperfections or uneven spots:
- If there are any minor dips or rough areas, lightly sand them down or fill them with a small amount of render and smooth them over with a float.
- Ensure the floor is level and smooth before applying any finishes or tiles.
Bonus Tip: Add a Sealer for Extra Protection For areas exposed to moisture or heavy traffic, consider applying a concrete sealer to the rendered floor once it’s fully cured. This will help protect the surface and make it easier to clean.
Screeding a floor

Floor screeding
The easiest method to screed your concrete floor is to use 2×2 wooden screeds (or 3×3, 4×4 if you need a thicker layer of screed). Therefore, you have to lay the screeds on the floor, every 3′ and you should use a spirit level to make sure they are perfectly aligned. In order to secure them into position, you could use screws and an electric screwdriver.
Next, pour cement screed between the wooden boards and level it with a straight edge. Push firmly the straight edge and pull it along the screeds.

Concrete floor
On the other hand you can screed the floor traditionally. First, you have to clean thoroughly the concrete floor, by using a brush, otherwise the cement screed won’t adhere to it. Make sure you remove completely the dust and other residues. Afterwards, sprinkle water over the surface to enhance the bond of the screed with the concrete flooring.
Check the pipes and cables that will be buried in the screed layer, as it is the last chance to fix any possible issues.
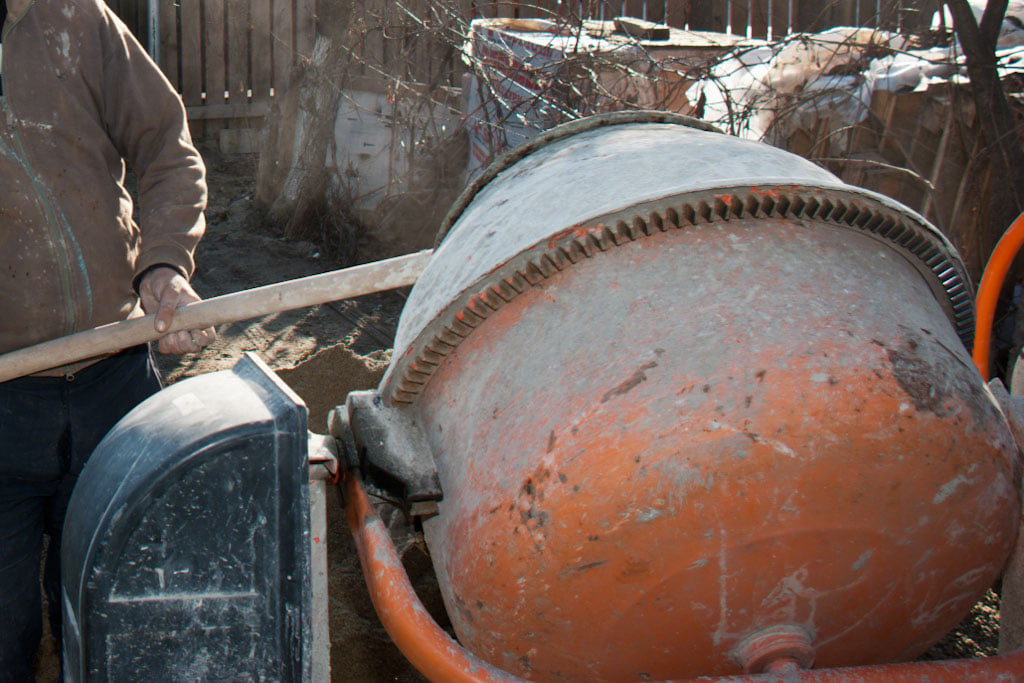
Mixing cement screed
Next, you have to mix the screed by using a power mixer. If you cannot afford buying one or you just don’t need it, you can always rent it for one day at a decent price. Nonetheless, you also have the option of mixing the screed by hand, but it will take longer and you won’t get the same quality.
In order to mix screed, you have to add 1 part cement to 3-4 parts sand. Pour the compounds in the mixer and add gradually water. Remember that the screed doesn’t need to be very moist (as regular concrete) but semi-dry. Make sure there are no lumps in the mix.
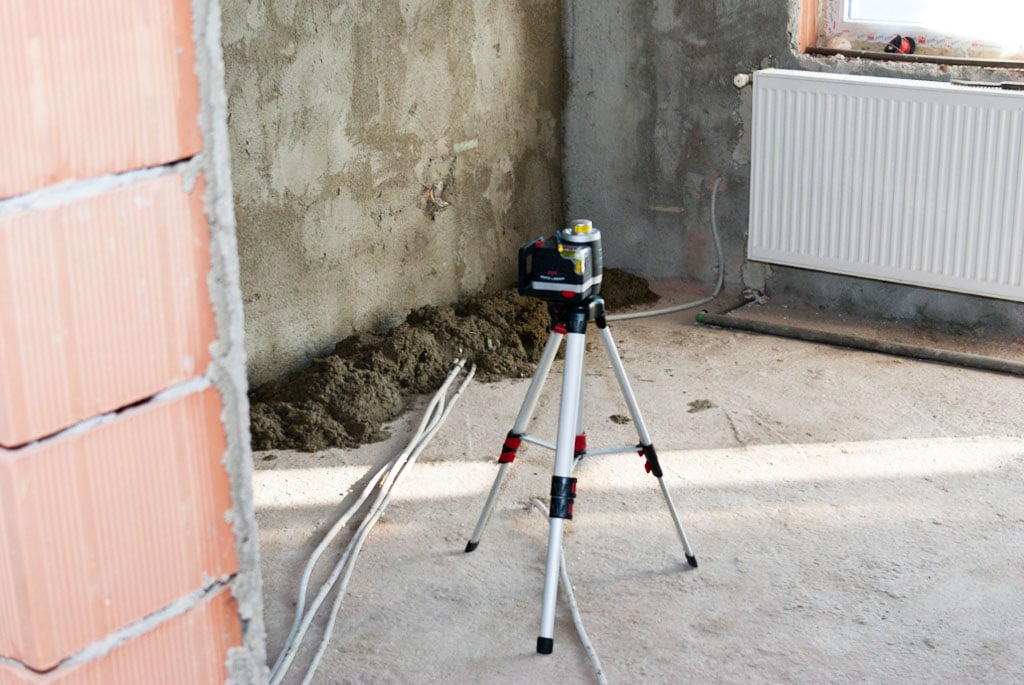
Floor screeding
Next you have to draw the guidance lines around the walls of your room. Therefore, you should use either a water level or a laser level to to set the marks around the corners of the room.
Next, you have to join the guidance marks, by using a caulk line. It is essential to mark the maximum level of the cement screed on the walls, otherwise you won’t be able to get the job done in a professional manner. Make sure the guidance lines are highly visible.

Screeding a floor
As we have already said, make sure you draw perfectly level lines along the walls of the room, representing the top edge of the screed layer. The screws should be about 1-2” thick.
Work with patience and with great care, as this step is essential for your project. The critical aspect is to make sure the screed will be perfectly level over the whole surface.
Floor screeding
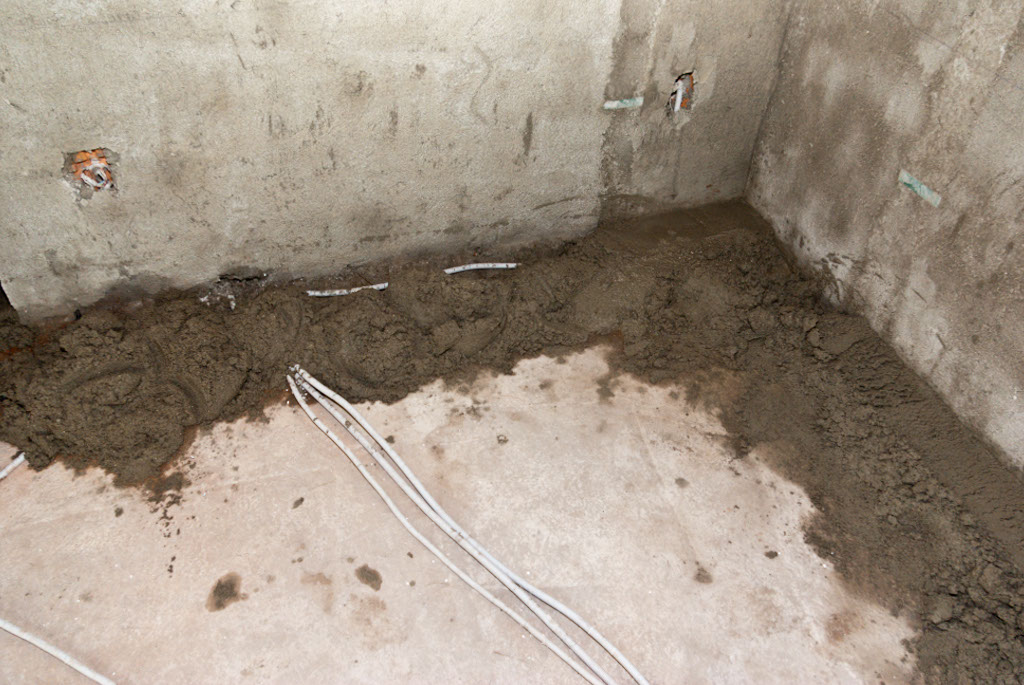
How to screed a floor
Next, start pouring the cement screed along the walls of your room. Taking into account that we won’t be using self-leveling screed (as it would be too expensive), we need to use our imagination as to level it.
Therefore, we will build plumb screeds along the walls (and maybe one in the middle if the room is wider than 8′ ). Afterwards, we will fill the whole area with cement screed and level the floor with a straight edge, along the built screeds.
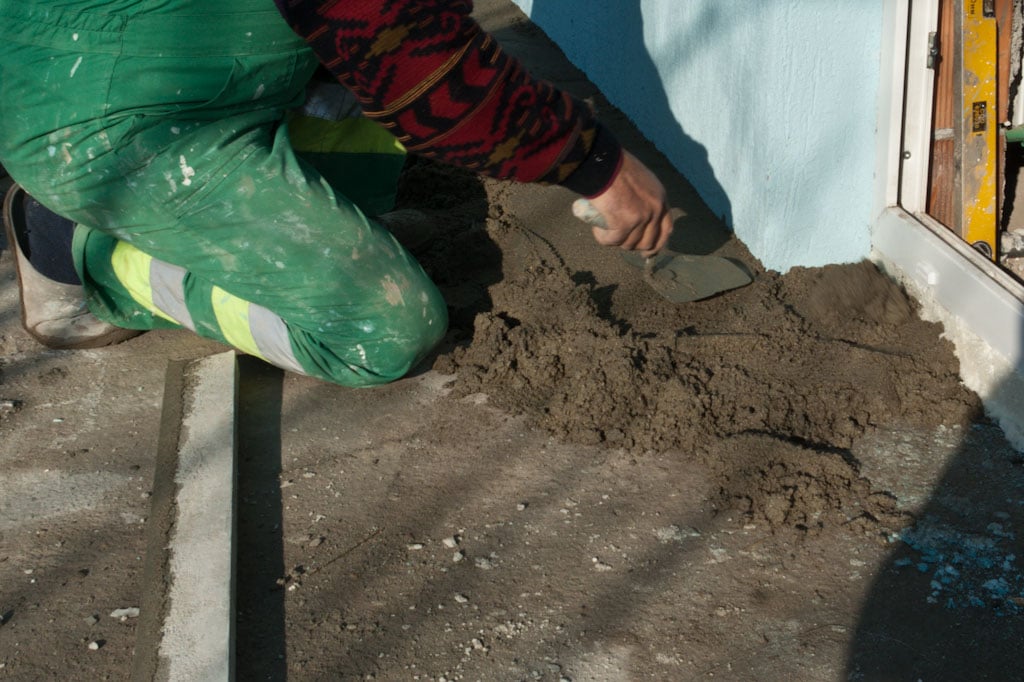
Spreading screed with a margin trowel
After you have poured the cement screed on the floor, you have to spread it by using a margin trowel. A margin trowel is a very handy tool and we recommend you to use it.
In addition, you should notice in the image, the right consistency of the cement screed. Therefore, you should not add too much water in the mix, otherwise it will be impossible to work with it. Make sure the semi-dry mix doesn’t have lumps, otherwise it won’t be durable on the long run.
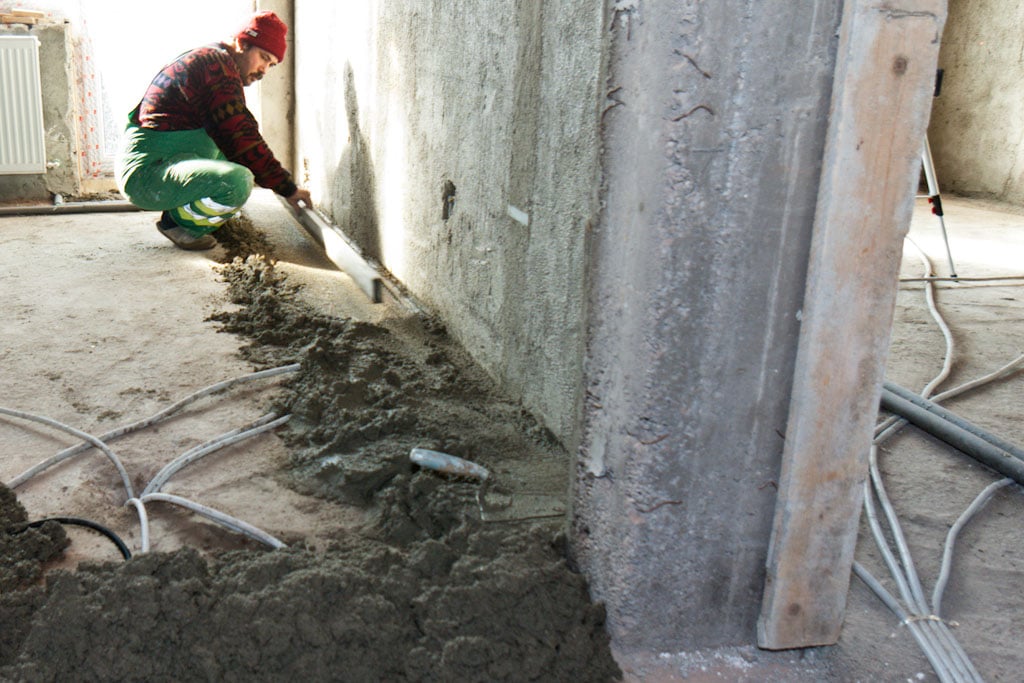
Making sure the screed is level
Use the large straight edge to level the screed along the walls of the room. In order to obtain a proper floor, you have to make sure that the guidance “screeds” will be perfectly level.
Working with an aluminum straight edge is not difficult, just hold it firmly and move it forward and backward, until you level the surface. Generally speaking, the screed layer must be at least 1” (2.5 cm) thick, as to cover the pipes and the cables. Nevertheless, you can make the screed layer even more thicker, as to fit with your needs.
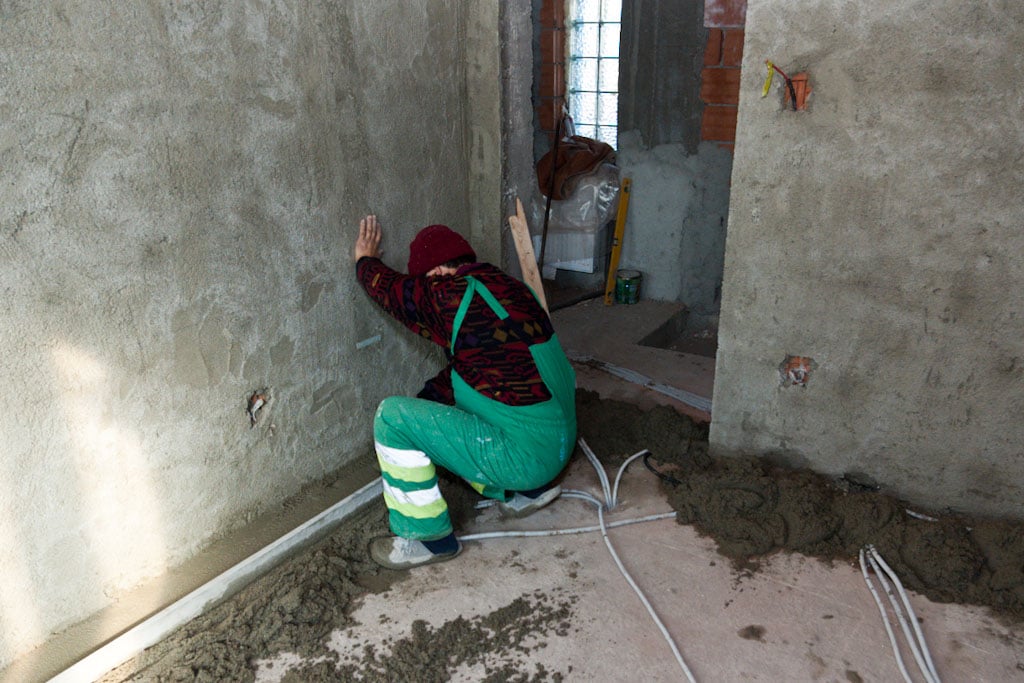
Puring screed on floor
In this image you can see the process from a different angle, as to understand better the techniques. In order to make sure the “screeds” are level, you should place a spirit level on the aluminum straight edge. Pour more screed or remove it, until the layer is perfectly level.

Leveling screed
After you have built the screeds, as level as possible, you have to fill the rest of the surface with cement. Therefore, work with patience and spread the screed as evenly as possible.
In order to level the floor, you have to move the straight edge several times, forward and backward, along the screeds until you are satisfied with the result. It there are void gaps in the surface, you have to add more screed and then level it again with the straight edge.
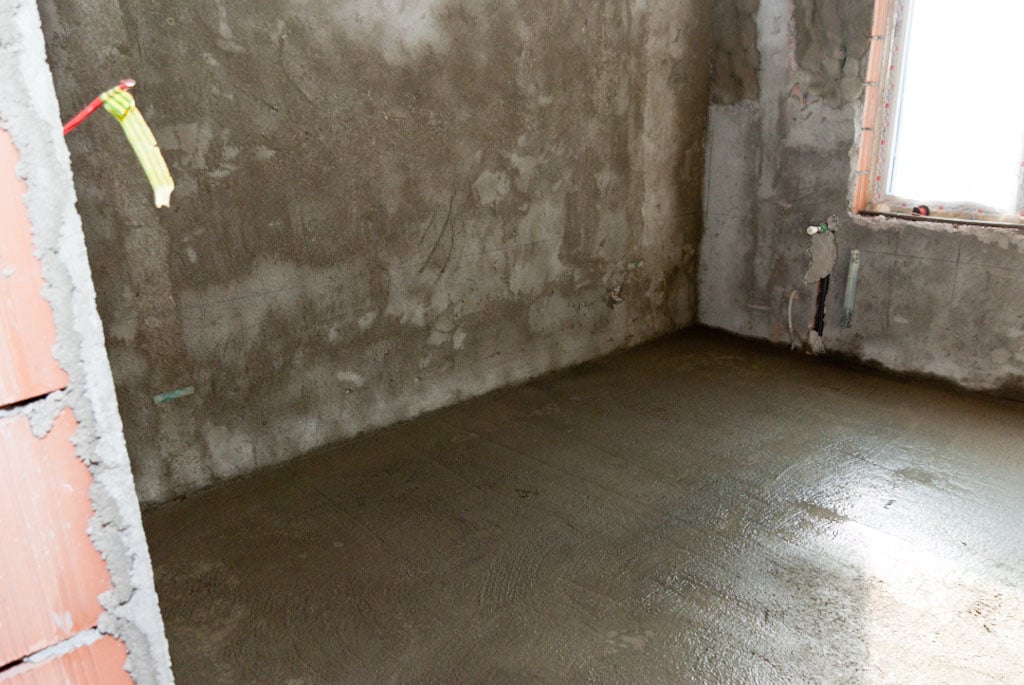
Screeding a floor
Last but not least, we have to show you how to finish the screed floor. If you want to obtain a better finish for your flooring, you can use a polyurethane float. Therefore, use circular moves all over the surface as to obtain a professional look and sprinkle water if necessary.
Remember that you have to let the screed dry out for a couple of days, before walking on it. This aspect is essential, as the cement screed isn’t very dense and you might damage it.
By following these steps, you’ll be able to cement render a floor that’s smooth, level, and durable, providing a solid base for tiles, paint, or other finishes. Whether you’re working indoors or outdoors, cement rendering is a great way to create a long-lasting floor surface.
Thank you for reading our article on screeding a floor and we recommend you to check the rest of our projects. Don’t forget to share our articles with your friends, by using the social media widgets.
