This article is about how to plaster a brick wall. After you have cement rendered the brick walls of your room, you have to prepare them for the paint coats by applying the plaster. Plastering a brick wall is not a complex task, being similar to plastering a drywall, but you have to follow a couple of guidelines, as to get the job done in a professional manner. Consequently, you must apply two coats of plaster, the first one a little more coarse, while the second one should be very fine. After the two coats have dried out, you have to sand thoroughly the surface, as to make it even and neat.
Make sure the surface is ready to apply plaster. If we speak of a new construction, then you should make sure you have cement rendered the walls and let them dry for a couple of days. If you want to plaster an old room, then you have to remove the coats of paint and sand the surface thoroughly. In addition, cover the walls with PVA bonding, according to the manufacturer’s instructions, as to make sure the plaster will adhere to the walls.
In order to mix the plaster, you need several tools: a clean construction bucket and a drill mixer / margin trowel. Pour water in the bucket (1/3 of the volume) and then add gradually the plaster. After a couple of minutes you have to mix thoroughly the compounds, until you get a material with the consistency of cream. If the plaster doesn’t fall off the trowel, it means that it has the right consistency.
Made from this plan
In order to plaster a brick wall, you need the following:
Materials
- Plaster
- Water
Tools
- Safety gloves, glasses, respiratory mask
- Margin trowel to load the plaster trowel
- Plaster trowel, medium-grit and fine-grit sandpaper
- Construction buckets to mix the plaster
Tips
- Apply the finish plaster after the first coat has dried out
- Check for imperfections after sanding the wall and fill them
Time
- First coat: One day, 100 sq feet / 10 m2
- Second coat: One day, 100 sq feet / 10 m2
My best tips on plastering a brick wall:
Plastering a brick wall can give it a smooth, modern look while improving insulation and durability. Whether you’re renovating an interior space or giving an exterior wall a polished finish, plastering is a great way to enhance both appearance and function. Here are my best tips for plastering a brick wall.
1. Gather the Right Tools and Materials
Before you start, make sure you have all the necessary tools and materials:
- Plaster mix (either pre-mixed or traditional cement-lime-sand mix)
- Trowel
- Hawk
- Float
- Wire brush (or stiff brush)
- Spirit level
- Bucket and mixing stick
- Water spray bottle
- Plastering mesh (if needed for extra reinforcement)
2. Clean and Prepare the Wall
Before applying plaster, it’s essential to prepare the brick surface for good adhesion:
- Use a wire brush or stiff brush to clean the brick surface, removing any dust, loose mortar, or dirt.
- If the brick wall has cracks or gaps, fill them with masonry filler and smooth the surface before applying plaster.
- Lightly dampen the brick using a water spray bottle or sponge. This prevents the dry brick from absorbing too much moisture from the plaster, which can lead to cracking.
For very smooth bricks or those with low absorption, consider applying a bonding agent to help the plaster adhere better.
3. Apply Plastering Mesh (If Needed)
If your brick wall has a lot of unevenness or cracks, consider applying plastering mesh for reinforcement:
- Attach the mesh to the wall using masonry nails or adhesive, ensuring it’s flat against the surface.
- This step provides extra strength to the plaster and helps prevent cracking, especially in high-stress areas.
4. Mix the Plaster
If you’re using a pre-mixed plaster, follow the manufacturer’s instructions for mixing. If you’re making your own mix, a typical plaster recipe is:
- 1 part cement
- 1 part lime
- 5-6 parts sand
Add water gradually until the plaster reaches a thick, workable consistency—similar to smooth peanut butter. Be careful not to make it too runny, as this can cause the plaster to slide off the wall.
5. Apply the First Coat (Scratch Coat)
Start by applying the first layer, also called the scratch coat:
- Load plaster onto your hawk and transfer it to the wall with a trowel. Begin at the bottom and work your way up, spreading the plaster evenly across the wall.
- The first coat should be 5-10 mm thick.
- Use a straight edge or spirit level to check that the plaster is even.
Once the first coat is applied, lightly scratch the surface with a scratch comb or notched trowel to create small grooves. This helps the second coat adhere properly.
6. Let the Scratch Coat Set
Allow the first coat of plaster to set for 24-48 hours, depending on the weather and humidity. Keep the wall damp by misting it with water during the setting period to prevent the plaster from drying too quickly and cracking.
7. Apply the Second Coat (Finishing Coat)
Once the scratch coat has set, it’s time to apply the finishing coat:
- Mix a fresh batch of plaster, but make it slightly thinner than the first coat.
- Apply the plaster in the same way as the first coat, but this time aim for a thickness of 3-5 mm.
- Use long, smooth strokes with the trowel to create a flat, even surface.
Check for levelness as you work and smooth out any ridges or imperfections with a float.
8. Smooth the Surface
After applying the second coat, use a steel float to smooth the surface:
- Work in circular or sweeping motions to ensure the plaster is even and there are no bumps or inconsistencies.
- For a more textured finish, use a sponge float while the plaster is still damp to create a subtle texture.
Take your time to ensure a professional finish, as the second coat will form the visible surface.
9. Let the Plaster Cure
Once the finishing coat is applied, the plaster needs time to fully cure:
- Keep the plaster moist by misting it with water, especially if the weather is warm or dry.
- Allow the plaster to cure for at least 7 days for interior walls, or longer for exterior walls exposed to the elements. This slow curing process helps prevent cracking and ensures the plaster develops maximum strength.
10. Finish and Paint (Optional)
Once the plaster is fully cured, you can apply a primer and paint the wall for a finished look:
- For exterior walls, use weather-resistant paint to protect the plaster from moisture and temperature changes.
- For interior walls, apply a coat of primer before painting to ensure an even finish.
Bonus Tip: Use Plaster Beads for Sharp Corners For corners and edges, consider using plaster beads to create sharp, clean lines. These metal or PVC beads are installed before applying the plaster and give your wall a professional, finished appearance.
How to plaster a brick wall

Plastering a wall
Before being able to paint your room, you have to plaster the walls as to even out the surface. Consequently, you have to apply two coats of plaster: the first one should be medium-grit, while the second one should be very fine.
First of all you have to prepare the plaster, either by hand (by using a trowel) or mechanically (by using a drill machinery with a mixing paddle). Pour a gallon of water (3 l) in a construction bucket, pour the plaster and let them for 5 minutes. Mix the compounds until it gets the consistency of cream.

Applying plaster on the wall
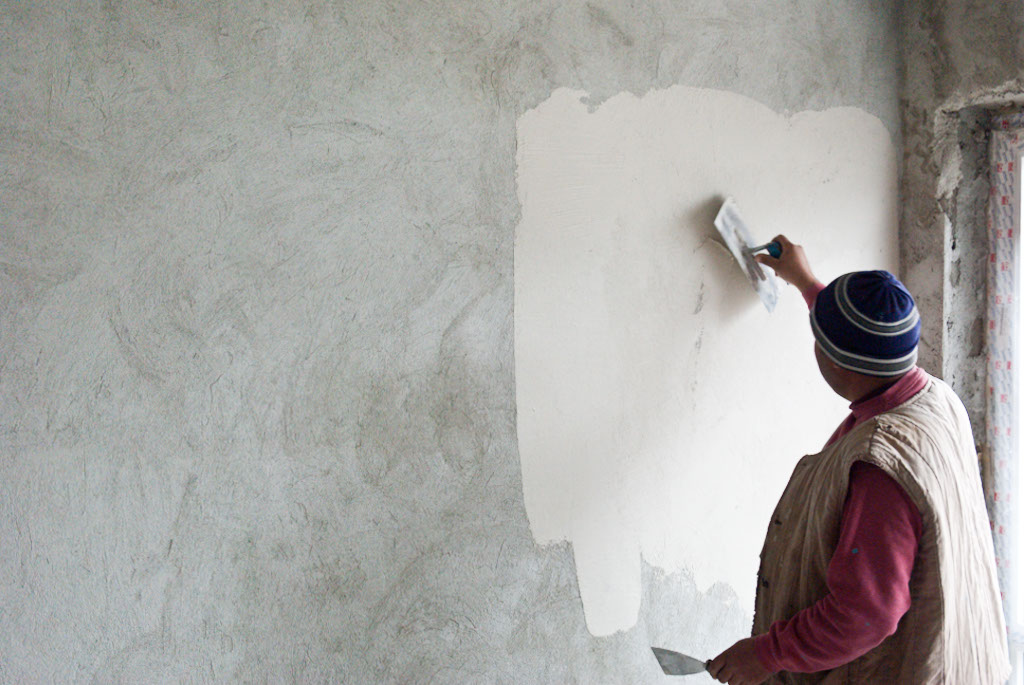
After you have mixed the plaster, you have to spread it on the brick wall, by using a plaster trowel. In addition, you have to load the plaster on the trowel, by using a 4” palette knife. Another option is to use a hawk, but any of these will work fine.
In order to plaster a brick wall, you have to use repetitive semicircular moves , until you get an even coat on the whole surface. Make sure you hold the plaster trowel angled while you are skimming the wall, creating a layer of about 1/10” – 2 mm thick.

How to plaster a brick wall
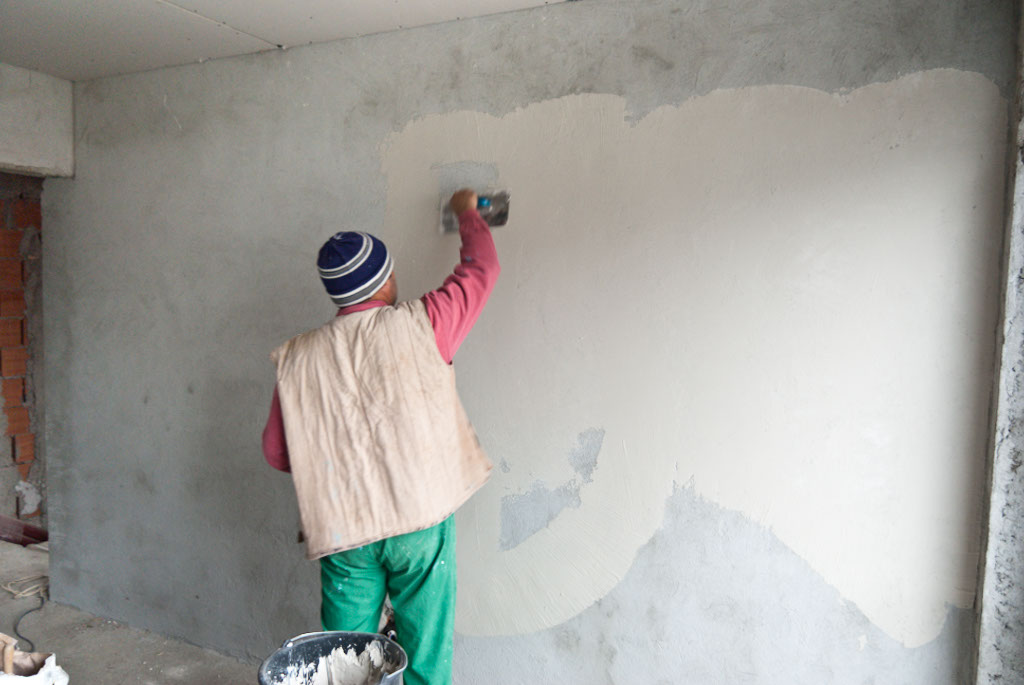
Continue the process of plastering the brick wall in the same manner, making sure you mix the material every 10 minutes and add a little water if necessarily. Generally speaking, the plaster dries out quickly, that is why you have to make sure it has the right consistency before skimming the brick wall.
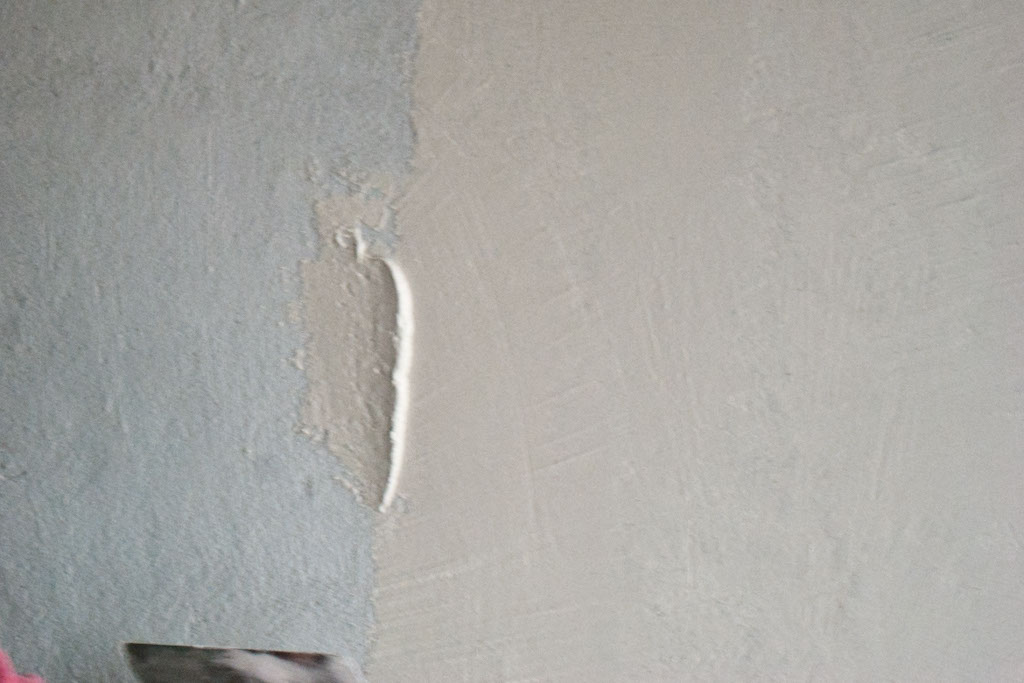
As a general rule, if the plaster has the right consistency, then it will not fall off the trowel. Spread the first coat evenly, but do not worry if you notice a slight texture, as you will fix it later on.

Spreading plaster on render
In this image you can see in detail the way in which you have to plaster a brick wall. Therefore, keep in mind these essential aspects: the plaster should have the right consistency and it should be mixed properly, you should hold the plaster trowel at angle and try to skim an even layer.

Plastering a concrete wall
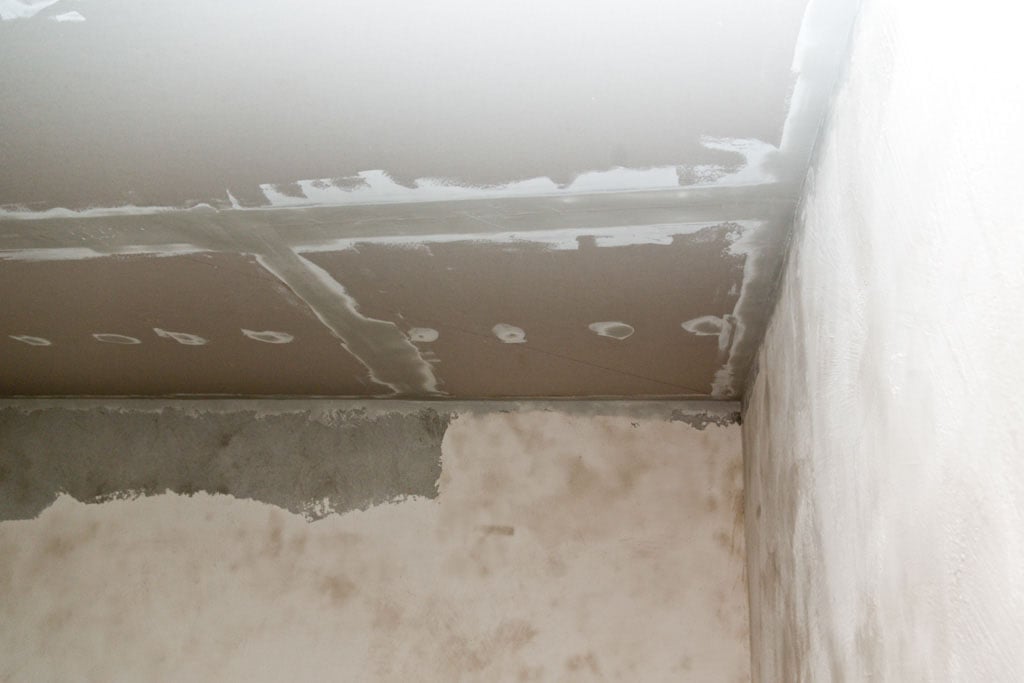
Another aspect you should take into account is the joints of the walls with the ceiling. As you can see in the image, you have to plaster the walls up to the ceiling. If those areas are inaccessible, then you have to use either a folding ladder or a workbench. Make sure the base surface is level, otherwise you risk injuring yourself.
Work with patience and every 10 minutes assess your work by looking at it from distance. The coat shouldn’t be perfectly even, but in the same time make sure it is at least decent.

Plastering up to the ceiling
Next, allow the plaster to dry out for 20 minutes before repairing the irregularities. Consequently, use the plaster trowel and go over the surface again, making it even and smooth. Remember that you don’t have to push the trowel too firmly, but in such a way to smoothen the surface.
If you notice drags or holes in the coat of plaster, you should add a little more material until you remove them definitively. In addition, you could also sprinkle water on the wall, by using a large brush, and then trowel the plaster with the float.
Plastering a brick wall: the second coat

How to plaster a wall around an outlet
After you have spread the first layer of plaster, you should let it dry for at least one day. Then, you have to apply the final coat of plaster using the same techniques described above.
The final coat should be much finer, so make sure you buy the right one from your local diy store. In the image you can see that you have to plaster the wall around the light switches and electric outlets, so make sure you turn off the electricity before stating the work.

Applying the final coat of plaster
The final coat of plaster must be applied on the whole surface of your room, so make sure you cover it evenly. Use the trowel to spread the plaster on the wall and try to cover all the irregularities.
Work with patience and make sure you mix thoroughly the plaster before skimming the wall. Plaster the whole surface of your room, from bottom up to the ceiling, around the sockets and light switches.

Applying the finish plaster coat
In this image you can see that you also have to plaster the walls around the windows and install corner beads, if necessary. Installing a metal corner bead on a brick wall is not complex, but it can make a difference if secured properly.
The main advantage of the corner bead is that it reinforces the edges against hits, and that it creates a straight edge from top to bottom. In addition, when plastering the brick walls, the coat will hide the corner bead, to the point where a person wouldn’t notice it at all.

Applying the finish plaster
In order to have access to the top areas of the wall, you have to use either a folding ladder or a workbench. Make sure the base surface is level, otherwise you risk injuring yourself during the project.
Spread the material evenly, moving the plaster trowel upward and downward, as well with circular moves. Remember that the final coat of plaster doesn’t have to be too thick, so make sure you spread the material as much as possible.
Sanding the plaster

Masking furniture while sanding the walls
After plastering the brick wall with a second coat, you have to leave it for at least a day to dry out. The next step of the plastering process, is to sand the surface with different granulations of sandpaper. Therefore, you have to use a medium-grit sandpaper at first, to remove the bigger irregularities, and then end the project by using fine-grit sandpaper.
Before sanding the walls, you have to mask the door and the other objects in the room (wires, radiator valves and so on) with paper tape and plastic foil. In addition, we strongly recommend you to wear a respiratory mask, as while sanding the plastered walls you will create a lot of dust. Inhaling the dust would irritate your respiratory system, so wear the mask and a pair of glasses, just to be safe.
Sanding the plaster walls is a serious job, as it is an essential step before painting the room. A poor job will be noticeable as the walls won’t be even and smooth, therefore you have to focus and work with great care.

Sanding wall plaster
Therefore, the best way to sand the walls is to use a sand block. Of course that you could use a sanding pad, but the cheapest way is to use a sanding block. Moreover, you have to use first a medium-grit sandpaper (120 will do fine) and smoothen the whole surface of your room, making sure you don’t miss any spot. Later on, you have to sand the plaster by using fine-grit sandpaper (150 is perfect).

Finishing the final coat of plaster
Sand the surface with the medium grit sandpaper, making sure you don’t miss any spots. It is essential to cover the whole area with the sanding block, otherwise the walls won’t be uniform. Use circular moves and insist in the areas which aren’t consistent with the rest of the surface.

Sanding the wall plaster
Next, you have to sand the walls again, this time using a very fine-grit sandpaper. This process will smoothen the appearance of the plaster coat and make it very uniform. Sand the plaster walls thoroughly, until you remove all irregularities, making sure they are perfectly level and even.
In the image you can see different areas which have a darker color as the rest of the wall. The explanation is very simple: the light color represents the second coat of plaster, while the darker areas represent the first coat of plaster. When sanding the surface, you will expose, in some areas, the first layer of plaster, which means that you have evened out the walls.

Dust from sanding wall
In this image you can see the dust resulting from the sanding process, and you have to trust me, there will be a lot of dust all over the floor. Therefore you should be ready to clean it, by using a vacuum.
Under any circumstances don’t use a broom, as you will make it worse. Nevertheless, if you want to brush it, you could sprinkle water over it. In this way the dust won’t raise in the air when using a broom.

Final stage of wall plaster
After the hard work you can rest for awhile, as to enjoy the result of your efforts. The surface of the walls should be uniform and ready for paint. Make sure you check again the surface of the walls before applying the paint, as to spot for irregularities and drags.
By following these steps, you’ll be able to plaster a brick wall that’s smooth, durable, and ready for finishing. Whether you’re working on an interior renovation or sprucing up an exterior space, proper plastering will give your brick wall a new, polished look.
Thank you for reading our article on how to plaster a brick wall and we recommend you to check the rest of our projects. Don’t forget to share our articles with your friends, by using the social media widgets.

3 comments
I’m sorry but what sorry plastering job requires several stages of sanding afterwards? This isn’t drywall with 4-5 coats of compound. This is plastering. Do it right and you’ll hardly have to touch sandpaper.
Is there a specific type or recommended brand of plaster that should be used?
Great post! Plastering a brick wall is a great way to achieve a smooth and durable finish. Proper surface preparation, including cleaning and dampening the bricks, ensures better adhesion. Applying the plaster in even layers with a trowel helps create a professional look.