This article is about how to build deck railings. Building deck railings is a fun project for any diy-er, as you have the chance to use many woodworking techniques and to freshen up the look of your house. In this step by step diy project we show you how to build deck railing and how to install bottom rail and handrails. This project is not very complex, provided you use the proper tools and material, as to get the job done in a professional manner. In order to build deck railings in a professional manner you have to use pressure-treated lumber, designed for being used for decks. If you aren’t accustomed to these materials, just go at your local store and you will find the right ones.
We used 3×4 lumber for the bottom rail and for the handrail. When purchasing these materials (they come in several length 10′, 13′ or greater – just choose the most convenient one for your project), make sure they are perfectly straight, otherwise you will have a hard time aligning them into position. In order to make sure the lumber is not bowed or crooked, just look from one end to the other on all 4 faces. If it has the slightest defect (including knots, splits, twists or wanes) don’t buy it, it would be very hard to build a proper deck railings with it.
Before building the deck railings, just draw a detailed plan, including the dimensions of your posts, rails and the design of your balusters. It is essential to know what you are going to build, as to buy the proper amount of materials and tools. You have to build and attach deck posts before building the railings. If you are going to install deck posts on concrete using post anchors, you should take a look on our related article.
Made from this plan
Materials
- 4×3 lumber
- Long wood screws (around 8” long)
- Wood screws (3” – to fasten the balusters)
- Wood primer, wood glue
- Dowel pegs
Tools
- Level, rubber hammer, hammer, measuring tape
- Circular saw / jigsaw, drill bits
- Clamps, Drill machine
- Electric screw driver with torque control
- Framing square, Carpenter pencil
Tips
- Read safety and disclaimer pages
- Select with great care the lumber, otherwise the railings would look bad
- Before fastening the posts, make sure they are plumb
Related
- Episode 1: Deck Plans
- Episode 2: Anchor Deck Posts
- Episode 3: Building Deck Railings
- Episode 4: Deck Stair Railings
Building the bottom rail
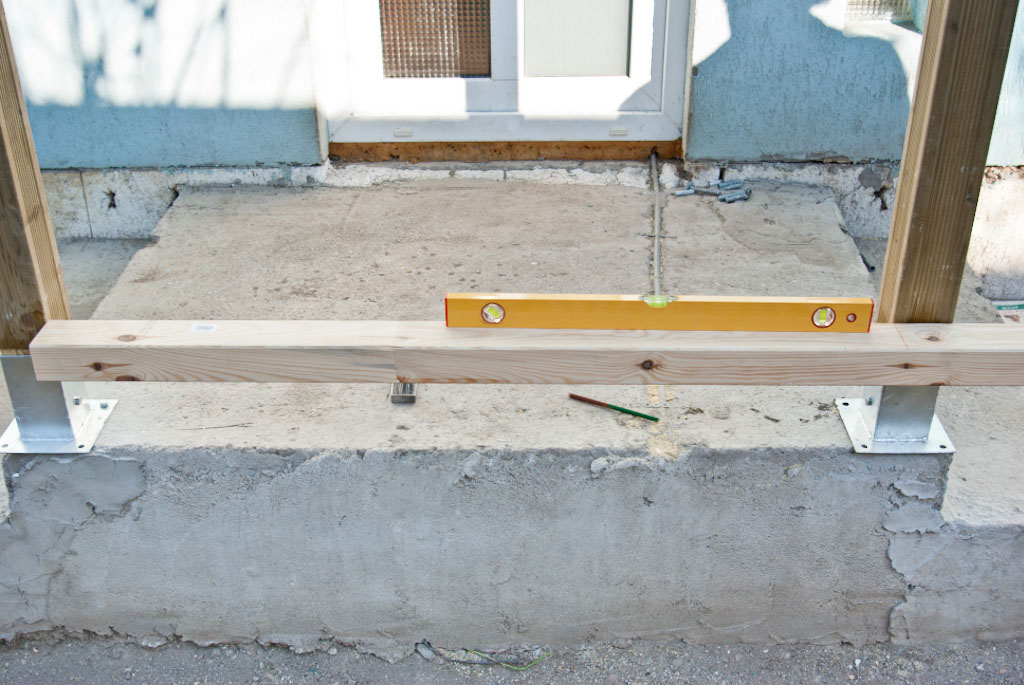
Building deck bottom rail
First we have to build the bottom rail. Consequently, position the 3×4 lumber between the deck posts and mark the cutting line, using a carpentry pencil. Make sure the the lumber is perpendicular on the posts, otherwise your bottom rail will be longer than you actually need. In addition, use a level over the lumber, as to make sure the bottom rail will fit between the posts.
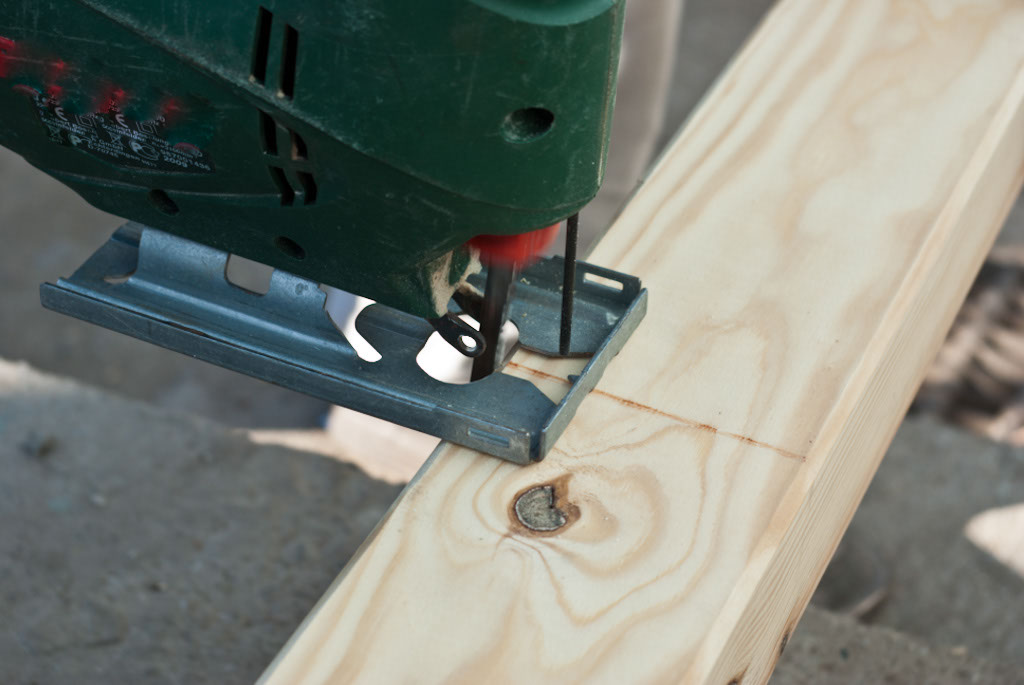
Cutting deck bottom rail
Next, we have to cut the bottom rail using a jigsaw or a circular saw. Make sure you use a sharp blade, otherwise you won’t be able to make a smooth cut.
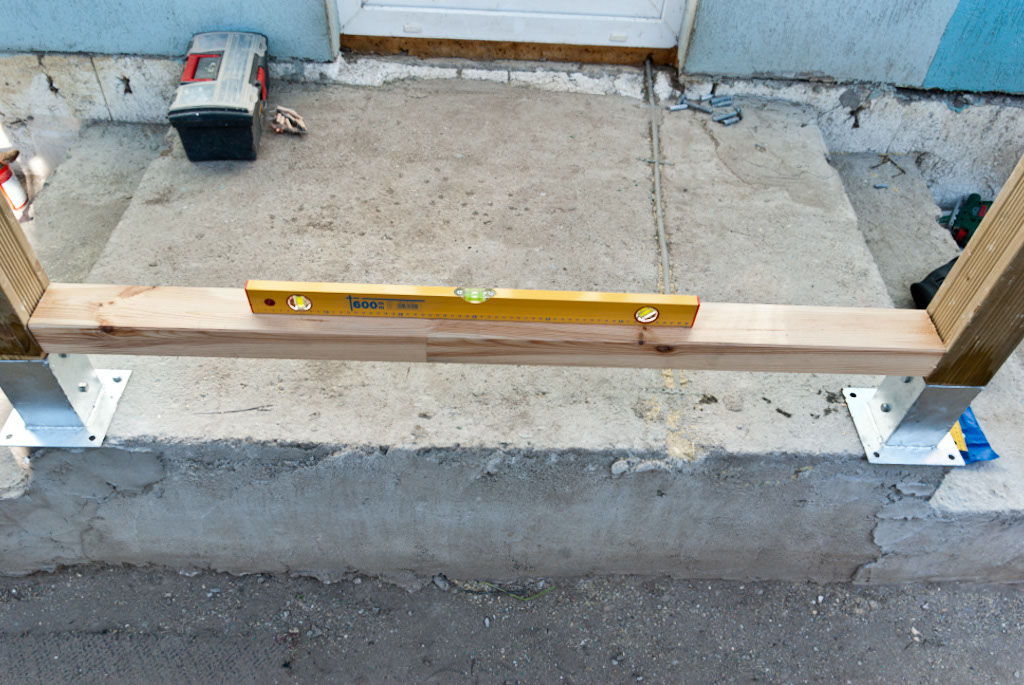
Installing the bottom rail using a level
After you have cut the bottom rail, you have to lock it into position between the deck posts. The distance from the deck to the bottom rail it usually varies from 5-10”, but it depends according to your needs and your local code.
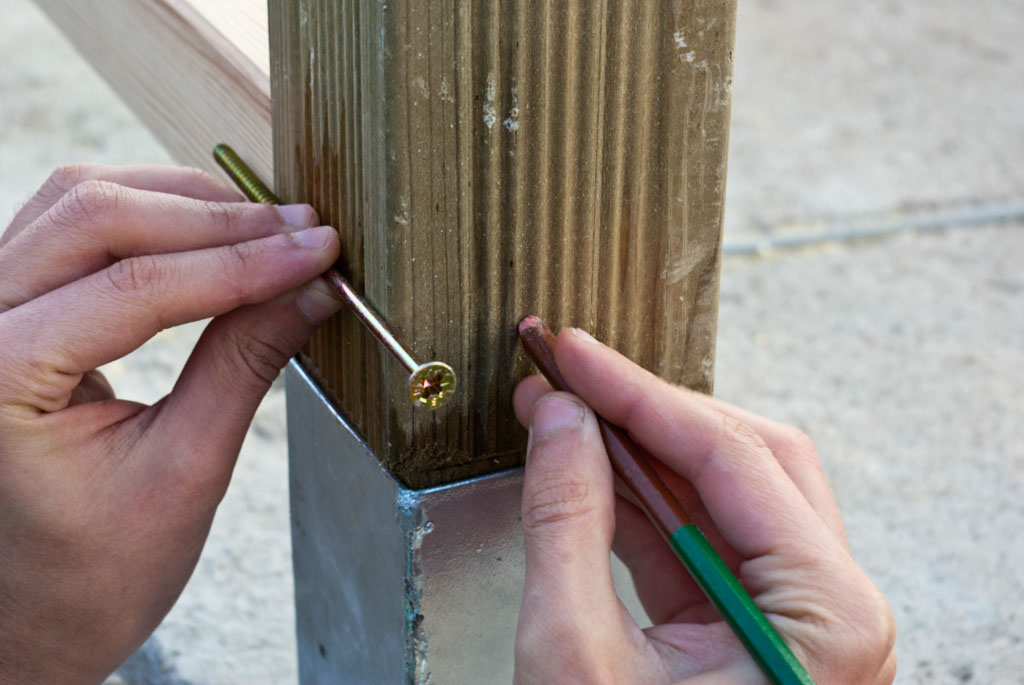
Marking the holes for fastening the bottom railing
Next, we have to fasten the bottom rail to the posts with 6-8” wood screws, but first we have to mark the spots where we have to drive in the screws. Consequently, make 2 marks on the post, making sure you leave at least 1” from the edges (to prevent wood from cracking).
In addition, you have to make sure the screws will go in the median of the bottom rail.
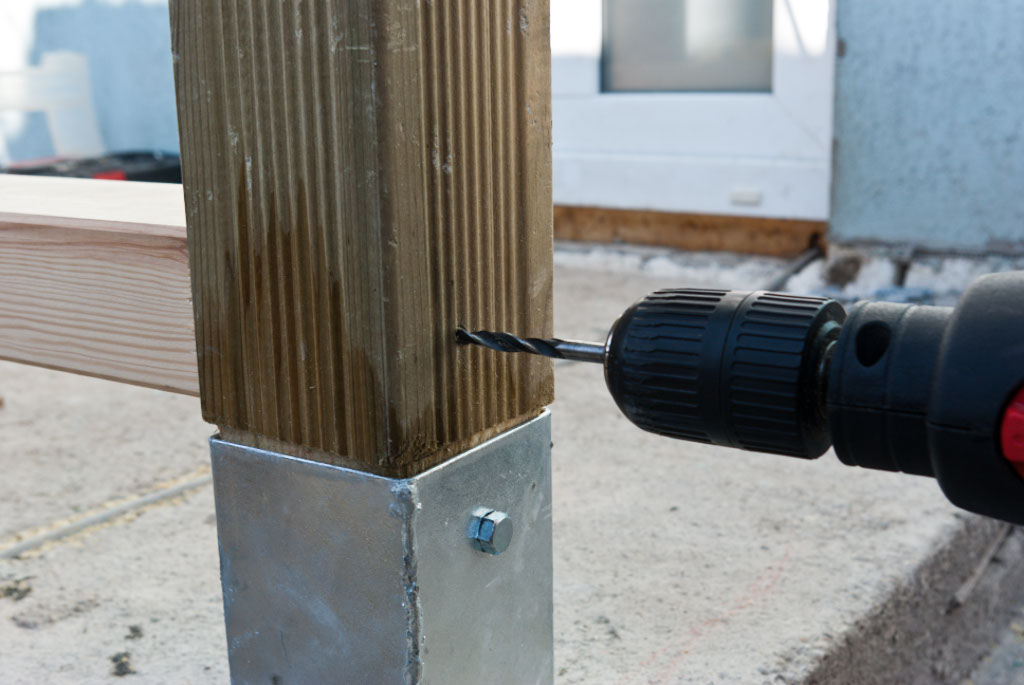
Drilling holes in deck post
Next, use a god drill machinery with torque control, as to make sure you will make proper holes. The size of the drill bit has to be chosen according to the screws you are using. In addition, make sure you drill only in the deck posts, otherwise the screws won’t be able to squeeze the 2 components together.
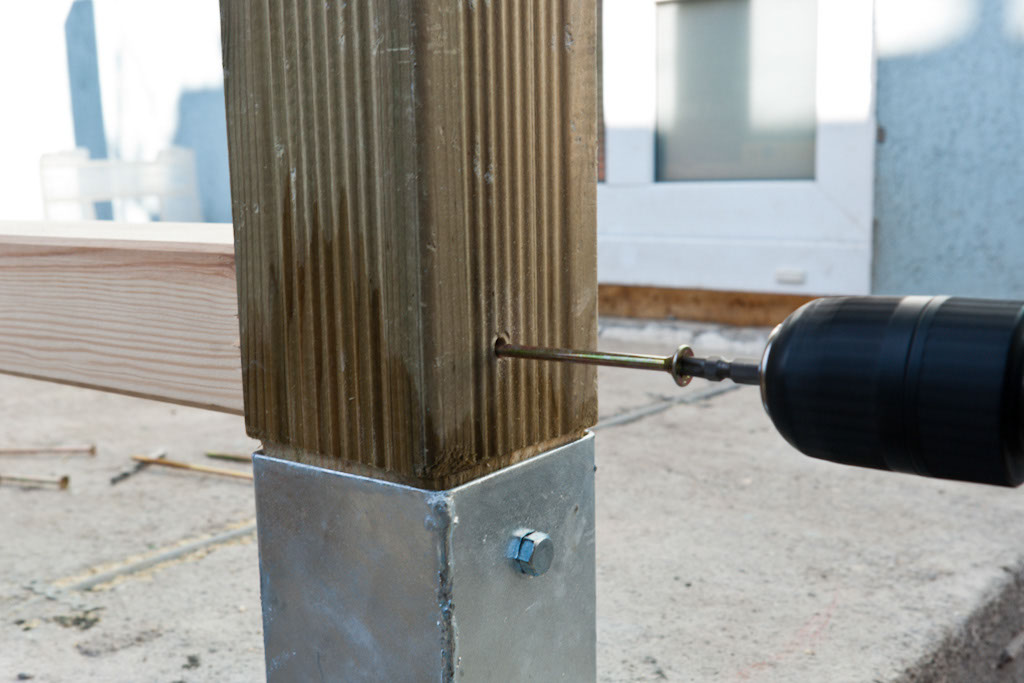
Fastening the bottom deck rail with screws
Next, we have to drive in the screws by using an electric screwdriver with torque control.
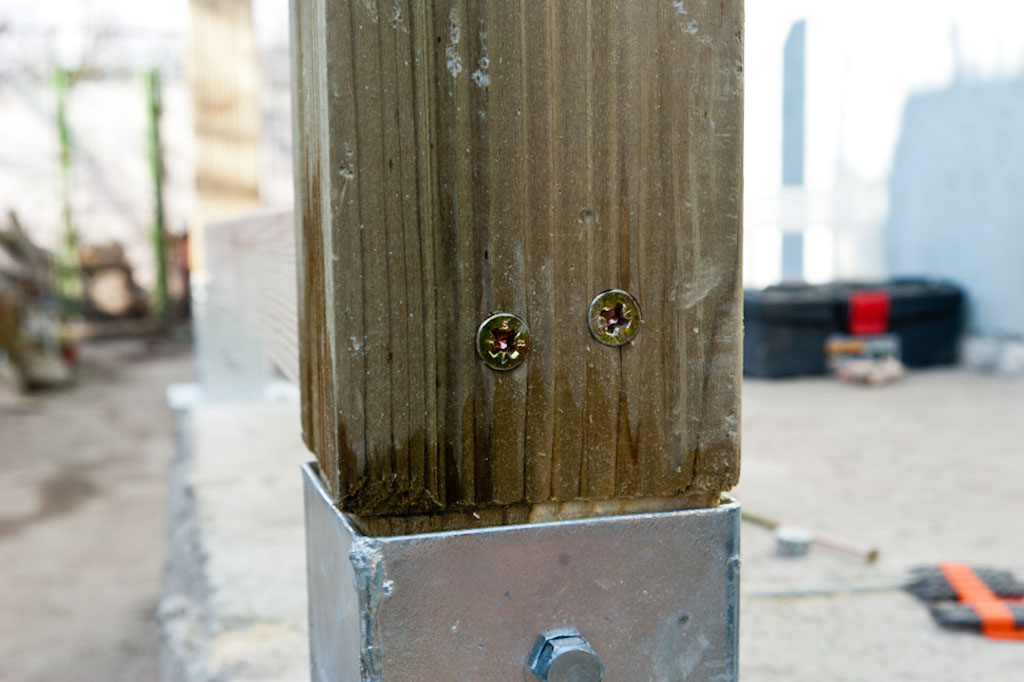
Bottom rail locked with screws to the deck post
After we have inserted the wood screws in the deck posts, as to fasten the bottom rail, we got the result you can see in the picture. Remember that it is recommended to countersink the heads of the wood crews, as we will install another bottom rail over them.
Building the floating post

Measuring the middle point of the bottom rail
This step is optional, if you install regular balusters, but in our case we will build x-shaped balusters. As between the posts we have a distance of 5′, we considered that it was necessary to install a floating post over the middle of the bottom rail.
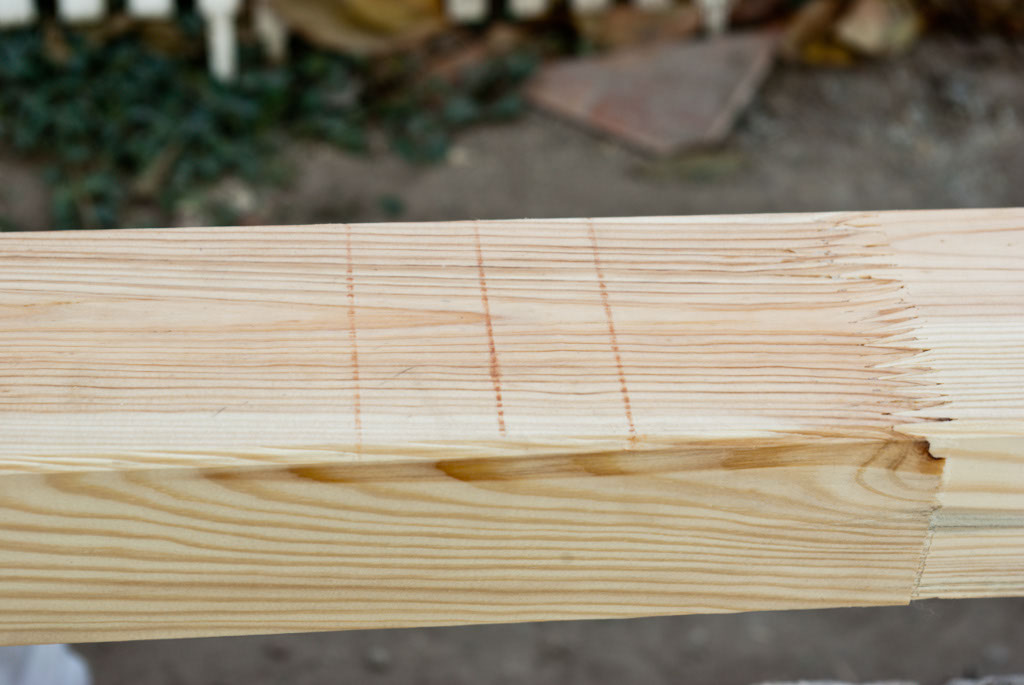
Marking the footprint of the floating post on the bottom rail
Next, use the carpentry pencil and the l-square to draw the footprint of the 3×4 floating post. Consequently, mark the contour, making sure it is highly visible.
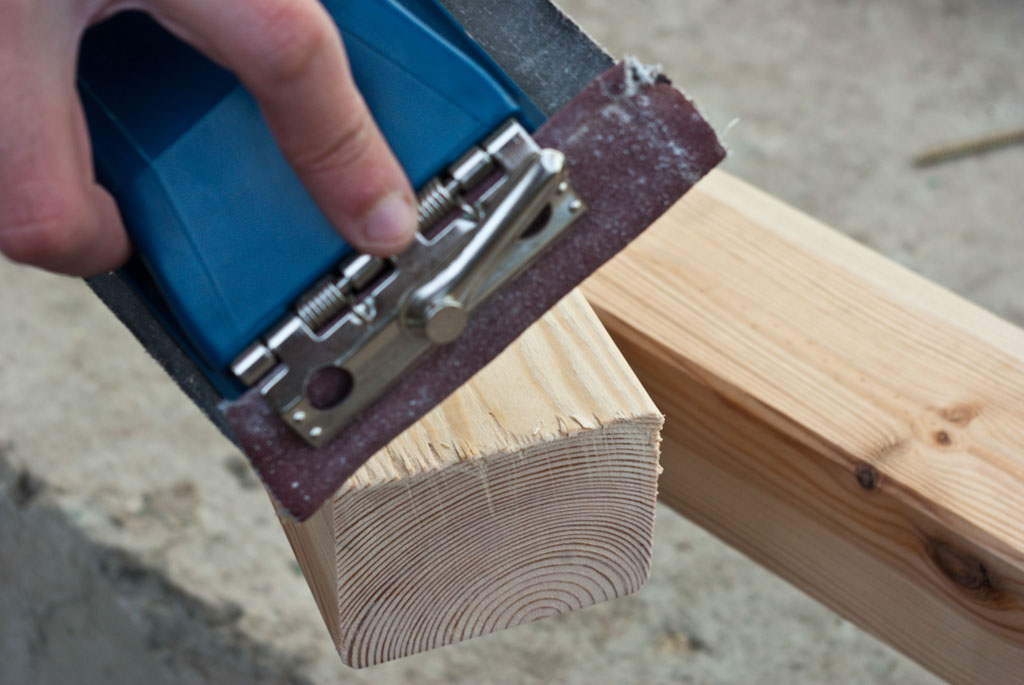
Smoothing the edges of deck post
After you cut the floating post with a jigsaw, we have to smoothen the edges, as to give it a nice appearance. The length of the floating post, varies according to the design of your project, but in our case it is around 28”.
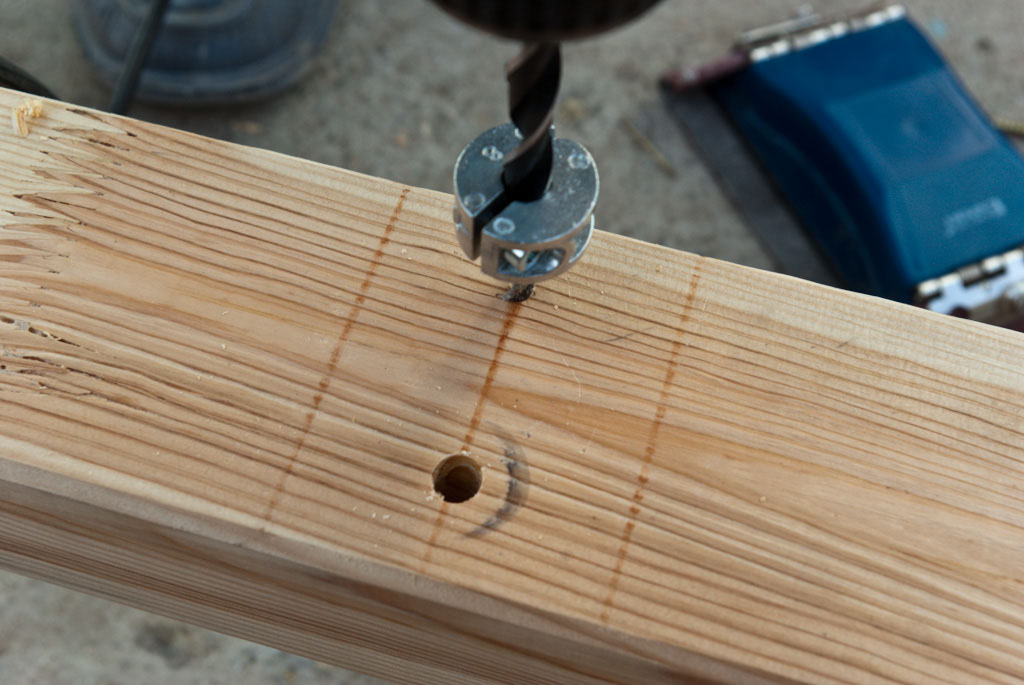
Drilling holes in the bottom rail
Next, we used a sharp drill bit to dill holes in the bottom rail, as to attach the floating post. Consequently, two dowel pegs will be enough to secure the floating posts.
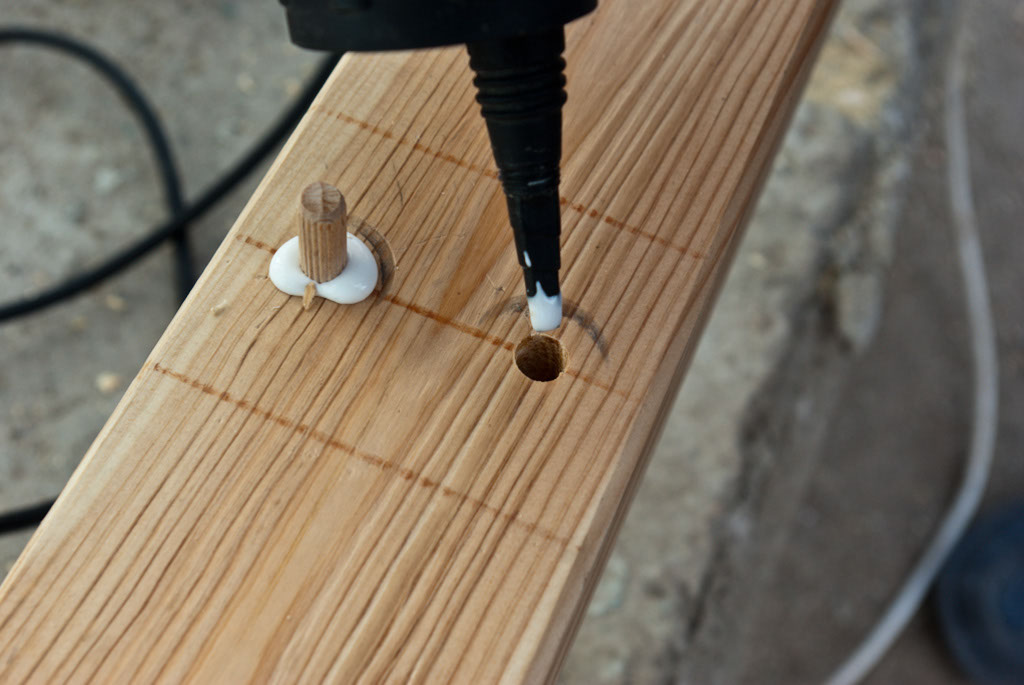
Installing dowel pegs
Next, install the wood dowels in the holes, using a small amount of wood glue. Consequently, pour glue in the holes and then tap the dowel pegs gently with a rubber mallet.
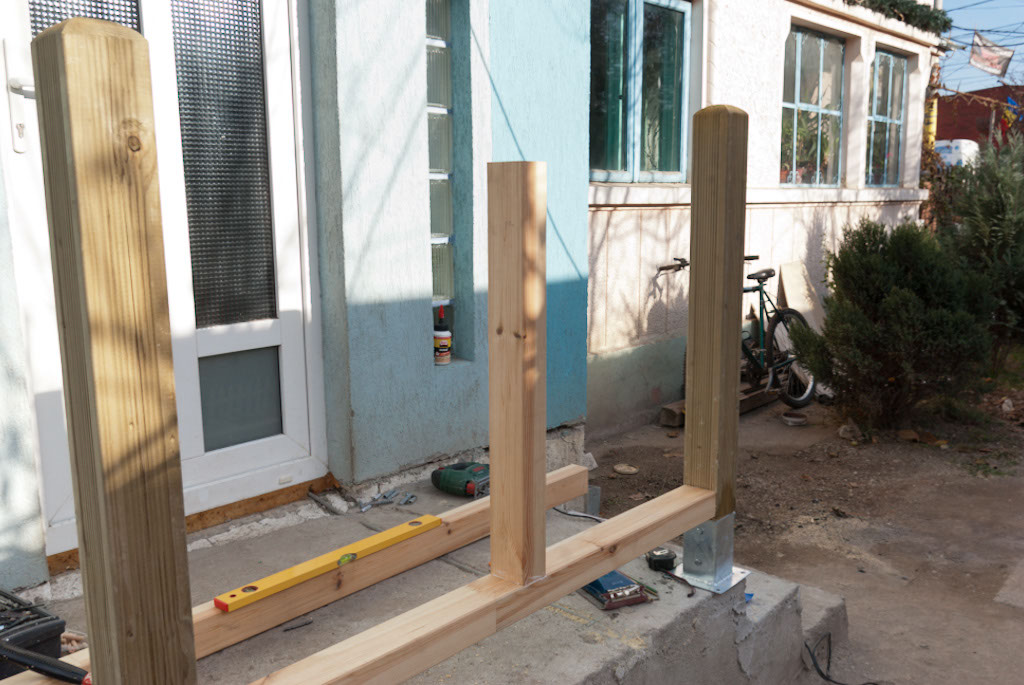
Installing floating deck post
When installing the deck post, you have to make sure it is level and plumb, by using a level. This aspect is essential, otherwise it won’t align when installing the handrail.
Building x-shaped balusters
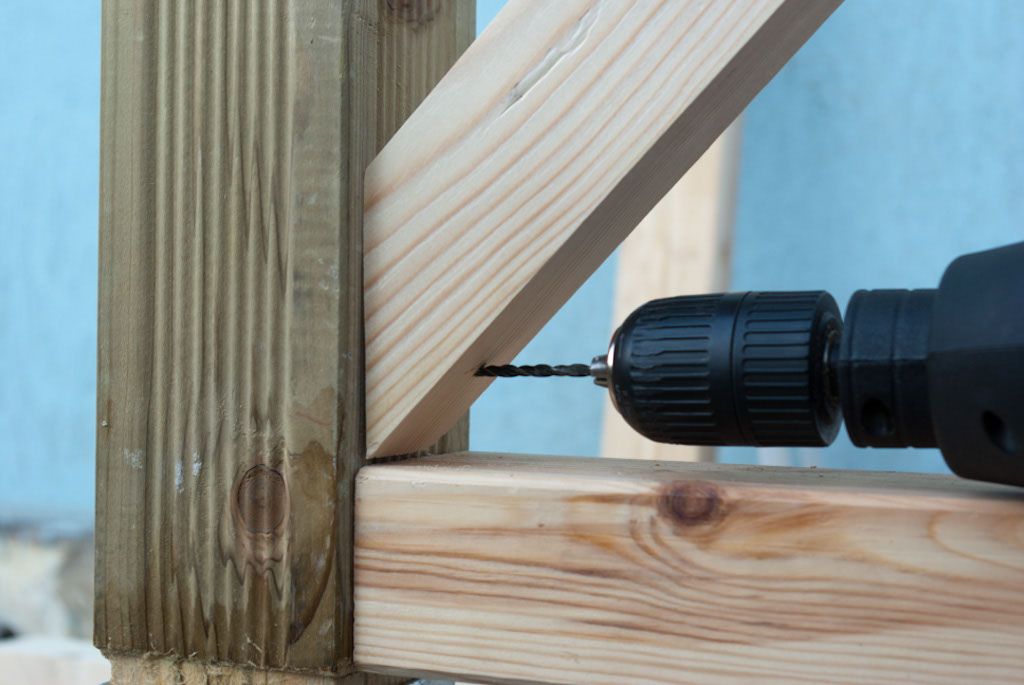
Drilling in deck balusters
Next, after we have cut the balusters as to fit between the posts, we drilled several holes as to fasten them with screws. Consequently, use a sharp drill bit and make one hole for every end of the baluster (one screw for every end of the balusters is enough).
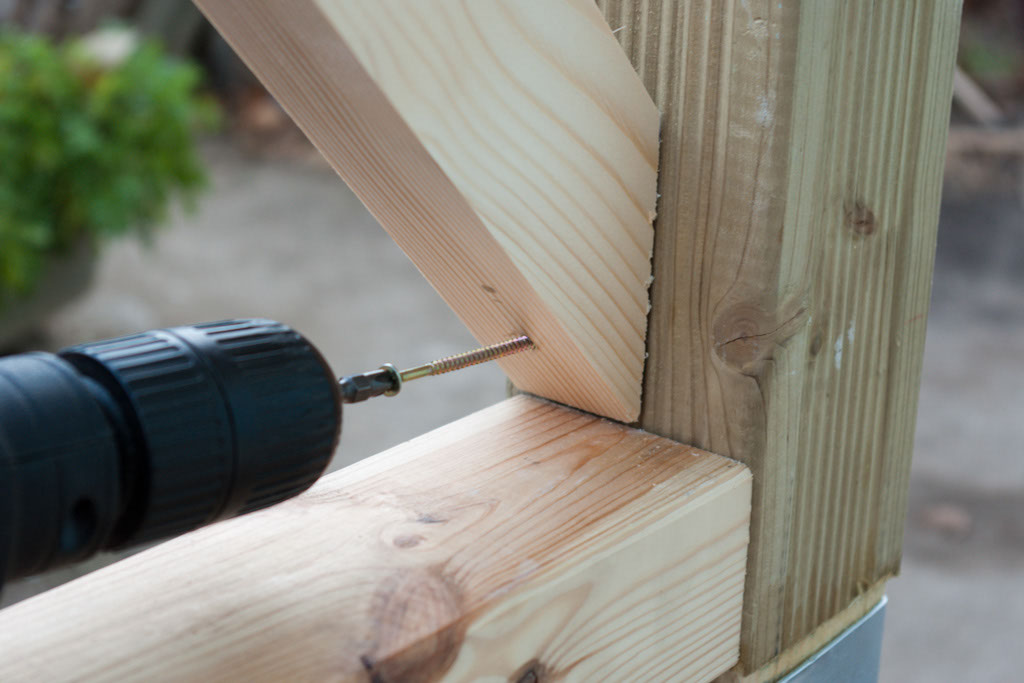
Fastening deck balusters
After we have made the holes, we have installed the wood screws (the screws must be at at least 3” long). The wood screws must be driven in, using an electric screwdriver with torque control. Remember that you have to use the electric screwdriver at low speeds, otherwise you might damage the screw heads.
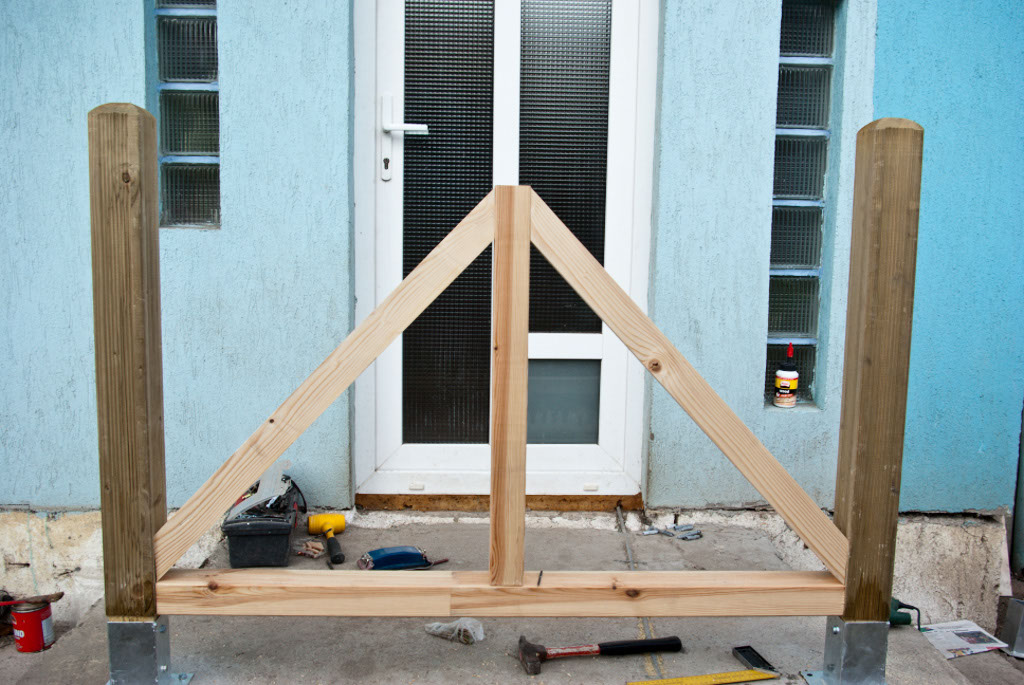
Installing x-shaped balusters
In this image you should notice that we installed one baluster on each side of the floating deck post. In this way we make sure, the post will stay on position, as the forces are evenly distributed.
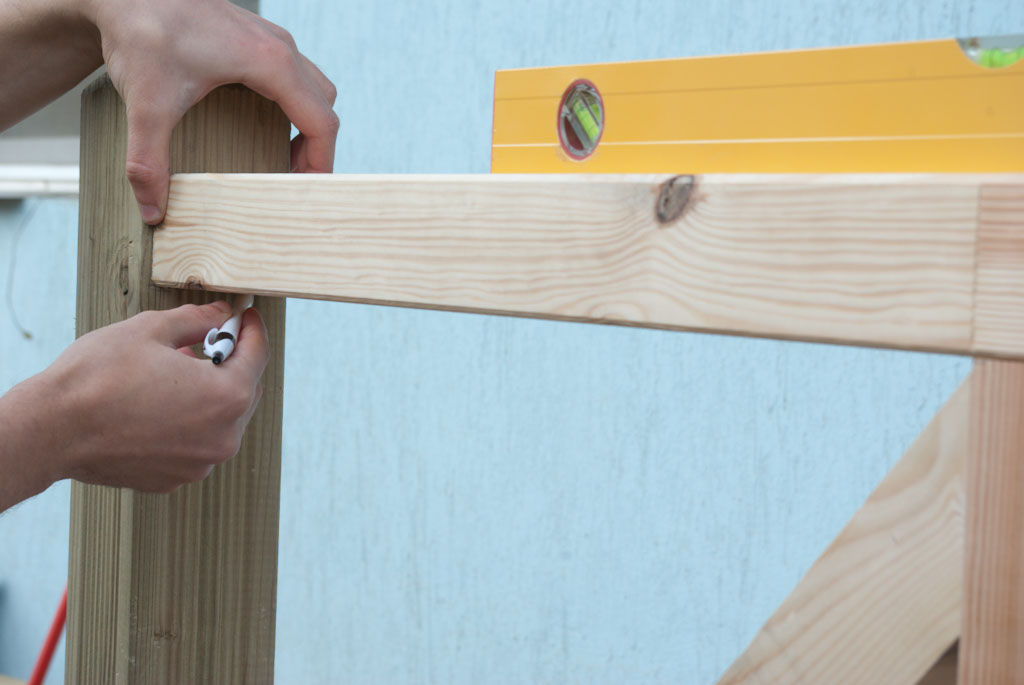
Marking on the post the bottom of the handrail
Next, in order to install the other components of the x-shaped balusters, we have to mark on both posts the bottom edge of the handrail. Consequently, use a carpentry pencil and a level, to be able to draw a straight line.

Marking the x-shaped baluster joint
After we have cut the other x-shaped baluster, we have to mark the joint over it, using a carpentry pencil. While in most of the cases you won’t have to do that, there are situations in which the width of the two balusters is greater than the width of the post. In our case we have to cut in 1/2 in one baluster, as to fit the width of the posts.
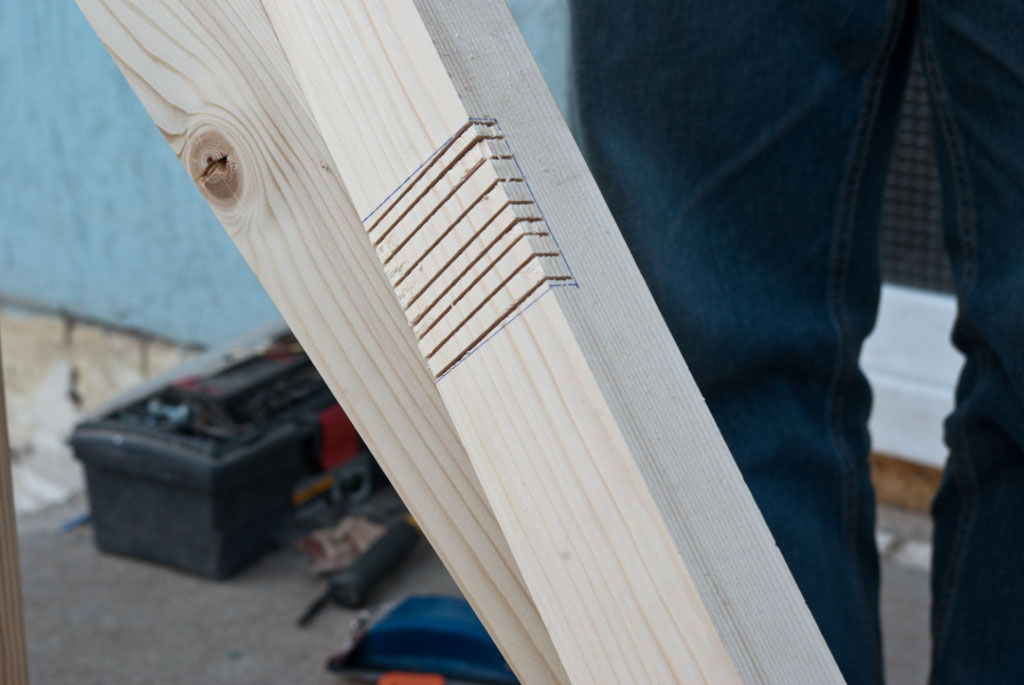
Cutting in baluster
Next, we have used a jig saw to cut several parallel lines in the area described by the two marked lines. Consequently, you have to work with attention, as not to cut too much in the balusters.
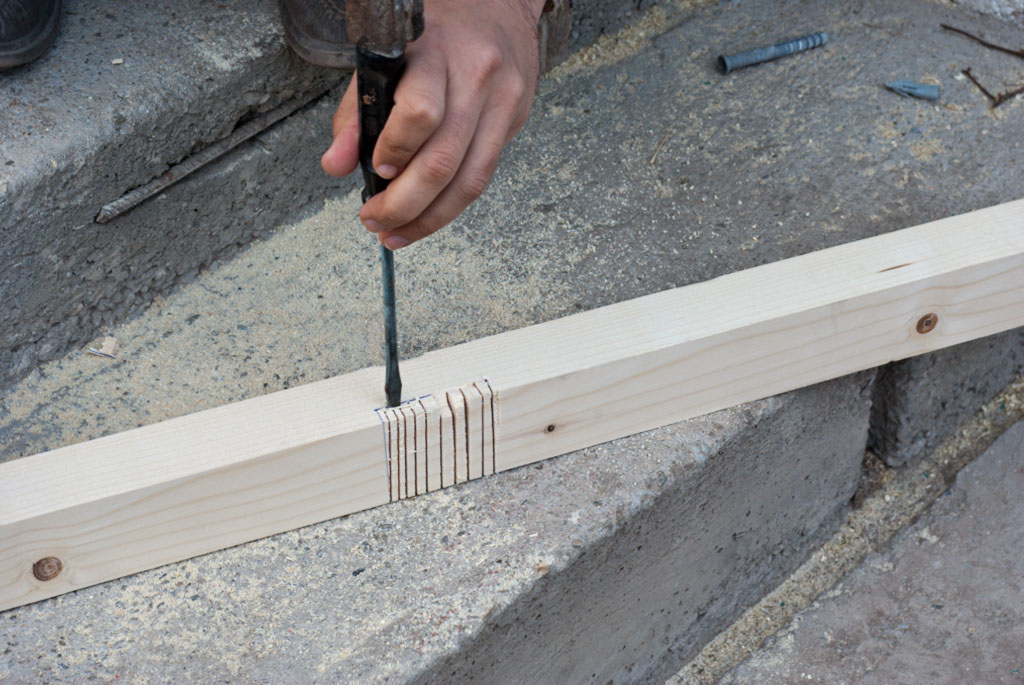
Carving in baluster joint
Next, we removed the wood by using a wood chisel and a hammer. Work attentively, and position the chisel over the marked line, as otherwise you risk damaging the wood (it can easily crack or tear more wood than necessarily).

X-shaped balusters joint
After we have used the chisel, we also had to use a grinder as to make a proper operation. By using these woodworking tools and techniques, we got a nice result. It is essential to smooth the surface, otherwise the wood joint will be poor.
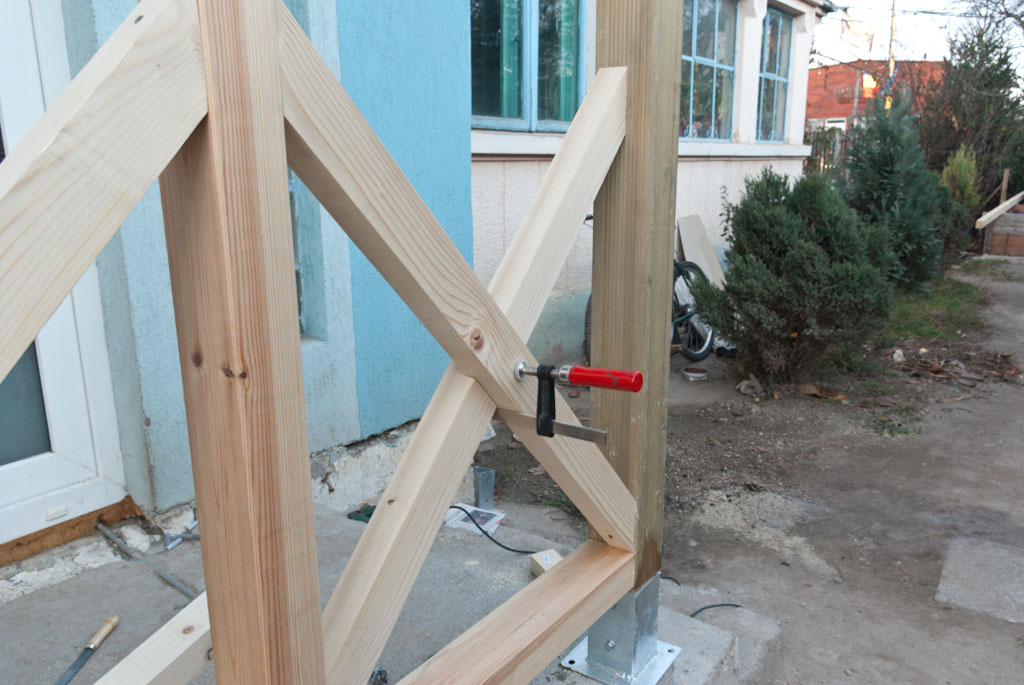
Installing x shaped balusters
After you have curved in the balusters, to make the wood joint, you have to set the x-shaped balusters in the position, by using a C-clamp.
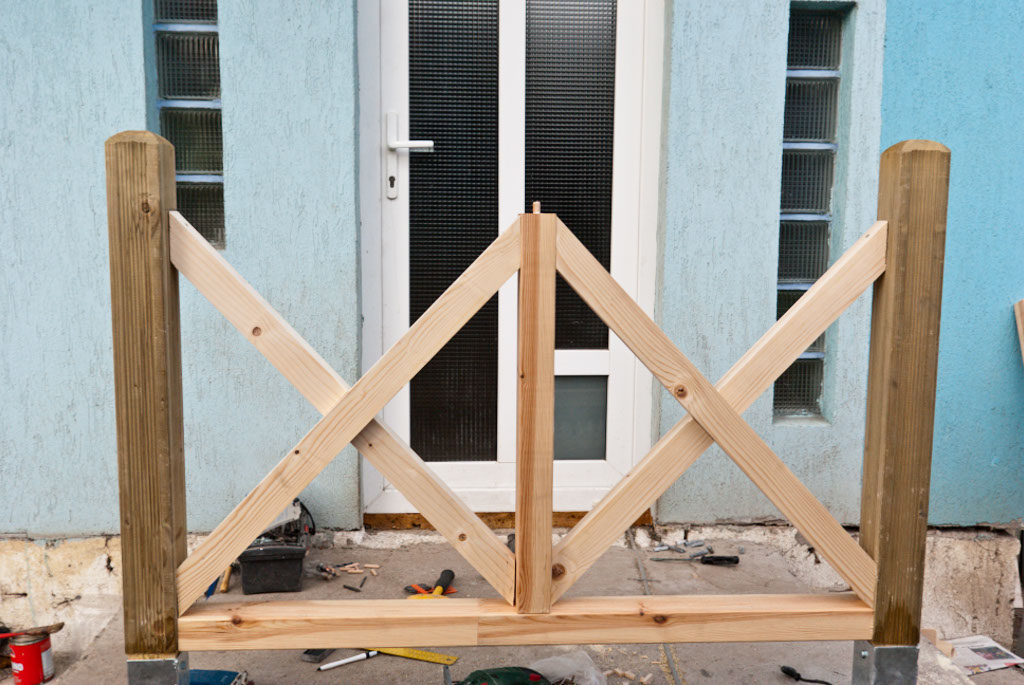
X shaped balusters
Next, use a good electric screwdriver and wood screws to fasten the balusters in the deck posts. When installing the x-shaped balusters, pay attention to the marks on the side posts. If you install the balusters above the marks, then you won’t be able to install properly the hand rail.
Installing the handrail
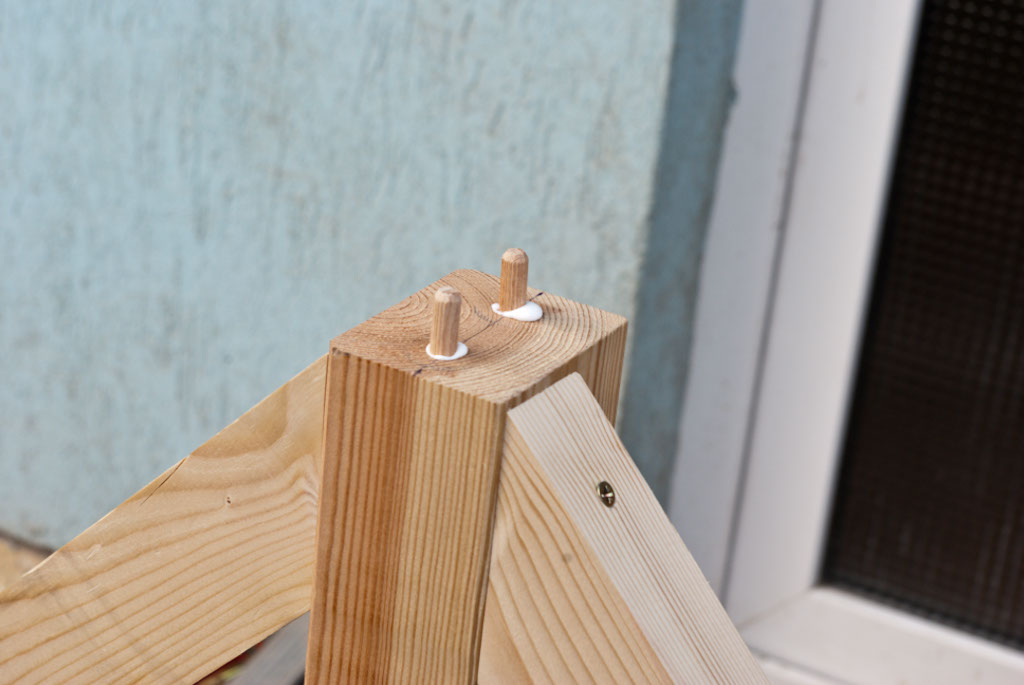
Dowel joint
Next, we have to install the deck handrail. Here there are several schools of thought, one claiming that it is better to use screws, other recommending a dowel joint. From our experience, we can say that both are very efficient, but definetly the second technique looks much better.
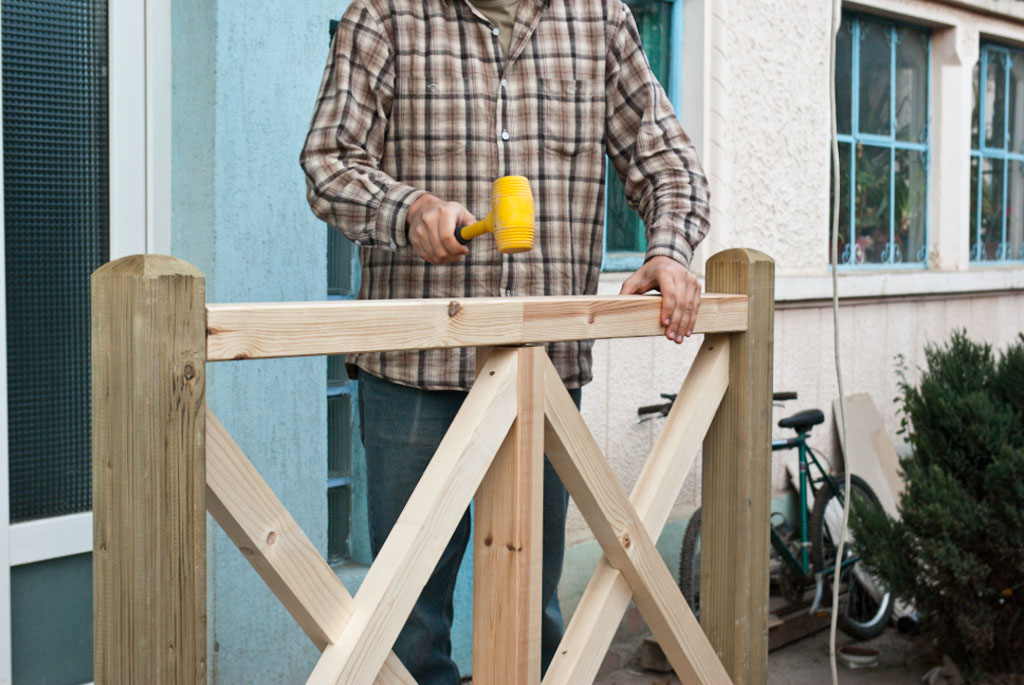
Installing deck handrail
Next, you have to drill the mating holes in the handrail as to be able to lock it into position. You also have to use a level, as to make sure the handrail is set into position properly. Use a rubber mallet to connect the wood joint properly.
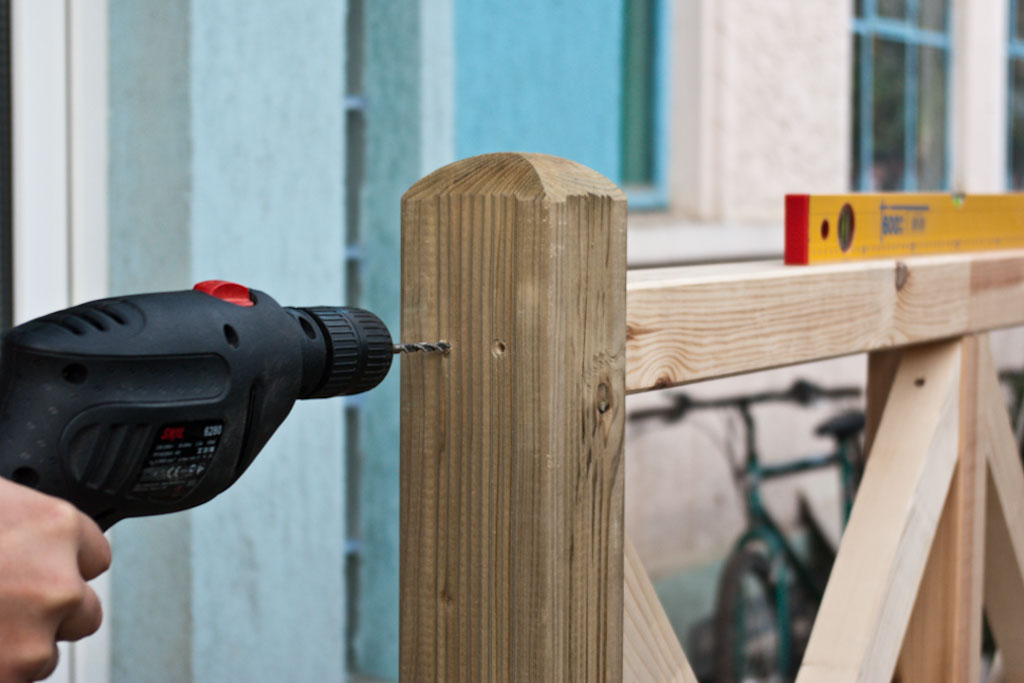
Fastening handrail with screws
Last but not least, we have to fasten the handrail into the posts, by driving in two screws in each side. Consequently, pre-drill two pilot holes on each end of the handrail, using a good drill machinery and a sharp drill bit. Check the full Concrete Deck Series.
Thank you for reading our article on how to build deck railings, and we recommend you to check out the rest of our projects. Don’t forget to share our projects with your friends, by using the social media widgets.

3 comments
How do you secure the next bottom rail and top rail from BOTH sides when the other rails are in the way?
Pocket screws.
Thank you for sharing your process. I’m updating my deck and getting a vinyl railing system installed in the spring, but I’ve been trying to decide on a railing design for the project. I love the horizontal and diagonal slats design you used for your project- I think that could look great for my deck!