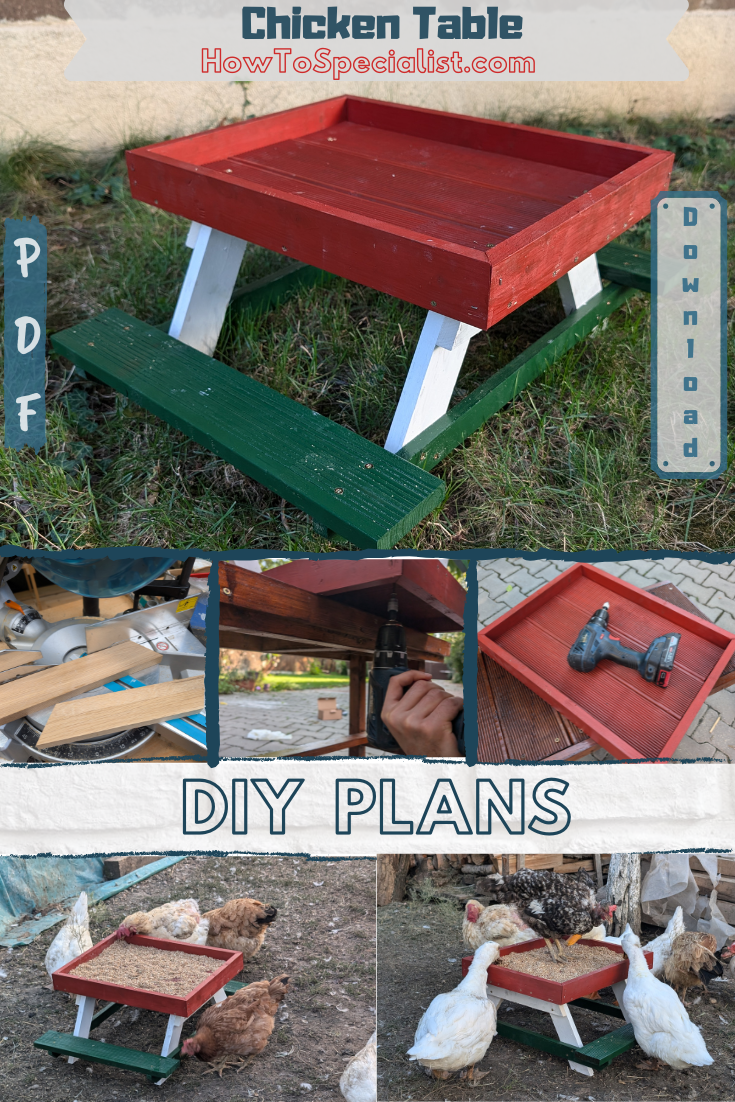
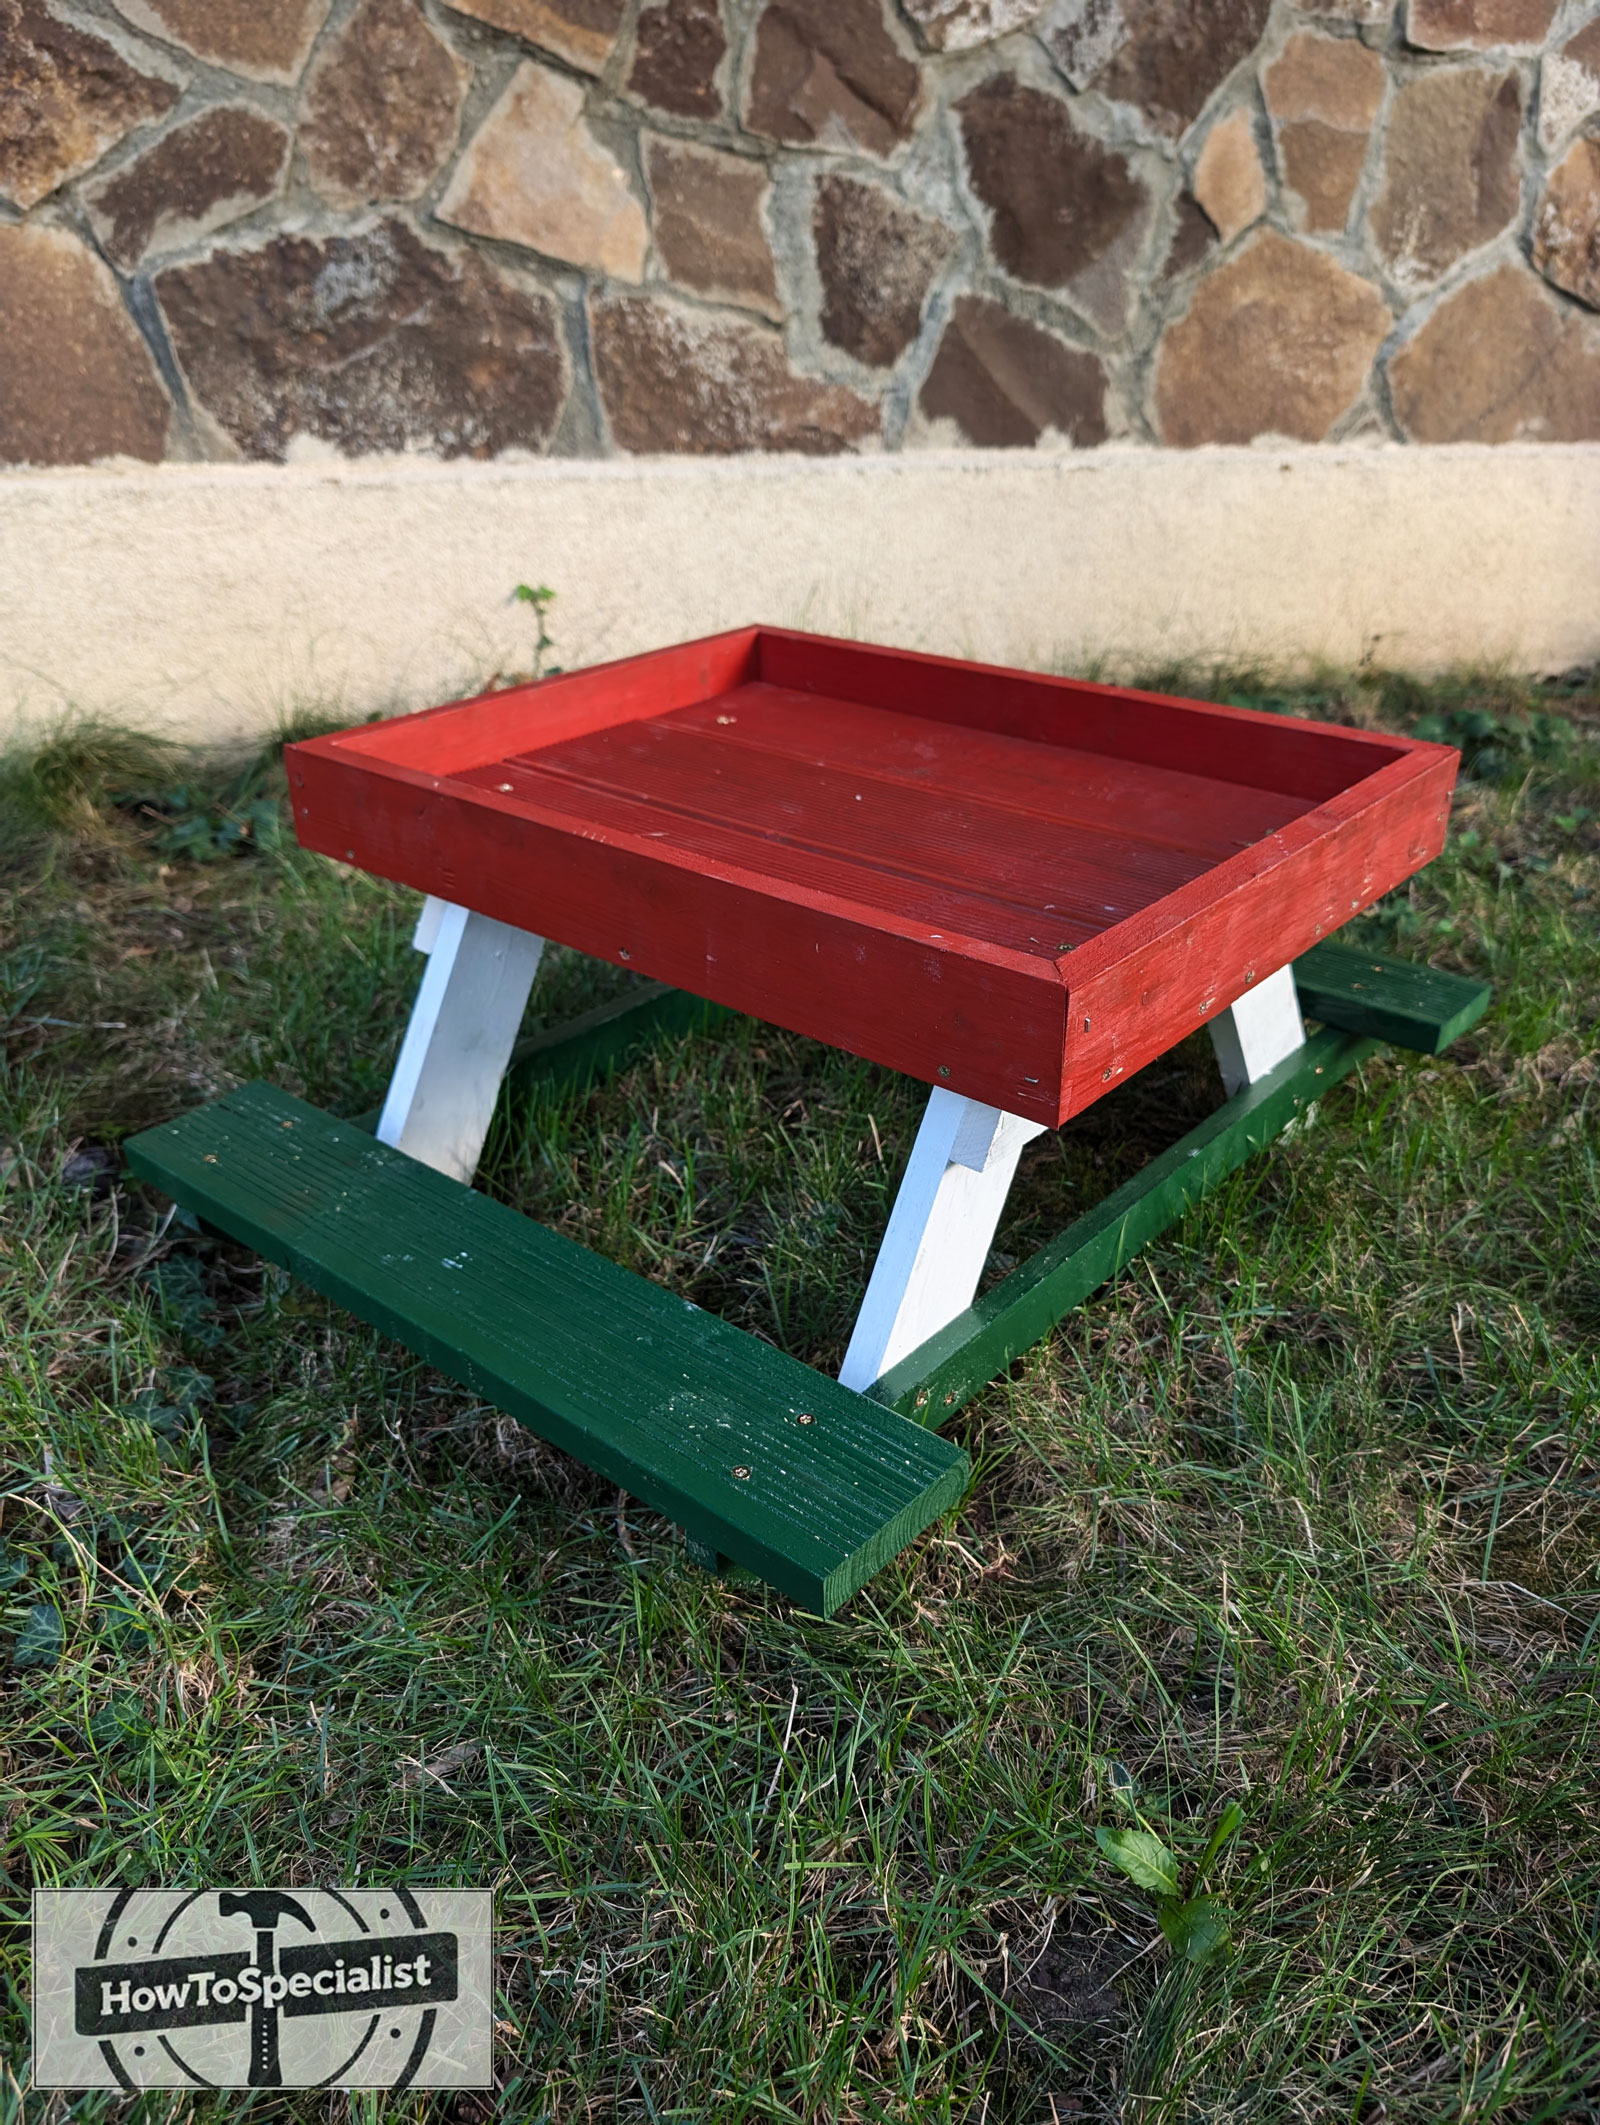
This project is about how to build a chicken picnic table. Chickens may not sit down for a backyard barbecue, but a well-designed chicken picnic table can serve as an excellent way to keep their feeding area organized while adding a charming touch to your coop or backyard. This project is both practical and enjoyable, offering a chance to improve your woodworking skills while creating something that enhances the daily routine of your flock. Using durable, weather-resistant wood and precise joinery, you can craft a sturdy and visually appealing feeder that will last for years. You can find the chicken table plans here.
Before starting, selecting the right type of wood is crucial. Since the picnic table will be exposed to the elements and subject to frequent use, it’s best to opt for rot-resistant lumber such as cedar, redwood, or pressure-treated pine. Cedar is an excellent choice because it naturally repels moisture and insects while being lightweight and easy to work with. If you use pressure-treated wood, ensure it is safe for animals by choosing modern, non-toxic treatments that won’t leach harmful chemicals into the feed. Avoid untreated softwoods like spruce or fir, as they tend to degrade quickly when exposed to moisture.
For fasteners, stainless steel or coated deck screws are the best options, as they resist rust and corrosion over time. Traditional nails may loosen with movement, and interior-grade screws will degrade quickly in outdoor conditions. Wood glue can also be used in combination with screws to reinforce critical joints, especially in areas where the table may experience stress from pecking and scratching.
Made from this plan
Pin it for Later!
Related
Step 1: Building the tabletop
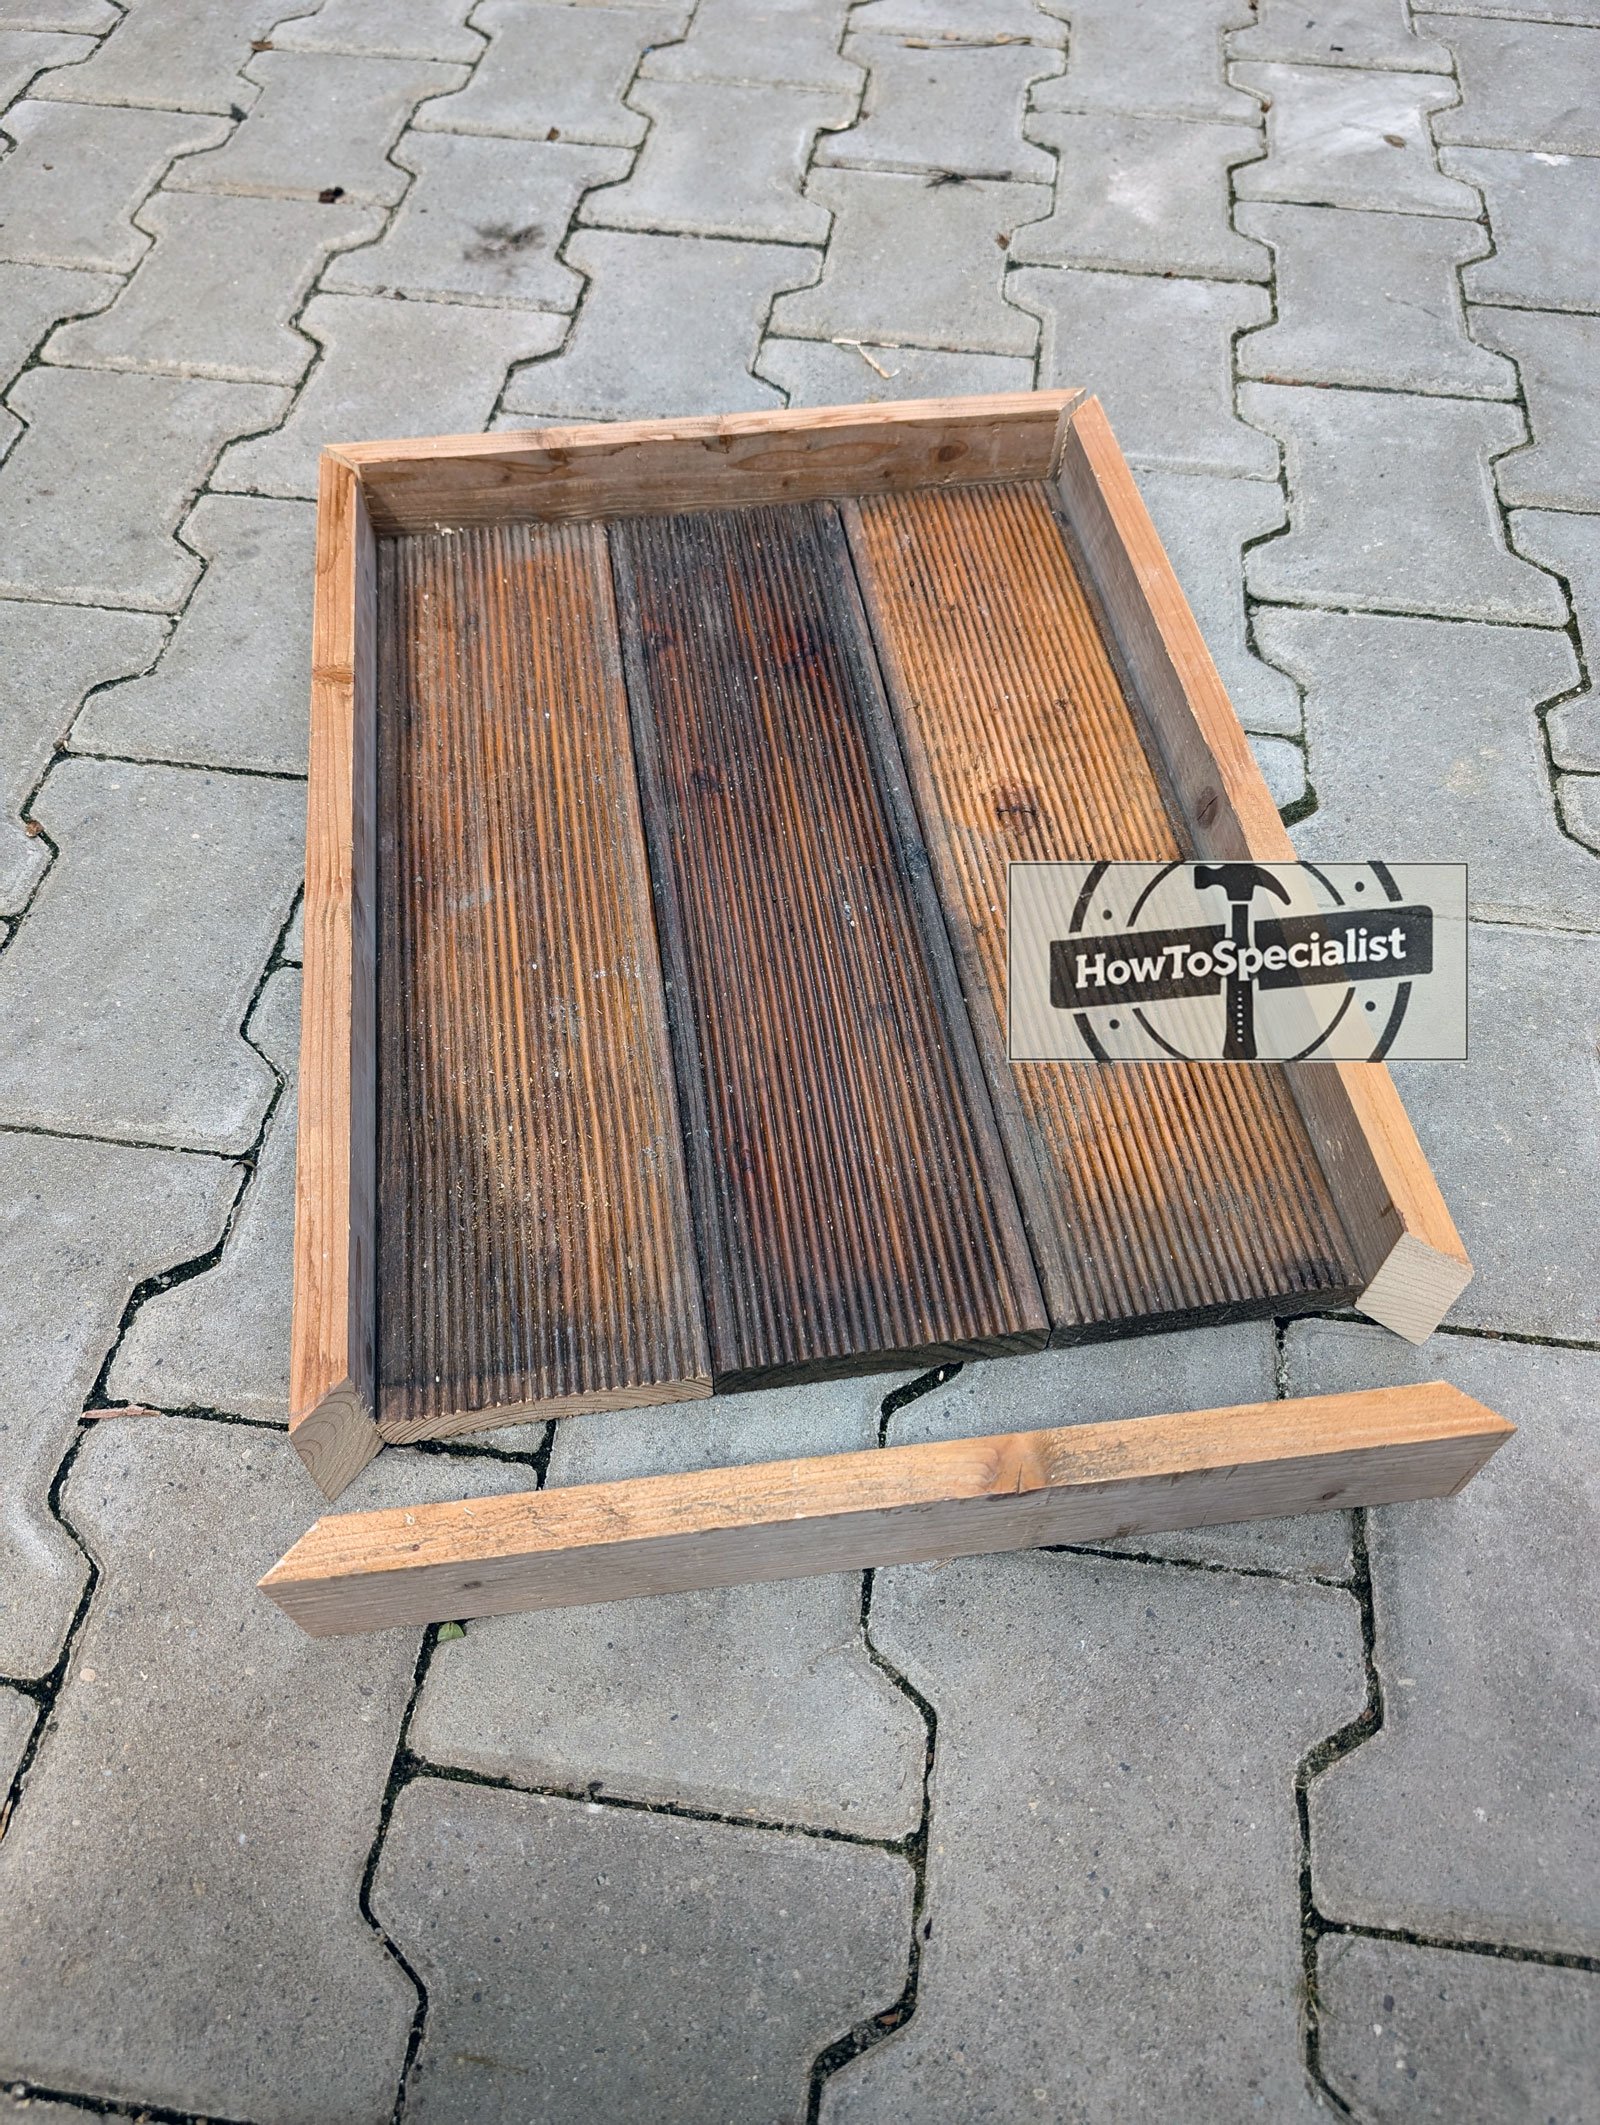
Assembling-the-tabletop
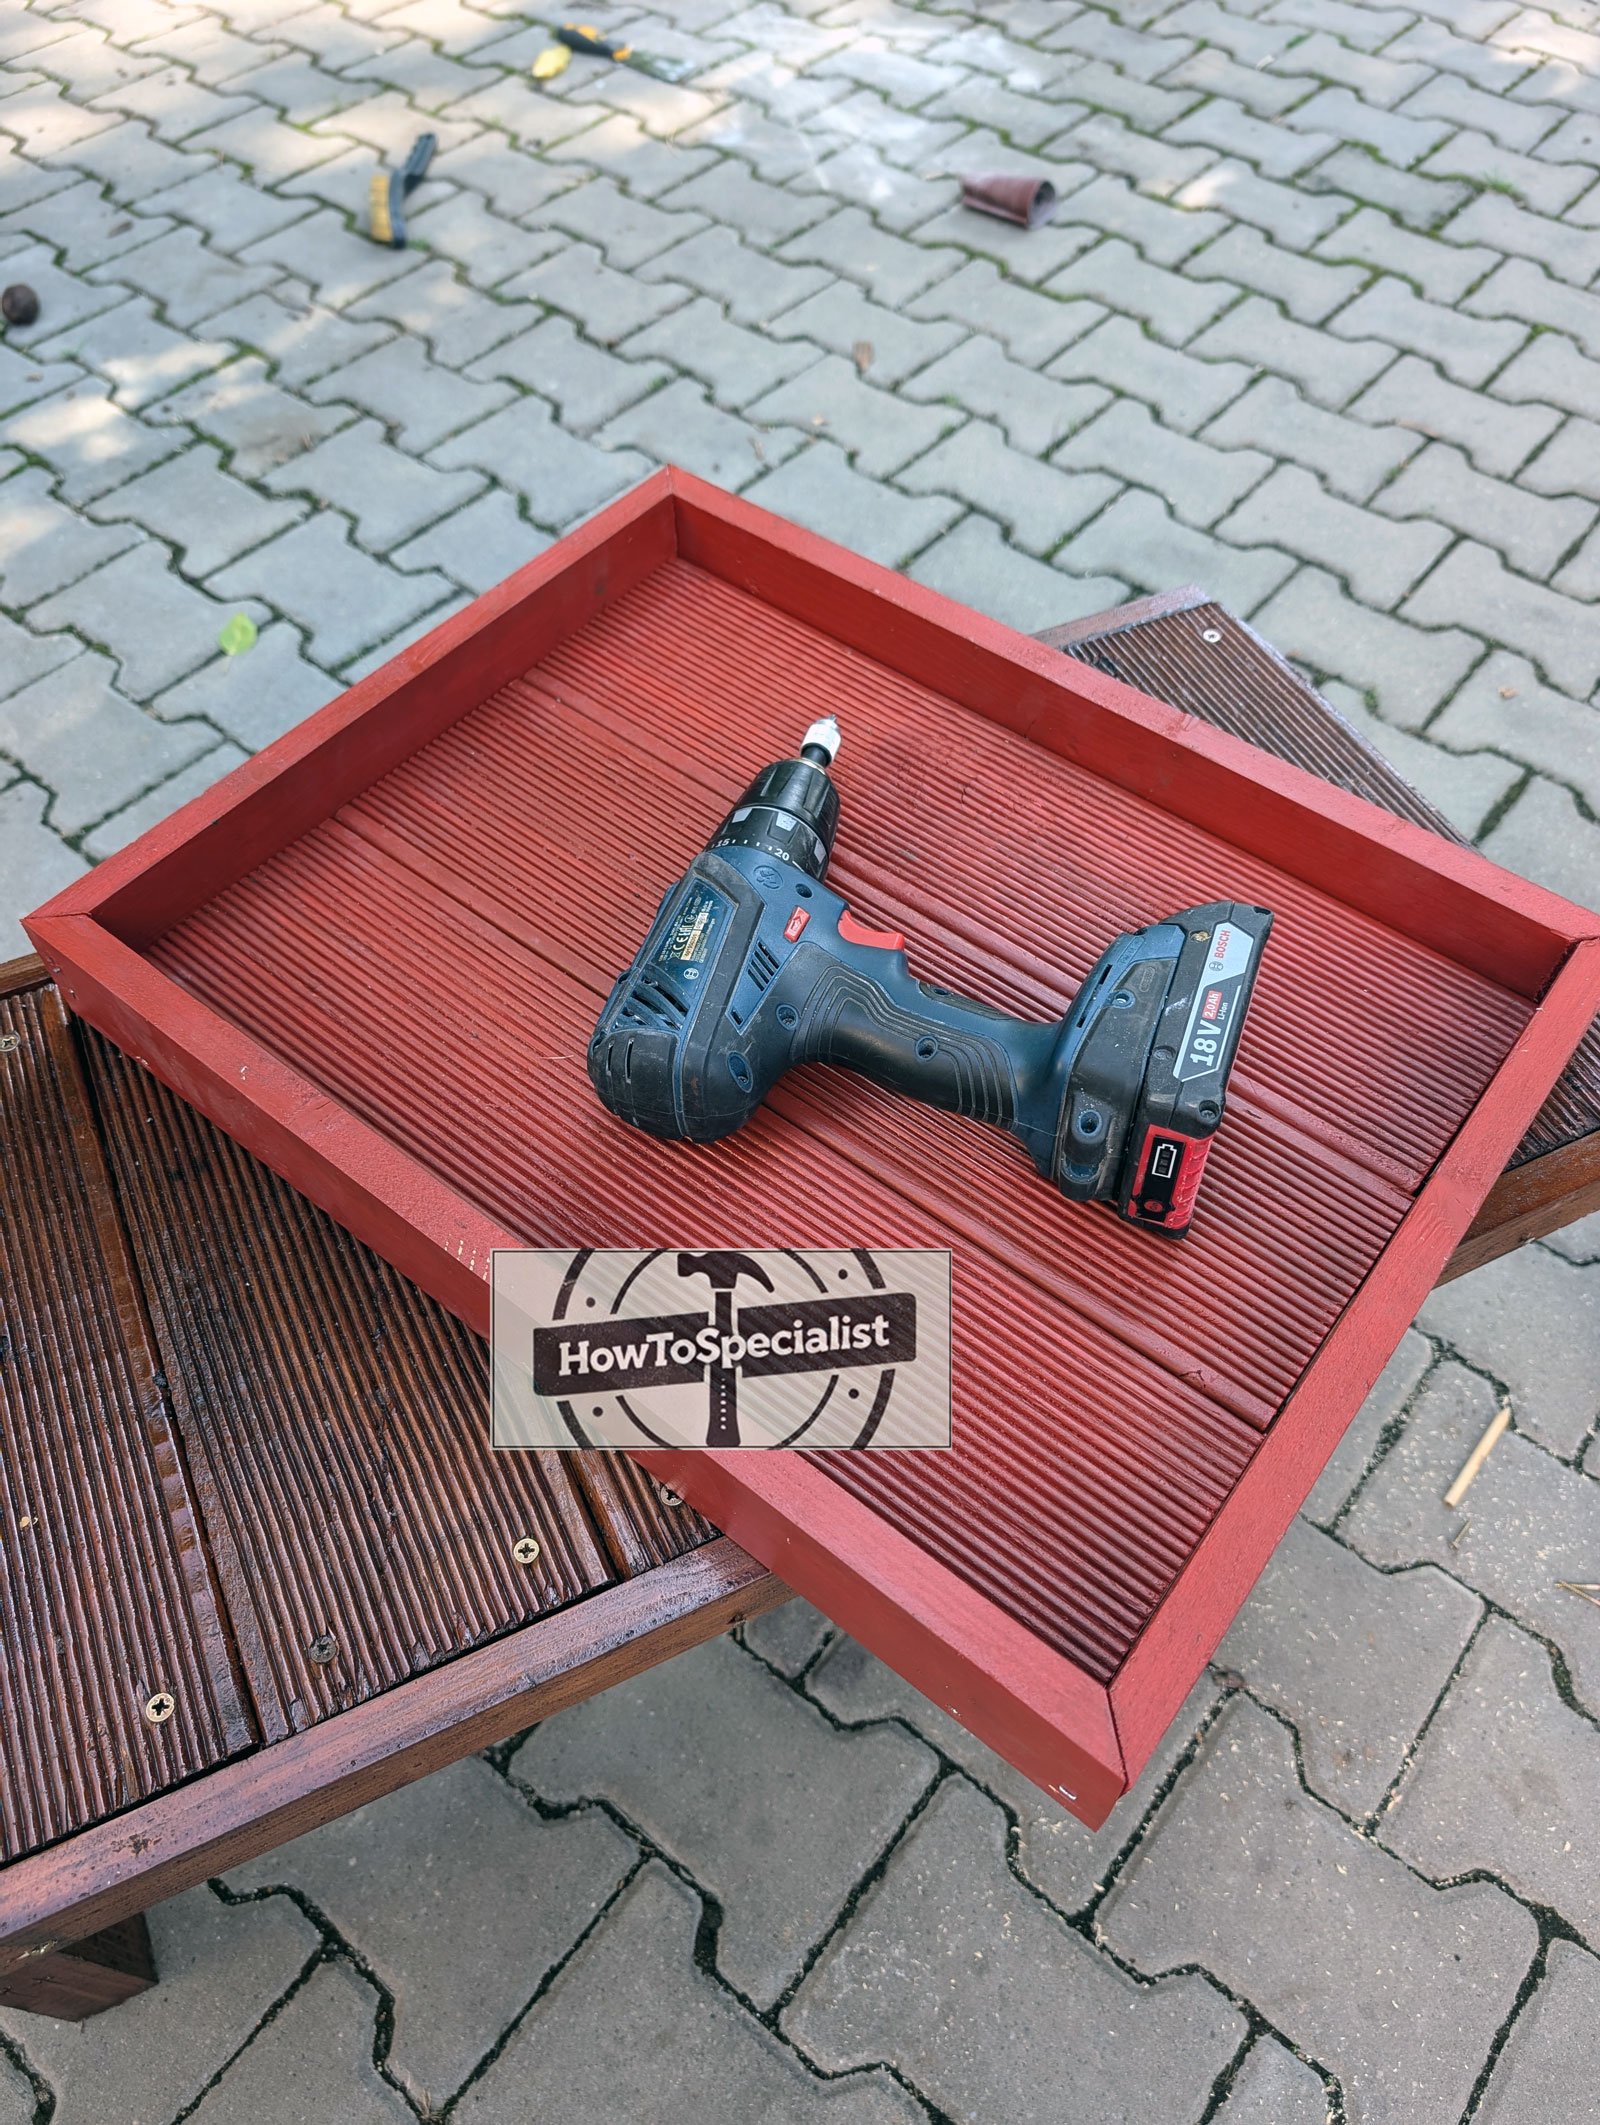
Painting-the-tabletop
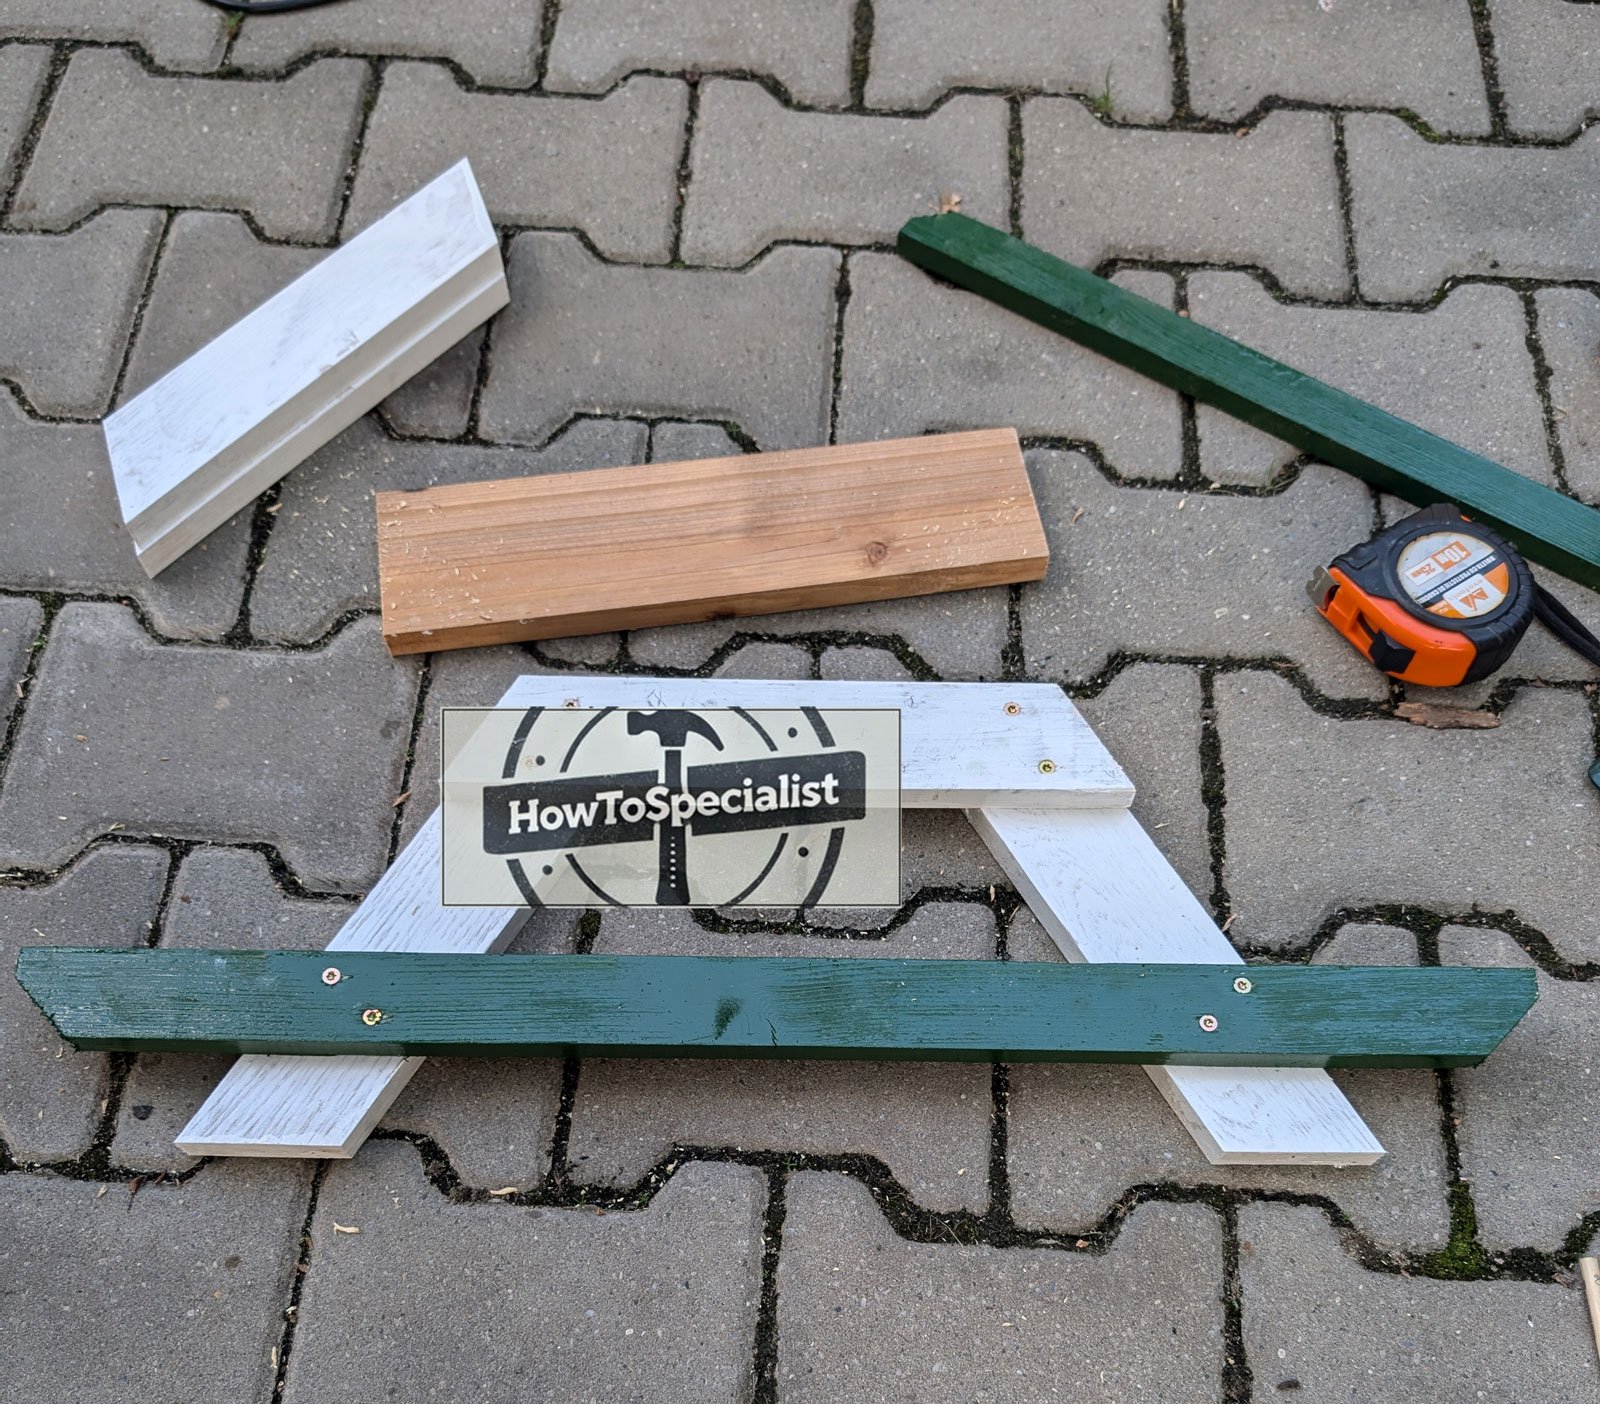
The tabletop is the heart of the picnic table, providing a level and stable surface for feed trays or scratch grain. Using 1×4 or 1×6 boards allows for a clean, polished look while keeping the overall weight manageable. I used some deck boards I had in the garage from previous projects. Cut the boards to equal lengths and arrange them side by side, leaving a small gap (1/8″) between each plank to allow for natural wood expansion and drainage. Supporting this top structure requires a robust framework.
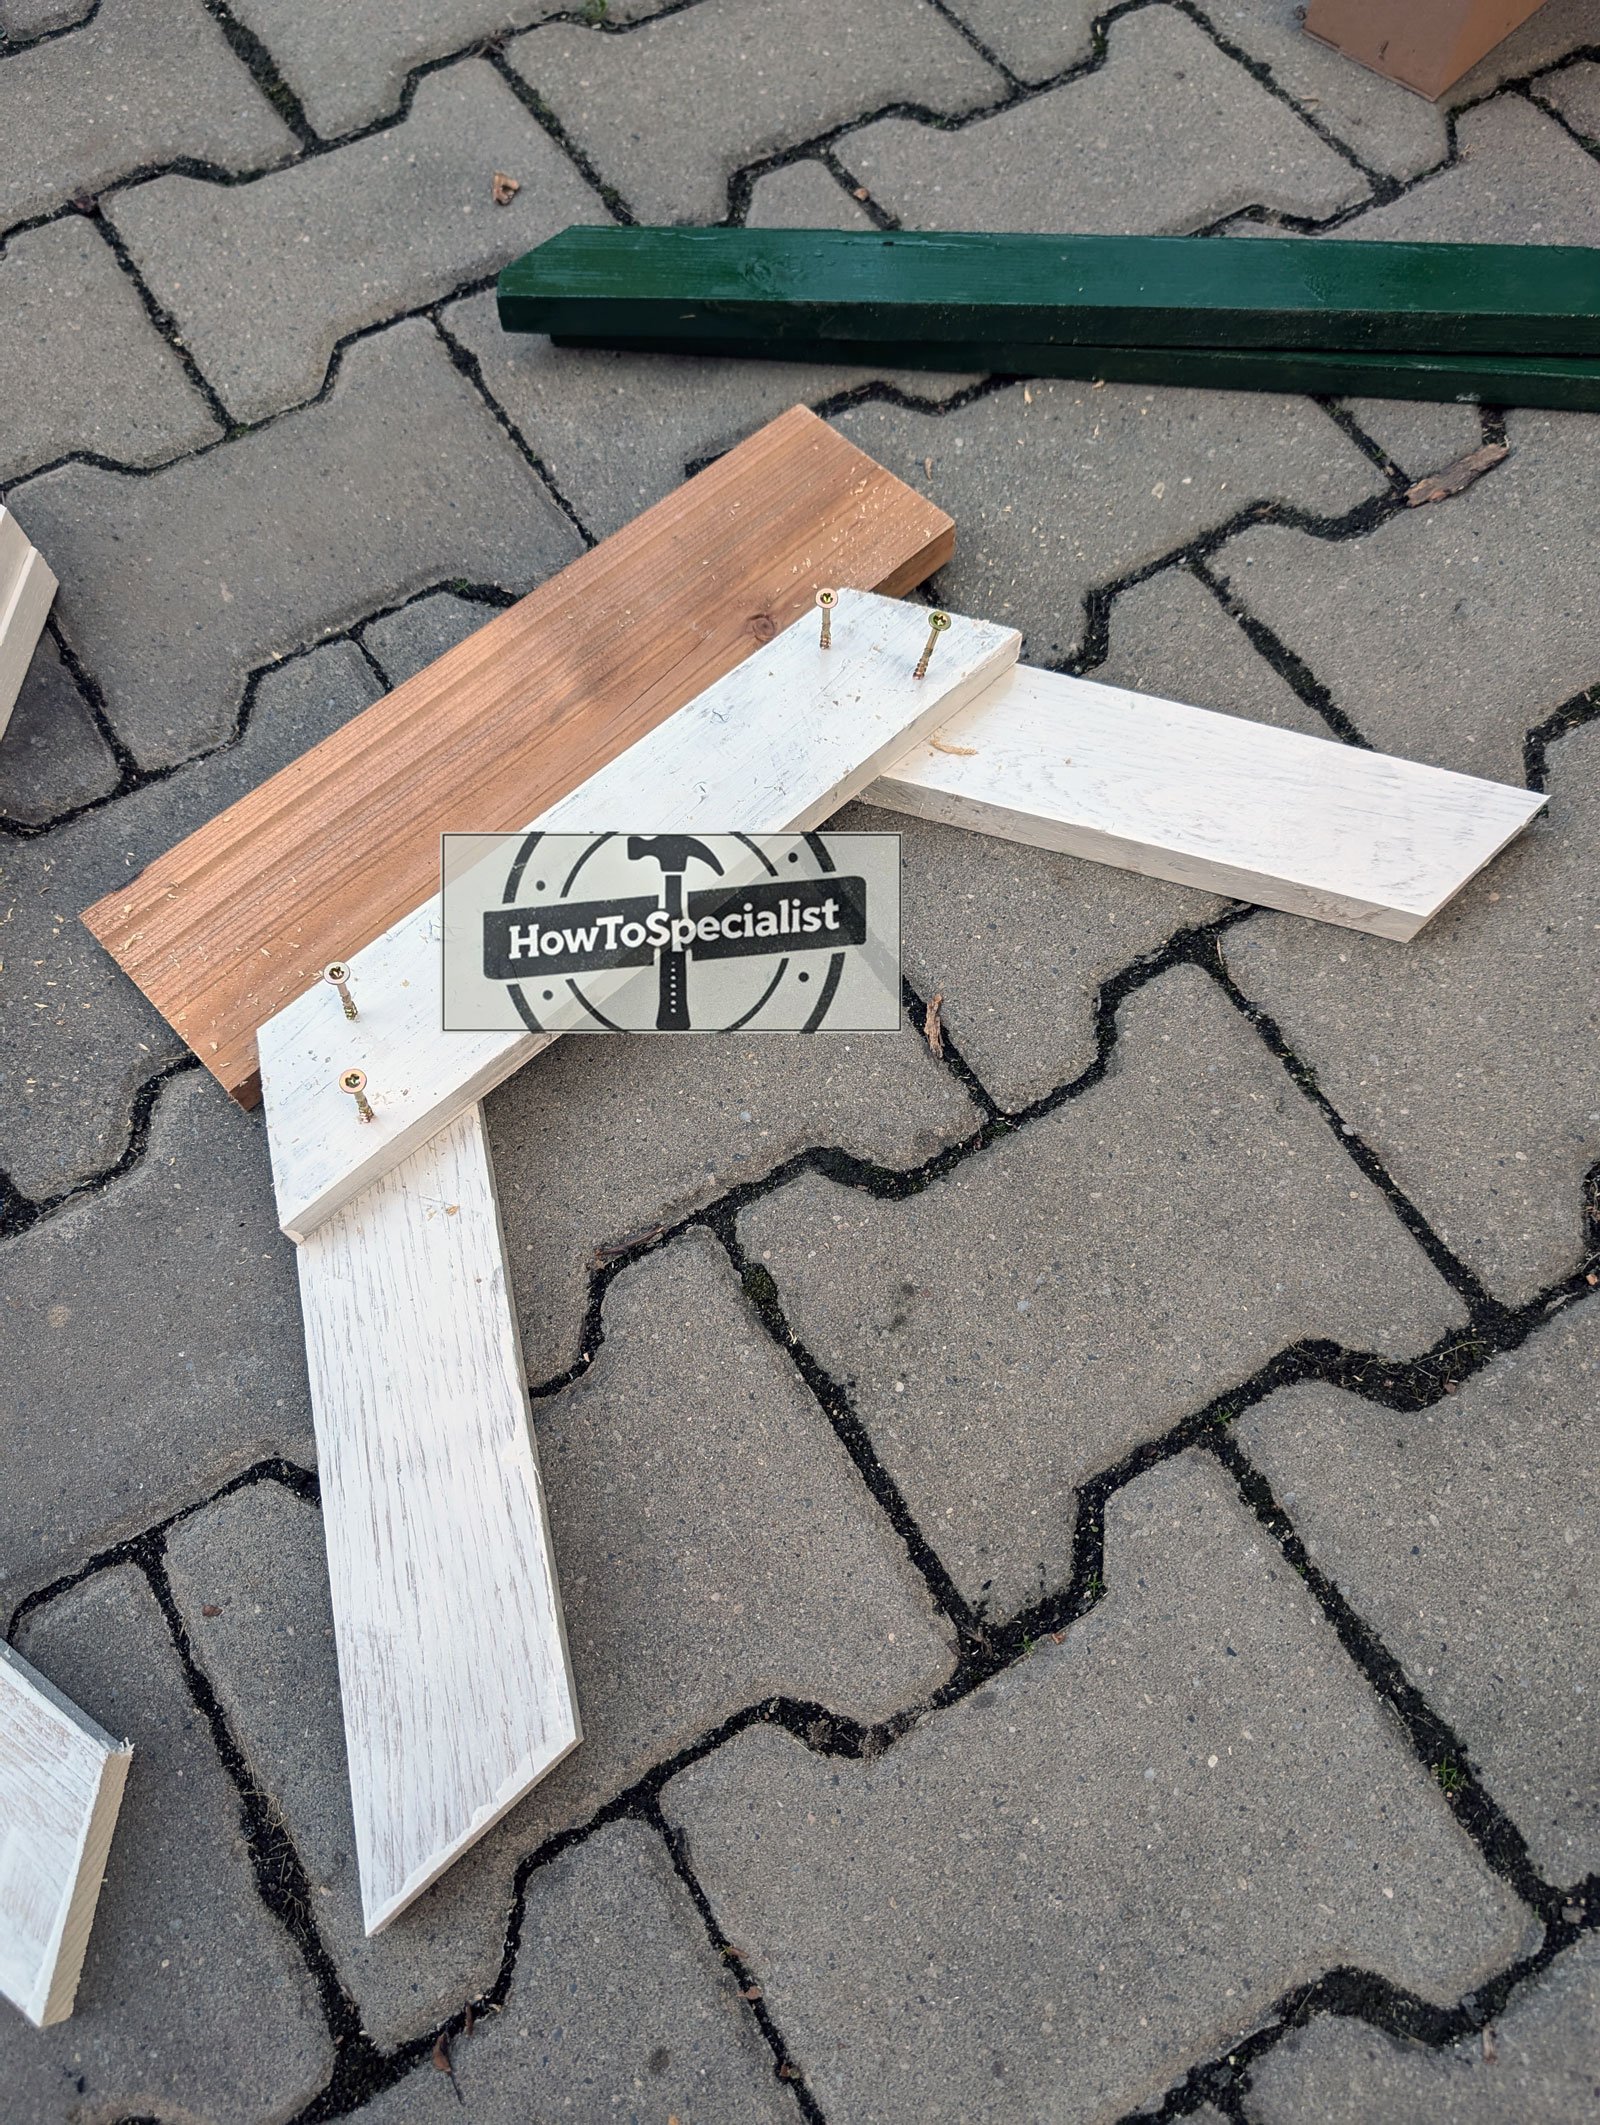
Cutting precise 45-degree angle braces at each corner is a great way to add additional reinforcement while giving the structure a refined look. The 1×2 boards surround the tabletop and crate the tray for the chicken food. I painted the components before assembly so I don’t miss any spot.
Step 2: Building the side frames
Cutting-the-legs
Assembling-the-frames
Fitting-the-seat-supports
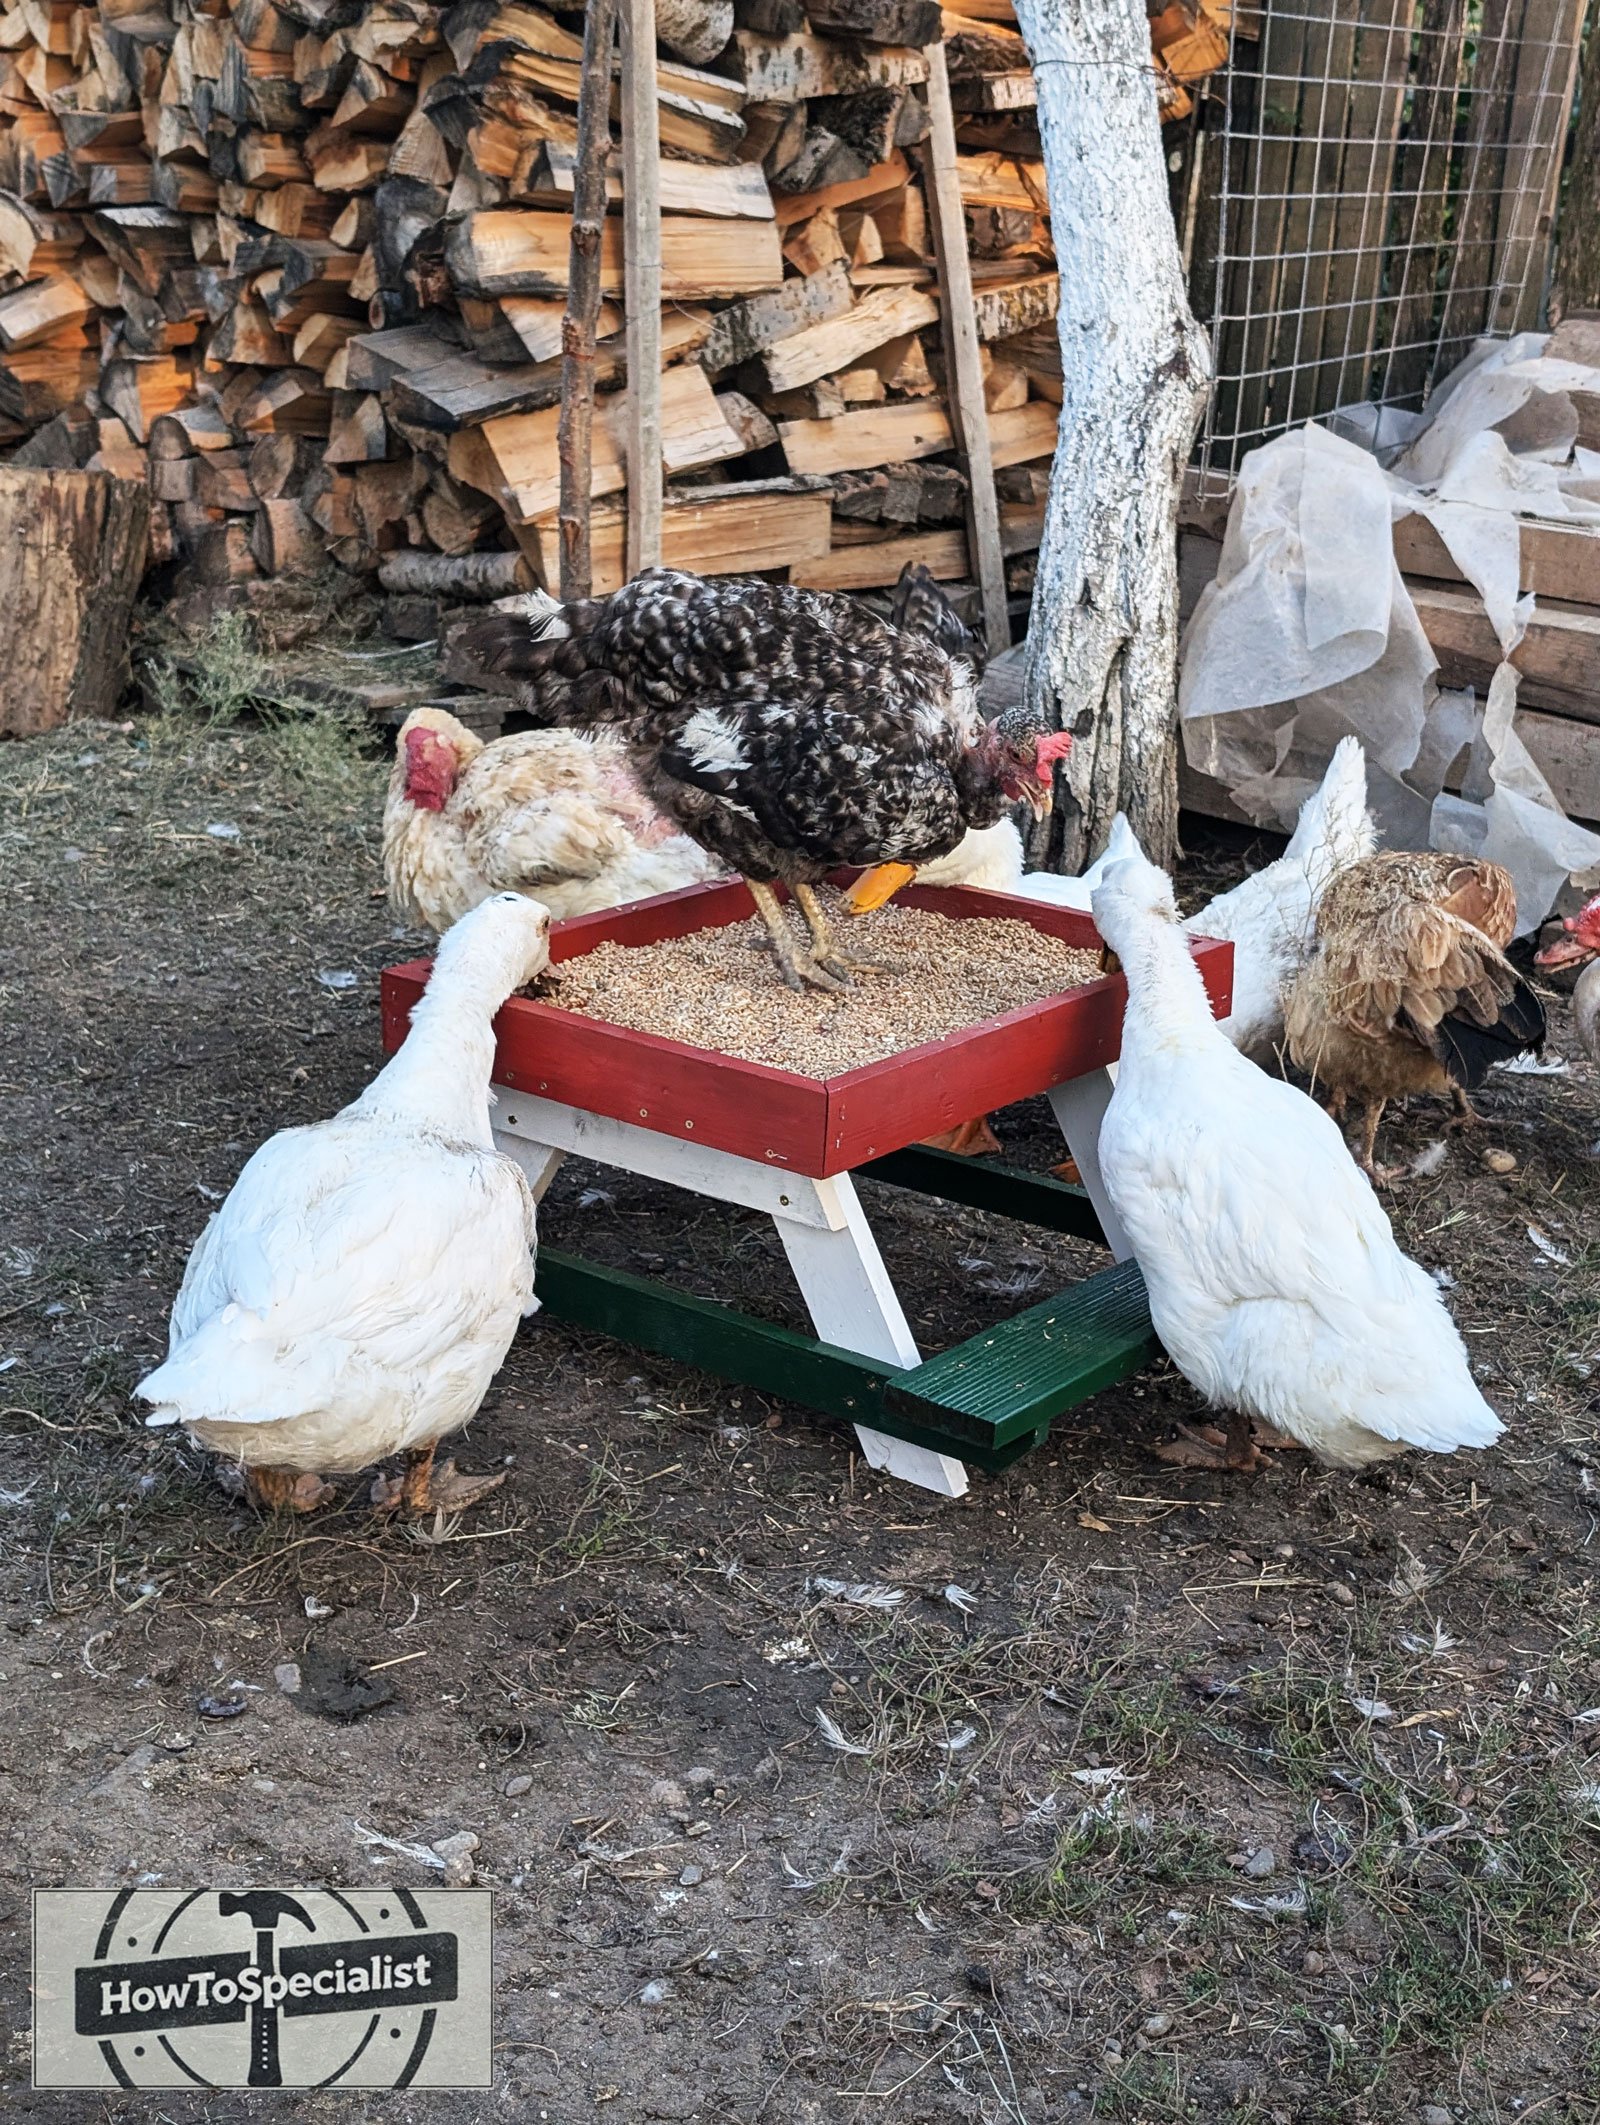
Unlike a human picnic table, where leg placement is dictated by seating needs, a chicken picnic table requires legs that maximize stability while allowing enough clearance for birds to approach comfortably. A classic A-frame leg design, similar to traditional picnic tables, works well by distributing weight evenly and preventing wobbling. Using legs cut at an outward angle provides a sturdy footprint, ensuring that the table won’t tip over, even when multiple birds are feeding at once.
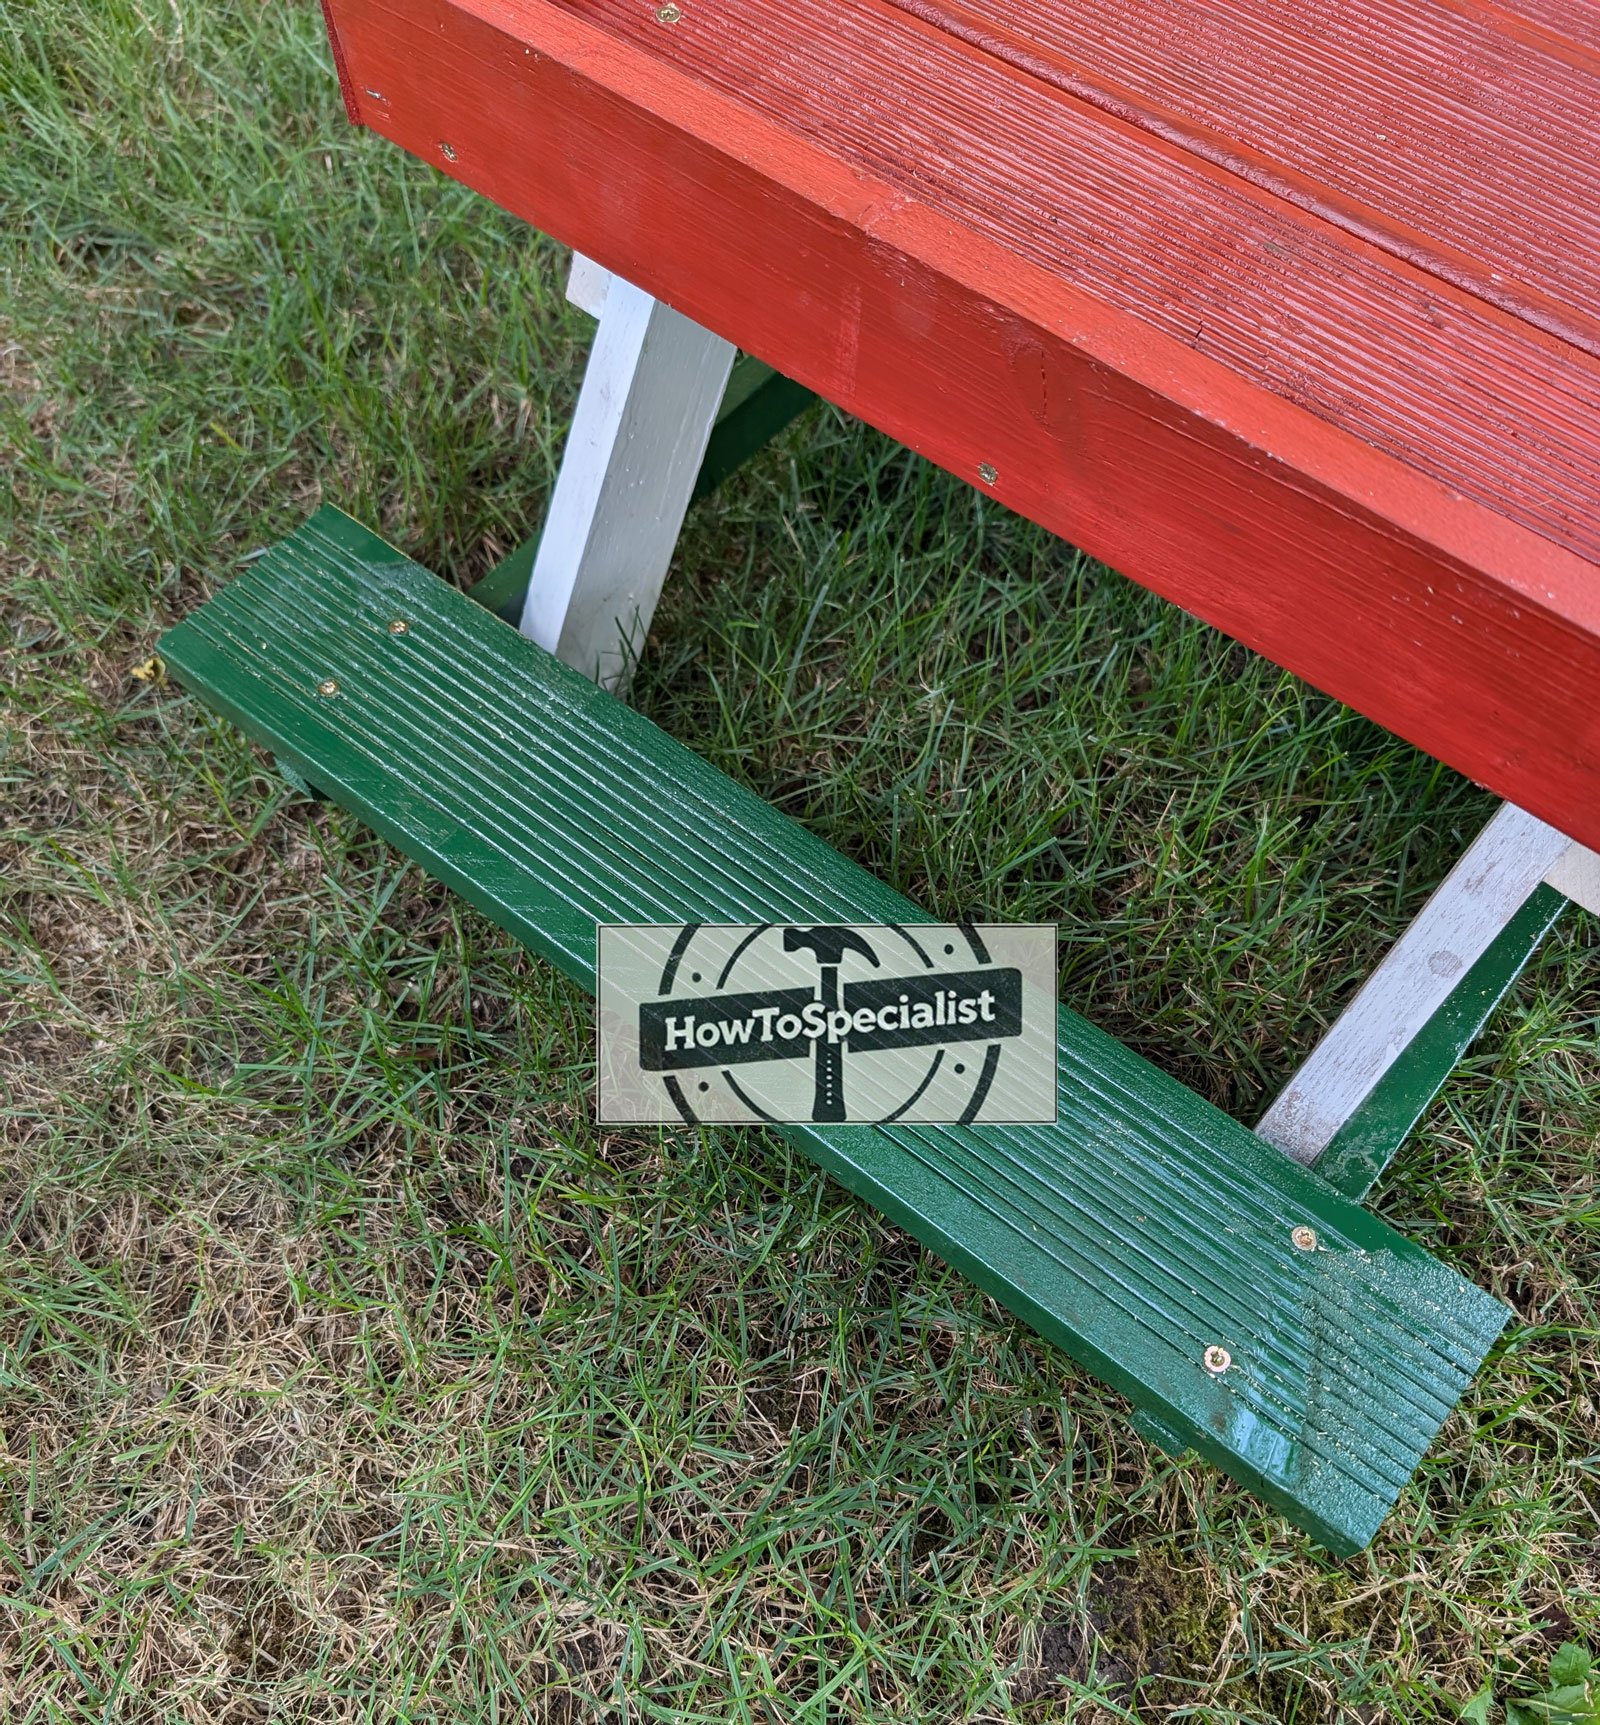
The benches on the sides serve a dual purpose: they mimic the classic picnic table aesthetic while also giving chickens a perch to jump on before feeding. Constructing the benches from 1×6 boards and attaching them with sturdy cross supports will create a strong and durable structure. If you want added stability, reinforce the bench supports with diagonal braces. Chickens love to hop onto surfaces, so ensuring that the benches are well-secured will prevent excessive movement and reduce wear over time.
Step 3: Assembling the picnic table
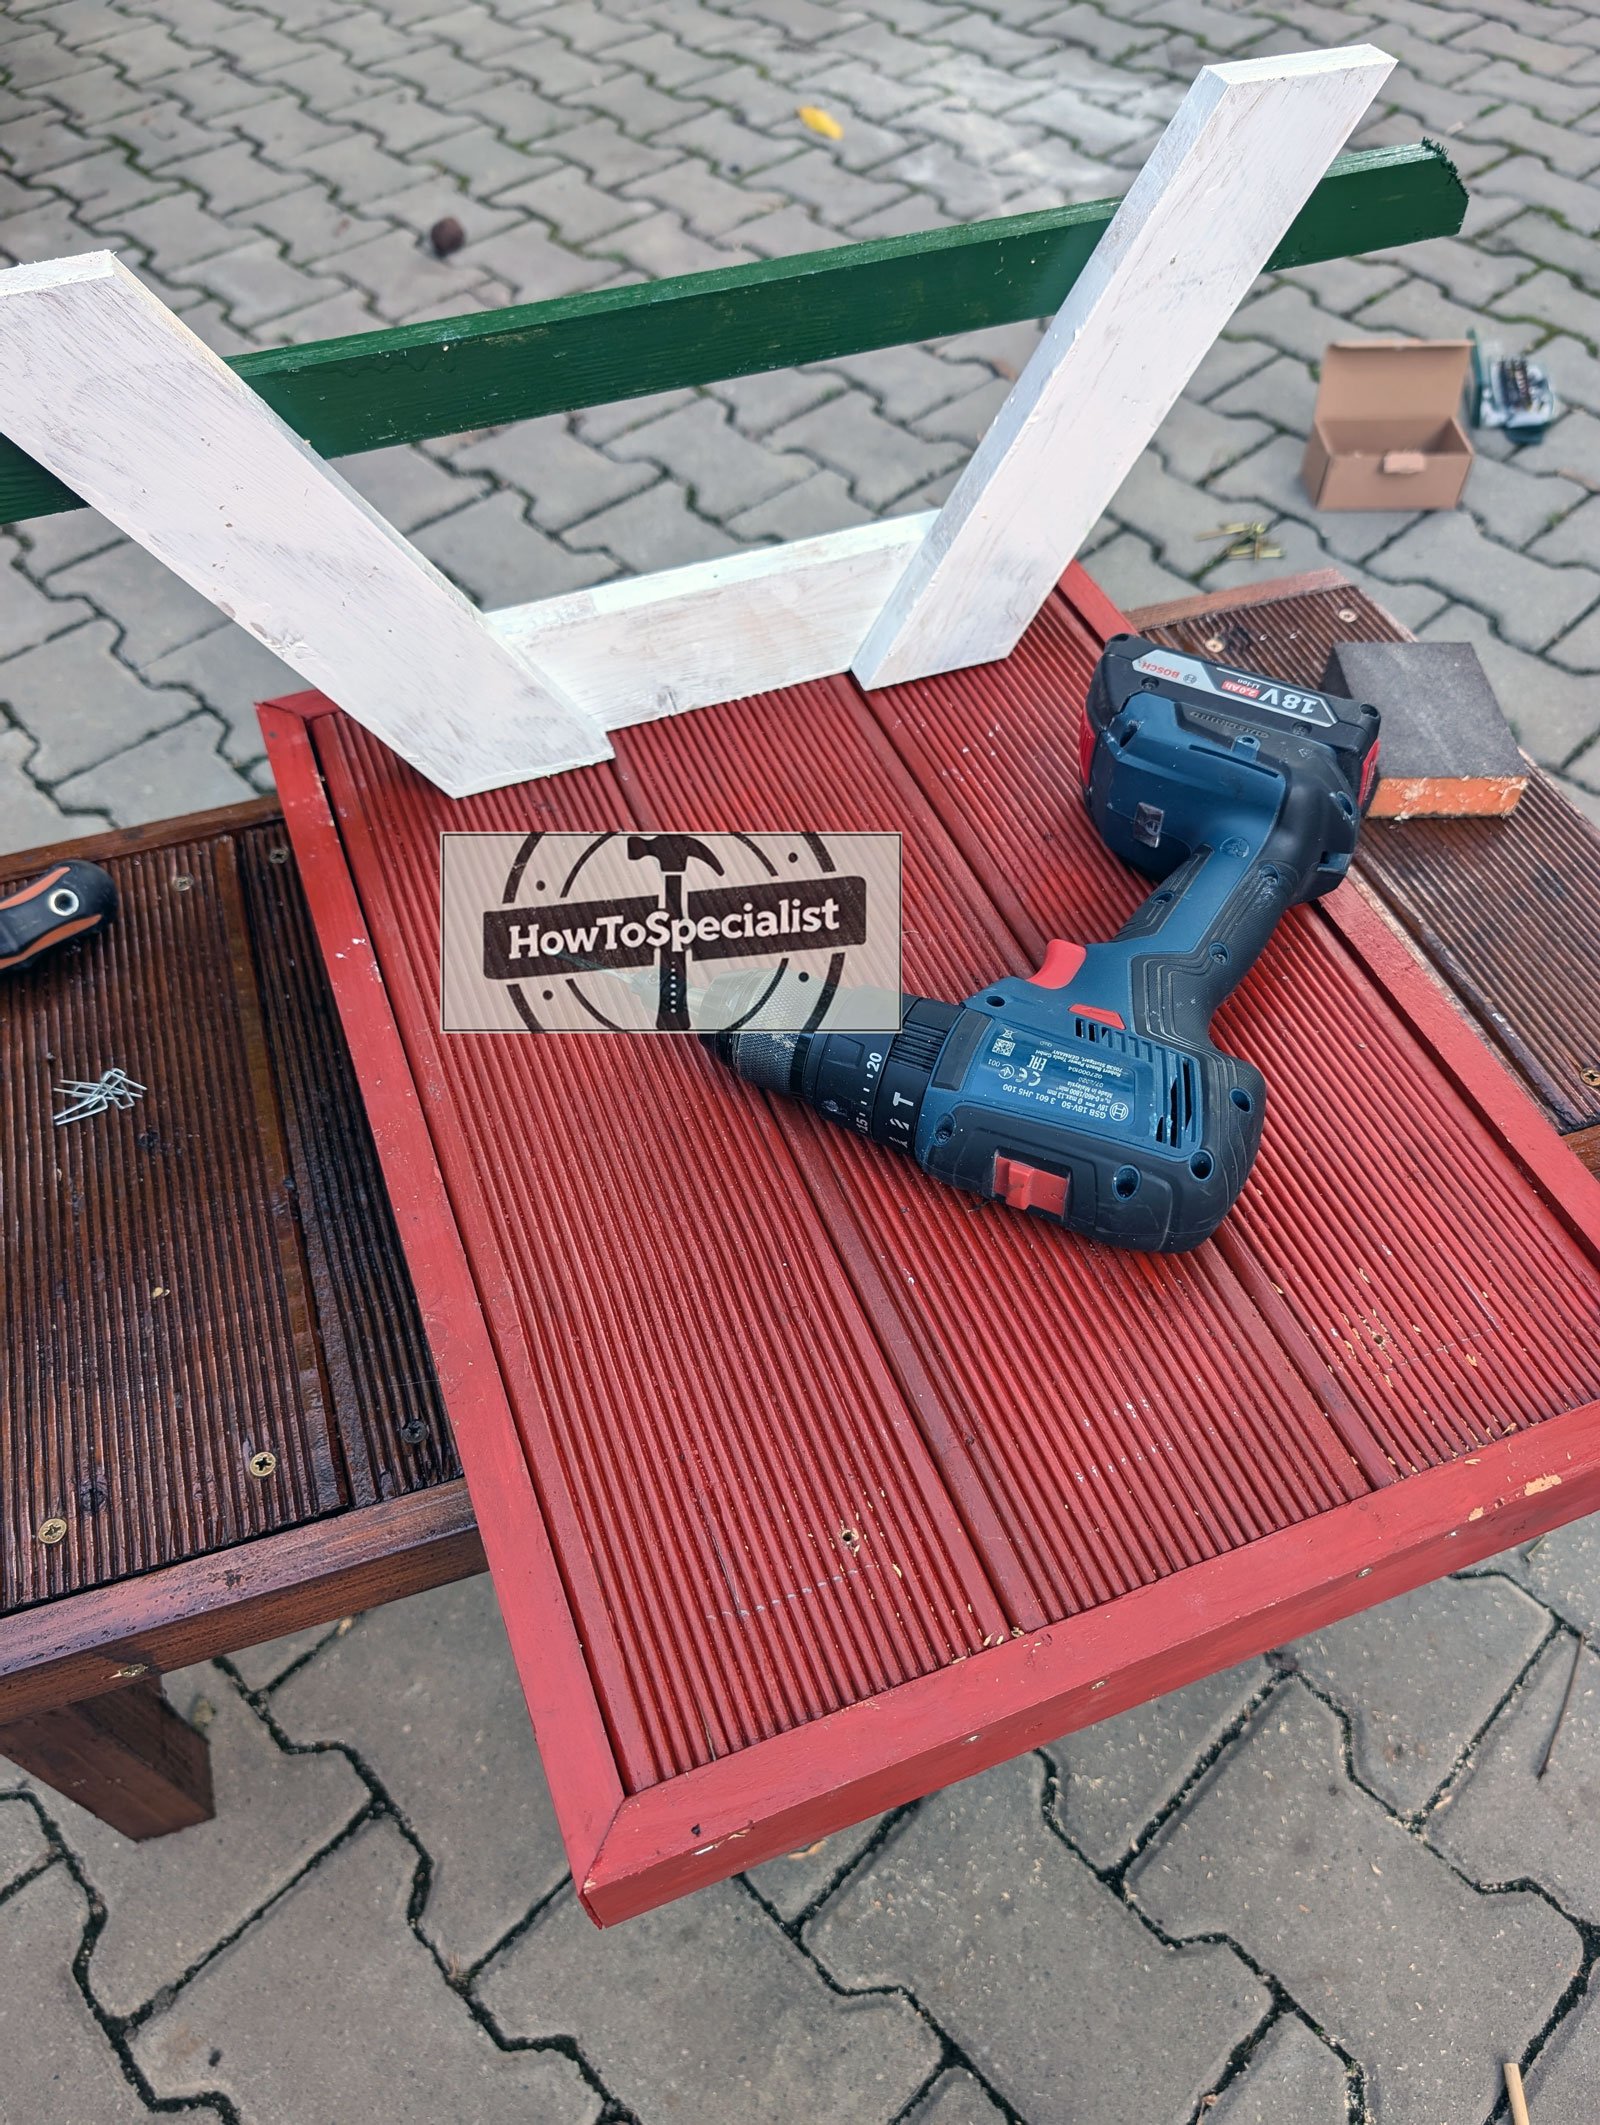
Attaching-the-side-frames
Seat-boards
I drilled pilot holes through the tabletop and secured it to the side frames with screws. Then, I attached the seat boards, ensuring a sturdy fit that allows the chickens to hop up easily and reach the tabletop where the treats are placed. Once the structure is assembled, taking time to refine the finish will elevate the final product. Sanding all edges and corners smooth is essential—not only does it improve the overall look, but it also prevents injury to the chickens. Sharp edges can cause unnecessary scratches, and rough surfaces will accumulate dirt and moisture, leading to premature deterioration.
Step 4: Finishing touches

Seat-boards
DIY-picnic-table-for-chickens
For longevity, sealing the wood with a non-toxic outdoor wood sealer or natural linseed oil will help protect it from the elements. If you prefer a more decorative approach, a food-safe exterior paint can add a pop of color to your coop while providing additional weatherproofing. Avoid overly glossy finishes, as they can become slippery when wet, making it harder for chickens to perch securely.
Placement and Practical Use
Where you place the chicken picnic table matters just as much as how you build it. Positioning it on a level surface, preferably on a dry, well-drained area will help keep feed from becoming waterlogged. If you experience heavy rains, consider raising the legs slightly off the ground with paver blocks or bricks to prevent moisture from wicking up into the wood. If predators such as raccoons or rodents are a concern, anchoring the table with stakes or weight can prevent tipping.
To encourage natural feeding behaviors, placing the picnic table near dust baths or shaded areas can create a comfortable and familiar environment for your flock. Some chicken owners also modify their tables by adding small removable feeders or cups to hold different types of grains or water sources, further enhancing the table’s functionality.
Customization and Future Modifications
One of the best aspects of DIY woodworking is the ability to modify and improve your design over time. If your flock grows, you might consider building a larger picnic table with extended benches or multiple feeding stations. Adding small hardware hooks for hanging treats like cabbage or mealworm dispensers can transform the table into an enrichment area.
For added convenience, you can incorporate a removable top panel with hidden storage underneath, ideal for keeping a small bag of scratch grain or feed additives handy. If mobility is important, attaching small caster wheels can allow you to move the table easily when cleaning the coop area or adjusting placement with the seasons.
A Fun and Functional Addition to Your Coop
Building a wooden chicken picnic table is a rewarding project that combines craftsmanship with practicality. Not only does it provide a dedicated feeding space, but it also enhances the aesthetic appeal of your backyard or coop. By selecting the right materials, reinforcing structural joints, and considering long-term maintenance, you can ensure that your table stands up to daily use while keeping your chickens happy and well-fed.
This DIY project is also a great way to sharpen your woodworking skills while creating something both unique and useful. Whether you choose to keep it simple or go all out with decorative touches, the key is to focus on stability, durability, and usability. With careful planning and a little effort, your chickens will have a stylish and functional new addition to their space, making feeding time more organized and enjoyable.
You can find the chicken table plans here. Thanks for checking out my DIY chicken picnic table! Be sure to explore my other projects for more fantastic ideas. Don’t forget to hit the LIKE button and SHARE with your friends using the social media links below.