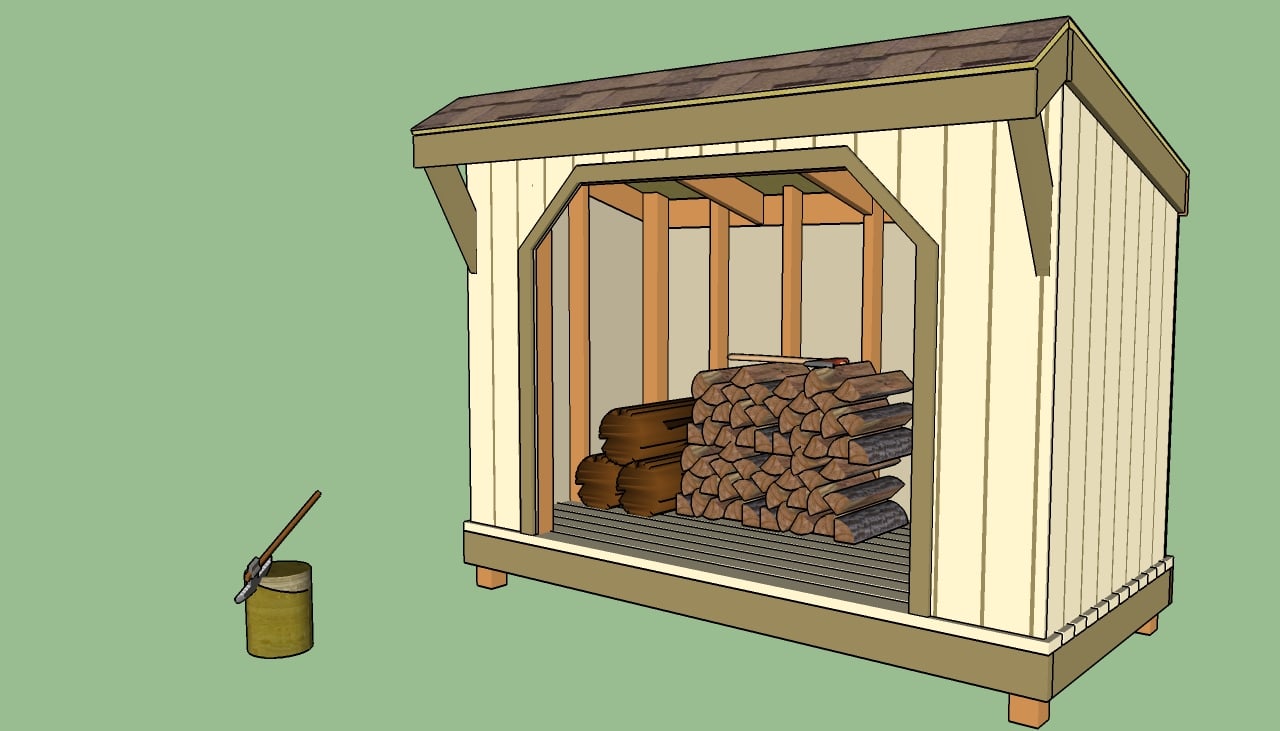
This step by step project is about how to build a firewood shed. If you want to keep the firewood dry during the cold season, or you just need a place to deposit them and to add style to your backyard, building a woodshed will solve all these issues. As compared to a garden shed, you don’t need to invest much time or money to get the job done. On the contrary, you could even build the firewood shed from pallets or from scrap materials.
Before designing the firewood shed or selecting the right plans to your needs, you need to study the local legislation. There are certain cases in which you have to comply with several building regulation, such as a certain distance from the property line, a certain depth of the footings or the materials you are allowed to use in the construction process. Starting with the legal background, you should design the shed, as to fit your needs and to match the style of the other construction on the property.
You can place the shed on a concrete slab, you could pour concrete footings or you set it on several concrete block. Moreover, you can attach 5/8” plywood to the wall frames, or use scrap slats. Irrespective of your choice, plumb the walls with a spirit level and to secure them properly to the joists, using 3” screws. Building a small front overhang would not only add style to the firewood shed, but would also protect the wood from heavy rain or snow. See all my Premium Plans in the Shop.
Made from this plan
In order to build a firewood shed, you needs the following:
Materials
- 2×6 lumber – JOISTS
- 2×4 lumber – DECKING
- 2×4 lumber – WALLS
- 2×4 or 2×6 lumber – RAFTERS
- 3/4” plywood – ROOFING
- 1×3 lumber – TRIMS
- Asphalt shingles – SHINGLES
- 1 1/4” and 2 1/2” wood screws – SCREWS
- 2 1/2″ screws
- stain, putty, Wood glue
Tools
- Safety gloves, glasses
- Miter saw saw, jigsaw
- Chalk line, tape measure, spirit level, carpentry pencil
- Drill machinery and drill bits
Tips
- Pre-drill holes in the wooden components, before driving in the screws
- Smooth the exterior edges of the components, by using a router with a 1/4” bit
Time
- One weekend
Related
How to build a firewood shed

How to build the floor of the shed
The first step of the project is to build the base of the woodshed. Therefore, we recommend you to build the joists and the rim joists from 2×6 lumber, as to support a significant weight. Drill pilot holes in the rim joists and insert the 3” screws or used metal hangers. Place the joists every 16” O.C.
Place the frame on a concrete slab, on several concrete blocks or pour several footings. Make sure the support surface is perfectly level.

Attaching the flooring
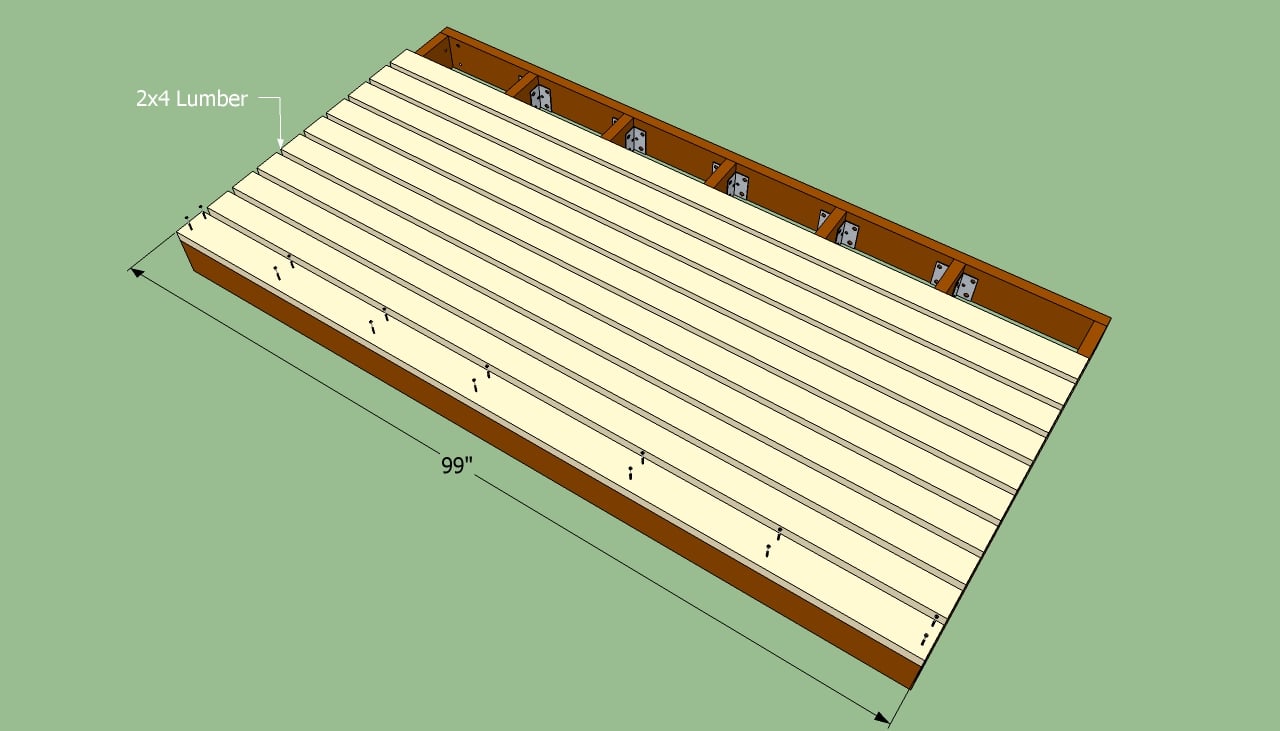
Afterwards, you have to attach the decking and secure the slats to the joists. In order to dry out the firewood properly, we recommend you to install 2×4 slats spaced at 1/2”, rather than installing 3/4” plywood sheets.

Back end plans
Afterwards, you should build the wall frames and fit them into place. First of all, you should assemble the components on the ground. Use a carpentry square to make sure all the corners are right-angled. Drill 3” screws trough the bottom place in the wall studs.
Secure the frame temporarily with one 2×4 slat at the top, before fitting it into place. Leave 1 1/2” to the edges, before securing the frame to the flooring.
Build the front wall in the same manner described above, making sure you leave a large opening, to have a proper access to the firewood. Cut the components from 2×4 lumber and assemble them together on a perfectly level surface.
Secure the top of the frame with a temporary 2×4 slats from one side to the other. After installing the rafters, you should remove the slats, as the frame will have enough support.

Side walls plans
Continue the project by building the sides of the woodshed. Therefore, build the frame on the ground before fitting it into place. As you can see in the image, you need to cut the ends of the studs at 15, in order to drain the water properly.

Installing the rafters
Build the rafters and fit them into place,as in the image. After securing the rim rafters to the walls, you should remove the temporary slats that keep the frames locked. Cut the ends of the rafters at 15º, as to fit into place properly. Place the rafters every 16” O.C. and connect them to the wall studs.
Align the rafters into place and secure them to the rim rafters with 3” screws from the outside. Drill pilot holes, to prevent the wood from splitting. Work with great care and good judgement.

Attaching the exterior siding
The next step of the project is to attach the exterior siding. Therefore, we recommend you to cut the panels from 5/8” grooved plywood and to secure them to the joists with 1 1/4” nails. Use a circular saw with a fine blade to get the job done accurately.
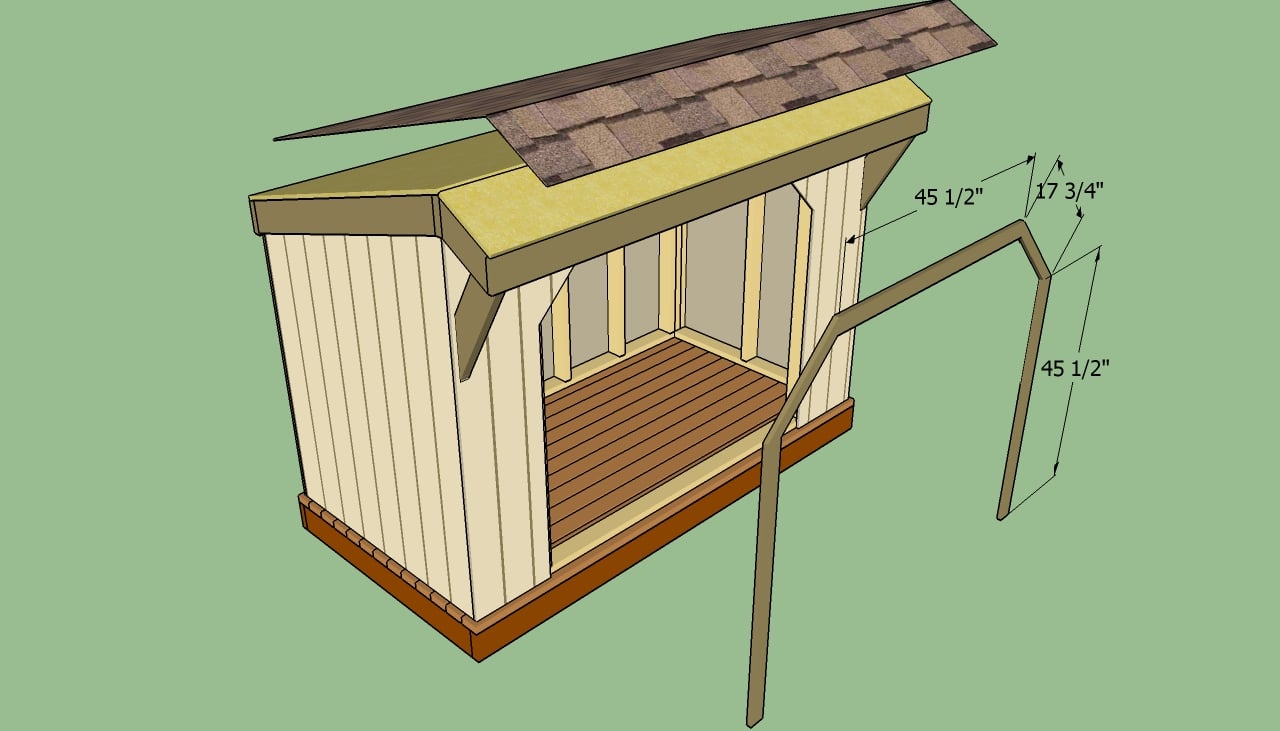
If you want to obtain a neat appearance, cut the opening of the firewood shed as in the image. Just draw two triangles with 8” sides.

Installing the front overhang
Building a firewood with an unique design is not a complex process, if you follow the step by step plans. Just install a front overhang as in the image. This time, you should cut the front rafter from 2×4 or 2×6 lumber at 30º.
Secure the rafters to the top ridge and to the rim rafter. In addition install two braces at both ends of the roof, to support the overhang properly. Cut the ends of the braces at 45º and secure them into place with 3” wood screws.

Installing the roofing sheets
Attach the roofing sheets to the rafters. The best way to get the job done is to install 3/4” roofing sheets and to secure them to the rafters with 2” wood screws, every 6”. In addition, we recommend you to choose tongue and groove plywood, as they will connect together easily.
The edges of the sheets should be flush with the roof components, in order to obtain a neat look. Drive in 2” screws, to secure the sheets into place.

Attaching the trims
Afterwards, cover the roof of the firewood shed with roofing felt. Next, install the asphalt shingles, starting with the left bottom of the roof. The tar paper layers should overlap at least 2”.
The side drip edges and the top drip edge should be fitted over the tar paper, while the front and back drip edges should be placed under the roofing felt. Install asphalt shingles over the roofing felt, making sure they overhand the edges at least 1/2”.

How to build a firewood shed
Don’t forget to take care of the finishing touches. Therefore, fill the gaps with wood filler and and let it dry out properly, before sanding the wood surface with 120-grit sandpaper. Apply several coats of paint, to protect the wood from rot.
Thank you for reading our article about how to build a firewood shed and we recommend you to check out the rest of our projects. Don’t forget to share our projects with your friends, by using the social media widgets. Like us on Facebook to be the first that gets our latest projects.
