Looking to complete your outdoor setup with a sturdy, stylish, and functional coffee table? You’re in the right place! This step-by-step guide will show you exactly how to build an outdoor coffee table that pairs perfectly with your sectional bench or patio furniture. Whether you’re hosting friends, enjoying a quiet morning coffee, or simply upgrading your backyard, this project is the perfect blend of practicality and DIY satisfaction.
With clear instructions, easy-to-follow diagrams, and a clean design, you’ll have this table built in no time, even if you’re new to woodworking. So grab your tools, roll up your sleeves, and let’s bring this outdoor coffee table to life! Trust me, your outdoor space is about to get a major upgrade.
The estimated cost for this project is around $50-$75, depending on local lumber prices and the finish you choose. The materials include 1×2, 2×2, and 2×4 lumber, with most pieces being affordable and readily available at hardware stores. A box of 2 1/2″ screws and 1 5/8″ screws, a can of paint or stain, and a bottle of wood glue round out the list, all of which are budget-friendly essentials. As for time, this project can typically be completed in 4-6 hours, depending on your skill level and tool setup. It’s a perfect weekend project that’s easy to tackle, offering a great blend of functionality and style for your outdoor space!
We recommend you to invest in the best materials you could afford. Therefore, you should buy weather-resistant lumber, such as pine or cedar. Always take accurate measurements before adjusting the size of the components at the proper size. Drill pilot holes trough the components before inserting the wood screws, to prevent the wood from splitting. My plans come with a full cut / shopping list and they are PDF Download and Print friendly. See all my Premium Plans HERE.
Made from this plan
Pin it for Later!
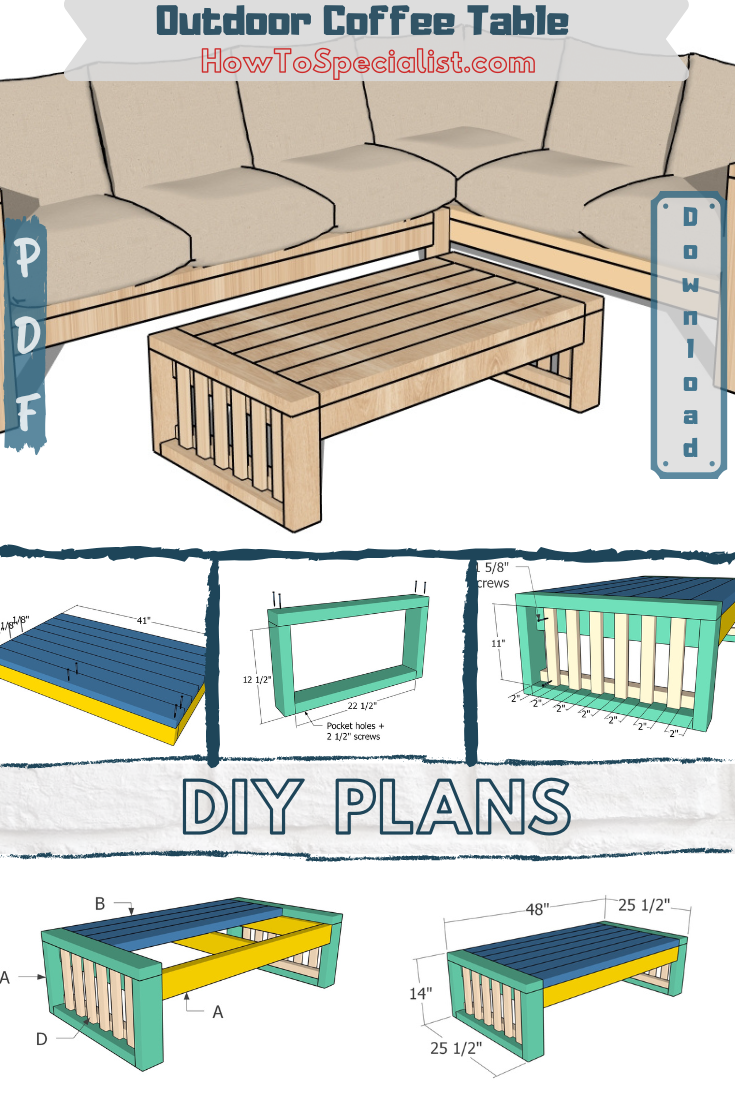
Outdoor Coffee Table – Free DIY Plans
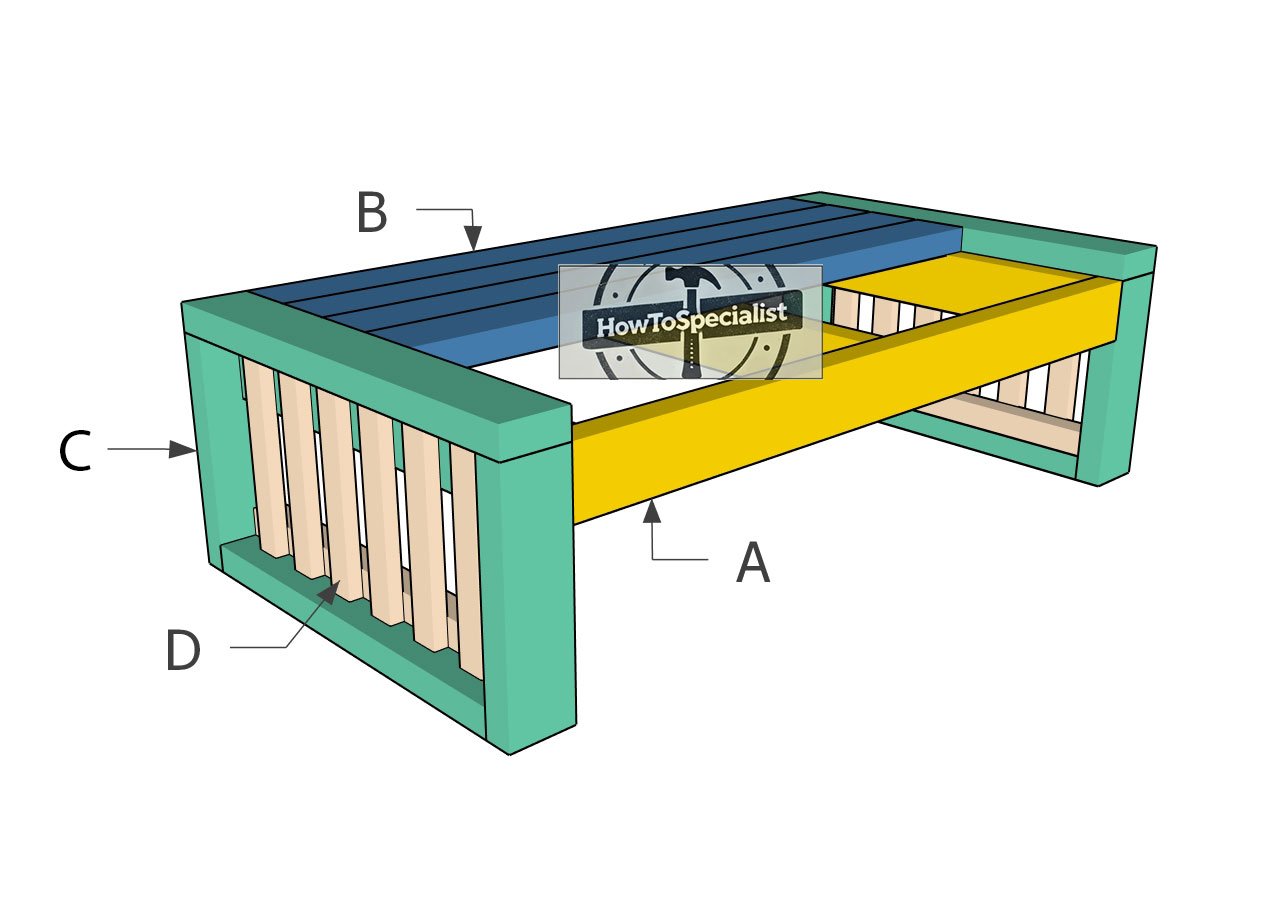
Building-an-outdoor-coffee-table
Materials
A – FRAME – 2×4 lumber 41″ – 2 pieces
A – FRAME – 2×4 lumber 22 1/2″ – 3 pieces
B – TABLETOP – 2×4 lumber 41″ – 7 pieces
C – SIDE FRAMES – 2×4 lumber 12 1/2″ – 4 pieces
C – SIDE FRAMES – 2×4 lumber 22 1/2″ – 2 pieces
C – SIDE FRAMES – 2×4 lumber 24″ – 2 pieces
D – CLEAT – 2×2 lumber 22 1/2″ – 2 pieces
E – BALUSTERS– 1×2 lumber 11″ – 12 pieces
- 1×2 lumber 12 ft – 1 piece
- 2×2 lumber 8 ft – 1 piece
- 2×4 lumber 10 ft – 2 pieces
- 2×4 lumber 8 ft – 5 pieces
- 2 1/2″ screws – 100 pieces
- 1 5/8″ screws – 50 pieces
- Paint / Stain- 1 can
- Glue – 1 piece
Tools
- Miter saw, Pocket hole jig
- Drill machinery, Drill bits, Jigsaw
- Safety gloves, Glasses
- Chalk line, tape measure, spirit level, carpentry pencil
Time
- One week
Related
Step 1: Building the tabletop
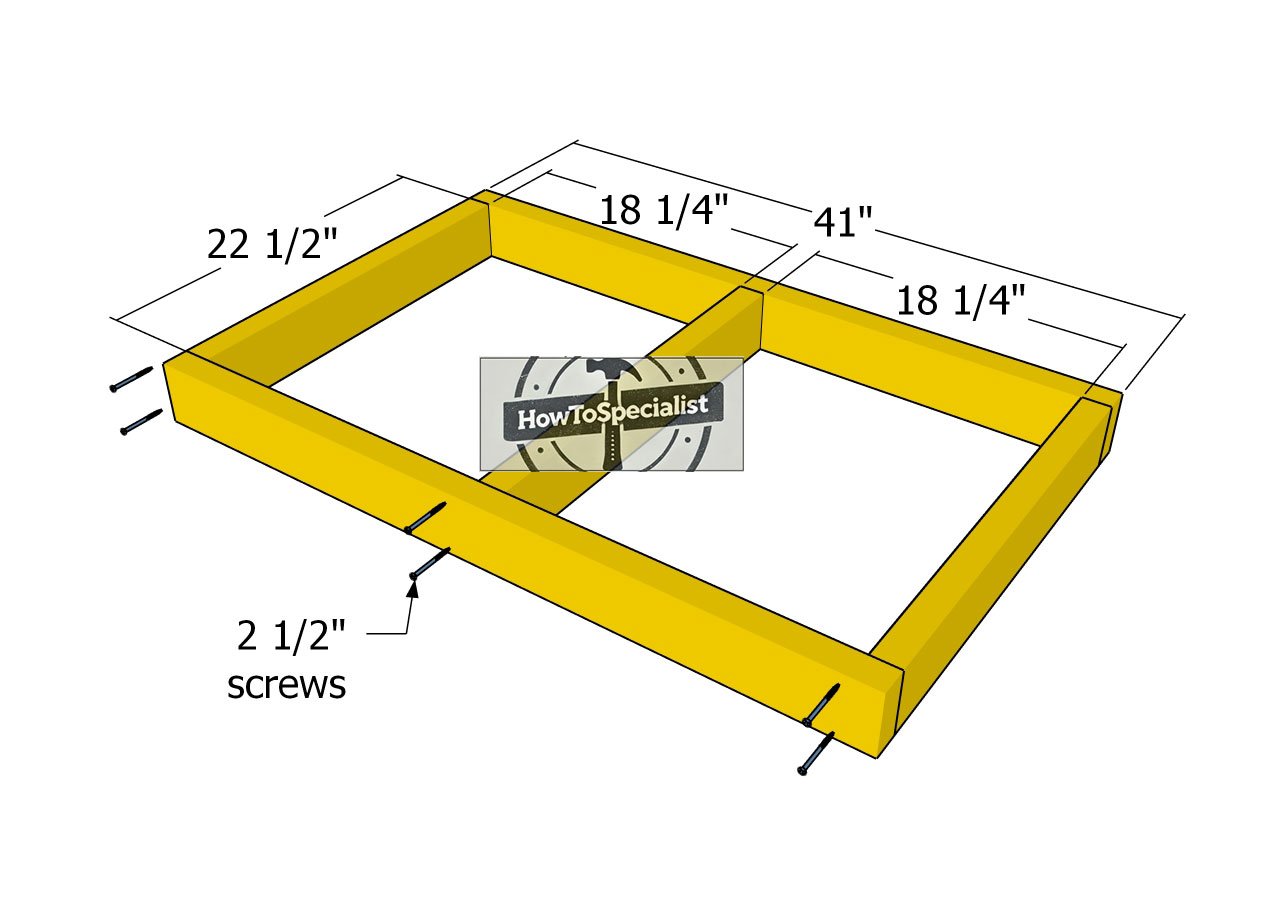
Tabletop-frame
The first step of the project is to build the frame for the table. Start by cutting the 2×4 lumber to 22 1/2″ and 41″ pieces, as shown in the diagram. Lay the components out on a level surface to ensure proper alignment. Drill pilot holes through the longer boards to prevent splitting, and secure the frame together using 2 1/2″ screws.
Make sure the edges are perfectly flush, and use a speed square to confirm the corners are 90 degrees. For extra strength, don’t forget to add wood glue to the joints before driving in the screws. This step creates a rock-solid base to support the entire build, so take your time to get it right!
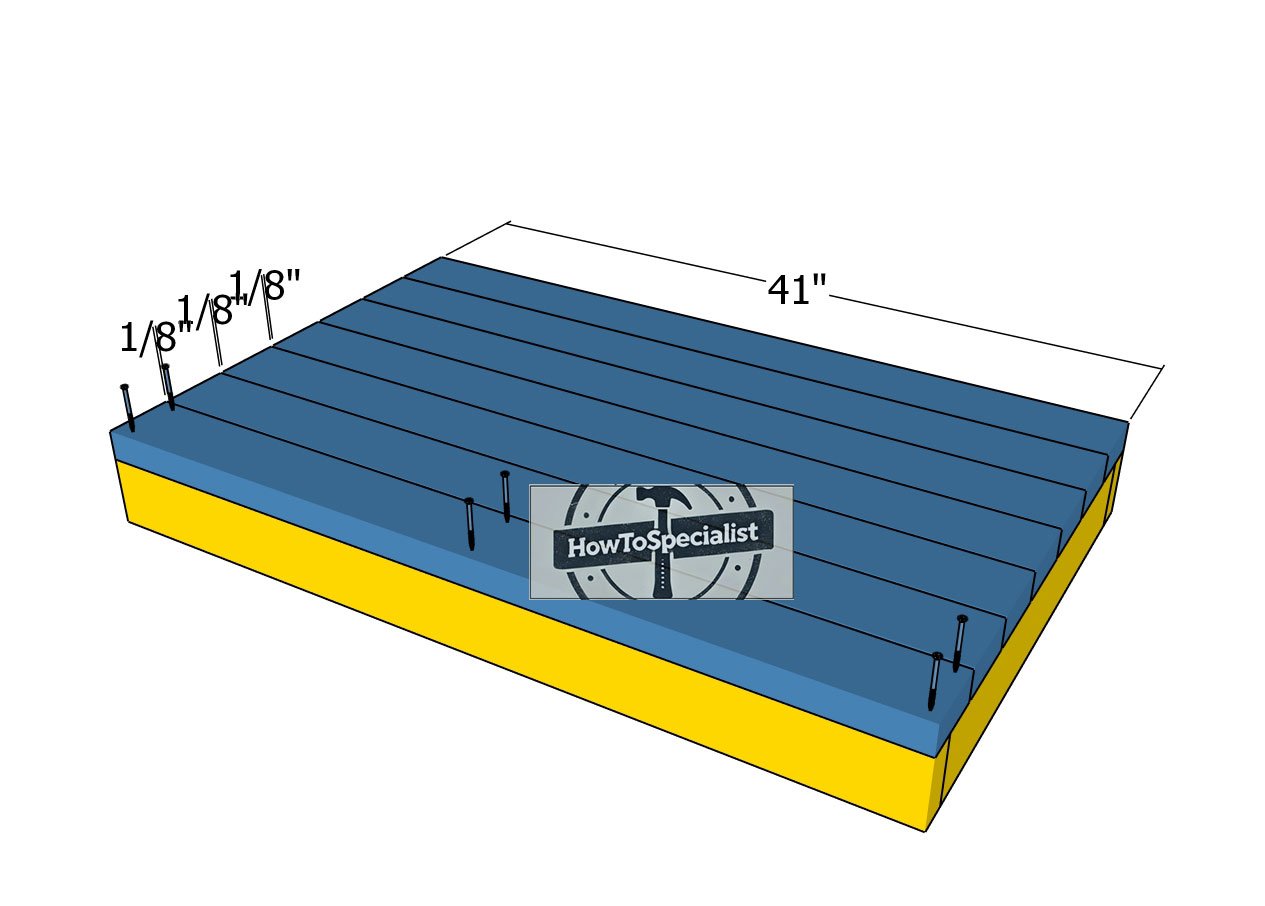
Fitting-the-tabletop-slats
Fit the tabletop slats to the frame, ensuring the edges are perfectly flush for a clean, professional look. Place 1/8″ spacers between the boards to maintain consistent gaps and allow for natural wood expansion.
Drill pilot holes at each joint to prevent splitting, then secure the slats to the frame using 2 1/2″ screws. Use 2 screws per joint to lock each board firmly into place. Take your time with alignment—this step sets the stage for a durable and visually appealing tabletop.
Step 2: Building the side frames
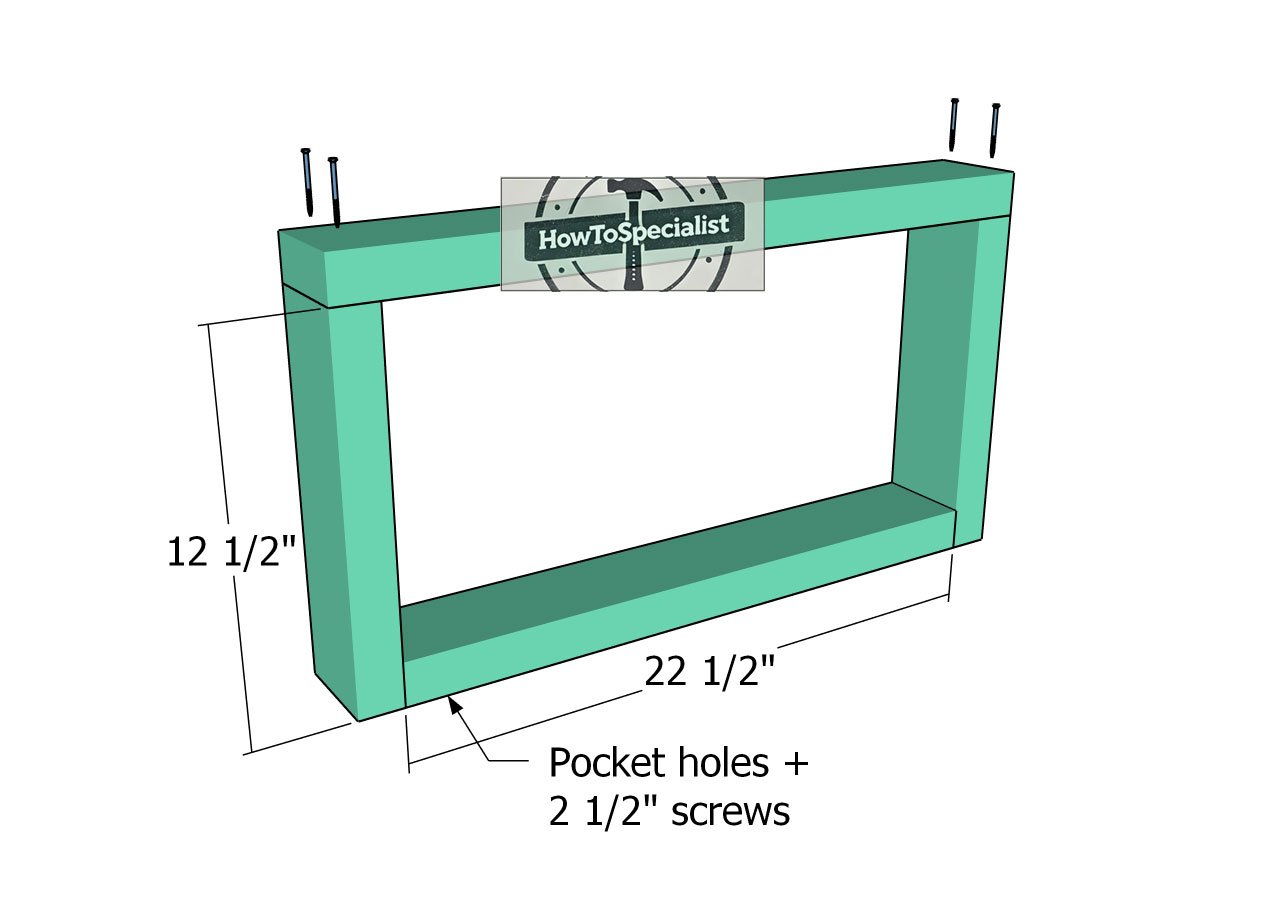
Side-frames
Next, let’s tackle the side frames for the table. Cut the components from 2×4 lumber according to the dimensions in the plans. Position the top board between the legs, ensuring the edges are perfectly flush. Drill pilot holes through the top board to prevent splitting, then drive 2 1/2″ screws into the legs to secure the joints.
Use a speed square to double-check that the corners are perfectly square, precision here will make the entire build stronger and easier to assemble. Don’t forget to apply wood glue to the joints for added durability. This step forms the sturdy sides of your table, so take your time to get everything aligned just right!
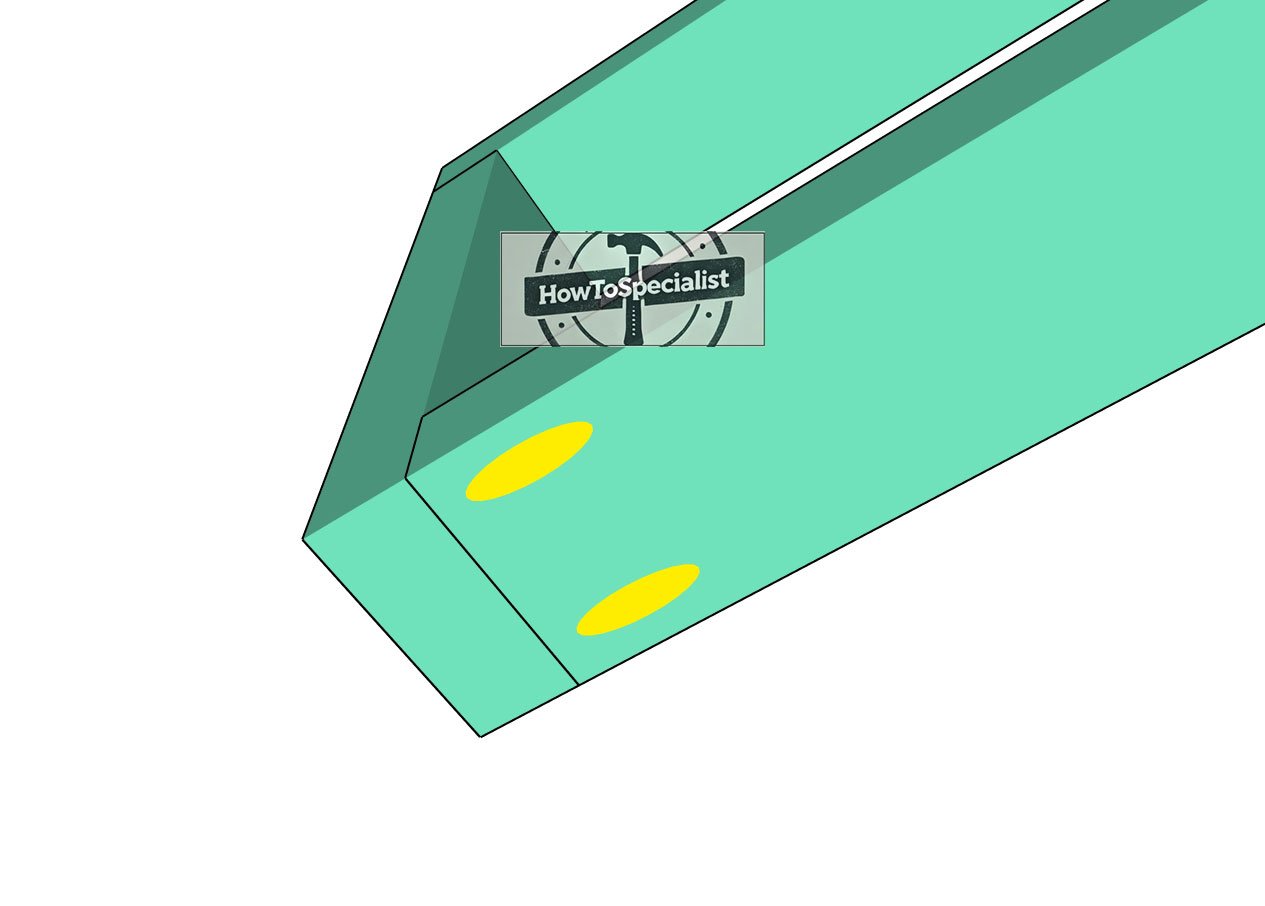
Detail
Secure the bottom board to the frame using pocket holes and 2 1/2″ screws for a strong, hidden connection. Drill pocket holes along the edges of the bottom board, as indicated in the plans, to ensure a snug fit. Apply wood glue to the joints before attaching the board for added strength. Drive in the screws carefully, making sure the board is flush with the frame and properly aligned. This step adds rigidity to the structure, so take a moment to double-check everything is square and tight.
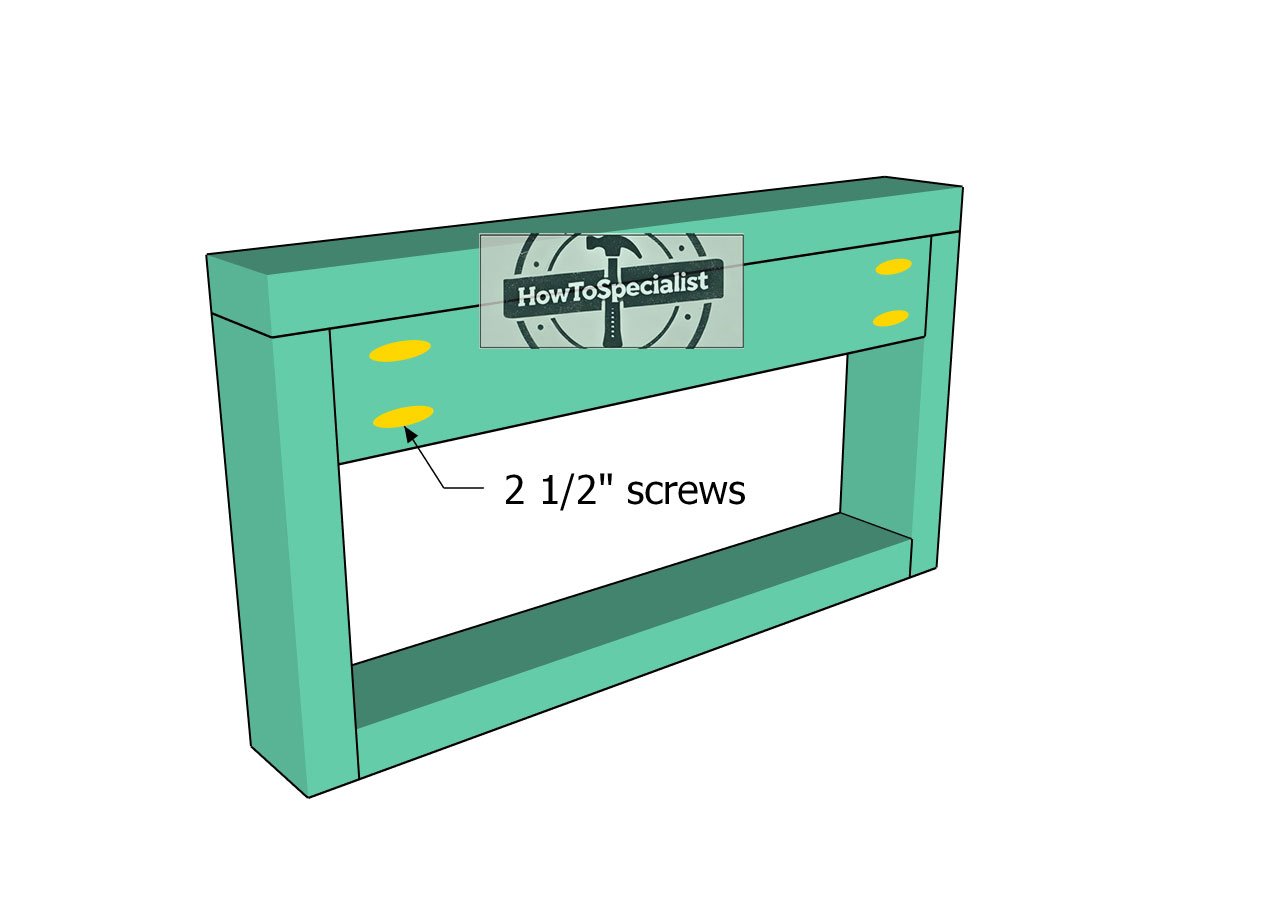
Side-supports
Attach the 2×4 support to the top of the frame to reinforce the structure. Start by drilling pocket holes at both ends of the support using a pocket hole jig. Position the support as shown in the plans, ensuring it’s flush with the frame and centered properly.
Secure it into place with 2 1/2″ screws through the pocket holes for a strong, hidden connection. Double-check that the support is aligned and level—this step ensures the frame remains sturdy and can handle whatever you throw at it!
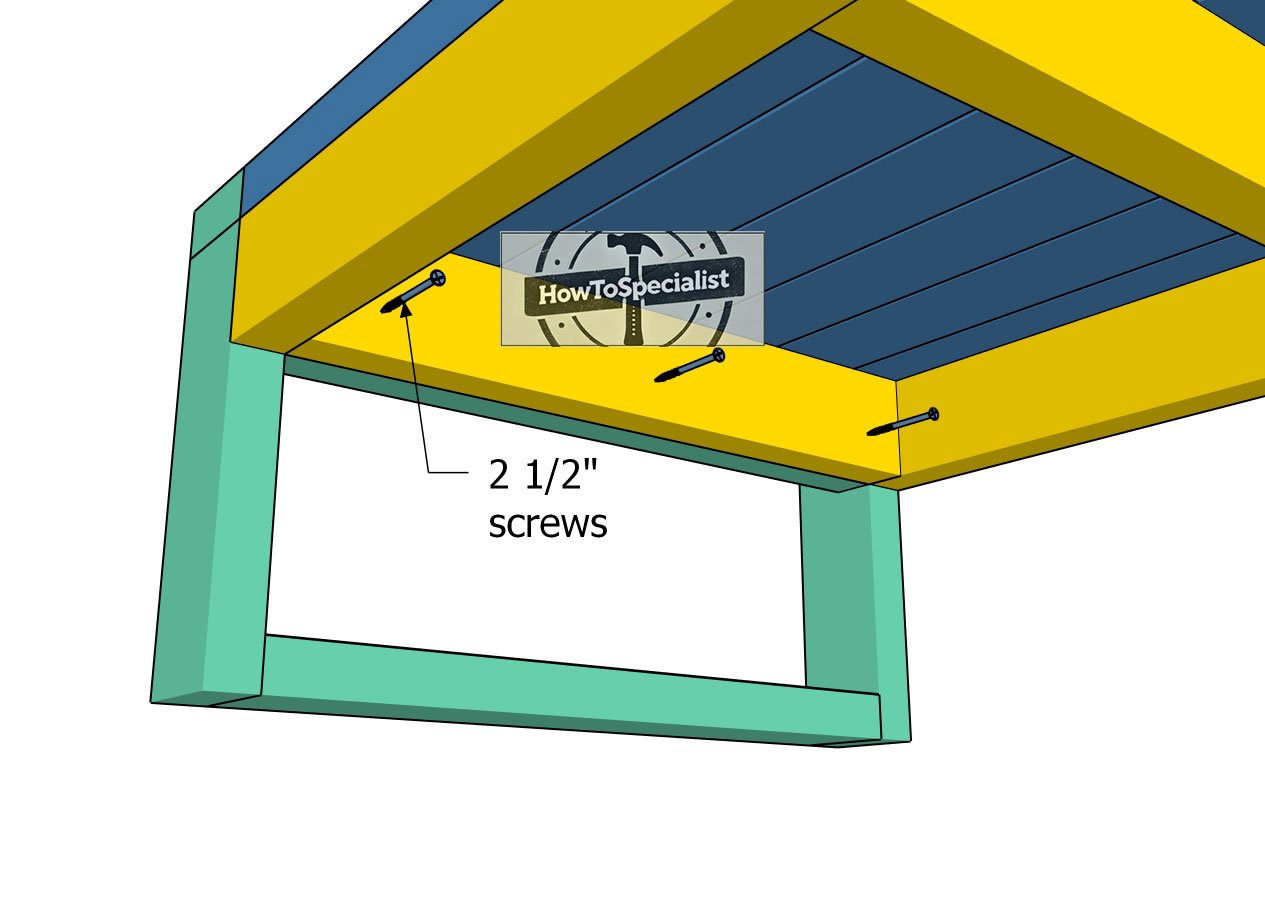
Fitting-the-side-frames
Fit the side frames to the tabletop of the outdoor coffee table. Align the edges perfectly flush for a clean, polished look. Drill pilot holes through the tabletop where it meets the side frames to prevent splitting, then drive 2 1/2″ screws into the side frames to lock them in place.
Repeat the process for the opposite side, ensuring everything is square and the connections are tight. This step ties the table structure together, so take your time to get those edges aligned and secured properly for a sturdy and professional finish.
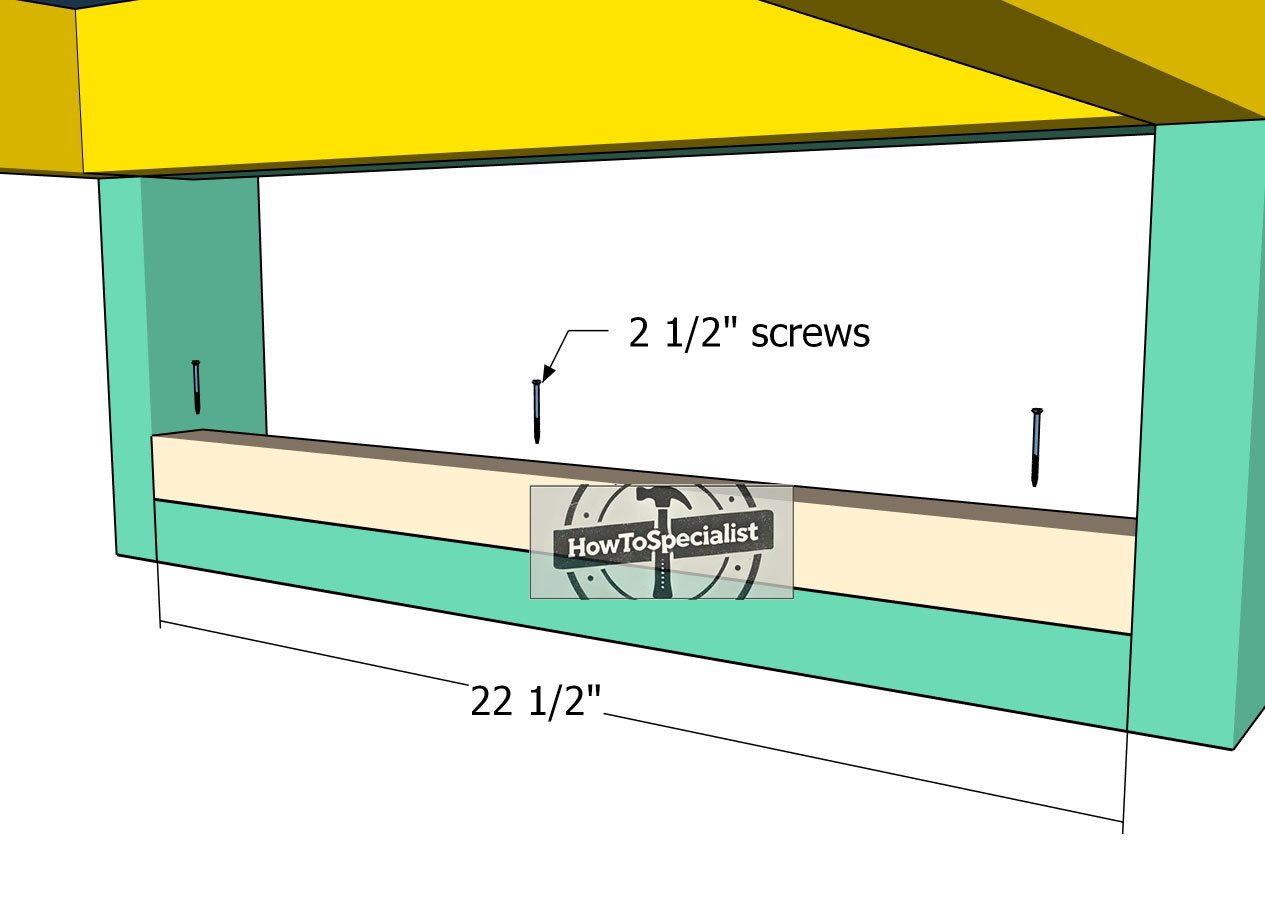
Cleats
Fit the 2×2 cleats to the base of the side frames to create support for the bottom shelf. Position the cleats flush with the interior edges of the frame for a seamless fit. Drill pilot holes through the cleats to prevent splitting, then secure them into place with 2 1/2″ screws.
Double-check that the cleats are level and properly aligned before tightening the screws. This step provides a sturdy foundation for the bottom shelf, so precision and a snug fit are key to ensuring long-term durability.
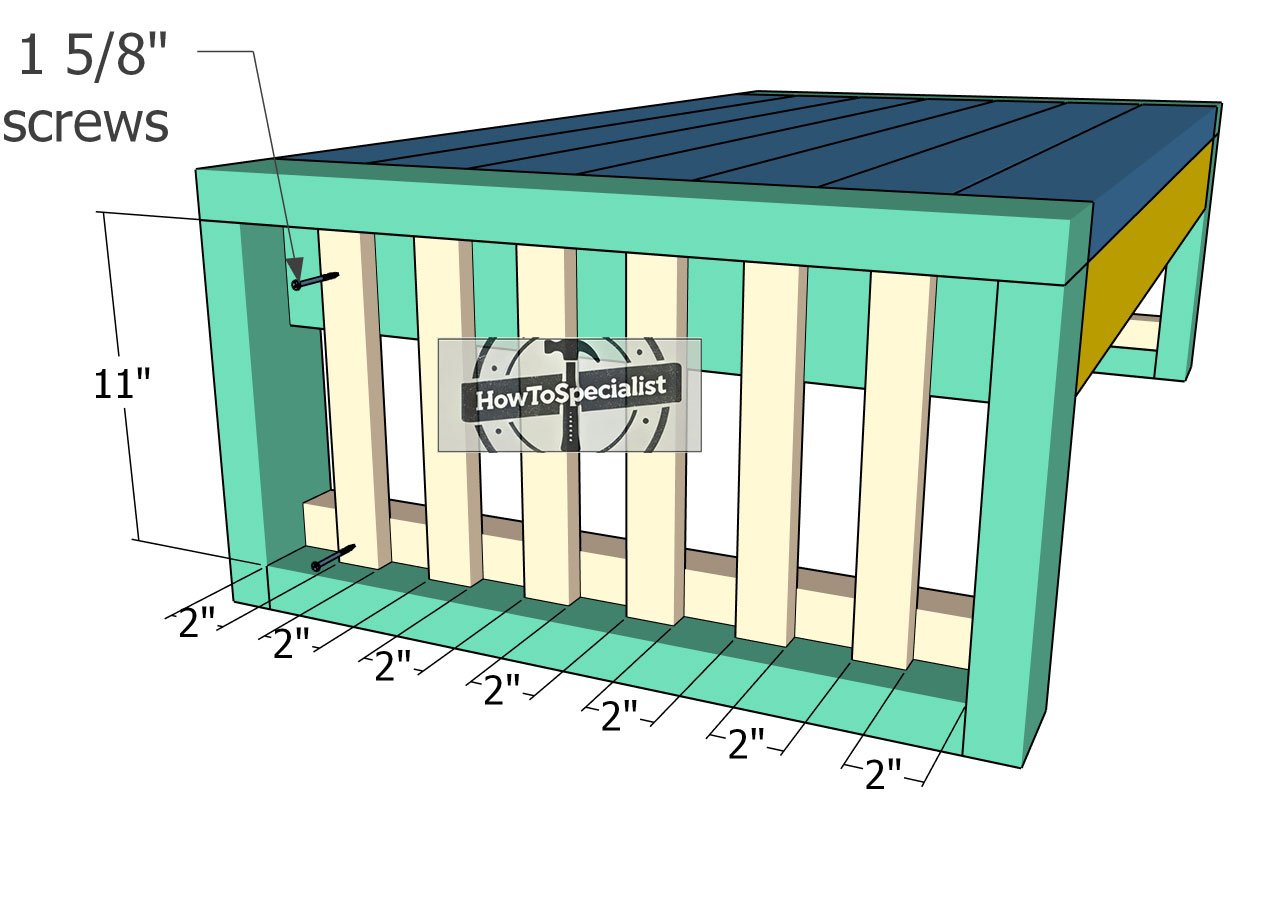
Fitting-the-side-balusters
Attach the 1×2 balusters to the frames to add both structure and style. Use 2″ spacers between the balusters to ensure consistent, even gaps throughout the frame. Drill pilot holes at each joint to prevent splitting, and secure the balusters into place using 1 5/8″ screws.
Double-check the alignment as you go, keeping the edges flush and the balusters perfectly vertical. This step not only enhances the look of your project but also reinforces the frame for long-lasting durability. Take your time, and enjoy watching the design take shape!
Step 2: Finishing touches
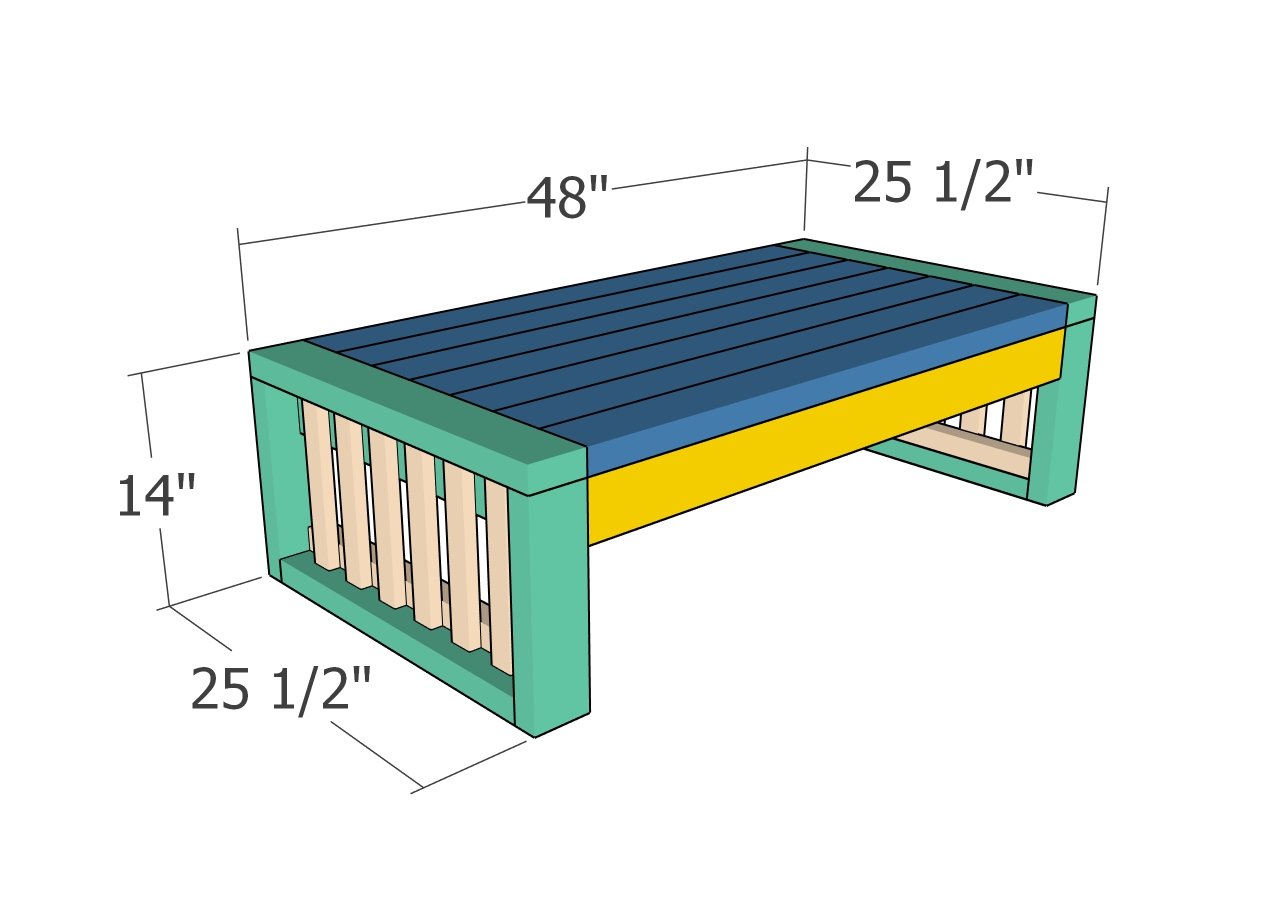
Outdoor coffee table – dimensions
For the finishing touches, fill any screw holes, gaps, or imperfections with wood putty and let it dry completely. Once dry, sand the entire project thoroughly with 120-220 grit sandpaper for a smooth, professional finish. Wipe away any dust with a tack cloth or damp rag to prepare the surface.
Apply your choice of stain to highlight the natural wood grain or outdoor-rated paint to add color and weather protection. Finish with a polyurethane sealer for added durability, especially if the table will be exposed to the elements. These final steps not only enhance the beauty of your build but also ensure it stands up to years of use.
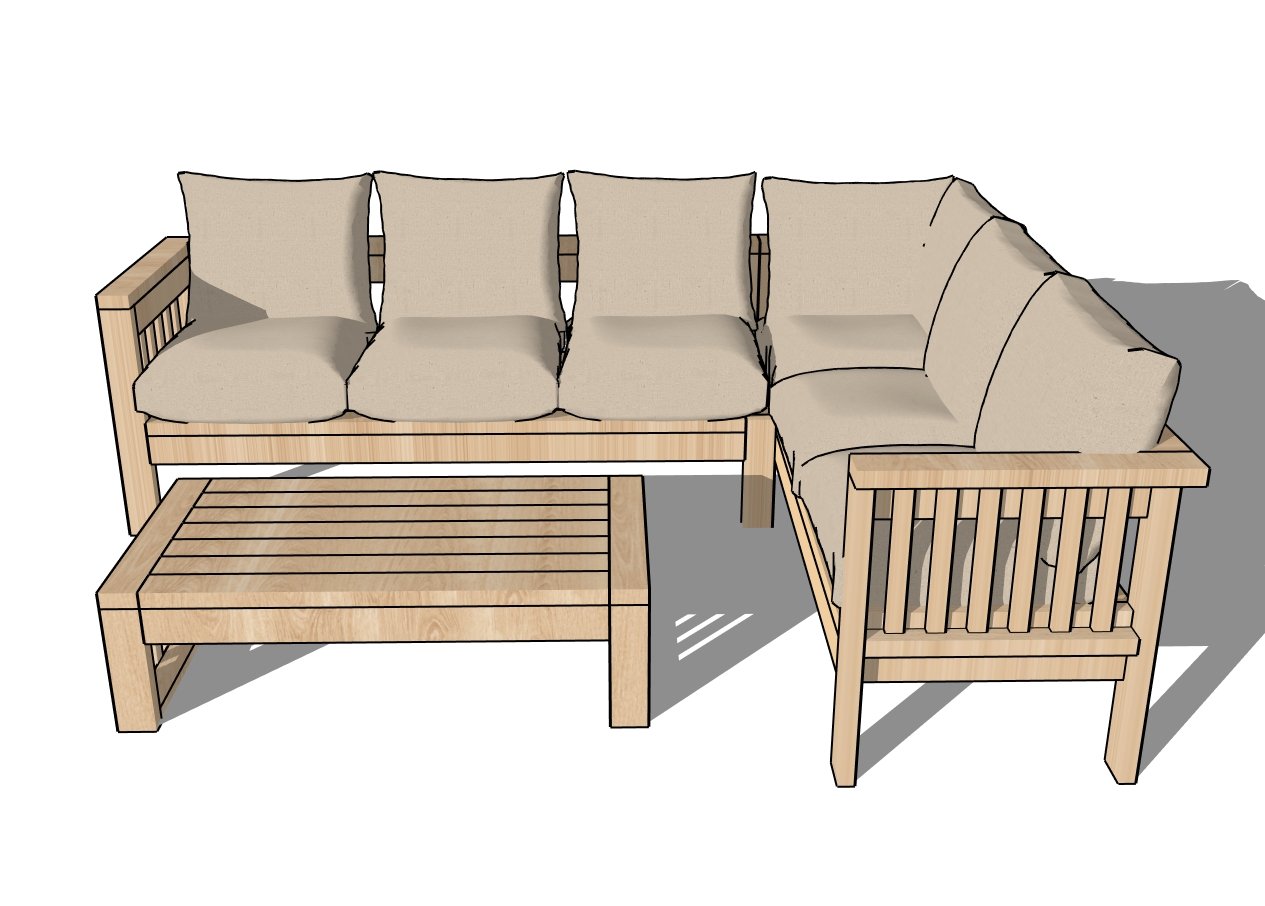
How to build an outdoor sectional
This outdoor coffee table is the perfect match for your outdoor sectional bench, creating a cohesive and functional space for relaxing and entertaining. The table’s sturdy design and clean lines complement the bench beautifully, while its spacious top provides the ideal spot for drinks, snacks, or decorative accents.
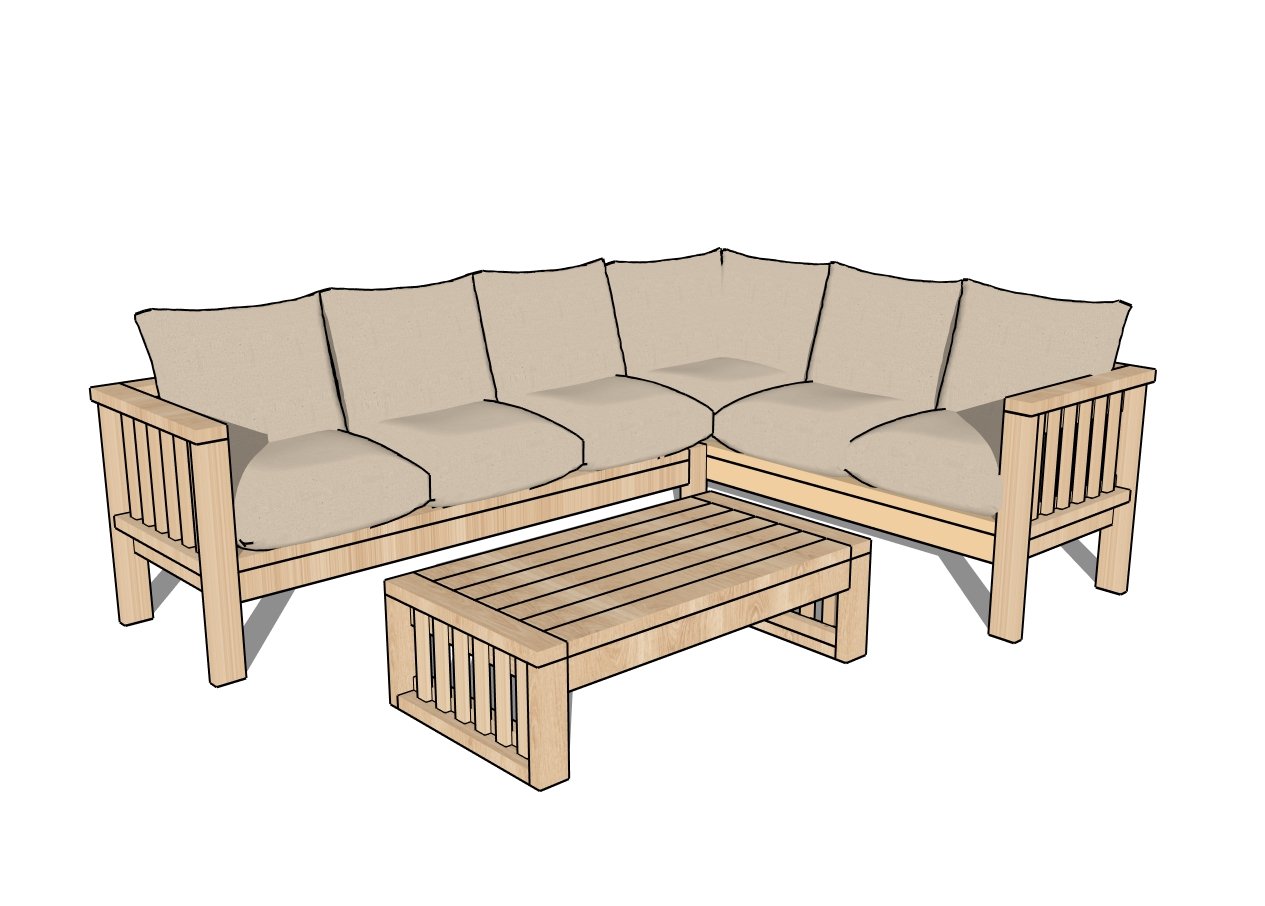
Coffee table plans
Built with durability in mind, it pairs seamlessly with the outdoor bench’s style and can withstand the elements when finished properly. Together, these projects transform any patio, deck, or backyard into a welcoming outdoor living area where you can unwind, host gatherings, or simply enjoy the fresh air in style.
Here’s a little extra to elevate your project: Pre-finish smaller parts like balusters and slats before assembly to make painting or staining cleaner and easier, especially in tight spots. For a polished look and added safety, lightly chamfer or round the exposed edges of the tabletop and frame using sandpaper or a router. If the table will be placed on a patio or deck, attach rubber feet or felt pads to the bottom of the legs to prevent moisture damage and extend the table’s life.
To really clean up the finish, consider filling the screw holes with wood filler before sanding and staining, this adds a seamless, professional touch while protecting against moisture. Lastly, for extra storage, you could easily add a bottom shelf by attaching cleats to the frame and fitting slats, giving your table even more functionality. With these upgrades, your table will not only look fantastic but last for years to come.
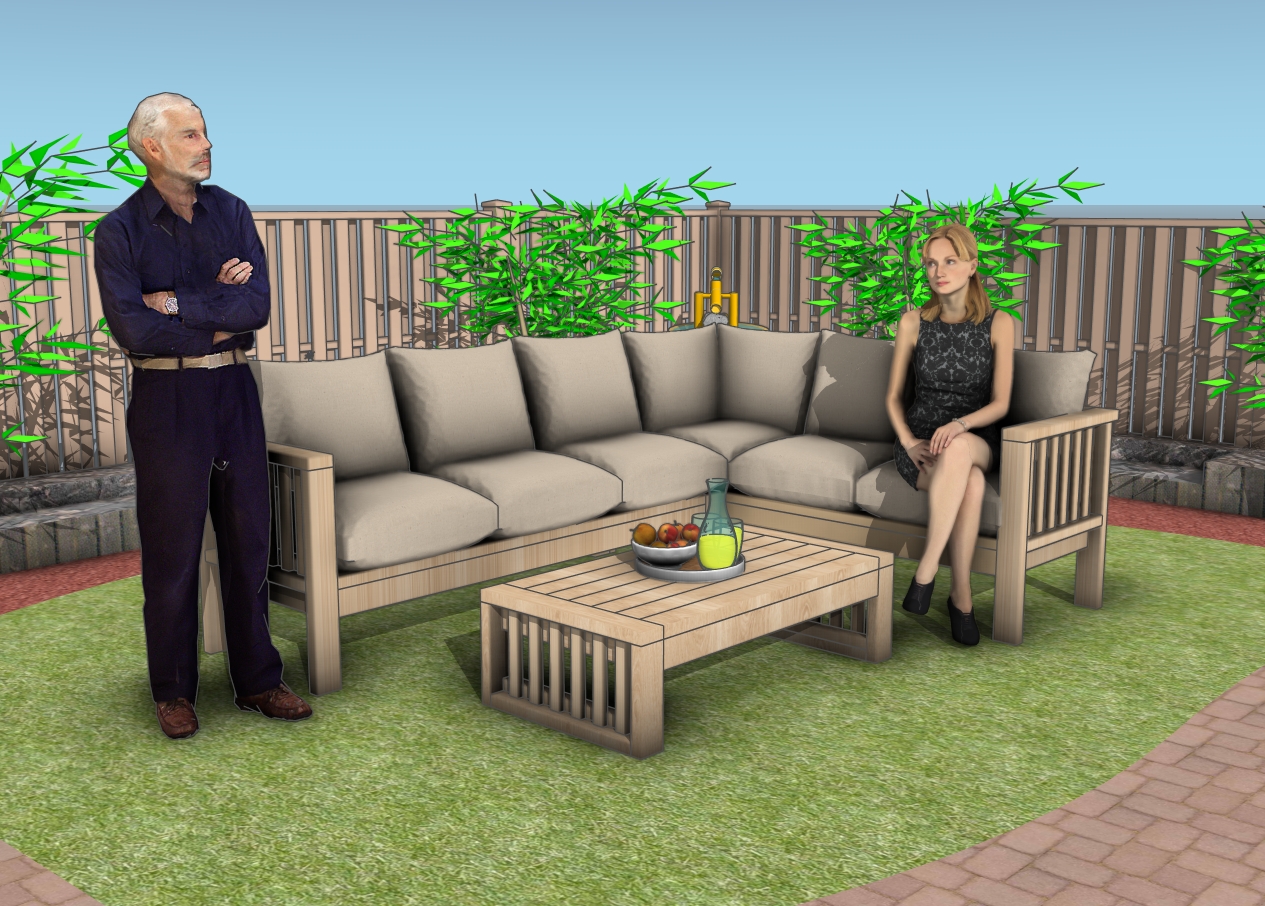
DIY Outdoor Sectional Bench with Table Plans
Thank you for checking out this post and following along with this project! I hope it inspires you to get out there and start building your own outdoor coffee table. If you enjoyed this, be sure to check out the other articles on the blog for more DIY furniture plans, outdoor projects, and step-by-step tutorials to help you upgrade your space. From benches to storage solutions and everything in between, there’s plenty more to explore and build. Happy building, and as always, I can’t wait to see what you create!
Thanks for checking out my DIY outdoor coffee table plans! Be sure to explore my other projects for more fantastic ideas. Don’t forget to hit the LIKE button and SHARE with your friends using the social media links below.

