This article is about how to lay laminate flooring around doors. Before installing laminate flooring, there are some steps which have to be taken as to do the job in a professional manner. Therefore, one of the most important steps is to cut off the door jambs, to facilitate the installation of the laminate flooring boards under the door way.
This procedure is not complicated nor difficult, if you use the right tools and materials. In this step by step article we show all the necessary techniques and tools you need to know to lay the laminate flooring around the doors.
Made from this plan
In order to lay laminate flooring around doors, you need the following:
Materials
- Laminate flooring boards
- Underlay for laminate flooring
- Wood glue
Tools
- Rubber hammer
- Vacuum cleaner
- Pull saw
Tips
- Install the laminate under the door jamb, not around it
- Clean the laminate flooring regularly with appropriate products
Time
- 30 Minutes
Cutting door jambs

Cutting laminate flooring
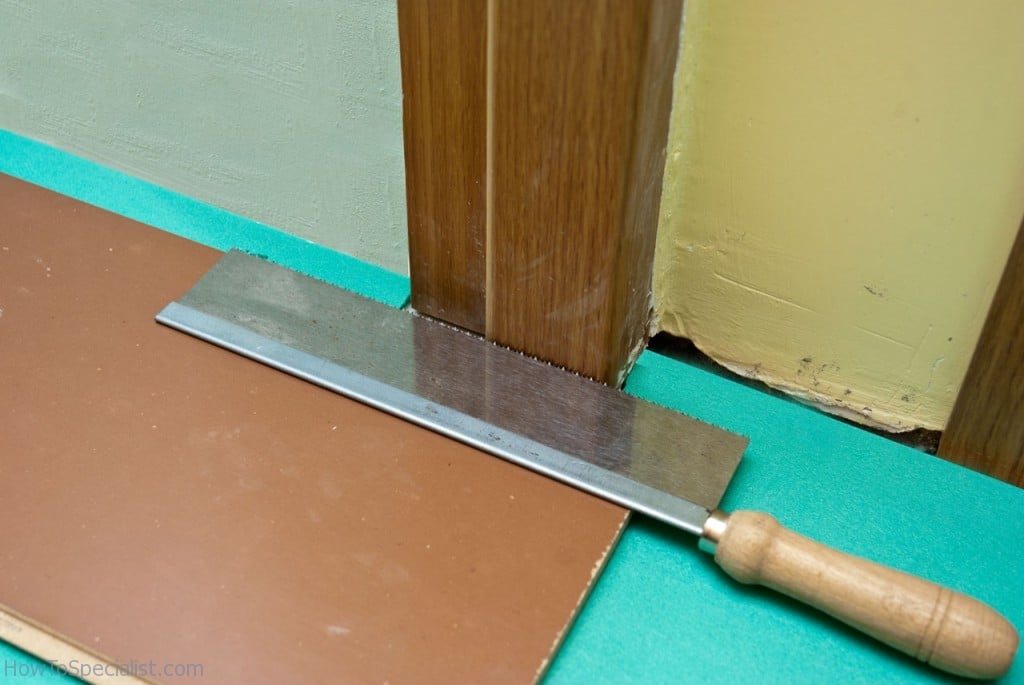
Step 1: In order to cut the door jambs, you need to use a pull saw or a regular back saw, as their teeth are sharp and the blade is very thin. Remember that you cannot use a regular saw, as it will damage irreversibly the door jamb and you won’t be able to obtain a neat look. Buying a pull saw is the best choice, as it is not expensive and it will make accurate cuts.
Step 2: Lay a piece of underlay and a board of laminate flooring board on the sub-floor and on top of them the pull saw. Next, cut the door jamb with great care, making sure the blade is perfectly level.

Removing residues under the door jamb
Step 3: Use a cutter or an utility knife with a sharp blade and cut the foam under the door jambs. In addition, you could use a large scrapper to level off the surface under the jambs, by removing the bumps.
Step 4: After you have cut of the door jambs, you have to vacuum thoroughly the area, making sure you remove the residues and the dust particles. This aspect is essential, otherwise the laminate flooring won’t be level.
How to lay laminate flooring around doors

Cutting laminate groove
Step 1: First of all, you have to measure the needed length of the laminate flooring boards you have to install around the doors. Make sure you take accurate measurements and leave 1/3” around the walls or in the transitions to other flooring.
Step 2: Next, you have to cut the groove of the laminate board you are going to lay under the door jambs, by using a sharp utility knife. This step is essential, as the door jambs stops you from connect the board with the rest of the flooring by lifting it at 45º.

Installing laminate flooring under door jambs
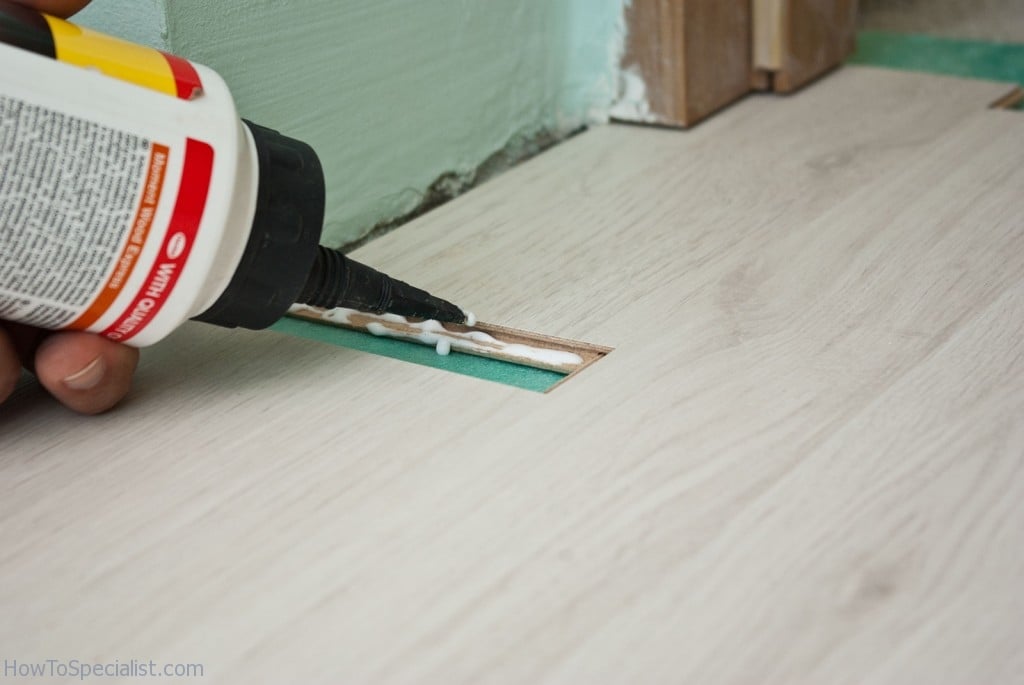
Step 3: Apply a good laminate flooring glue in the cut groove of the laminate board and tap it gently with a mallet until there is no visible gap. Use a clean cloth to wipe off the excess glue and place a heavy item on the area, to lock them together (remove the item after an hour).
Step 4: Continue installing the rest of the laminate flooring by working with great care. Last but not least, vacuum the whole surface and clean the laminate flooring with a appropriate product.
My best tips for laying laminate flooring around doors
Laying laminate flooring around doors can be tricky, but with the right techniques, you can achieve a professional finish. Here are my best tips for handling doors when installing laminate flooring:
1. Undercut the Door Jambs: Instead of cutting the laminate to fit around the door frame, use a jamb saw or handsaw to undercut the door jambs. This allows you to slide the laminate underneath for a seamless, professional look. Measure the thickness of your laminate, then cut the jamb just slightly higher than the thickness of the flooring.
2. Use a Piece of Laminate as a Spacer: To ensure you cut the door jambs to the correct height, place a scrap piece of laminate on top of the underlayment, next to the jamb. This will serve as a guide for cutting just the right amount off the jamb, so the plank fits perfectly underneath.
3. Cut Laminate Precisely for Doorways: Measure and mark the area where the laminate meets the door frame. Dry-fit the plank first, then use a jigsaw to make detailed cuts to fit around the door frame or any molding. Always cut slowly and carefully to avoid splintering or uneven edges.
4. Work the Laminate Under the Jamb: After undercutting the jamb, insert the laminate plank underneath. You may need to use a tapping block and rubber mallet to gently tap it into place without damaging the plank or frame. Be careful to avoid cracking or damaging the laminate edges.
5. Leave an Expansion Gap: Remember to leave a small expansion gap (usually 1/4 inch) between the laminate and the wall or door frame. This allows the flooring to expand and contract with changes in temperature and humidity. The transition strip or door threshold will cover this gap later.
6. Plan for Thresholds: If you’re transitioning between laminate flooring and another type of flooring (like tile or carpet) at the doorway, make sure to plan for a transition strip. These are designed to bridge the gap between two different floor heights and materials, giving a clean, polished finish.
7. Cut Carefully Around Hinges: When you reach the door hinges, use a jigsaw to make a precise notch in the laminate to fit around them. Be sure to measure accurately and cut slowly to avoid any misalignment.
8. Reattach the Doors: Once your laminate flooring is installed, you may need to trim the bottom of the door to accommodate the new flooring height. Use a circular saw to carefully shave off a small amount, ensuring the door swings freely over the new floor.
Thank you for reading our article on how to lay laminate flooring around doors and we recommend you to check out the other projects. Don’t forget to Like our articles and the SHARE them with your friends, by using the social media widgets.

1 comment
Awesome post. I did find it very helpful!
Congrats on the blog as well, it’s very nice!
Thanks for sharing
Adrian