This diy article is about how to cement render a wall. Rendering a brick wall with cement is not an easy job, but is an ancient technique which has proved its efficiency and utility over the years. Consequently, although it might seam as a complex project, we kindly recommend you to use the cement rendering method, if you want to apply a durable finish on your brick or block walls. From the very beginning, we have to point out that this method is applicably only in the case of masonry walls, not for drywall. Therefore, these things being said, we advise you to read carefully our step by step guide, and to pay attention to our tips.
In order to prepare the cement render, you could use a pre-mixed mortar (you only have to add sand and water), or you can do it the old way, by using cement, lime , cement and water. If you decide to use pre-mixed render (we strongly advise you to in this way, as it contains special additives designed for this purpose), you have to read the instructions labeled on the bag, but usually the recipe is: 1 part of cement render to 2.5-3 parts of fine sand.
If you want to use the old style method, you have to mix 1 part cement, 1 part lime and six parts sharp sand. In order to get a proper render, you have to use a power mixer and pour in the cement, lime, sand and then the water. You have to mix these compounds for at least 5 minutes, making sure you get a material with the consistency of pinnate butter. Don’t forget to check out the masonry projects, if you want to see more step by step guides.
Made from this plan
In order to cement render a wall, you need the following:
Materials
- Fine sand
- Cement render
Tools
- Safety gloves, Eye protection
- Measuring tape, Carpentry pencil, L-square, Spirit level
- Margin trowel to spread the cement render
- Concrete mixer to mix the cement render
- Construction buckets or wheelbarrow to transport the cement render
Tips
- Make sure the pillars are plumb
- Use the right cement render mix
Time
- One day, 30 sq feet / 10 m2
My best tips for cement rendering a wall:
Cement rendering is a great way to give walls a smooth, durable finish while improving their weather resistance and insulation. Whether you’re working on an exterior or interior wall, cement rendering can give your project a clean, polished look. Here are my best tips for cement rendering a wall.
1. Gather the Right Tools and Materials
Before you start, make sure you have the following tools and materials:
- Cement render mix (pre-mixed or make your own)
- Trowel
- Hawk
- Spirit level
- Mixing bucket
- Drill with mixing paddle attachment (or a cement mixer for larger projects)
- Float
- Sponge float
- Measuring tape
- Brush
- Water spray bottle
2. Prepare the Wall Surface
Before applying cement render, ensure the wall surface is clean and properly prepared:
- Clean the wall thoroughly to remove dirt, dust, and any loose materials. A stiff brush or a pressure washer can help with this.
- Dampen the wall slightly before applying the render. This helps the render adhere better and prevents it from drying too quickly.
For smooth surfaces, such as concrete or bricks with little texture, you may want to apply a bonding agent or scratch the surface with a tool to help the render stick.
3. Mix the Render
If you’re using a pre-mixed render, follow the manufacturer’s instructions for mixing. If you’re mixing your own, a typical cement render mix is:
- 1 part cement
- 1 part lime
- 6 parts sand
Slowly add water and mix the ingredients until the render has a thick, creamy consistency. Be careful not to make the mixture too runny, as this will weaken the render.
4. Apply the First Coat (Scratch Coat)
Start by applying the first coat, also known as the scratch coat:
- Load the render onto a hawk and transfer it to the wall using a trowel.
- Spread the render evenly over the wall, keeping the coat at around 5-10 mm thick.
- Work from the bottom of the wall upwards, applying the render in sweeping motions.
- Use a spirit level to check for evenness as you go.
Once the scratch coat is applied, lightly scratch the surface with a scratching tool or notched trowel. This creates grooves that help the next layer of render adhere better.
5. Let the First Coat Set
Allow the first coat to set for 24-48 hours, depending on the weather conditions. The surface should be firm but not fully dry before you apply the second coat. Keep the wall damp during this time by misting it with water if the weather is hot or dry.
6. Apply the Second Coat (Finishing Coat)
Once the scratch coat has set, apply the finishing coat:
- Mix a new batch of render, using the same proportions as before but with a slightly thinner consistency.
- Apply the second coat using the trowel, making it about 5-7 mm thick.
- Use long, smooth strokes to spread the render evenly, and check for levelness regularly with your spirit level.
7. Smooth the Surface
After the finishing coat has been applied, it’s time to smooth the surface:
- Use a float to flatten and smooth the render, working in circular motions across the entire surface.
- For a more textured finish, you can use a sponge float while the render is still damp to achieve a stippled or textured look.
Take your time during this step to ensure a uniform, even finish across the wall.
8. Cure the Render Properly
Curing the render is key to ensuring a strong, durable finish. The render needs to dry slowly, so it doesn’t crack:
- Lightly mist the wall with water regularly over the first few days after applying the render to keep it damp.
- Cover the wall with plastic sheeting or hessian cloth if the weather is hot or windy to prevent the render from drying too quickly.
Let the render cure for at least 7 days before applying any paint or additional finishes.
9. Apply a Final Finish (Optional)
If you want to paint or add a final finish to your cement render, wait until the render is fully cured:
- Prime the surface with an exterior primer if you’re applying paint.
- Use weatherproof paint for exterior walls to ensure the render remains protected from the elements.
You can also leave the render in its natural state for a more rustic, textured finish.
Bonus Tip: Apply Render in Cool Weather Avoid rendering in extremely hot or windy weather, as this can cause the render to dry too quickly and crack. For best results, choose a day with mild, cool conditions.
How to cement render a wall

Brick wall
Before applying the cement render, you have to check a few aspects regarding the brick walls. Therefore, make sure the wall is plumb and it doesn’t have any irregularities . If you have to render an old brick wall, you have to remove first the coats that covers the bricks, by using a chisel, a hammer and a palette knife.
Brush thoroughly the walls, making sure there are no residues left, as well as no dust. After that, you could apply a fungicide, this step being optional, but recommendable for old houses.

Rendering a brick wall
Next, you have to apply the first coat of cement render. First, remove all objects in the room, as there is a high probability of covering them with cement render. The first coat of render is essential for the project, as it should adhere to the brick wall and support the second layer of render and the plaster.
The first coat must have the following recipe: 1 part cement render to 2.5-3 parts of fine sand. Read the instructions labeled on the bag. Load the mixer with cement and sand, and add water progressively until the compound has the consistency of cream.

Building the render pillars
Next, in order to apply the second coat of cement render, you have to build vertical guidance pillars every 3′ / 90 cm. As to build the pillars, you have to start by constructing two bumps, one at the bottom of the wall and the other at the top of the wall.
The thickness of these bumps will represent the thickness of the render layer, therefore you must make sure it is around 1/2” – 1.24 cm. In addition, these protrusions must be plumb one with another, otherwise your wall will look bad.
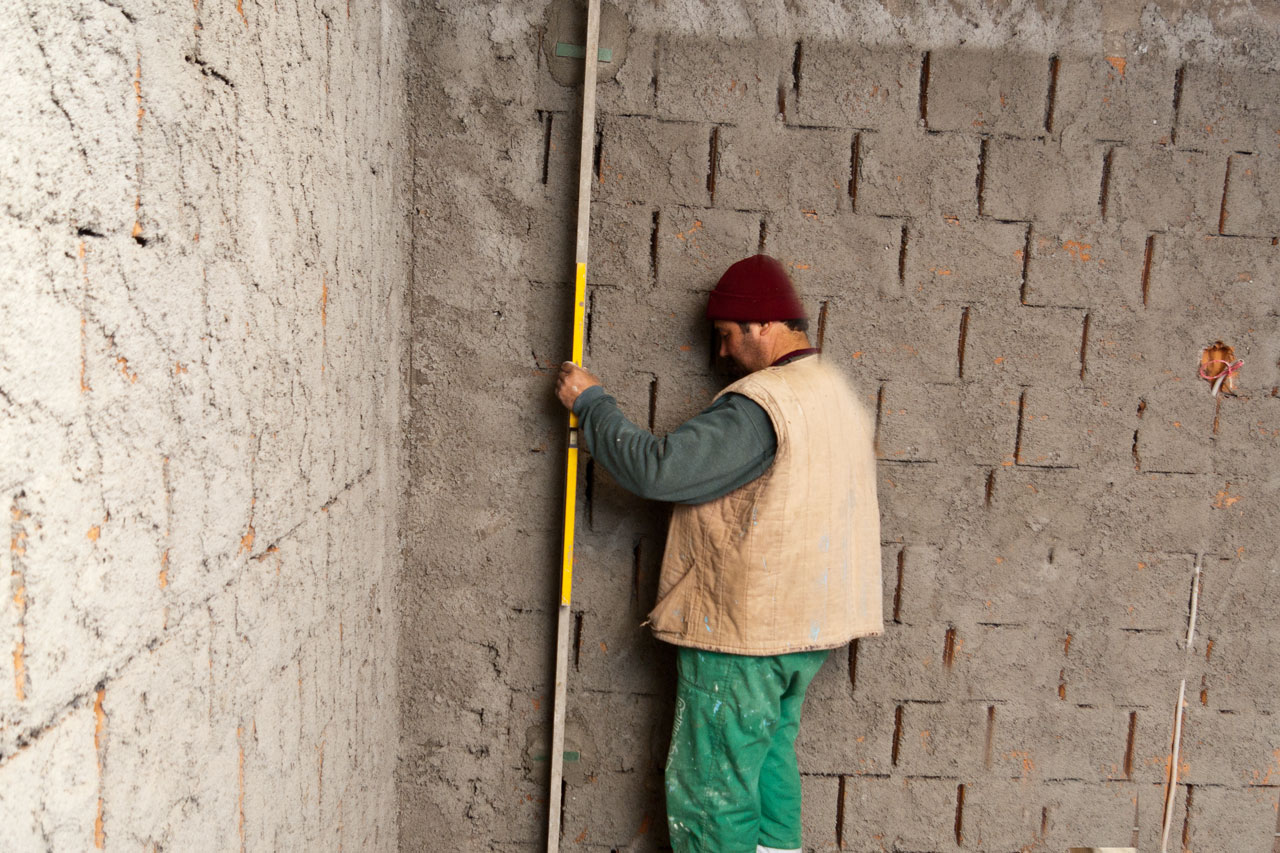
Making sure the plaster is plumb
In order to check if the bumps are plumb, you have to use a long aluminum straight edge and a spirit level. If the bottom and the top guidance points aren’t plumb, then you have to add more cement either at the bottom or at the top of the wall, making sure the thickness doesn’t exceed 1/2”.
After you have built the first pillar, you have to build the rest of them, every 3′ / 90 cm, in the same way as above. In addition, make sure the pillars are aligned one with another, especially if the bricklaying have been done poorly.

Building two pillars
In order to build the guidance pillars, you have to apply cement render on the wall, between the bottom and the top bumps. In order to level the pillar, you have to use the large aluminum straight edge. As you can see, you can learn easily how to cement render a wall, if you read carefully our step by step article.
Before loading the rest of the wall with cement render, you have to build another pillars, every 3′, in the same way as we have described it previously. It is essential to work with patience and with great care, otherwise your wall plaster won’t have the desired quality.

How to cement render a wall
Next you have to load the wall (between the guidance pillars) with cement render. Consequently, you should use construction buckets or a wheelbarrow to transport the material inside your house. Next, use a hawk and a margin trowel and “throw” the render towards the wall, making sure you cover the whole surface.
Rendering a brick wall
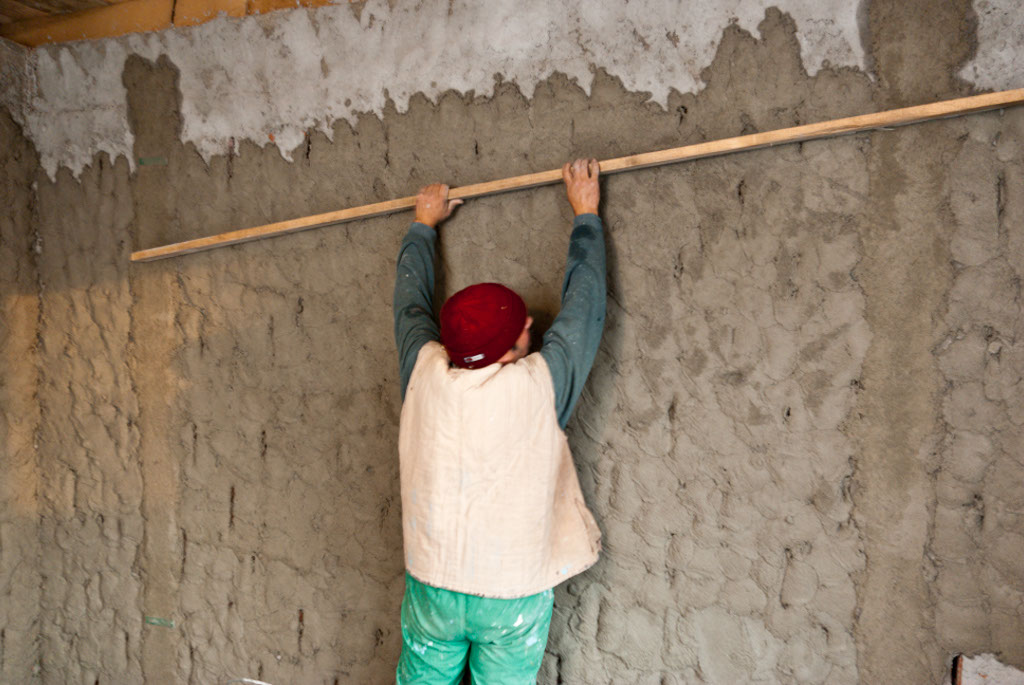
Leveling cement render
In order to straighten the cement render coat, you have to push the aluminum straight edge (moving it from left to right, like sawing), making sure it goes along the guidance pillars.
When the straight edge is filled with material, you have to get it off by using your margin trowel. You can reuse the material, but you have to mix it again with the power mixer. Allow the cement render to dry for 15 minutes, before loading it again with material, if the surface is not uniform. Use the straight edge again to smooth the surface.
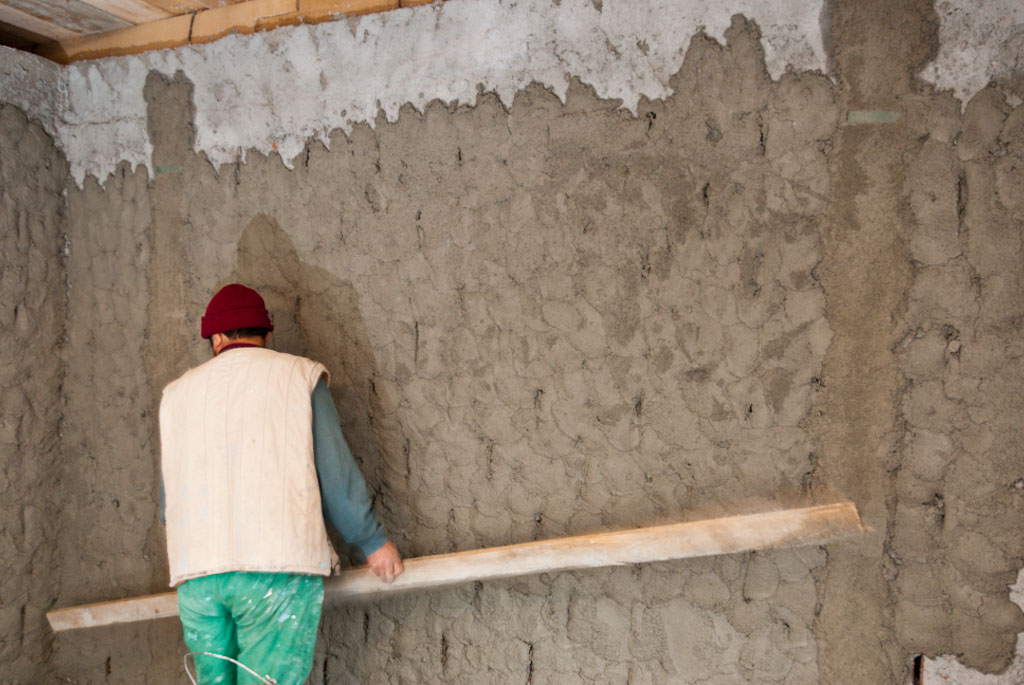
Cement rendering a wall
As you can see in the image, you won’t get a proper surface from the very first time, you have to add another coat and straighten it till you get the desired result.
However, the thickness of the render (determined by the guidance pillars) will influence to a high degree the process. If the render coat will be thin, then you can pull it through from the first time, but if you want to apply a thicker coat of cement render, than you need several loads.
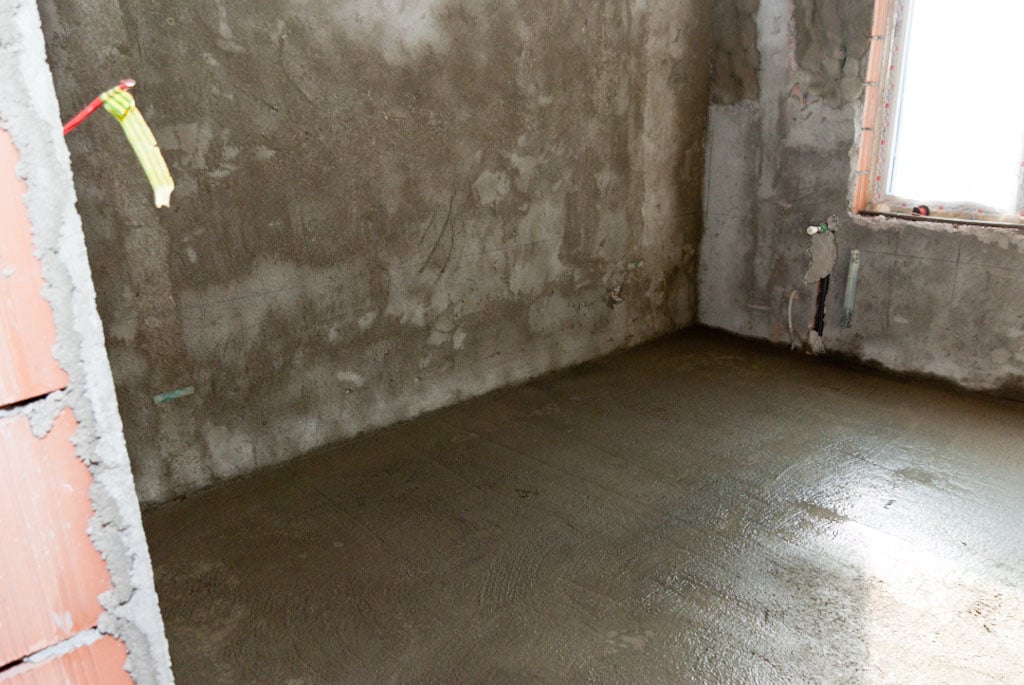
Cement render
Last but not least, in this image you should notice the final look of the cement render. Consequently, make sure the coat of cement render is uniform all over the surface of your walls, otherwise you will spend more money on the finishing layers you have to spread, before painting the room.
As a general rule, the more uniform the coat of render, the easier and cheaper will be the plastering process. Therefore, work with patience and great care, and let the render to dry out for at least 1 week, before applying the plaster.

Sprinkling water on the wall
As to get a nice finish you have to use a polystyrene float over the whole surface of the wall. Nevertheless, you have to wait for about an hour before finishing the wall, as to let the cement render to bond to the wall.
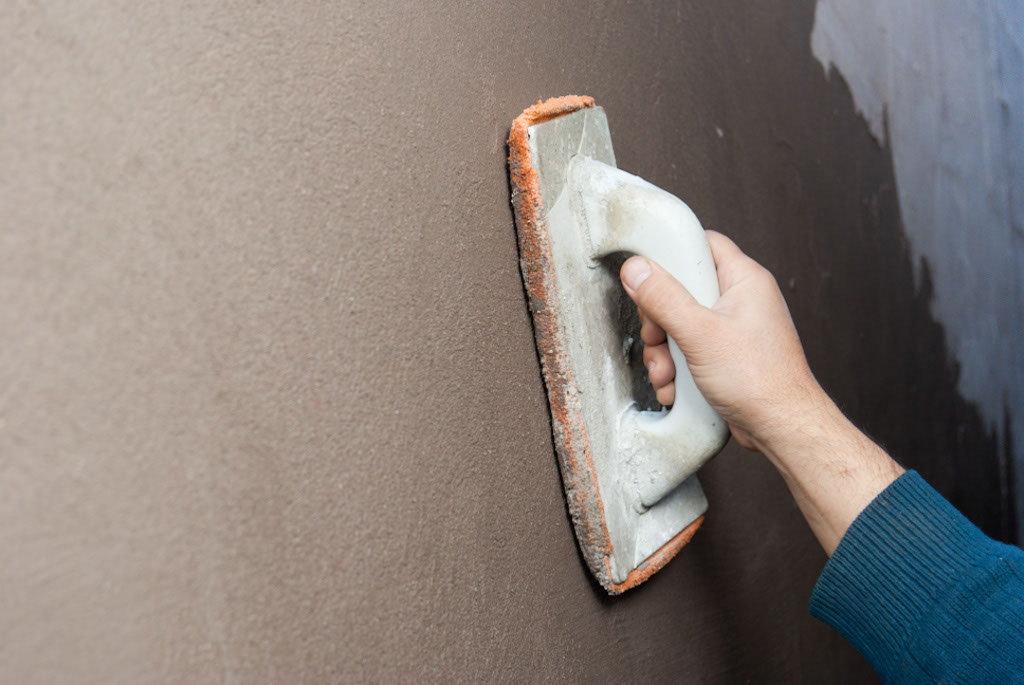
Using a float to finish the cement render
Next, use a polystyrene float and finish the cement render, by moving it circularly. This technique is not difficult and you will enjoy changing the look of the cement render.
By following these steps, you can apply a smooth, durable cement render to any wall. Whether you’re working on an exterior façade or an interior feature wall, proper preparation and technique will ensure a long-lasting, professional finish.
Thank you for reading our article on how to cement render a wall and we recommend you to check out the rest of our articles. Please SHARE our articles with your friends, by using the social media widgets. LIKE us to be the first that gets our latest projects.
